Sweet!
Question:
Are you planing to put an air gap between the frame and your Pots, Kettles or Kegs?
Sorry the photo is sideways....
I'm contemplating it but I haven't decided yet.

Sweet!
Question:
Are you planing to put an air gap between the frame and your Pots, Kettles or Kegs?
Sorry the photo is sideways....
n2fooz: How about a some more pics of that Infinity? Is that a G37? Wheels/brakes/suspension look aftermarket. Does it have a lot of work into it?


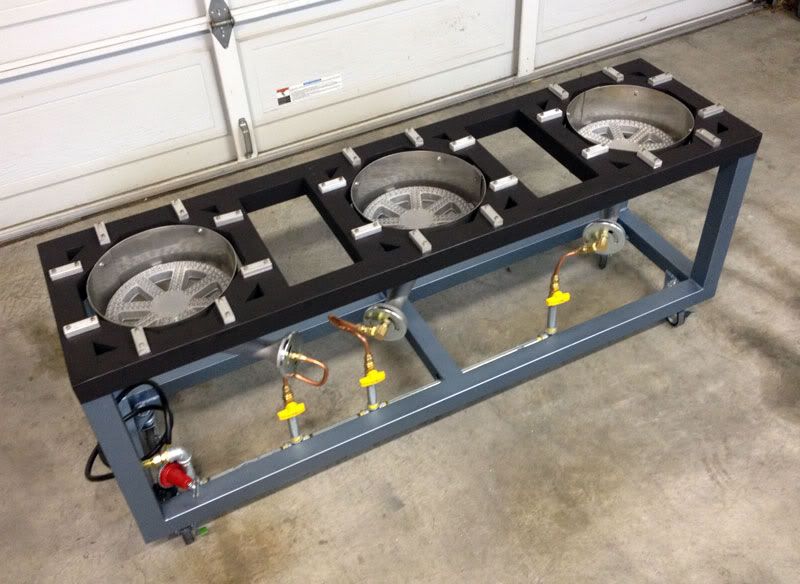
nice stand you got yourself there...envy is not a great look on my but damnit i want it. mine is sort of the same only 1x1x1/8 steel. the burners are the regular bayou classics and i couldnt drive a tank over it.
just out of curiousity...i dont know if it was covered, but i used a mig style welder...actually it was flux core wire instead of using the gas...that looks an awful lot like tig welding...either that or i really do suck at welding.
on a final note, im not sure about wearing out the saw...i havent heard anything like that but since im not a professional i suppose i cannot exactly say one way or the other...what i do know is that i have a craftsman 9'' compound sliding miter saw that is about 20yrs old and has cut all kinds of metal, including all the cutting for my stand...with the help of a 10.00 harbour freight metal blade...and it still works like a champ.
Subscribed...great looking build so far.
I have been looking at builds for several months now, planning my own and taking ideas from a ton of people.
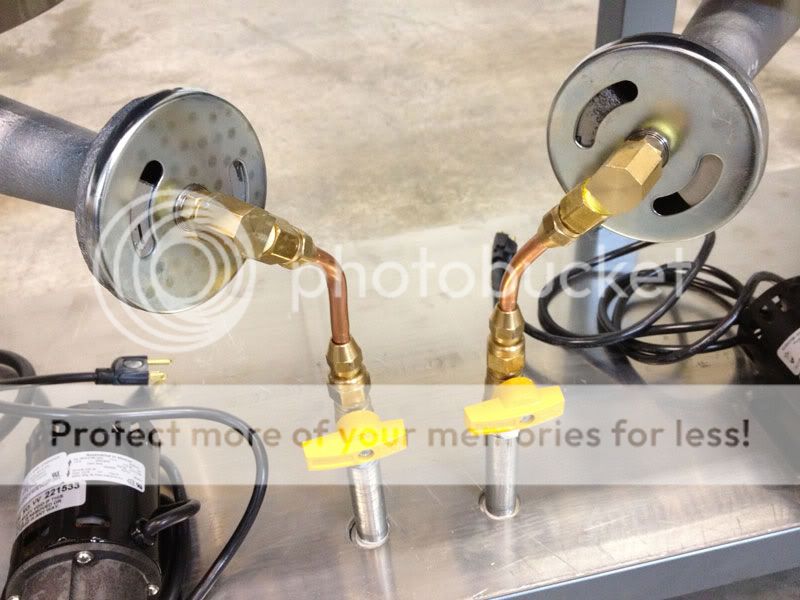
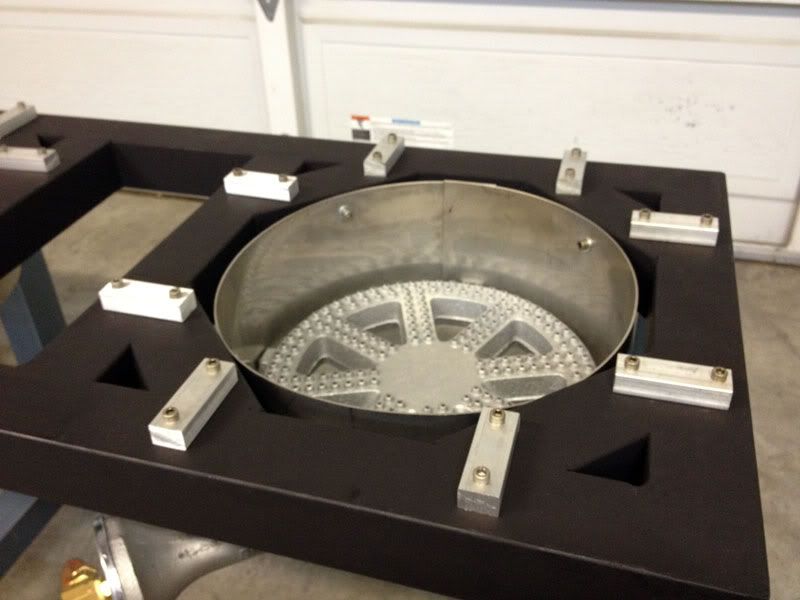
May I request that when it comes time to mount your burners that you include some up close shots. That is one thing that I haven't figured out yet in my own plans. Cheers...wnc
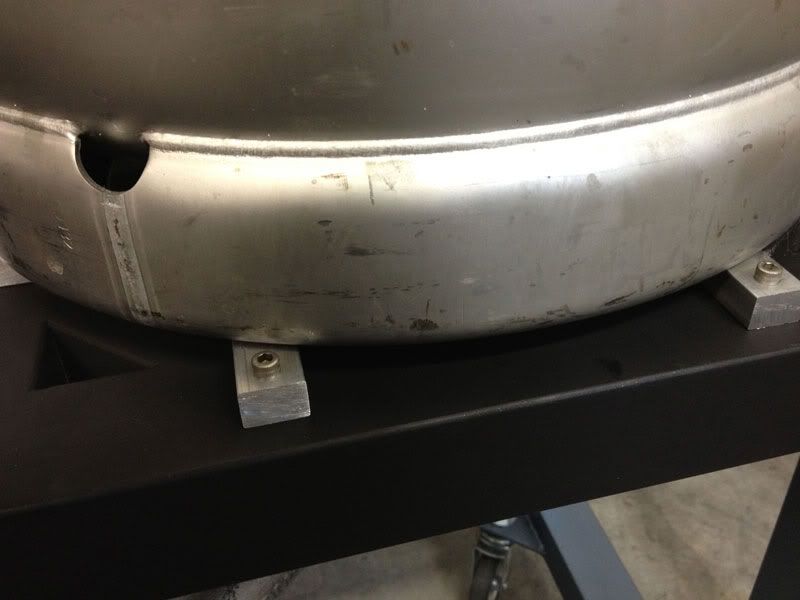
That's a super clean looking mount. I like the jig you made for bending the SS.
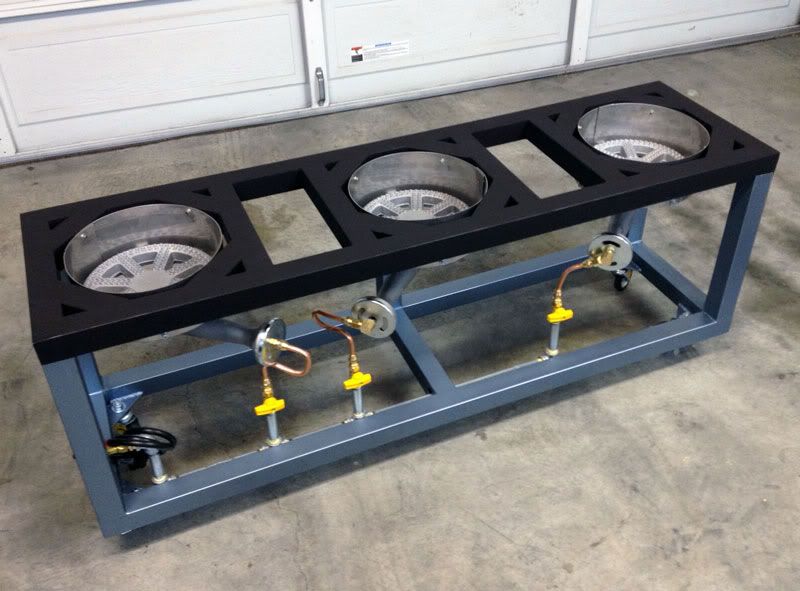
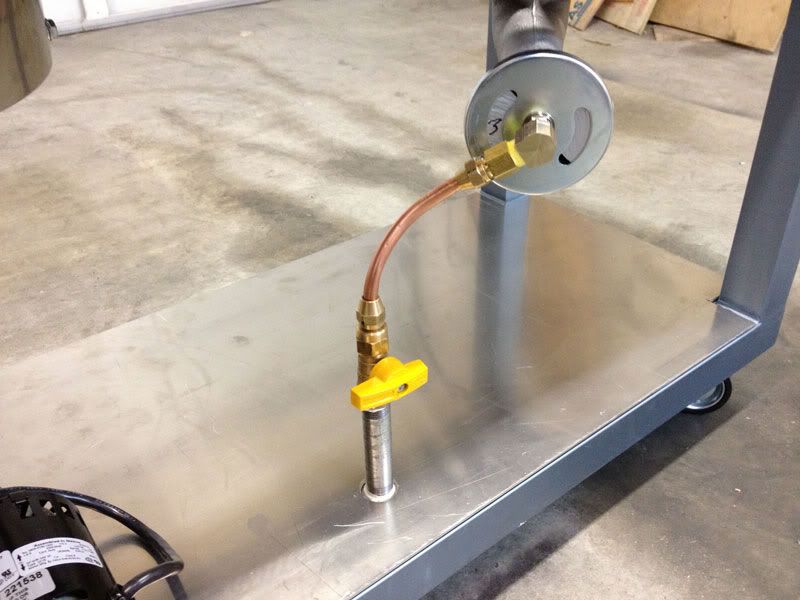
Only concern I have is where is the burner exhaust going?
Thanks to Sea1961, I'm going to add Stainless spacers at the top to help exhaust and protect the paint.
n2fooz said:Thanks.
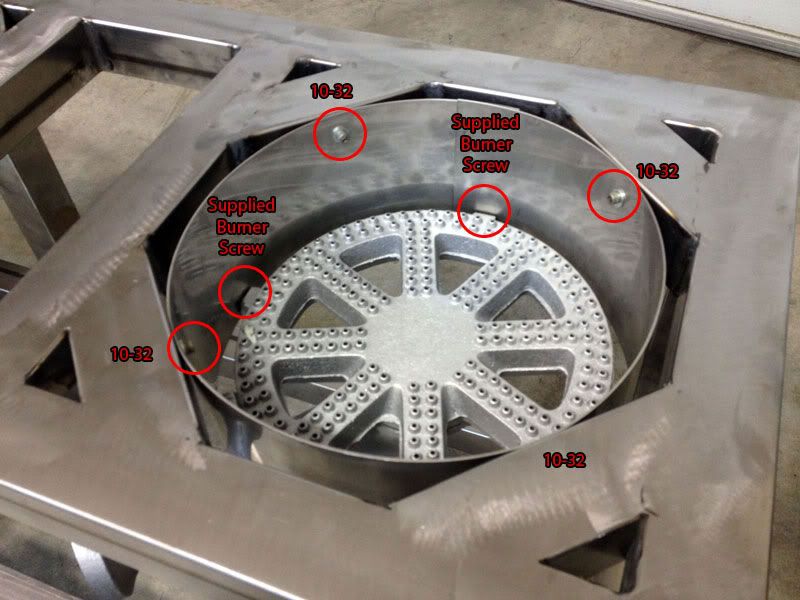
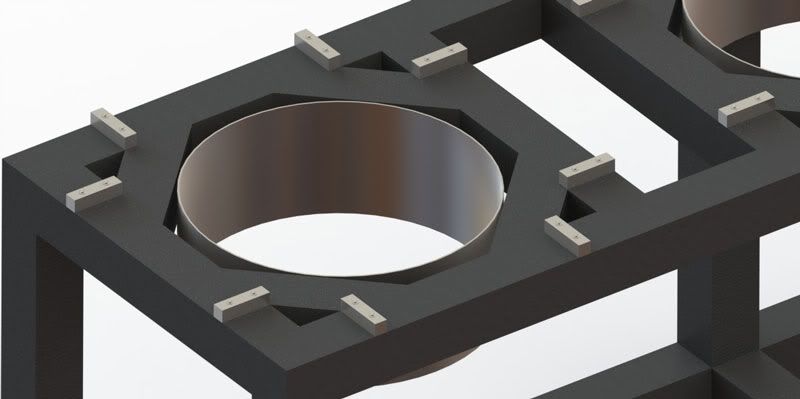
For mounting the burners, I used the heat shields. I drilled holes for the supplied burner screws at the bottom of the shield and mounted the burner to the shield. I then drilled and tapped (4) 10-32 holes on the 45º gussets. The burner/heat shield assembly is then mounted to the stand with (4) 10-32 stainless steel cap screws and washers.
Hope this helped.
Can you show/explain this in more detail?
The stand-offs can be cantilevered further in and thus eliminating the large diagonal pieces.
The stand-offs can be cantilevered further in and thus eliminating the large diagonal pieces.
Do you have a sketch up of the whole thing? That is sexy.
Looks real good.
How did you attach the casters?
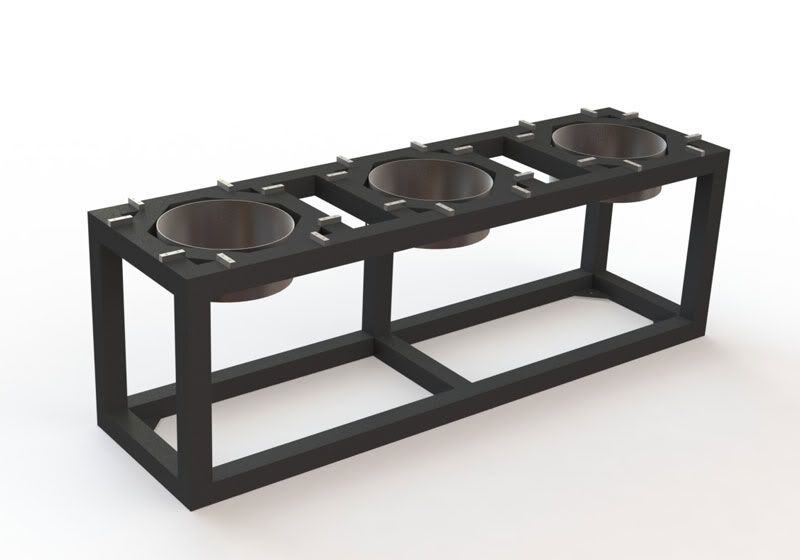
I actually use a 3D program called Solidworks. I haven't modeled the burners or castors but here is a rendering of the stand:
I am a SolidWorks user as well... CSWP actually... What kind of work do you do on SW? (besides designing your own brewstands) haha...
I am a SolidWorks user as well... CSWP actually... What kind of work do you do on SW? (besides designing your own brewstands) haha...
I thought your name looked familiar. I saw your rendering on this thread and asked what program you were using: https://www.homebrewtalk.com/f51/my...0-some-nice-modifications-172927/index32.html
Good to see a fellow SW user.
Seen any use yet?

Looking mighty fine! I like the socket head cap screws placement for holding the Brew pot / kettles from sliding off during a busy brew day! Can't wait to see the finished product...
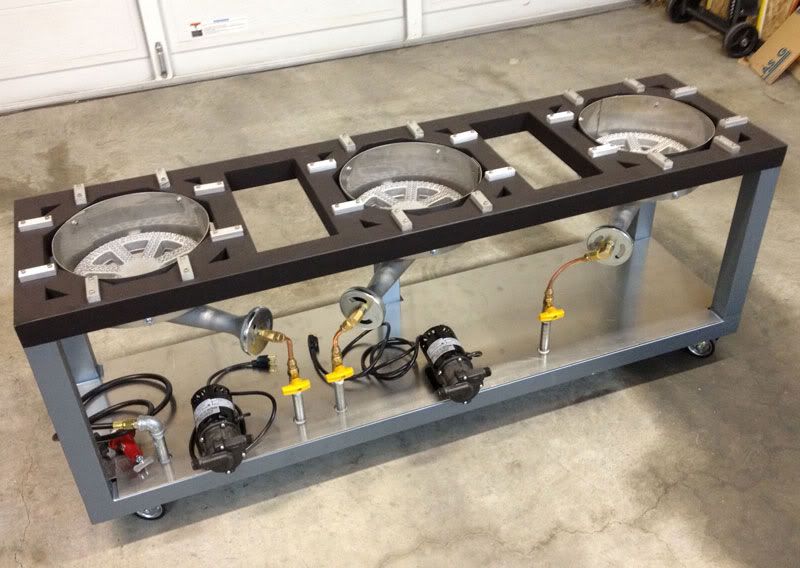
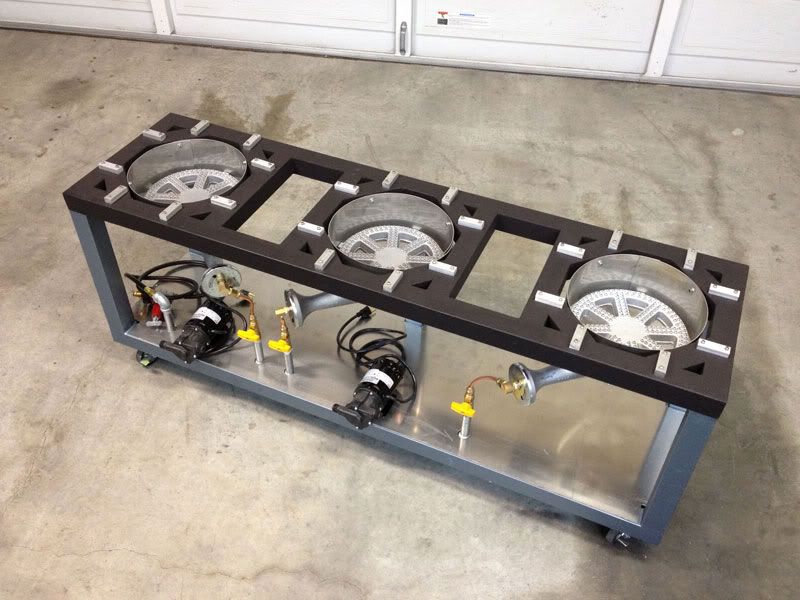
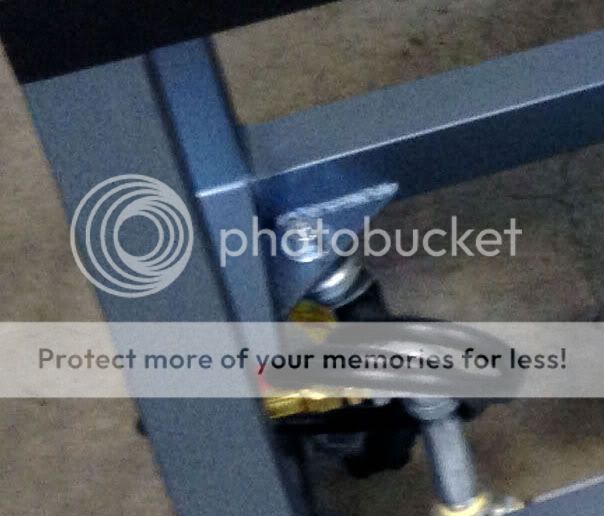
n2fooz said:I welded gussets and drilled holes for stud mount style castors.
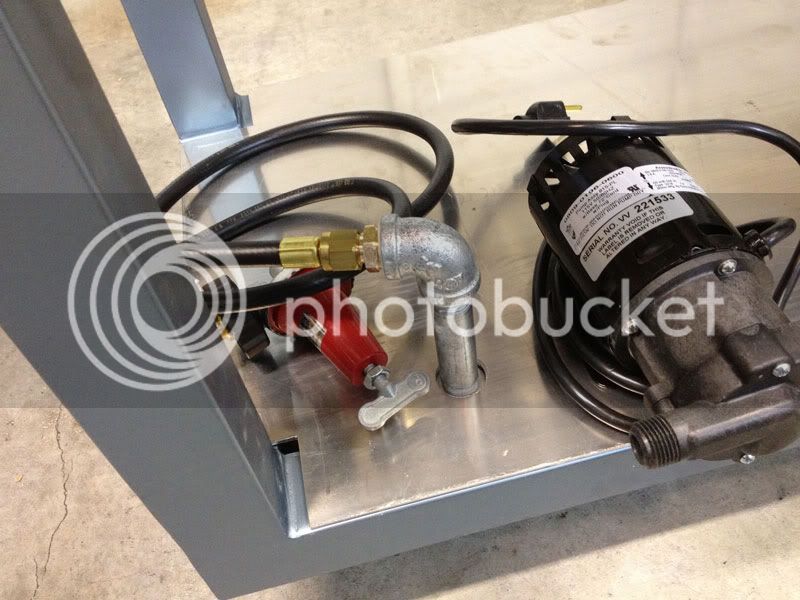
Sorry it's blurry but I cropped it from the original pic. It should be good enough for you to get the idea:
Hey n2fooz,
My build as progressed to the point where I'm looking to attach casters, and I'm thinking of doing exactly what you did.
Couple questions --
- from the picture, it looks like you cut a steel bar to fit, and welded that in, or did you get a larger steel plate and cut it to fit?
- How thick is that piece?
- Confident that it will hold (obviously, but is there any doubt)?
- Is it easy enough to using the locking mechanisim, being mounted that far inside the stand?
These answers will help immensely. Thanks!
n2fooz said:It was pretty simple. 2in flat bar cut at 45 on each end. Once welded in there is no way they are going to fail.
As far as locking the casters, I have no issues.
Enter your email address to join: