Modified Ferm Cabinet to accept kegerator

Homebrew Talk - Beer, Wine, Mead, & Cider Brewing Discussion Forum

Help Support Homebrew Talk - Beer, Wine, Mead, & Cider Brewing Discussion Forum:

This site may earn a commission from merchant affiliate links, including eBay, Amazon, and others.

nakeddog

Well-Known Member
Joined
Mar 24, 2010
Messages
99
Reaction score
7
Location
NYer in Helsinki, Finland
Ok, this is far from your average build so I thought I would share. I am probably the only one who would need/want this, but I figured I would post it anyways.

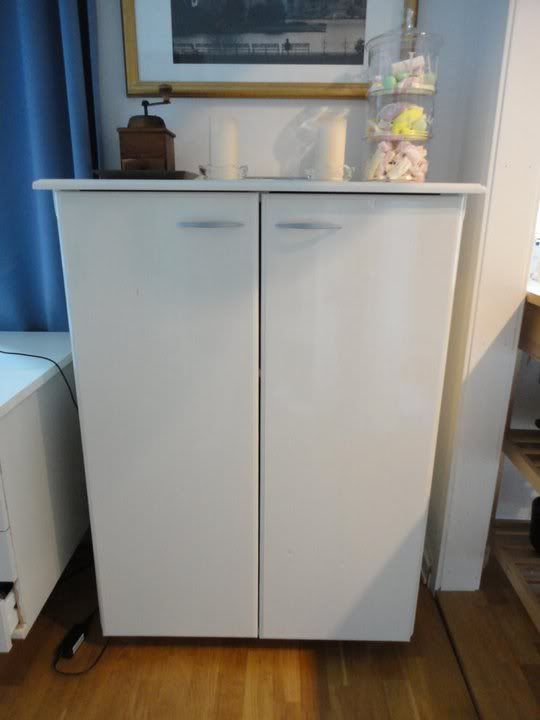
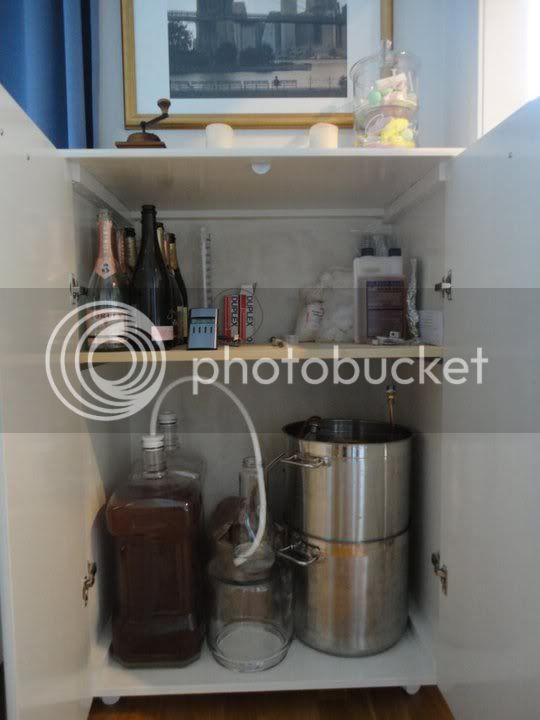
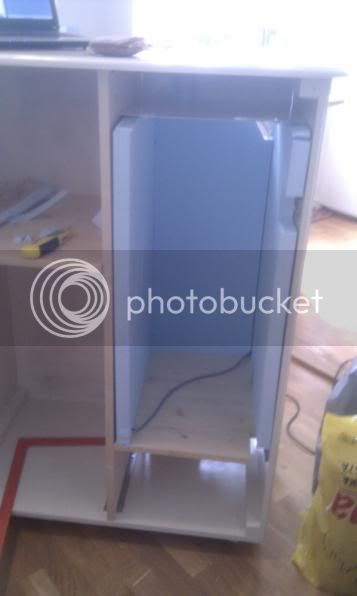
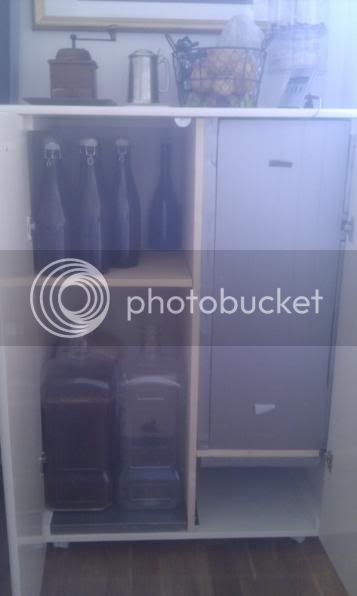
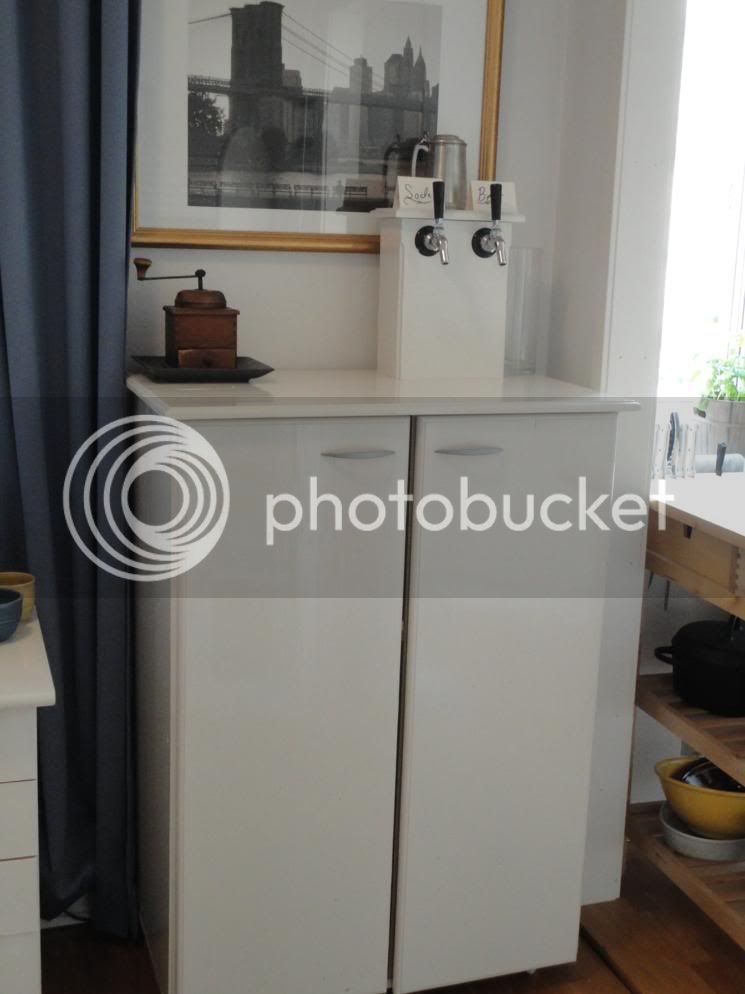
I am currently living in a decent sized apartment in Helsinki, but quite limited on space for what I can use for brewing, storing and kegging my beer. So it has forced me to get a bit creative. I tried talking the SWMBO into allowing me to rent a space to brew and for other projects, but somehow 'we' agreed that it would be a waste of money. The compromise, was I could build a brewing cabinet to house all my beer stuffs and keep it in our office right off of our kitchen.

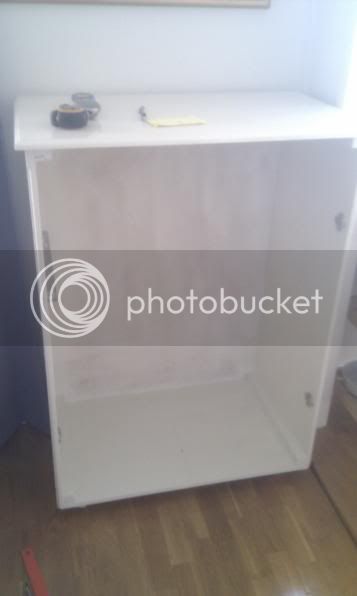
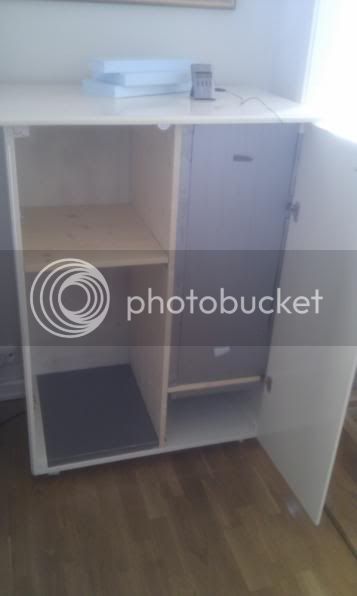
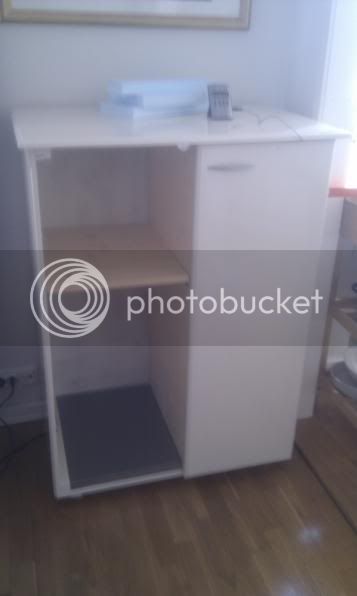
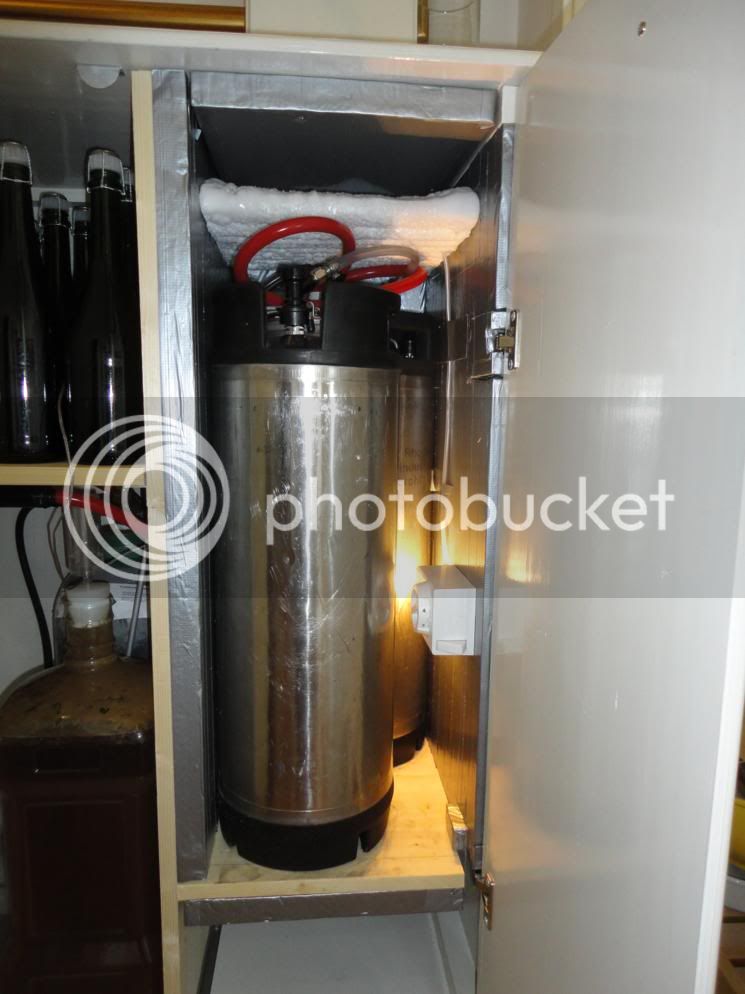
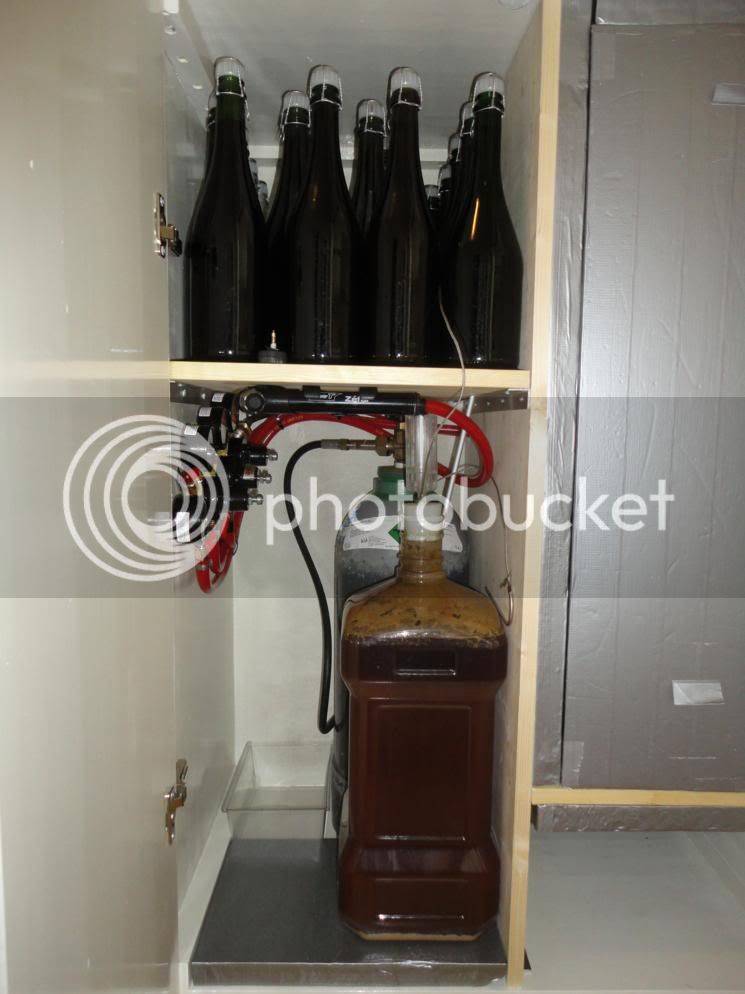
So here's the cabinet I built a few months ago. Completely handmade, to the specs I then assumed would be perfect for my fermenters, bottles and gear. I have no pictures of the build as I wasn't thinking to share as I am far from a pro furniture maker.

ferm_cab2.jpg


ferm_cab1.jpg


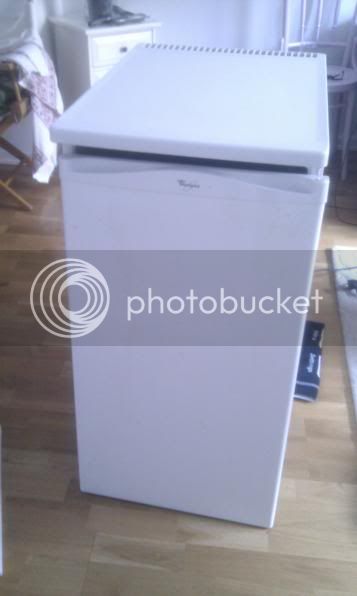
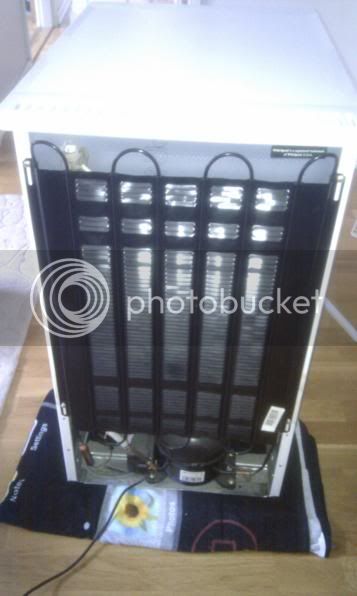
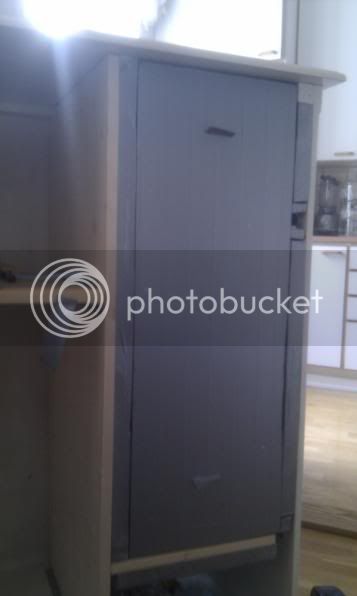
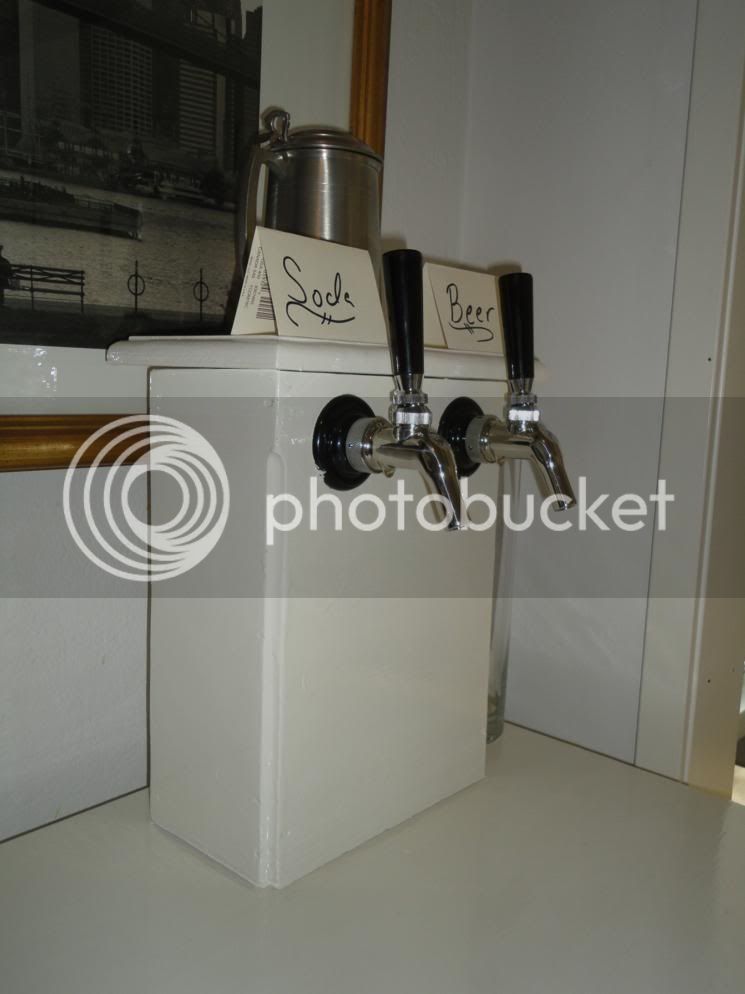
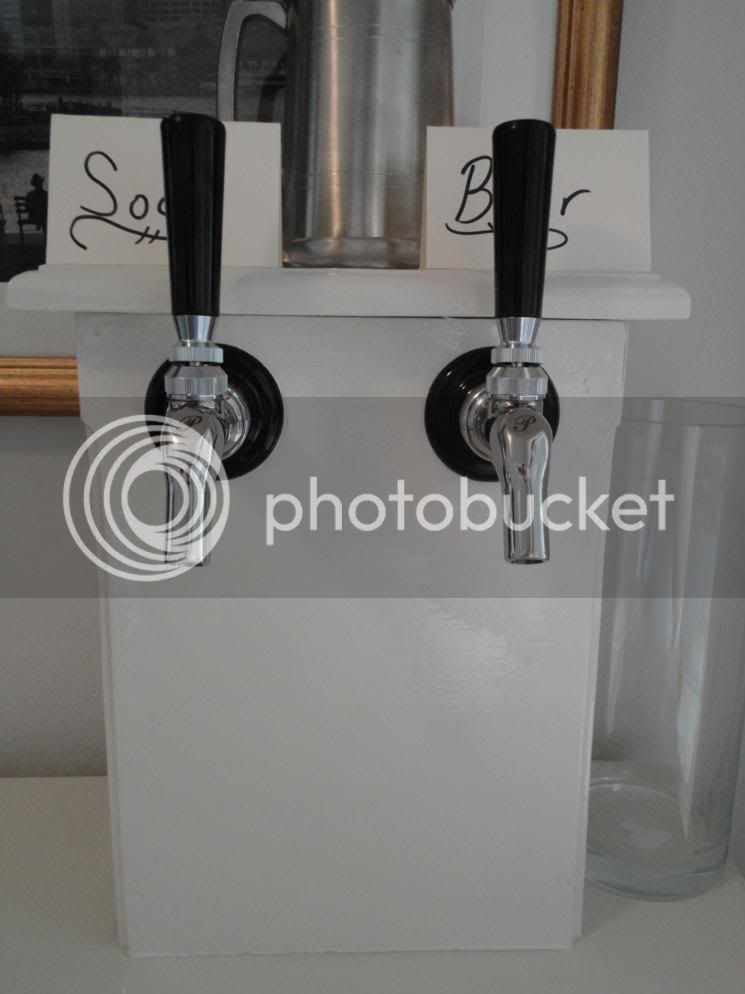
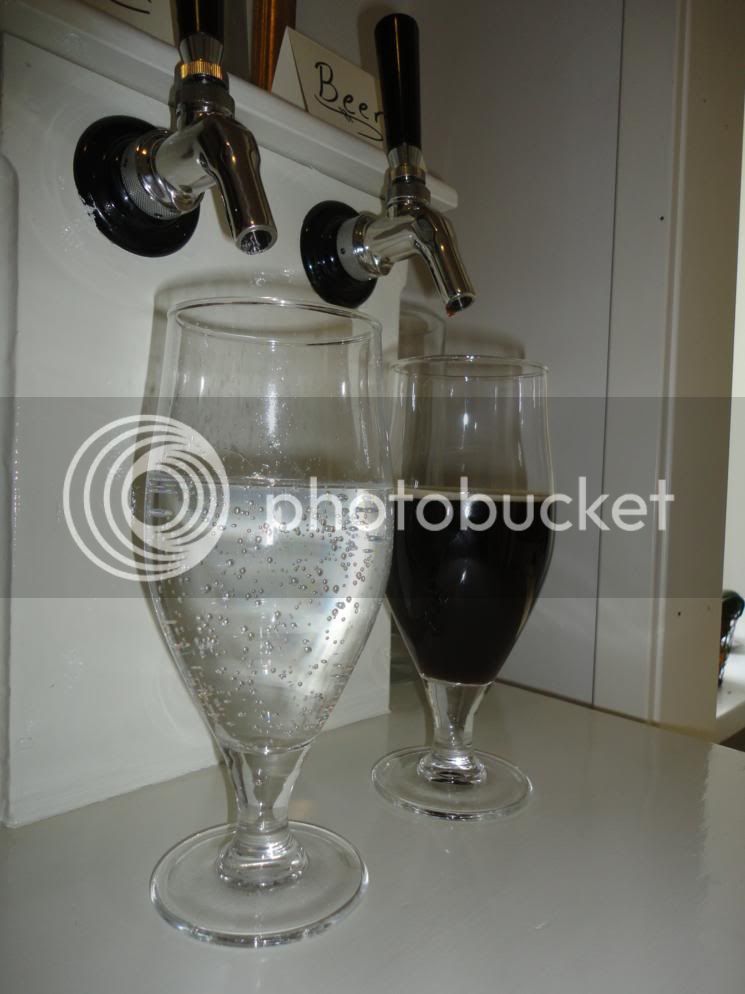
However I decided I really wanted to start kegging as well as bottle so I could have the best of both worlds. Big beer aging in bottle form, and fresh beers straight from the tap. However there was no way I was getting a proper kegerator past the wife. So time to get a bit creative...

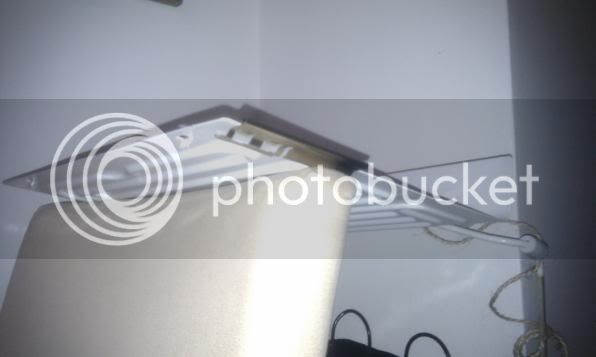
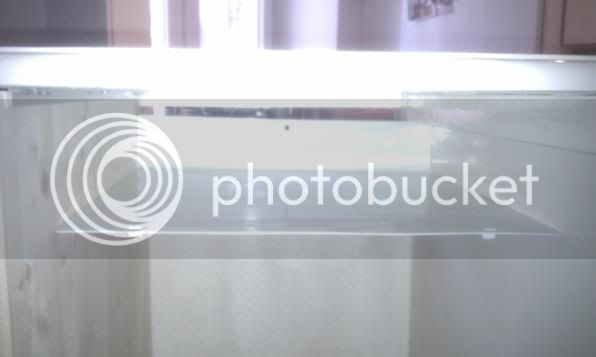
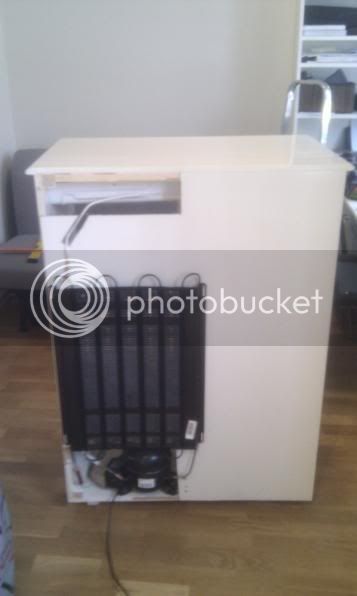
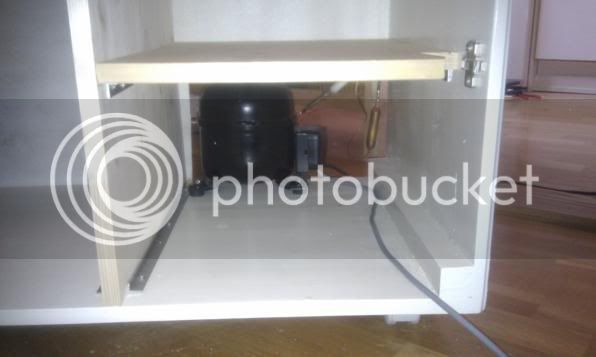
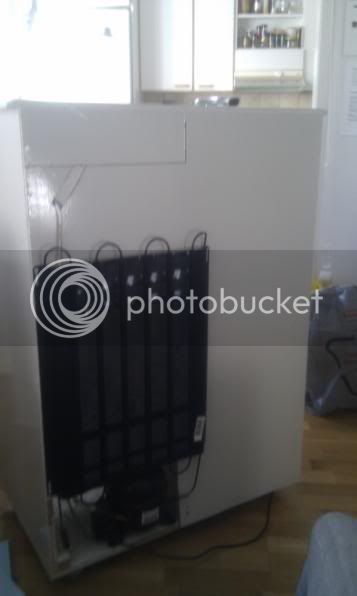
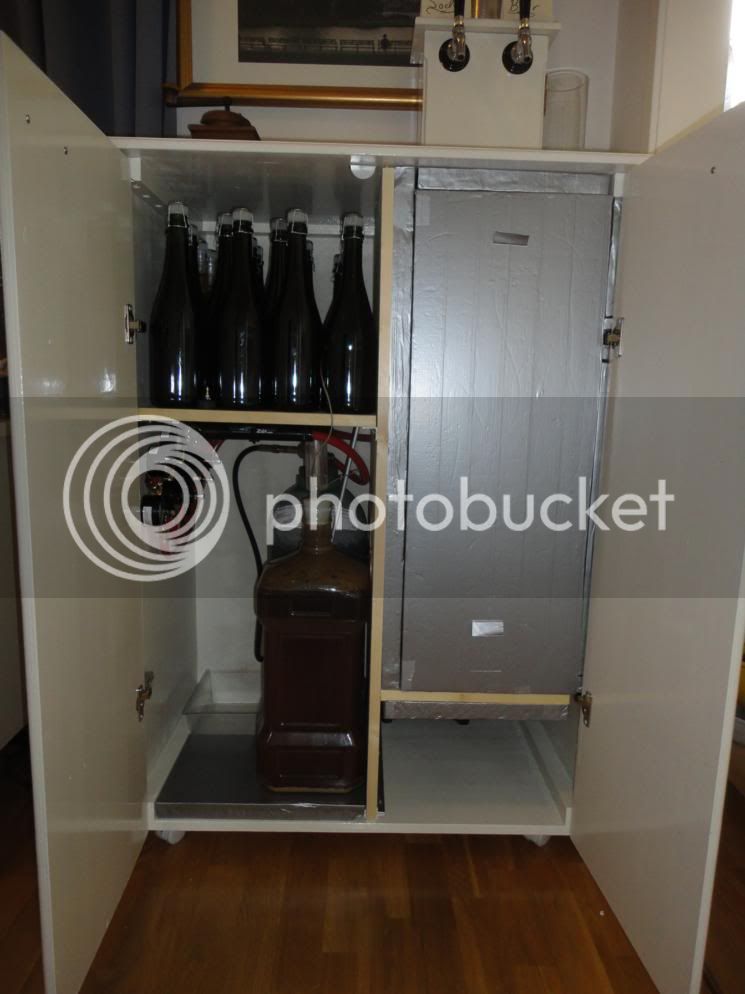
I found a mini fridge for sale in the local eBay type auction site for 15€ (~$20). It worked just fine, it just wasn't cared for very well (absolutely gut-wrenching odors from within) but since I only wanted the compressor and cooling system, it was perfect for me.

Fridge_front.jpg


Fridge_back.jpg
 
First off, sorry for the bad quality pictures. Apparently I am too lazy to charge the battery on my camera so all was taken with my phones camera.

So I took the fridge completely apart, keeping only the cooling system for my project. LEt me tell you this is no fun task, especially considering these mini fridges use the freezer shelf as the internal cooling element and there are no supports other than the cooling lines coming off of the compressor. So the whole structure is EXTREMELY fragile and difficult to move around solo. If anyone else is stupid enough to attempt this as I was, a second set of hands would be recommended.

Here is the after shot of the cooling equipment from the fridge.

cooling_element.jpg


cooling_element2.jpg


After destroying the fridge, I began to empty out and reconstruct my cabinet to make room for the new cooling element.

cab_empty.jpg


cab_shelves.jpg


And then installed the cooling elements.

Element_installed.jpg


Element_installed2.jpg


Element_installed3.jpg
 
The next step was to start insulating the chamber where the cooling element was installed. I have a limited supply of material here in Helsinki to use, so I went to the local Home Depot type store (Bauhaus) and got 3cm (1.2inch) thick styrofoam insulation board that is typically used for roofing and siding insulation. I then sealed the styrofoam board with duct tape to help seal any gaps and also form a condensation barrier.

Begin_insulation.jpg


begin_insulation3.jpg


begin_insulation4.jpg


Then filled all potential leaks spots and made the inner door.

Begin_insulation5.jpg


Door.jpg


And of course closed up the backing as well.

Closed_backing.jpg
 
And then the final product as of this stage. The fridge works like a champ, getting the compartment cool in minutes and running surprisingly quiet. However there seems to be an issue with the temp controller as it never shuts off, regardless of setting or temp probe location. So I need to open that back up and see why.

final1.jpg


final2.jpg


final3.jpg


My next step is to build a two tap tower out of matching wood for the right side of the top of the cabinet. That will be this week. And then get my kegging setup installed! It is designed to hold 2 19liter (5gallon) Cornelius kegs, however a bit tightly. If the 8.5inch (~22cm) diameter is accurate, I will need to shave my door insulation a bit to make it fit. The CO2 tank will sit in the left chamber in the open space behind the (now) empty carboy.
 
Ok, she's done! It took some time from when I began this project, but that was mostly expected since I was planning on getting most of the kegging parts while spending Easter in NY.

Right now I have it set up for a 2 keg system, but with a 3 body regulator. The 3rd body is for when I have both taps set for beer, I can carb 1.5liter bottles of soda water for my wife. But being as I only have one kegged beer, I am currently using the 2nd tap for soda water. Might've been a mistake though, my wife is getting a bit too comfortable with that...

Image1.jpg


I have yet to figure out how I am going to label my taps and if I plan on incorporating labels in the handles or not. So for now, this keeps me from making a bad pour.

Image8.jpg


Image4.jpg


Here's a look on the inside. As discussed earlier, the right side is the customized fridge I made, and on the right is my fermentation and aging section. The c02 tank was bigger than I was hoping, so I only have room inside for 2 3gallon carboys, instead of the 3 I was initially hoping for.

Image6.jpg


Here's the very tightly packed fridge side with the two kegs.

Image10.jpg


And here's a closeup of the fermentation side. Note the bicycle pump? You can see it better on the 2nd photo. That is my interpretation of a home soda making station. On the shelf above, you can see the modified cap with presta valve on it that is used for making the soda.

Image13.jpg


Image12.jpg
 
So figured out the problem with the temp controller. The probe needs to be right up against the cooling element to function well. With it positioned where it is currently I can maintain 2-4deg C (35-39deg F) on its warmest setting. If I want warmer, I need to reposition the thermostat internally or possibly insulate the part of the probe that is not pressed against the element.

So hopefully this week I will be able to continue forward on the tower build. Any thoughts?
 
With it positioned where it is currently I can maintain 2-4deg C (35-39deg F) on its warmest setting. If I want warmer, I need to reposition the thermostat internally or possibly insulate the part of the probe that is not pressed against the element.

So hopefully this week I will be able to continue forward on the tower build. Any thoughts?

I believe (for food safety reasons) a fridge should be at 41*F or lower, so that might be why the built-in thermostat isn't allowing you to get up higher than 39*F.

If you want to go warmer, you can try what you are currently doing, or you can buy or build an eternal thermostat to give you more control.

There are build plans for a DIY external controller for less than $40 here.

That would make sense, I never thought of it like that. So I probably will need to go with the external temp sensor.

Walker said:
By the way, that's a kick-ass little cabinet you wrangled together there!

Thanks! I'm still amazed at how much I could squeeze into such a little cabinet. Just don't tell my SWMBO where I moved all my brewing equipment to that was supposed to be stored in there. ;)

android said:
that's sweet! nicely constructed.

Thanks man! I guess all those years in construction paid off for something!
 
So figured out the problem with the temp controller. The probe needs to be right up against the cooling element to function well. With it positioned where it is currently I can maintain 2-4deg C (35-39deg F) on its warmest setting. If I want warmer, I need to reposition the thermostat internally or possibly insulate the part of the probe that is not pressed against the element.

So hopefully this week I will be able to continue forward on the tower build. Any thoughts?

Maybe this is a stupid question, but why can't you just use the existing thermostat from the fridge? Or did you and that is why it doesn't go warmer.
 
Subscribed. Are you planning on blowing some of that cool air into the other chamber for fermenting?
 
Maybe this is a stupid question, but why can't you just use the existing thermostat from the fridge? Or did you and that is why it doesn't go warmer.

It was mentioned by another member (walker) in this thread that due to food safety fridge thermostats won't go above a certain temperature. So if I want to have better control of the temperature, I might need to get an external t-stat setup.

kpr121 said:
Subscribed. Are you planning on blowing some of that cool air into the other chamber for fermenting?

I think I need to. My apartment stays pretty consistent around 68-70* however I am noticing lately that with the sun hitting the building during the day, that it can spike a little bit more than I would like. I'll keep an eye on it and see what happens.
 
Ok, she's done! It took some time from when I began this project, but that was mostly expected since I was planning on getting most of the kegging parts while spending Easter in NY.

Right now I have it set up for a 2 keg system, but with a 3 body regulator. The 3rd body is for when I have both taps set for beer, I can carb 1.5liter bottles of soda water for my wife. But being as I only have one kegged beer, I am currently using the 2nd tap for soda water. Might've been a mistake though, my wife is getting a bit too comfortable with that...

Image1.jpg


I have yet to figure out how I am going to label my taps and if I plan on incorporating labels in the handles or not. So for now, this keeps me from making a bad pour.

Image8.jpg


Image4.jpg


Here's a look on the inside. As discussed earlier, the right side is the customized fridge I made, and on the right is my fermentation and aging section. The c02 tank was bigger than I was hoping, so I only have room inside for 2 3gallon carboys, instead of the 3 I was initially hoping for.

Image6.jpg


Here's the very tightly packed fridge side with the two kegs.

Image10.jpg


And here's a closeup of the fermentation side. Note the bicycle pump? You can see it better on the 2nd photo. That is my interpretation of a home soda making station. On the shelf above, you can see the modified cap with presta valve on it that is used for making the soda.

Image13.jpg


Image12.jpg


And the final results. The inaugural beer is my Cascadian Dark Ale. As you can see it's not fully carbed yet, but is mighty tasty! :ban:

Image14.jpg
 
That is awesome looking! It would fit in any homes living/dining room!

Looks like there is a lot of condensation accumulated in the kegerator though, are you sure everything is air-tight? Or has that accumulated over a long period of opening/closing?
 
That is awesome looking! It would fit in any homes living/dining room!

Looks like there is a lot of condensation accumulated in the kegerator though, are you sure everything is air-tight? Or has that accumulated over a long period of opening/closing?

Thanks!

That condensation is from the past two months when I didn't really have the top of the fridge sealed properly because I was waiting to finish the tap section. Everything is sealed now, and I'm waiting to see if the condensation continues or stabilizes before I do anything to remove it.
 
Thanks!

That condensation is from the past two months when I didn't really have the top of the fridge sealed properly because I was waiting to finish the tap section. Everything is sealed now, and I'm waiting to see if the condensation continues or stabilizes before I do anything to remove it.

Glad to hear! I had some issues with condensation in my kegerator build until I slathered the inside with silicone.

Here's to hoping you find no more leaks, and have healthy pours all day!
 
Back
Top