Soldering Stainless steel

Homebrew Talk - Beer, Wine, Mead, & Cider Brewing Discussion Forum

Help Support Homebrew Talk - Beer, Wine, Mead, & Cider Brewing Discussion Forum:

This site may earn a commission from merchant affiliate links, including eBay, Amazon, and others.
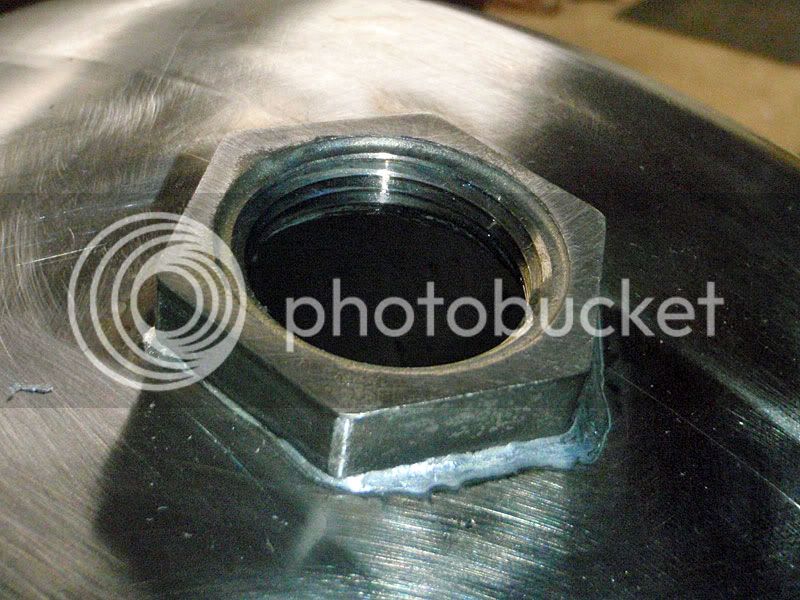
I have noticed that the 1/2" couplings from mcmaster-carr have the perfect diameter to go with the reducer for the flaring tool (also from mcmaster-carr). However, the 1/2" couplings from bargain fittings are slightly too small while the coupling from austinhomebrew that I have is much too large. Like Flomaster advised, if the fitting is slightly smaller don't pull the reducer completely through.
 
yeah i started my pull and got a flare started, then removed the reducer and replaced with the coupling. once it gets started the coupling will do a fine job of centering its self and being pulled through.

-=Jason=-
 
yeah i started my pull and got a flare started, then removed the reducer and replaced with the coupling. once it gets started the coupling will do a fine job of centering its self and being pulled through.

-=Jason=-

Approximately how far did you pull the reducer through before you replaced it with the coupler? Did you grind down the the end of the coupler at all to allow it to pass through easier?
 
I finally got around to testing out the keg tool. I got the flare tool pulled all the way through and looked good. I tried my 1/2 inch coupler, but it was much too large to pull through like Scut monkey said about his Austin homebrew couplers. I purchased mine from ferguson. I'll just order some from mcmastercarr. Anyone have a part number for quick reference?
 
just replace the reduce on your keg tool with your coupling and tighten er down it WILL pull through ;)

tighter is better... hrm.... well thats what she said.

-=Jason=-
 
I did crank down on it until the washers on the outside started crushing inward under the stress. I'll try applying a heavy dose of flux to help with lubrication. It's on a test vessel so I'm not concerned with messing it up.
 
I want to put a electric element into a keg with out cutting the top off the keg. so there will be no access to the inside, would you recommend that i solder a fitting onto the side, or is it possible to just thread the keg shell and screw it in?
 
I want to put a electric element into a keg with out cutting the top off the keg. so there will be no access to the inside, would you recommend that i solder a fitting onto the side, or is it possible to just thread the keg shell and screw it in?

I personally can't think of an easy way to do this but to solder or possibly weld one a fitting on the side for the element to thread in to. There have been some users that have welded fittings on the side for this reason. Why are you trying to do this while leaving the top in place? I do hope you are removing the spear at least.
 
I want to put a electric element into a keg with out cutting the top off the keg. so there will be no access to the inside, would you recommend that i solder a fitting onto the side, or is it possible to just thread the keg shell and screw it in?
That is not very hard to accomplish. If you are going to use the keg with the spear in place, just remove it temporarily & replace the spear when you get done with the element install. If you don't need the spear, remove it.

Drill the hole for the element and use a step bit to make it a "good" fit for the element. Tie a small nut to the end of a strong cord and drop it through the top of the keg. Move the keg around so that the nut & cord end come through the element hole. Loop that through the end of your element and drop it back into the keg. Invert the keg so that the small nut now comes out the top.

Next trick is to place your element nut over your louped cord and drop it into the keg. It will fit through the spear hole and will follow the string loop to the element port and then over the end of the element. Place the element through the element nut and thread it into place. (this might take a little fiddling) Once the element is placed and tightened, just pull the cord out and you are good to go. BTW, the element gasket provides the seal on the outside of the keg so it will be a leakproof connection.

It almost took longer to describe than to do. Hope it helps.
 
Hey guys! I was building a Grant yesterday and decided to take a video of drawing the dimple and soldering the fitting. Hope you like it ;)

Click through for glorious 720p high-def.


-Joe
 
Last edited by a moderator:
I want to put a electric element into a keg with out cutting the top off the keg. so there will be no access to the inside, would you recommend that i solder a fitting onto the side, or is it possible to just thread the keg shell and screw it in?
I went the solder-a-fitting-on route. It worked perfectly and was very easy. Steps I took:

  1. Drilled a hole in the side of the kettle so the element would go through (I think 1 1/16" or 1 1/8").
  2. Sanded and cleaned the outside of the kettle.
  3. Sanded and cleaned the 1" NPT locknut.
  4. Fluxed the outside of the kettle around the hole.
  5. Put two rounds of 1/16" solder around the hole.
  6. Fluxed the bottom of the locknut and sat it on top of the solder.
  7. Heated the locknut (which by proxy heated the kettle) until the solder flowed.
  8. Let it cool without touching it.
  9. Profit!

hlt_element.jpg


-Joe
 
Hey guys! I was building a Grant yesterday and decided to take a video of drawing the dimple and soldering the fitting. Hope you like it ;)

Click through for glorious 720p high-def.

http://www.youtube.com/watch?v=OpMFQFi6Hh4

-Joe

This video is absolutely priceless!!! Thank you for taking the time Joe. This should be the perfect tutorial for anyone who wishes to do this. You covered all of the bases.

Kudos!

John
 
I actually soldered the swage (Tool) together at the washers and the bolt head to make it more stable and better at centering. I also tapered (red lines) the last part of the coupling so that it "pops" thru the hole.

Iphone Camera 4241 copy.jpg


Iphone Camera 4246.jpg
 
That's really not a bad idea. I have had good luck with the swage tool so far so I'm not planning on a modify but very clever idea. I do have to mention though that I obtained a used Greenlee 1/2" conduit (makes 7/8" diameter hole) and it is much easier than using the step drill bits. I was trying to hold off from buying one but I grew tired of the lackluster performance from my step bits.
 
Hey guys! I was building a Grant yesterday and decided to take a video of drawing the dimple and soldering the fitting. Hope you like it ;)

Click through for glorious 720p high-def.

-Joe

If a picture is worth a thousand words, then I guess a video is worth millions.
Very nicely done :mug:

Thanks for putting this together and sharing!

Ed
 
That's really not a bad idea. I have had good luck with the swage tool so far so I'm not planning on a modify but very clever idea. I do have to mention though that I obtained a used Greenlee 1/2" conduit (makes 7/8" diameter hole) and it is much easier than using the step drill bits. I was trying to hold off from buying one but I grew tired of the lackluster performance from my step bits.
I went with the 1/2" punch as well. I didn't want to mess around with a step-bit and I really had no need for other size holes, at least for now. A pilot hole and then the punch and you are left with a nice perfectly sized hole ready for the tool to go into.
 
Just an fyi, you can braze harris 54 rods with map gas no problem. Just stuck a 4'' sanitary clamp on 4'' dwv copper no problem, so I'm sure it would work on a kettle coupling no problem. I did a messy job, but it was my first time brazing ever.....
 
I just wanted to reiterate the importance of using a liquid flux designed for ferrous metal. I did all my fittings with paste flux and they were a ***** with the flux causing almost more problems than it solved. After having to redo a couple of the fittings, I finally got the Radnor (Harris) StayClean liquid flux. What a HUGE difference. Soldering with that stuff is effortless compared to what I had been doing. I wish I had this stuff to begin with.
 
I agree about the liquid flux. I've done 5 couplers now and this is simple if you have the right tools. Two things I've learned and it's been mentioned here before: if you use the keg tool, I recommend getting the couplers from mcmaster as well. I bought others that were much too large. Also, once you pull the coupler through check it's position before you solder. I have one that isn't sitting right and I might redo it. What's the best process to take when you want to remove a solder joint and redo it?
 
I used the harris liquid with soft Ag solder, and it did seem to stick to the stainless pretty well. I used the paste with the harris 54 wire and it also stuck pretty well. It just seems to me that before you go to extra lengths to support a connection and use soft solder, you should just get some mapp and use the hard stuff. It's really just as easy, even thought the melting point is higher.

The only disadvantage I can see is if you are working with copper, because you necessarily have to anneal the copper, and you might not want to. I have seen some people plate Cu onto the stainless, and then solder with standard flux.
 
Just got a weldless bulkhead from bargainfittings. It's one of their new ones with a washer soldered to the hex head of a nipple. Looks super clean. I also am a fan of the larger rubber washers you're using now.
IMG_00282.jpg
 
I went the solder-a-fitting-on route. It worked perfectly and was very easy. Steps I took:

  1. Drilled a hole in the side of the kettle so the element would go through (I think 1 1/16" or 1 1/8").
  2. Sanded and cleaned the outside of the kettle.
  3. Sanded and cleaned the 1" NPT locknut.
  4. Fluxed the outside of the kettle around the hole.
  5. Put two rounds of 1/16" solder around the hole.
  6. Fluxed the bottom of the locknut and sat it on top of the solder.
  7. Heated the locknut (which by proxy heated the kettle) until the solder flowed.
  8. Let it cool without touching it.
  9. Profit!

hlt_element.jpg


-Joe

I want to do this as well. Anyone know if it would be any different soldering to an aluminum kettle?
 
I don't know that you'll be able to solder stainless to Al. The flux I'm using (Harris Stay-Brite) specifically says it's not for Al.

-Joe
 
I hope that the difference in heat expansion rates between the AL and SS aren't enough to cause the solder joint to fail, but that's probably unfounded speculation.
 
I hope that the difference in heat expansion rates between the AL and SS aren't enough to cause the solder joint to fail, but that's probably unfounded speculation.

That's a good point I was thinking this myself different thermal expansion rates.

If I needed to go the weldless route I would of used a thicker washer then machined a groove to capture or retain the "O" ring allowing the proper amount of preload crush of the "O" ring plus before seating the washer solid against the keg with the nut. Talking 40 ft/lbs torque for a solid fitting without fear of ball valves wobbling around spitting out "O" rings. JMO's.
 
Not an expert, but what if you put the solder on the aluminum then placed the nut on the solder then heated the nut? I think that would negate some of the expansion differences.
 
When soldering an element locknut, is it heavy enough to not float around like a hockey puck? The only other Silver Solder I've done to date was a grounding lug which skated all over the place.
 
When soldering an element locknut, is it heavy enough to not float around like a hockey puck? The only other Silver Solder I've done to date was a grounding lug which skated all over the place.

what seems to be the best for lock nuts is. coil a piece of solder the same diameter as the lock nut and place that on the vessel, use your liquid flux, set the nut on top of the solder and heat even around the outside of the nut until solder melts.

is that the method you used when the nut was skating around on you?

-=Jason=-
 
When soldering an element locknut, is it heavy enough to not float around like a hockey puck? The only other Silver Solder I've done to date was a grounding lug which skated all over the place.

I'd use a pair of vice grips or the like to hold it in place.
 
is that the method you used when the nut was skating around on you?

-=Jason=-

No, it was just a tiny Copper ground lug which I fluxed and then flowed the solder around it. That little thing just started sliding all over the place.
 
Back
Top