Bare Bones Fermentation Cabinet

Homebrew Talk - Beer, Wine, Mead, & Cider Brewing Discussion Forum

Help Support Homebrew Talk - Beer, Wine, Mead, & Cider Brewing Discussion Forum:

This site may earn a commission from merchant affiliate links, including eBay, Amazon, and others.

Seabee John

Swing the BIG hammer
HBT Supporter
Joined
Oct 1, 2007
Messages
2,309
Reaction score
71
Location
Sunrise
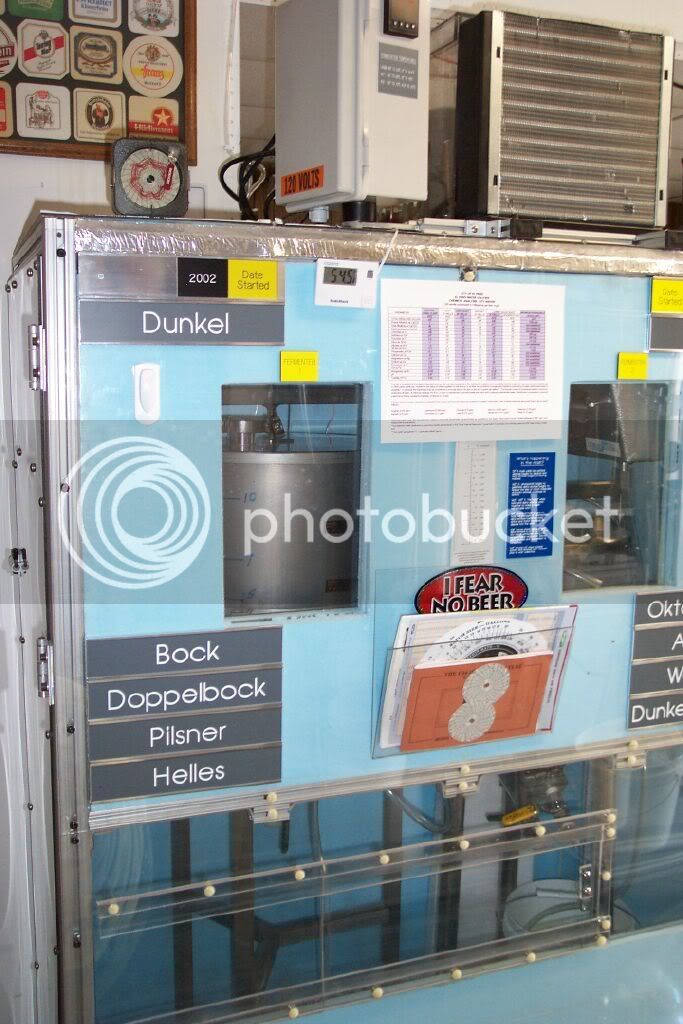
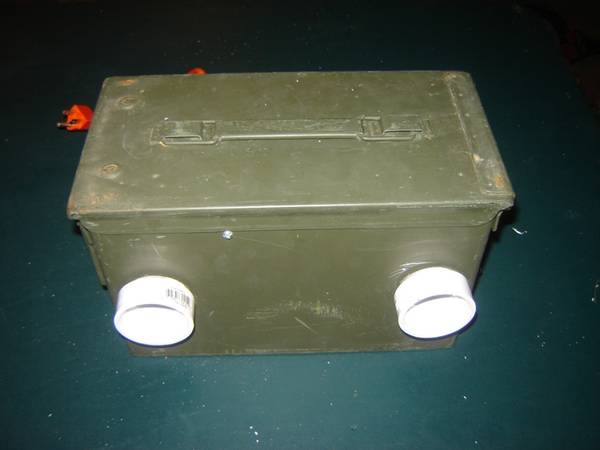
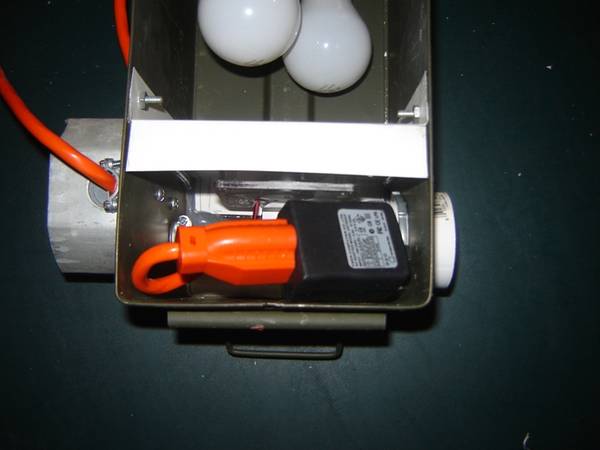
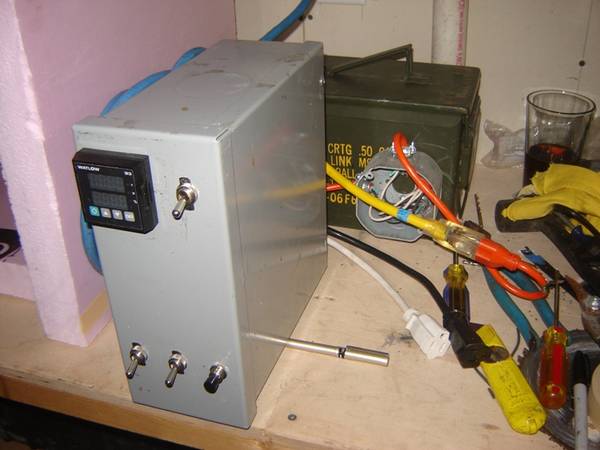
Some of you may have seen my PID controlled brew rig. I built it with a removable control panel so I could use the PID to control my fermentation between brews. Well, I put together a prototype on the cheap. All in all it cost me less than $70 to make (PID control panel not included) Here it is:

ferm001.jpg

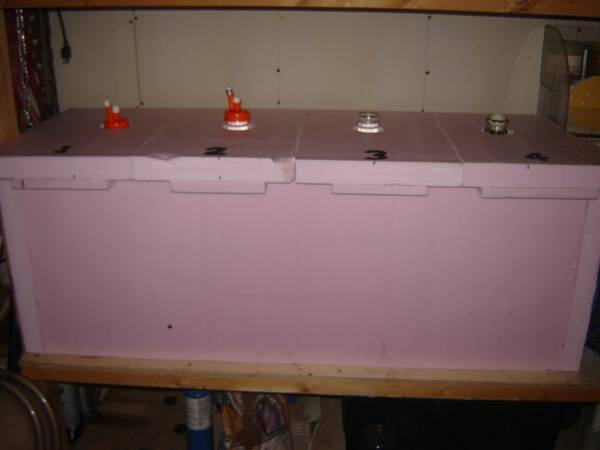
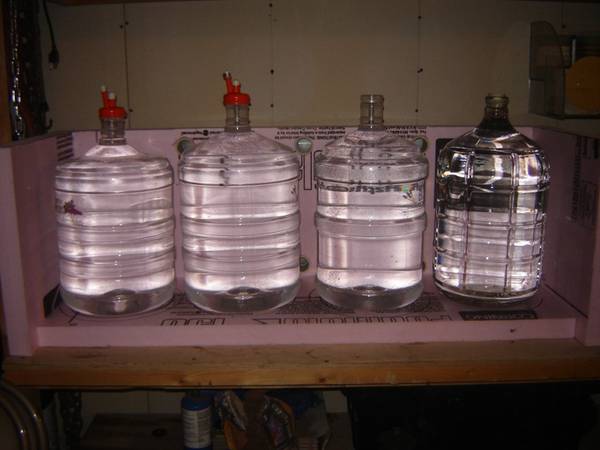
It don't look like much.... but it's holding 20 gal of water @ 68 deg with no problem...

ferm002.jpg

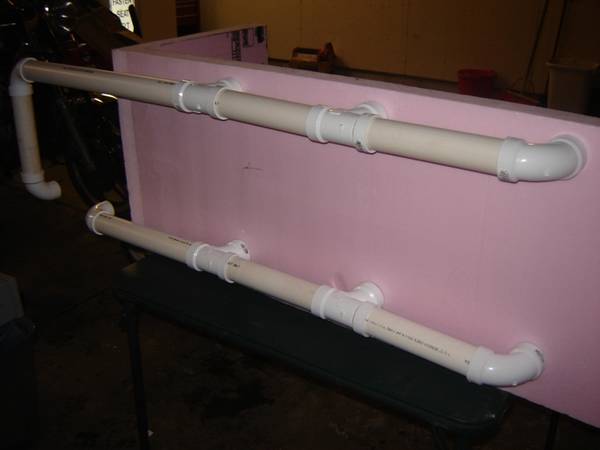
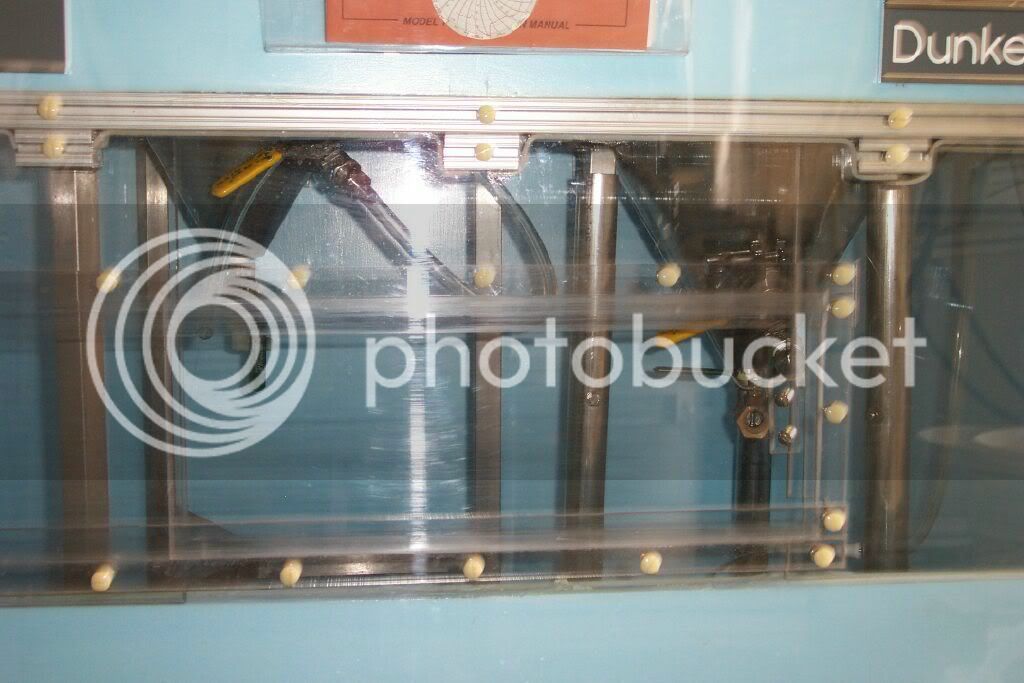
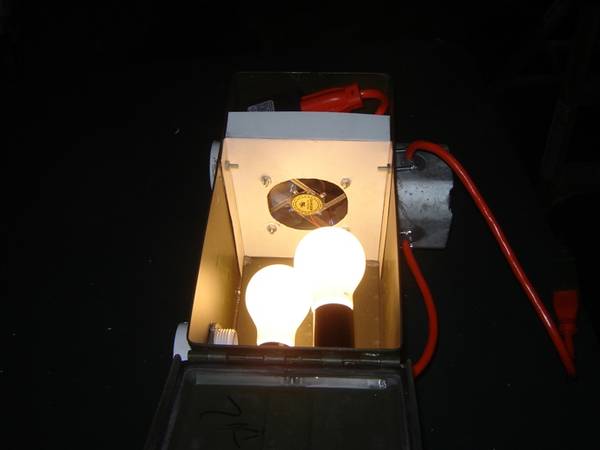
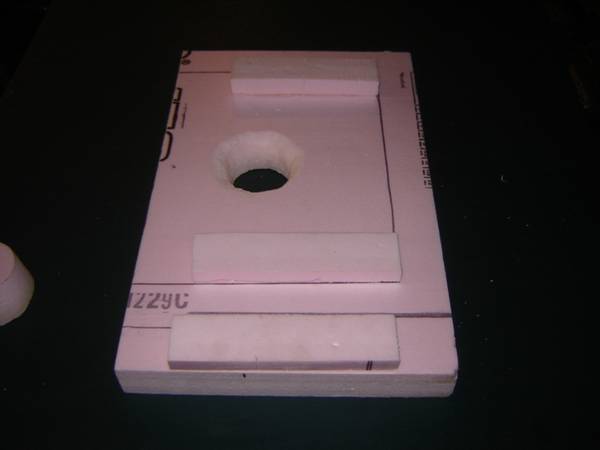
Warm air supply is on the bottom, with the cold air return on the top

ferm003.jpg

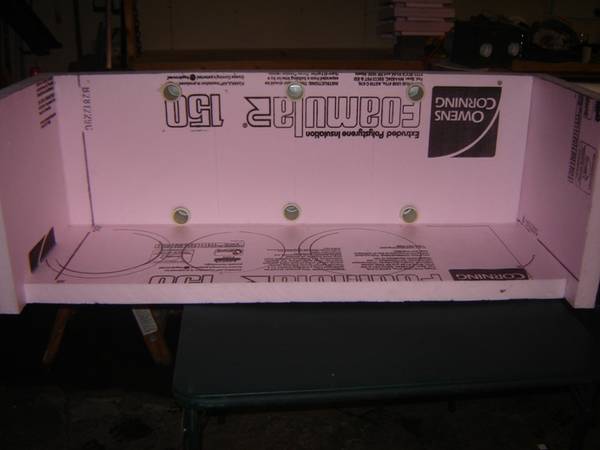
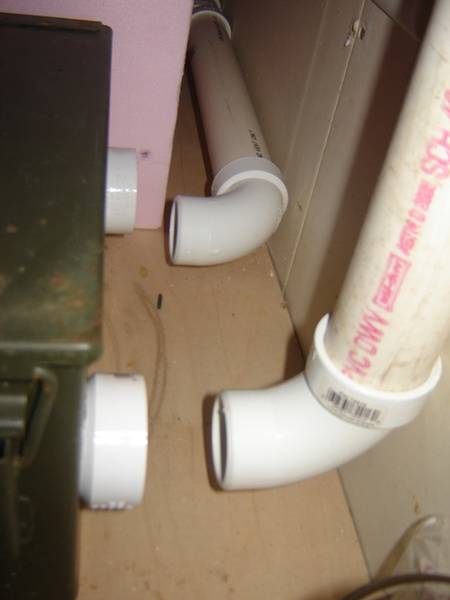
you can see the 6 inflow and outflow ports line up between where the 4 carboys sit

ferm004.jpg

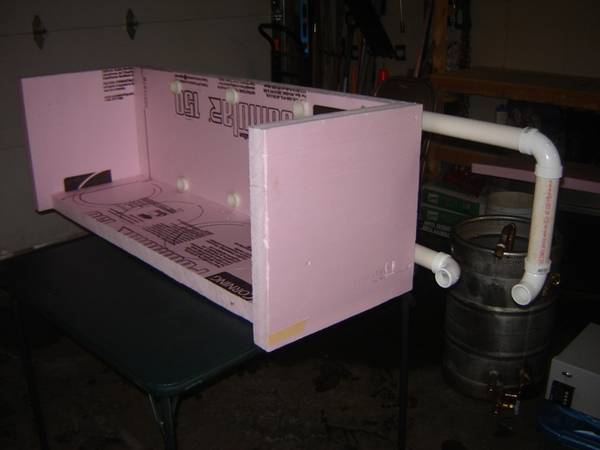
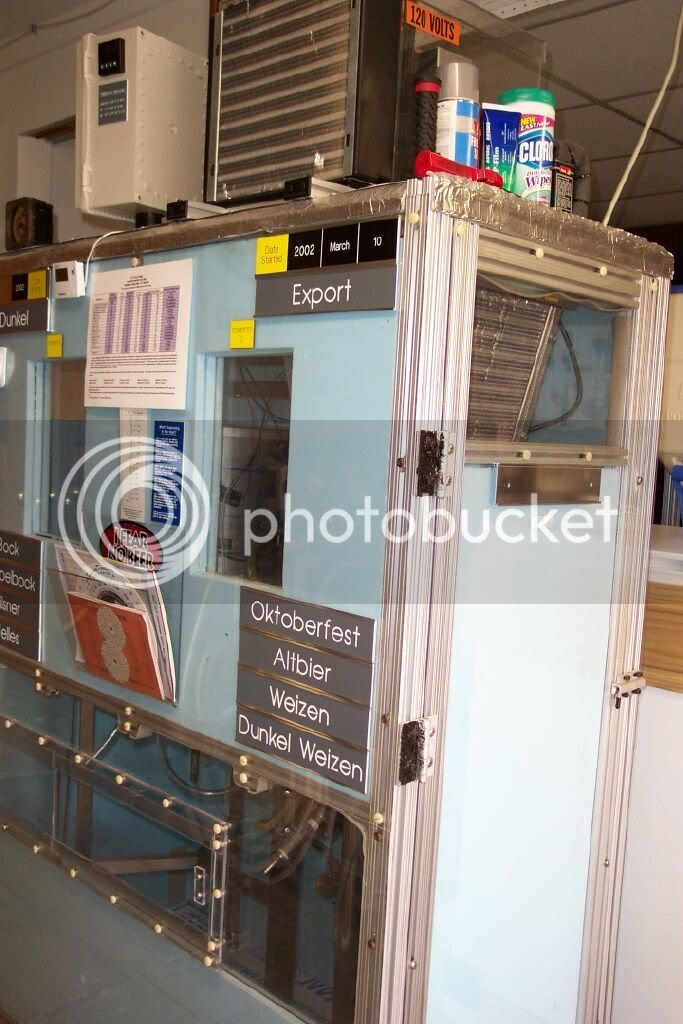
she takes up a foot print of about 6 feet by 2 feet
 
ferm005.jpg

this is the heating box from the back where the ducts hook up

ferm006.jpg

This is the box from the front with the electrical cover open

ferm007.jpg

This is the blower motor and power supply - I cut the divider from some sheet aluminum I had laying around, The fan is a 80mm computer fan that runs on DC, so I used an old AC adapter I had for the power conversion.

ferm008.jpg

here's the specs on the adapter
 
ferm009.jpg

Plug the adapter into the extension cord I used for wiring the box.

ferm010.jpg

Here's the source for heat - 2 100w light bulbs... the sockets were from the lamp parts section at menards

ferm011.jpg

Everything is on and working - shut the lid on the ammo box - and it's showtime!

ferm012.jpg

Line the box up with my pvc duct work and connect
 
ferm013.jpg

Put the cabinet on the bench, add the carboys

ferm014.jpg

Put the front of the cabinet in place and it's time for lids

ferm015.jpg

I fashioned 4 independent lids, with a hole in the top for the airlocks/blow off tubes to remain outside the cabinet
The bung you see is there to fill the hole in case I'm only using some of the carboy places

ferm016.jpg

I used silicone caulk to glue some strips of polystyrene foam on the underside of the lid so they "lock" in place

EDIT: I also used caulk to glue the cabinet sections together where needed, as well as providing an air tight seal for the divider in the heating box.
 
ferm017.jpg

Set the lids in place

ferm018.jpg

Hook up my PID control panel to the cord for the heating box and there you have it. I've been running tests for about 4 days now, the temps are holding just fine in a room where the ambient temp is at 45 deg F

Let me know what you think....
 
YEAAAAH I'm the first to say.....


Very cool idea. What are you going to do in warmer temps to keep it cool?

I would never have the room for this thing, but I am working on a most elegant solution.
 
YEAAAAH I'm the first to say.....


Very cool idea. What are you going to do in warmer temps to keep it cool?

I would never have the room for this thing, but I am working on a most elegant solution.

I pondered what to do in cooler temps, I may just place the whole thing in the basement where it hovers around 60 deg all summer, but then again, I'm looking into incorporating a heat exchange you might find in a server rack for computers. I can then recirculate chilled water through the exchanger inside the box. As far as what's chilling the water? well I could use a reservoir with the frozen water bottle swap thing... or I could re-locate it next to one of my fridges and run copper in to the freezer and fill the lines with glycol... but for now, I'm just happy with the control
 
to chill it -

make a styrofoam/fan 'swamp cooler' with dry ice or bags of ice cubes (fan in the lid, ice in the cooler and tube out the side) and connect to your rig with the same dia pvc but higher in the cabinet so the cold air comes into the cab and sinks around your ferm vessels

if you get a good fan and put it on full power and plug into a light dimmer switch you can control the cpm of the fan pretty easily

I'm not sure what it costs for a block of dry ice, but I'm pretty sure the SWMBO thinks that would be a bit too much.

If I really find a desperate need to have cool fermentation... I've got a fridge I can use (just gotta find a place to put my frozen deer meat...:D)
 
instead of the dry ice, I'm sure you could use 2 litre soda bottles filled with water and frozen.
 
I'm not sure what it costs for a block of dry ice, but I'm pretty sure the SWMBO thinks that would be a bit too much.

If I really find a desperate need to have cool fermentation... I've got a fridge I can use (just gotta find a place to put my frozen deer meat...:D)

I can make it easy for you... I'll take the venison off your hands free of charge!

Seriously though, very cool idea.
 
Here are some pics showing my old now retired fermentation box.
The unit was not flexible enough for my needs, could not ferment a Weizen & a Bock at the same time.


CoolroomFrontView.jpg

Access doors on both sides
CoolroomSideView.jpg


Sliding door permits taking samples from the fermenters without opening the side doors.

SampleSlidingDoor.jpg


Cheers,
ClaudiusB
 
that turned out really nice John, i like the pvc piping, does the fan run all the time or just when the bulbs are trying to heat?
 
that turned out really nice John, i like the pvc piping, does the fan run all the time or just when the bulbs are trying to heat?

Fan and bulb are both connected to the PID.... and I've got it det with a one degree dead band so their isn't alot of on and off, it will stay off for about 20 min, then heat to the high end of the target temp, which takes about 10 minutes, then off again. I'm still running tests, it's maintained 70 deg for about a 24 hour period and I just set it to ramp up to 72. It will take about 2-3 hours to get there.
 
Very cool build but I would hardly call it "bare bones"
I thought this would be something I could throw together in an afternoon with crap that I found in my garage.
 
Very cool build but I would hardly call it "bare bones"
I thought this would be something I could throw together in an afternoon with crap that I found in my garage.

Well, almost bare bones.... having the PID on my brew rig was cheating a little.... but the rest of it can be made very cheaply., all told, you could include the PID and SSR plus wire, switches and a panel box and do the whole thing for less than $200.00

The reason I called it bare bones is when you compare it to other ferment cabinets on this site... Mine becomes so ghetto, not even BierMuncher could stand to look at it. :D

Mine is bare bones, a cooler with some frozen water bottles and a couple of towels thrown on top.:D
I am not even sure what a PID is?
 
Mine is bare bones, a cooler with some frozen water bottles and a couple of towels thrown on top.:D
I am not even sure what a PID is?

A PID (programmable interface device) Is a small computer that hooks up to a thermocouple for measuring temperature, then tells an SSR (solid state relay, or switch) to turn on or off based on the target temperature and the current temperature. I hook up my heating box to the SSR & PID.

So, If I want my ferment vessel to be at 68 deg F. I set the PID target to that temp. If the thermocouple measures a temp of 67 Deg F, the PID tells the SSR to switch "ON" and my heating box then begins to blow warm air into the cabinet. When the ferment vessel reaches 68 Deg F, the PID tells the SSR to switch "OFF" That way, I know my temps are right on the button, and I don't have to constantly watch it to maintain the temps needed. The same concept works for cooling, but you need to replace the heating box, with some sort of system for generating cool air.
 
So I thought I'd post a little data I've collected so far:
Ferment_Performance.jpg


A little help on deciphering the data....

Y Axis is Temp in F
X Axis is Date in M/D, Time in 24 hour format

The PID line is the temperature my thermocouple is reading in a carboy in the chamber of the cabinet

The Baseline is the temperature of my most reliable thermometer in a different carboy in the chamber... it should always read fairly close to the PID

The Chamber line is the temperature of the ambient air inside the chamber (showing the temperature disparity between air and liquid)

The Garage line is the temperature off of the thermostat on the wall of my garage (yes my garage is heated) showing the ambient temperature inside the garage. Hovering around 45 Deg F

The Target line is the temperature "target" of my PID... If the target temp is lower than the PID Line temp - the heating box is in an OFF state, if the target temperature is higher than the PID line temp, then the heating box is in an ON state.

If you note the changes in the Target line, you can see when I changed it and then compare the response time by looking at the PID data.

I'd like to hear from those of you with your own temp controlled fermentation (heat wise) and see how I stack up... if you have the data anyway.
 
SeaBeeJohn; I would use what is posted below, these strip heaters come from low as 20 watts to 1,000 watts 120 volts and higher on 240 volts, 240 volt strips below 1,000 watts also.
We used them in MMC's all the time at work for moisture control. I as a Pack-Rat on old equipment removal would save a couple all the time. I used two 200 watt under my Iguana's cage bottom mounted below a 24" x 24" x 3/8" steel plate covered with sand on top with a 100*F thermo snap on the plate for the animals protection. It worked for over 12 years trouble free.
Check the charts on Pages 5, 6 strip heaters and 7 for disk heaters, they show what is available in wattage and voltage.

http://www.tempco.com/Catalog/Section 8-pdf/Mica Strip.pdf

They can be used many for different things as long as the terminals are out of harms way or little fingers. I would use one instead of lamps with your computer fan but add a 120*F thermo snap safety switch inside that amo box. JMO's on what has worked for me in the past with these strip heaters. Free parts make for fun projects.

BierMuncher still holds the trophy for the best keggle top cut job.
He must hold the "Tim the tool man Taylor stitch award". Did anyone ever see what the lid itself looked like after that cut out?
 
SeaBeeJohn; I would use what is posted below, these strip heaters come from low as 20 watts to 1,000 watts 120 volts and higher on 240 volts, 240 volt strips below 1,000 watts also.
We used them in MMC's all the time at work for moisture control. I as a Pack-Rat on old equipment removal would save a couple all the time.

http://www.tempco.com/Catalog/Section 8-pdf/Mica Strip.pdf

Sounds like a great idea... got a few laying around you can just fedex over?

They look a little on the expensive side... I had been using a heating pad, but it was only 6 watts.... I went to go find a different one, and they were all over 50 bucks.
 
More data to relate.

I wanted to find out the BTU output of my little heating box so I did a little digging

As it turns out, Watts multiplied by (5.689E-2) gives you BTU's/Minute

So, my 2 (100 Watt) lightbulbs = 200Watts(5.689E-2)=11.387 BTU's/Minute
 
Bump. Hey John this is epic. I love the massive size of this thing and living in montana for a while i know how cold things can get. Only thing im wondering about is your warm air suply is at the top...Since warm air rises wouldnt you want them the other way around? Warm air comes out top and as it gets colder sinks and gets sucked up at the bottom through the cold intake and heated going back out the top?
 
This is SCHWEEET...the ONLY thing I may have done differently is placed the warm air supply lines coming into one SIDE of the chamber (not back) and have the cold air return on the opposite SIDE so that they are at opposite ends for a better exchange of air. That is awesome temp control though :)
 
Bump. Hey John this is epic. I love the massive size of this thing and living in montana for a while i know how cold things can get. Only thing im wondering about is your warm air suply is at the top...Since warm air rises wouldnt you want them the other way around? Warm air comes out top and as it gets colder sinks and gets sucked up at the bottom through the cold intake and heated going back out the top?

I could have done it either way... It's fan driven so it has enough flow that it completely turns the volume over in about 8 minutes... so convection really isn't a factor. All I'd need to do to swap the cold and hot would be to change the polarity on the fan power... it's DC so it will run in either direction...
 
well there I was.... picking my 2nd year hops.... I questioned: "where to dry them???"

hoppick001.jpg


then came the answer! impromptu elevated supports made from brick,

hoppick003.jpg


resize the screen I used last year, unhook the cold air return from my heat box and bingo.... a hops dryer!

hoppick004.jpg


Dried my cascades (3lbs wet) down to 13.5 OZ dry in less than 24 hours

runs about 110 deg F.
 
Well, almost bare bones.... having the PID on my brew rig was cheating a little.... but the rest of it can be made very cheaply., all told, you could include the PID and SSR plus wire, switches and a panel box and do the whole thing for less than $200.00

The reason I called it bare bones is when you compare it to other ferment cabinets on this site... Mine becomes so ghetto, not even BierMuncher could stand to look at it. :D

I know this is an old thread but for anyone looking wouldn't this work as well? It's what I use on my fermenting fridge (I have to heat and cool). It's a simple build (I did it as suggested in the first post) and have little to no experience with electrical wiring.
https://www.homebrewtalk.com/f51/stc-1000-ebay-temperature-controller-build-330427/

Has anyone thought of a way to do this with cooling involved? Chest freezer the only way?
 
Back
Top