My Keezer Build

Homebrew Talk - Beer, Wine, Mead, & Cider Brewing Discussion Forum

Help Support Homebrew Talk - Beer, Wine, Mead, & Cider Brewing Discussion Forum:

This site may earn a commission from merchant affiliate links, including eBay, Amazon, and others.

Lilrascal

Supporting Member
HBT Supporter
Joined
Apr 7, 2010
Messages
199
Reaction score
9
Location
Wisconsin
Well I have just gotten started in the homebrew hobby. In fact my first batch of beer is not even finished yet, it is an amber ale that is currently in the secondary. But I can tell you I already have the bug. When I first started reading the forums, I spent to days reading the "show us your kegerator" thread". As soon as I started reading the thread I knew that I wanted to build one too. I read each post, bookmarking ones that I found interesting. The I came to the holy grail of keezers: Jester's magnificint build. It can be seen here: https://www.homebrewtalk.com/f51/keezer-project-31221/index13.html#post710605. I just knew this is what I wanted to build. I spent the next day reading his build thread.

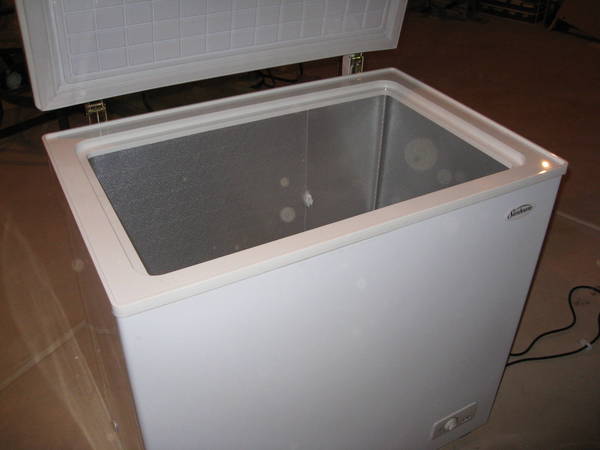
I then PM'd Jester. He was nice enough to send me the sketch up files. I can not give him enough credit, and hope he feels honored that I have cloned/copied his design. Now obviously his is a different size freezer, and I had to design mine with that in mind.

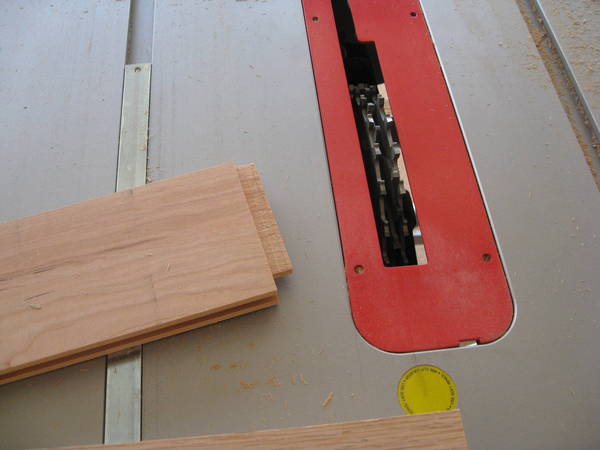
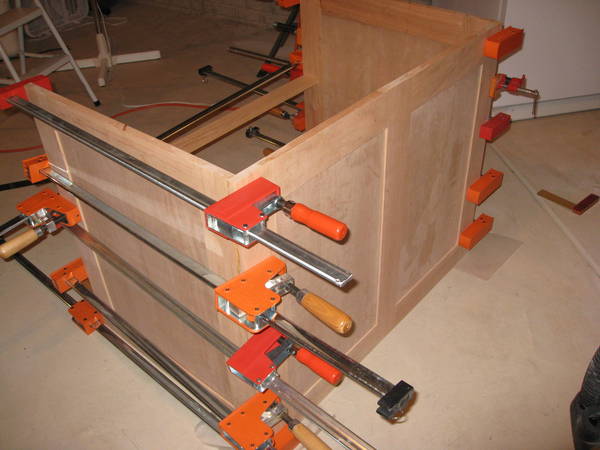
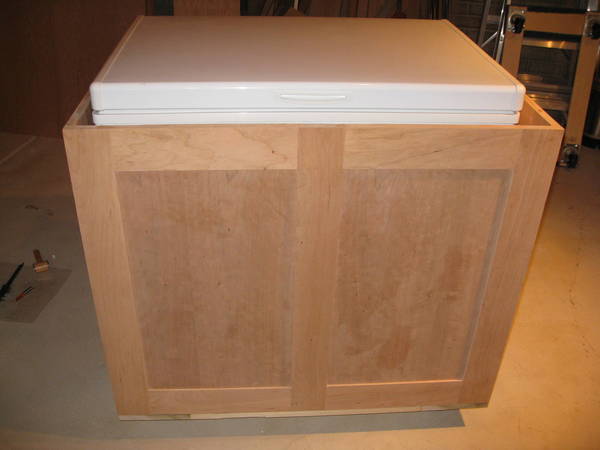
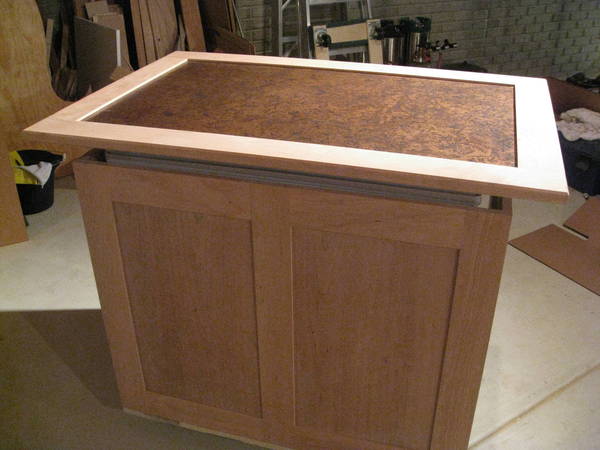
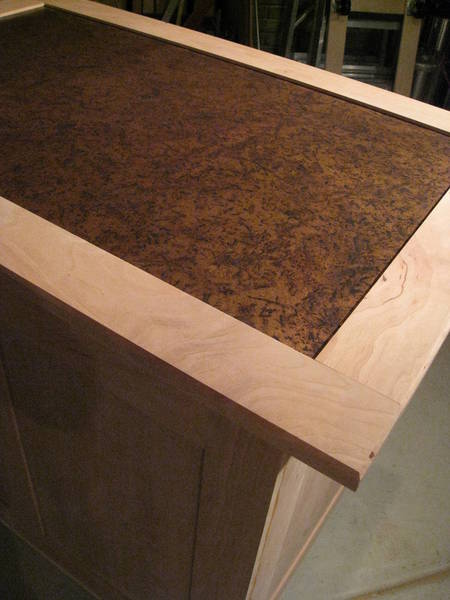
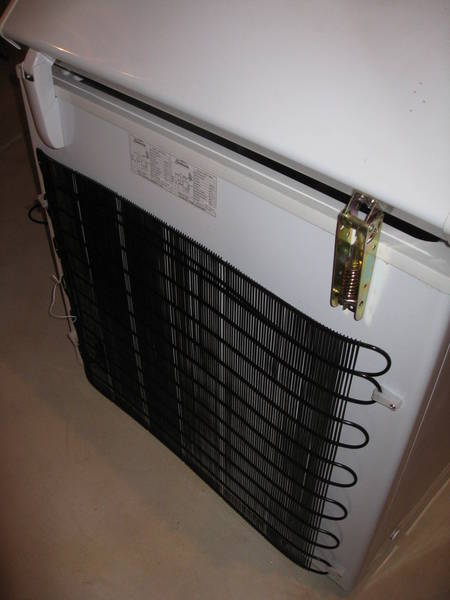
In the past I have dabbled in woodworking, and had a small shop at our old house. But once we moved 4+ years ago, I never got around to setting it back up again. This gave me an excuse to dust of some of the tools, and set them up in the garage, as a temporary workshop.

What follows is my chronicle of my build. It will be in somewhat in real time, so it may take me a couple months to finish. I am looking forward to sharing with you all, and getting ongoing opinions and advice. I can only hope it turns out half as nice as Jester's, and I hope my beer turns out good too!

More posts and pic's to follow soon.......

Joe
 
First step is to buy a freezer. I went with a Sunbeam 7.2 cu ft model. I got this at a hardware store call Menard's. It happened to be on sale the day I got it for $169. Not a bad deal:
IMG_3421.JPG


One of the reasons I went with this model is it had the coils in the back of the freezer. This way I could have the front and sides enclosed and not worry about overheating. See below:
IMG_3422.JPG


I am planning for four taps. Three dedicated to beer, and a fourth dedicated for soda/rootbeer. I am easily able to fit three corines in there. There is room for a 10 lb CO2 tank, and I am planning a 2.5/3 gallon cornie for soda to fit on the hump.
IMG_3423.JPG


More to come......
 
Nice start, and welcome to club! ;)

My advice, I just finished my build, would be: BE PATIENT do not fill that sucker up until you are finished. I was so excited to get started And SWMBO was so eager to get fridge space back we moved beer, yeast and a keg into the freezer once the controller got here and that was HUGE mistake. No matter how tempted you are don't do it!

Keep the pics coming"
CHEERS!

Thanks. The controller is here, but I am waiting. I guess it is easier to wait since I don't have my first batch ready yet!!! I plan to bottle first batch, I need to learn that too.
 
I had asked Jester if there was anything he would do different. He said he wished he used a higher quality wood. That helped me make the decision to go with cherry. I decided to start on the base cabinet first.

I purchased some 4/4 cherry to get started. First step was to joint, plane and dimension it to 3/4 stock. Then I cut out the rails and stiles for the cabinet:
IMG_3417.JPG


Next step was to use a router table to cut a 1/4" dado to accept the cherry plywood panel and join the rails and stiles.
IMG_3418.JPG


Next I used a dado blade to make the tenons on the rails that will fit into the stiles.
IMG_3419.JPG


Next I cut the cherry plywood into the correct panel sizes. I used 1/2" cherry plywood. I cut a 1/4" deep rabbet in the back. This is so the front would still have a 1/4" reveal. I did this at the router table with a rabbeting bit.
IMG_34202.JPG


That is as far as I am in the project. Next step is to sand everything, then glue up the cabinet panels.

I will keep you posted.
 
nice work...

I just picked up a used 8 cf freezer tonight off Craiglist for $40, and I'm going to start building it up into my keezer tomorrow.

Please keep us posted, looks like you're going to have a nice one when it's finished!
 
Heh, using words like "dado" and "stiles", you sound like Norm. And remember there's no more important rule than to wear THESE safety glasses!

That cherry already looks nice, can't wait to see it come together.

Good luck with the project.

Cheers
 
Good looking build but why wouldn't you just build a taller collar so that you could fit a 5 gal. corny on the compressor hump?
 
Good looking build but why wouldn't you just build a taller collar so that you could fit a 5 gal. corny on the compressor hump?

I thought about adding a collar, though was quite content with 3 kegs. Plus I was quite fond of the idea of not having to mess with the original freezer seal. The idea of adding a fourth tap for soda was kind of an afterthought/bonus. 2.5 gallon batches of soda will be more than enough for just SWMBO and my self.
 
I added a collar to mine, the seal part was the easiest hurdle. I am happy with the extra height as it allows placement of a manifold inside and I also plan on adding a tray to hold glassware to have them chilled on hand, maybe another tray to hold bottles of beer. I am also contemplating powering a fermentation chamber off the keezer by piping some cold air through a duct out the side of the collar.

On the other hand I had no plans to add a case to the outside of the freezer as at 10.3 cu ft it would take a lot of wood so the collar is the only wood on the keezer. I used rustic red birch. Got it super cheap and stained it cherry. It looks really nice, SWMBO even agrees, which is fortunate as it is in our living room.:mug:
 
Well today I didn't do much, have to work this weekend. I just fine tuned the fit a little and dry fitted the panels. Here is a picture of the front dry fitted.

IMG_34242.JPG


Next step is to sand all the pieces, and glue them up. I probably wont get to that until first part of next week.
 
Thanks everyone for all the positive comments. I finally got around to gluing and clamping up the cabinet panels today. Now I am off to find wheels/casters for the base. Think I will head over to Harbor Freight and see what I find.

IMG_34261.JPG
 
Well my Perlick faucets arrived from Austin Homebrew. Great price, fast shipping. I added the black handles and plugs from there option list. I was thinking they would be the black plastic plugs/caps. Turns out they are just a sponge insert, oh well, they were only 99 cents.

IMG_3427.JPG
 
Well I did some more work on the keezer today. I had been thinking hard about what I wanted the top to be. I really like the ceramic tile, but I also wanted to go with something different and possible lighter. I had saw a couple tops with copper. After some searching I found some copper that had a patina on it. It was a little pricey, but I figured what the hell. I just hope it works out.

Some of the patinas can be seen here: http://www.colorcopper.com/categories/Patina-Copper-Sheets-%28Light-36-Gauge%29/

I went with the medium distressed.

Here are some examples of it in use: http://www.flickr.com/photos/colorcopper/sets/72157617126261683/

I will be spraying it with several coats of lacquer specifically designed for copper. I have laminated and glued it to the top. Tomorrow I will see how it turned out. Here are some pictures of the actual copper before I laminated. I think I will have enough to also do the backsplash of the coffin.

IMG_3432.JPG

IMG_3434.JPG

IMG_34331.JPG
 
That's what I wanted to do to mine, but I couldn't find any. Found some Formica that kind of looked like that, but the pattern was not random and looked fake. That is really going to look nice!
 
First off thanks to everyone for the comments. Well today I got around to assembling the sides and front of the cabinet. Here it is all glued and clamped up:

IMG_34351.JPG


Next step is to build the base, which the casters and cabinet will sit on.

I have been working on the copper top. It is not turning out as great as I hoped, though I am still hopeful it will look nice. First off The best solution for attaching the copper veneer would have been a vacuum press. since I did not own one, and could not find one for rent, it meant I just used some weights on the layers. It was not the best solution, as there are some areas that did not attach as solidly as others. This made for some slight variations in the top. Also the copper is very hard to work with since it is such a soft metal. I used my router with a spiral flush cutting bit to trim the edges. Wells after I was done I noticed some scratches around the edges. Turns out some of the copper shavings got between the router and the top causing some scratches, though you do have to look close to see them.

I have so far applied 4 coats of the copper lacquer. Here is a picture of the work so far:

IMG_34381.JPG


That is it for today.

Joe
 
Well I got some more work done on my keezer. I made the bottom out of poplar. and attached the for casters to it. Then I attached the whole bottom to the cabinet frame.

IMG_3440.JPG


The freezer was placed inside the cabinet.

IMG_34411.JPG


IMG_3442.JPG


On the back I used pocket screws to attach a cross support. This way I can remove it to get the freezer out if need be.

IMG_34441.JPG


That pretty much finishes the bottom, except for the base molding, which I will attach later.
 
Lookin' really good! I'm planning a build almost exactly how yours is headed. I can't wait to see it finished.
 
Lookin' really good! I'm planning a build almost exactly how yours is headed. I can't wait to see it finished.

Thanks! It has been fun so far. I got the drip tray in. I ended up ordering it from beverage factory, at a premium price as I had trouble finding it in a flush mount with no drain and the size I was looking for. The sticker on the box said Infra Corporation. Not sure if it would have been cheaper to order directly from them, as they do not have prices on their website. Someone needing a tray, may want to check with them directly. I will post a picture later when I get a chance.
 
Here is a pic of the drip tray as promised (not yest installed obviously). Today I worked some more on the top. Dimensioned some more cherry to border the copper top.

IMG_3445.JPG
 
It finally seems to be coming together. I finished the top except for the apron that will go along the bottom of the top. Not yet attached to the freezer. Here are some pictures.

IMG_3450.JPG


IMG_3452.JPG
 
Well work on the coffin is coming along. I decided to use a 16" LED strip light to mount under the taps. I figured it would be pretty easy to conceal, and was fairly inexpensive.

IMG_34532.JPG


Here is the coffin all framed up, and the light installed. Obviously I still need to make and attach the sides and top which will be cherry. Then I will finish by putting in the drip tray, permanently attaching the top, and finishing the apron and base trim.

IMG_34561.JPG
 
Looks great. I still can’t get over that copper! That is going to look fantastic with the finished cherry. Oh, how I wish I’d found it before I finished mine. :(
 
Looks great. I still can’t get over that copper! That is going to look fantastic with the finished cherry. Oh, how I wish I’d found it before I finished mine. :(

Thanks. To be honest I am not sure if I would use it again. It does look nice, but I am concerned about the long term durability. It did scratch easily. I am hoping it fairs better now that there are a few coats of lacquer on it. I thought about epoxy over the top, but have never done that before, and am afraid of really screwing it up. I will see how it goes though. The top shouldn't be getting too much abuse.
 
Well I finished. I still have to do the plumbing and the finishing. Here is the picture of the final build. I have to adjust one of the holes for the taps since I did not have a drill press, and I guess it wasn't as straight as I thought. Looking forward to getting the finish done so I can put it in to use.

IMG_34601.JPG
 
Looking forward to getting the finish done so I can put it in to use.

IMG_34601.JPG

I have put mine to use for about a month now the finishing touches are still waiting. With 5 beers currently on tap the finishing touches may be waiting a while longer.

Beautiful work.
 
Looks fantastic :mug:

Coming from you that is a true compliment!!! I thank you for all the inspiration (if you call copying your design inspiration ;)).

I have one batch of a cream ale sitting in a keg waiting for me to finish so I can get it on tap, plus a Fat Tire clone sitting in secondary.
 
That looks FANTASTIC.

Planning on staining the wood, or leaving it natural? Can you show what the back looks like now? Also, a pic with the keezer open? Do the hinges support your top ok?
 
That looks FANTASTIC.

Planning on staining the wood, or leaving it natural? Can you show what the back looks like now? Also, a pic with the keezer open? Do the hinges support your top ok?

Thanks. Right now I have it in 3 pieces (cabinet, coffin, and top) in preparation for finishing. I will snap a picture of it when done though. There is a picture earlier on in the thread of the back of the cabinet. It is open, to allow ventilation of the freezer coils. I don't think the hinges alone will support the top, but I will have a wooden prop stick to prop it open. It is Cherry, so I will not stain it. Cherry does darken with age, though it will not get much light in the basement (soon to be man cave). Cherry has a tendency to get blotchy when finished. I tried a couple different samples, and the technique I am going with is a 1# washcoat of garnet shellac, followed by several coats of General Finishes Arm R Seal topcoat.
 
Here it is all finished. I apologize that it does not have a rightful man cave yet, that is coming later this summer. Right now I have a keg of cream ale carbing and a 1/2 keg of root beer carbing. Hopefully will be ready in a week or so.

IMG_3463.JPG
 
Back
Top