Frigidaire Model FRC445GB Mini-Fridge Kegerator Conversion

Homebrew Talk - Beer, Wine, Mead, & Cider Brewing Discussion Forum

Help Support Homebrew Talk - Beer, Wine, Mead, & Cider Brewing Discussion Forum:

This site may earn a commission from merchant affiliate links, including eBay, Amazon, and others.
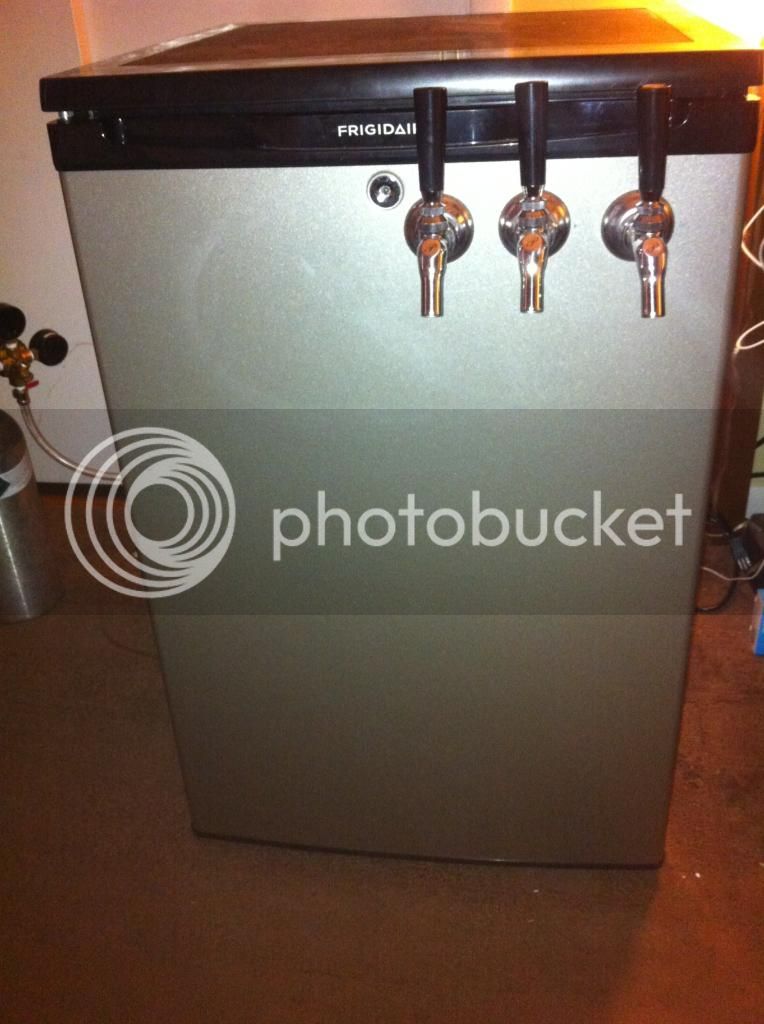
I am getting ready to convert this fridge (FRC455GB) and I put in the both kegs and the co2 tank just to test the fit. The co2 tank won't sit on the back hump with the regulator attached unless I lean it slightly. This isn't a huge problem, but it would make me more comfortable if it fit upright. Has anyone else experienced this? Maybe the 5lb tank I have it slightly too tall.

I just converted this fridge and it was easy thanks to all the great info in this (unbelievably enormous) thread. I included two pics to show that I can get a 5lb co2 tank in the back on the hump but I need to lean the co2 gauges over rather than leaning the tank over. (Does this cause issues with gauge accuracy?)

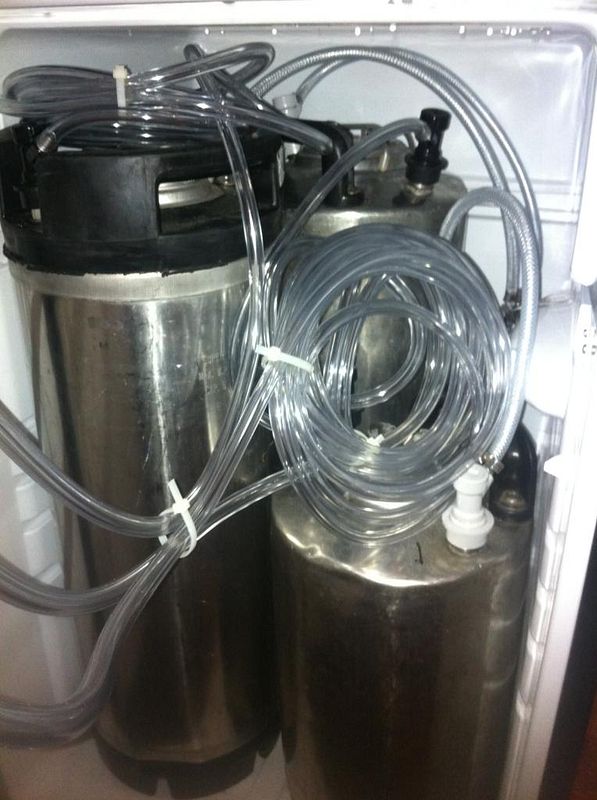
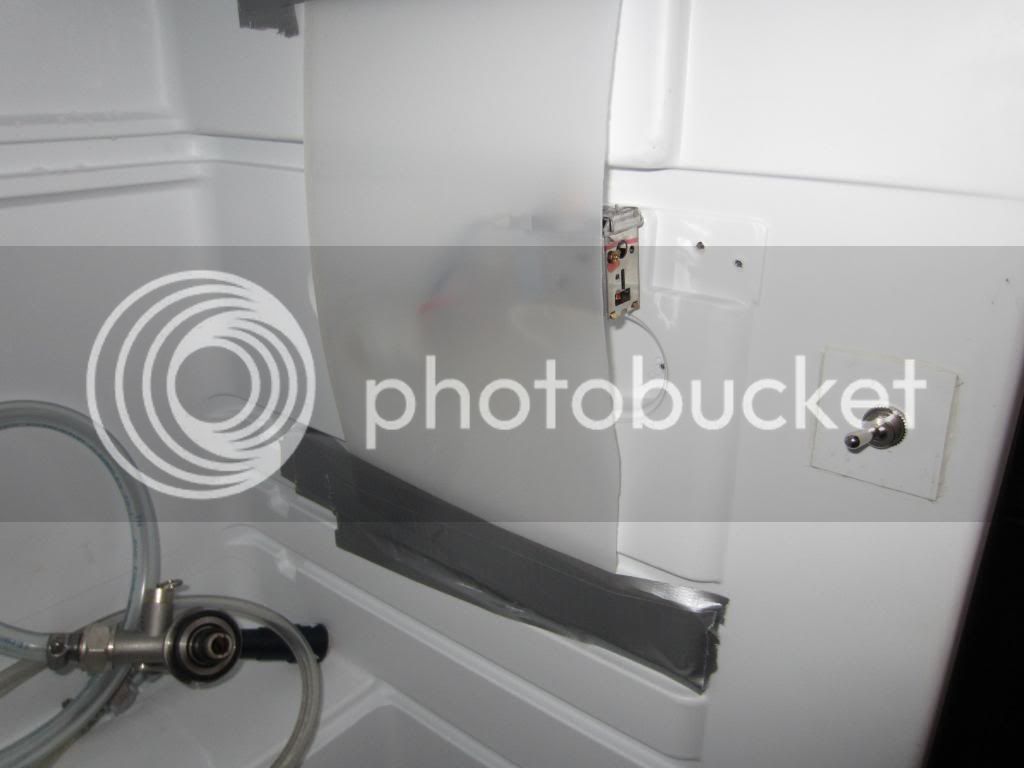
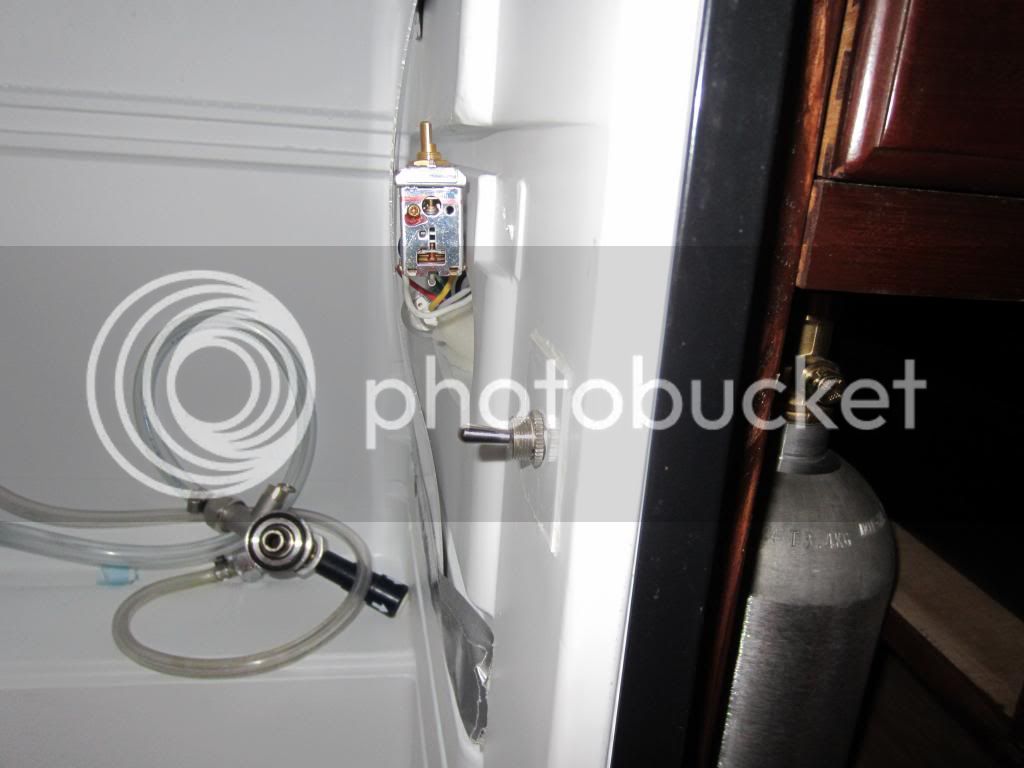
The second picture shows that it is possible to get 2x5gal corney ball lock kegs, a 3 gal corney and a 5lb tank with the regulator. I will say that in order to do this one must move the thermostat and cut out the plastic on the door. I currently only have a single 5gal in the fridge so, I have not moved the thermostat (plus I want to do the Love controller mod). The right hand keg is not in all the way because of the thermostat.

I'm pondering the idea of mounting the regulator to the back of the fridge on a bit of plywood with a co2 manifold to supply all three kegs. My understanding is that this would require a high pressure gas hose. However, the ply would give enough room to mount the regulator horizontally.

One comment for anyone thinking about using this fridge. If you're cutting through the styrofoam in the top of the fridge take the damn thing to the garage or outside the house first. Don't even think about trying to do this inside or you'll end up with hundreds of styrofoam dust bunnies on the floor, the wall, the furniture, the roof, the cat, in the kitchen and even in the sheets of your bed (stuck to my foot, I think)... Seriously. If I didn't live alone, I'd be dead now.

IMG_1794.jpg


IMG_1795.jpg
 
I built mine, and it has been up and running for a while now. I went with a no frills build, 2 ball locks, CO2 inside on the hump, 2 faucets drilled through the door. I've been very happy with it thus far.
 
Thanks for replying, I'm kinda going for a no frills build. I want it to hold just one 1/6 barrel and some stuff from my bar.

But, I was actually asking if anybody built it IN - as in built into a cabinet.
 
Bought my fridge and about to start my build. Two questions...

1. I noticed two people in the last 60-something pages said they built theirs in. Anybody else?

2. Anybody run their lines thru the side and have any pics? I read where a member talked about wanting to do it, but not sure if anybody actually has. I was thinking of doing something like this....

http://www.micromatic.com/beer-questions/dispense-keg-beer-away-from-refrigerator-aid-419.html

I built mine. :)

I considered three options for running the tap lines. First, as in my pictures above, everyone seemed to be successful going through the top (after digging through the styro to find the coolant lines).

The second I considered was going through the hump bottom. I didn't find anyone/any posts that was successful in going through the sides. The back also has coolant lines but in the horizontal section of the hump (and possibly the lower vertical section) there is the possibility of successfully drilling a hole. I didn't do this but I saw a post where someone cut out the lower vertical section of the hump to make room for a 1/6 keg. I tested the horizontal section by running the fridge with the door open. The horizontal section of the hump in my fridge never got cold. YMMV. I decided not to go this route due to the length of non-chilled hose from the back of the fridge to the tap. I opted for the first, through the top, method.

I discarded the last option, taps in the door, because I built a bar where I have a two tap tower fixed to a 6'x2' sheet of granite. You'd be surprised how cheap granite is (with the economy in the trash) if you buy it fabricated but not installed... but then it's up to you and your friends to get it home and mounted. The granite cost me about $175. The install was 22 beers.

Additionally, many people have fed the thermometer probe for a fridge controller through the fridge drain hole. Since the fridge controls inside need to be moved to permit two ball-lock corneys, many people opt for an external controller (Love, JC, etc).

I will say that you should be prepared to remove the plastic on the door in order to have more space in the fridge. I'm planning to mount a whiteboard on the inside of the door but I have not gotten around to it since I've had good, cold beer on tap less than ten steps from my sofa.

--
Primary: Double IPA
Secondary: Cabernet Sauvignon
Bottles: Fat Tire clone
Keg 1: Red Irish Ale
Keg 2: empty
Keg 3: Root Beer
 
Thanks for your reply. I think my current plan is to build it in where it will be flush against the back and open somewhat on the sides. I talked to a friend who owns an industrial plumbing/AC business and he said to do this:

1. Cut a 4" opening on the bottom rear sides of the refrigerator panels.
2. Run 4" flex duct from one side up to a vent (I"m gonna hide mine under the bar top)
3. Place an inline fan in the middle of the duct

This should pull cool room air from the top and blow it across the compressor. The other side will be open to some shelves in my bar, which is where any heat should be pushed.

If this works, I can top mount the tower through the bar top like you did. And have it built in to my bar.

I built my fridge into a cabinet/bar structure. The fridge is about 21" wide and I left about 3/4" on each side. The fridge dumps heat on the side panels so it's important to have airflow over these side panels. I built a kickboard into the cabinet and cut a hole in the base. I mounted a 4" computer fan in the hole so air is pulled past the sides of the fridge. Presently, the fan vents out through the kickboard space. If the compressor gets too hot, then I'll reverse the direction of the fan so the cool air passes over the compressor first and then the heat sinks on the fridge.

The fridge had been in place and running for about a month without the fan. I noticed that I kept needing to raise the temp of the fridge thermometer to keep it about about 35F. As soon as I turned on the fan, the temp dropped to 20F in the fridge and I had to set the thermometer back to about 2.

--
Primary: Double IPA
Secondary: Cabernet Sauvignon
Bottles: Fat Tire clone
Keg 1: Red Irish Ale
Keg 2: empty
Keg 3: Root Beer
 
I wondered about venting it out the bottom but I think my cabinet is too high. I'm also curious what the reversing the fan will do in your set up. Very interesting! Glad to hear somebody else has built it into a cabinet and vented it with a fan. Very encouraging!
 
I wondered about venting it out the bottom but I think my cabinet is too high. I'm also curious what the reversing the fan will do in your set up. Very interesting! Glad to hear somebody else has built it into a cabinet and vented it with a fan. Very encouraging!

The largest issue when building it into a structure is that you need to ensure that there is reasonable airflow over the heat sinks. In the case of this fridge, I'm thinking that means the sides, the back and the compressor.

In my build, I have a large airspace over the fridge that I need to fill or block so the air will move over the sides rather than simply over the top.

My fan is setup to pull air past the fridge right now. This means that the cooler (room temp) air should pass over the side heat sink first, then the back compressor coil, then the compressor. Of those three things, I'd guess that the compressor runs the hottest by design. If the air to cool it has already been heated by the side heat sinks then that air will have a smaller thermal difference than fresh (room temp) air and will cool the compressor less.

By reversing the fan, air will push past the fridge, compressor first then the heat sinks, rather than pulling. The coolest air will hit the compressor first. Granted that means there is a smaller thermal difference at the heat sink. I set the fan up to pull air because the heat sink seems to run cooler than the compressor. In the push direction, if the compressor heats up the air too much it's possible that the air could be as hot as the heat sink when it passes over the heat sink. Not good.

I also got this gadget to turn on and off the fans and the lights:
http://www.amazon.com/gp/product/B003ZTWYXY/?tag=skimlinks_replacement-20

--
Primary: Double IPA
Secondary: Cabernet Sauvignon
Bottles: Fat Tire clone
Keg 1: Red Irish Ale
Keg 2: empty
Keg 3: Root Beer
 
Last edited by a moderator:
I only plan to put one sixth barrel in it - ever. My question is if I'm only putting one keg in it, should I still be expecting some of the problems others are having with temp control? I was hoping I would be fine with the existing t-stat since I'm only cooling one keg.
 
Thanks for replying, I'm kinda going for a no frills build. I want it to hold just one 1/6 barrel and some stuff from my bar.

But, I was actually asking if anybody built it IN - as in built into a cabinet.

With this sort of fridge, you can not build it in directly. That is assuming when you say "build it in" you mean placing the walls of the cabinet in direct contact with the side walls of fridge. The heat exchanger is in the side walls and that is what requires you to have some air space between the fridge sidewall and the cabinet sidewall.

There are built-in versions of wine coolers and mini-fridges which are intended to be placed wall to wall. These have the heat exchanger in the bottom. You can (normally) visually identify these by an air vent or grill on the bottom front of the cooler and by the astoundingly high price tag.

You can do a "faux build-in" where you leave space around the fridge and add some sort of trim on the front, so it looks (kinda) built-in but really has 3/4" to 1" on each side. This is enough with a fan forcing the air in. I use a 4" computer fan. There are pics about 6-8 posts up of my incomplete build-in.

Since you said you wanted simple, I'm going to have to go the entire opposite direction and say that if you really wanted to trick it out, you could build it in if you put some other heat absorbing and distributing system next to the fridge heat exchanger... Perhaps, a glycol cooled wall?

I only mention this because I remember that in order to get a 1/6 bbl into this fridge, you have to make serious changes to the insides. There's a post a ways back (pg 30 to 45???) with pictures and details of the conversion.
 
I'm almost finished with the bar section that will house the kegerator. The right side of the fridge will be open to shelving under the counter. The left side will be open to an 8" hidden void in the bar wall, which will have a vent at the bottom. I also plan to cut out a 4" square section of the fridge's side panels in the bottom back corners to open up the compressor area for air flow. Hard to explain but I'll post pics when I'm done....
 
So... with door modifications and as far as commercial kegs - a 1/6 will fit by itself and a 1/4 slim will fit by itself. Anybody put a 1/4 squat in there using a shelf in line with the hump? If so, I assume there's no room for CO2 and gauges...?
 
It's not the cleanest kegerator, but it'll get the job done. Removing the mess on the door and keeping the CO2 tank on the outside, I can comfortably fit two 3 gallon kegs and a 5 gallon keg.

2012-10-28151403.jpg

2012-10-28151416.jpg
 
I know this kegerator build will fit a SQUAT 30L (euro quarter barrel) as long as the temperature controller is out of the way. I just did this build and want to run it on the original temp controller for now. I just need an extra inch in width, so my question is:

Can I just leave it like this, or do I need to cover all this up somehow for safety reasons/moisture/etc....

IMG_0101.jpg
 
Can I just leave it like this

I think this is probably fine; the plastic panel probably didn't do much to keep out moisture, etc. I just took some aluminum tape and secured everything to the side as flat as I could... probably the same effect as that plastic molding and got it out of the way when I stuff cornys in there (though I can still access the temp control).
 
Thanks for your response! I found some really thin flexible plastic sheeting. I was thinking of using that to cover it. Would it be safe to use some small screws to secure that to the inner fridge lining or could there something above and below the temp/light housing inside that area that I need to be wary of?
 
could there something above and below the temp/light housing inside that area that I need to be wary of?

Unfortunately, you're on your own for that one. All coolant lines (I think) are on the top. Sides radiate heat, but not sure if there is anything to "hit" with a screw. Dunno; I went with the tape since it was both quick and low impact. YMMV.
 
I may be an idiot, but a quick suggestion for those that remove molded portions from the door should make sure the switch for the light is still being activated by the door. Mine was not until yesterday... the amount of cycling it does is greatly reduced now that the light isn't on 24/7.
 
I may be an idiot, but a quick suggestion for those that remove molded portions from the door should make sure the switch for the light is still being activated by the door. Mine was not until yesterday... the amount of cycling it does is greatly reduced now that the light isn't on 24/7.

Realized this after about a week and rigged up a little magnet solution.


As to the question of whether or not to install an external temp controller...in my opinion, I would just do it if you're building it now. I have had mine running for about 6 months and depending on whether you have one or two kegs in at a time determines how much the temp is fluctuating. I have an electronic temp probe in there 24/7 and I find myself every other day changing the dial from 4-6 because it will be at 44 degrees then 38 degrees (perfect) then all of a sudden it's reading 34 degrees...So, it's definitely in my plan soon to put in a love temp controller.
 
I used duct tape for a few days but then it just peeled off. I ended up glueing two strong magnets above and below the switch. Then put a thin bolt crossing over the switch. Magnet holds down the bolt enough to keep the light on. Then I just take off the bolt if I want light.
 
I wired a simple toggle switch. I put connectors on the switch that matched the connectors on the original switch. Then I framed it using a piece of the plastic taken off the door. I'll post a pic if anybody wants to try that.
 
IMG_0532.jpg


IMG_0528.jpg


I also did the following:

1. ran my C02 outside
2. built it in, which included venting the sides near the compressor
3. flattened the original temp control as best I could, hopefully it will fit a 1/4 squat keg.... we'll see

I'll post more on my build when I get a chance.
 
And for the record... a 30 Liter euro (pretty much the same as a 1/4 barrel - maybe bigger) SQUAT/SHORT keg WILL FIT. I have a Murphy's Irish Red 30 Liter keg resting in there right now. The door was modded the same as everybody else and my temp/light set up is posted in a pic above. I did build a little step out of scrap 1" x 4"'s for the front so it would be even with the back hump.
 
Hey, so I tried drilling though the side. I drilled forward of the thicker plates, nearest the door, and I don't think I hit any vital organs. Unfortunately, I see no evidence of any cooling at all. Every inch of the unit is at room temp or warmer. Did I still manage to ruin it?
 
So far my kegerator is doing great, keeping my keg between 35 and 38 and hardly running. I insulated my tower in such a way that I thought would prevent foam on the first pour. My set up is like this... beer line, copper, pipe insulation, PVC, pipe insulation, tower wall.

I am however getting about a half glass of foam in the first pour, but not warm beer. I'm also getting the freeze/melt/freeze/melt condensation on the inside the top of the fridge. I only have about 3-4" of copper extending in the fridge (because I needed to fit a squat quarter barrel) which I suspect is the problem. I plan on adding the fan to the set up.

My question is what size muffin fans are y'all using? I have a 90mm (3.54") laying around but it just seems too big.
 
I am however getting about a half glass of foam in the first pour, but not warm beer.

If your beer is cold, your temp may not be the issue. The other factors are serving PSI (and fridge temp), line length and tube diameter. So, if you're getting a fast pour, that may be causing the foaming.

For what it's worth, IIRC, I use about 9 ft of 3/16 ID line at around 11-12 PSI at ~38 degrees.
 
I wondered about line length, but every pour past the first is perfect - unless it sits for a half hour or so. And am I supposed to be trying to dial in both lines - air and beer line? I'm using whatever lines came with the kit. I think it's 5' at 5/16" I.D. for air and 4' at 3/16" I.D. for beer line. My C02 bottle is outside the fridge if that matters. My pressure is holding at 12.5 PSI at usually 37 degrees.
 
im about to drill my hole in the top and im wondering if anyone has tried getting the copper pipes as close as they can to the cooling/freon to keep the tap cold. any thoughts? maybe to much condensation?
 
I used 3/4" copper and I got it close to coolant lines on both sides. I get a third to half glass of foam on the first pour. The beer is still fairly cold on the first pour, but not as cold as the second and after. Tho it's not as bad as some, I'm working on improving it.
 
I've had this fridge for about five months and have been using the OEM controls to maintain temp. I ordered a Love TS-2 a while back and it has since been gathering dust in the box. I finally hooked it up today, using instructions from Schnitzengiggle and ClaudiusB.

I have everything hooked up in a really simple config:
OEM black -> 7
OEM white -> 8
OEM blue -> 11
OEM black jumpered from 7 to 10

The OEM yellow and red are connections for the light and door switch. The green is ground.

I still have the OEM temp controller in there because I don't know if I can cut/crimp the silver metal tube, the thing that isn't a wire. I don't want to cut it and find out that's where the coolant is. So, is it safe to cut this metal tube or not? If not, what do people normally do with that.

As for the fridge, I cut all the plastic shelves off the door. I am able to get two 5gal ball lock corneys with a 5lb co2 bottle and a dual gauge regulator. I'm pretty sure there's enough room to get a 3gal ball lock on the hump, too but I have not tried it.

If someone would like to see pics, I got some. I'm planning to post a bunch of stuff dealing with the build out of my entire beer bar -- it's more that just a kegerator. :)

OK. I found my own answer...

About page 54, there's a bit about someone who accidentally cut the cap tube, which seems to be required only if you're using the OEM thermostat. So, I sucked it up and cut the cap tube. The compressor is still running... Whew...

I decided to test the Love controller by setting the set point higher than the current temp and the compressor turned off. I then reset the set point lower than the current temp and... nothing.

After waiting for five minutes, which is the default value for the minimum off time, the compressor kicked back on.

Like I said above, my Love install is pretty simple. No light, no door switch. I just connected the live, neutral and compressor live to the controller.
 
Back
Top