I am looking for some different ideas on how you guys have mounted your control panel. I thought there was a thread on here for it but I can't seem to find it. So, let's post some pics of what you have done for mounting of your control panels please.
You are using an out of date browser. It may not display this or other websites correctly.
You should upgrade or use an alternative browser.
You should upgrade or use an alternative browser.
Show us how you mounted your control panel
- Thread starter fujieagle
- Start date

Help Support Homebrew Talk - Beer, Wine, Mead, & Cider Brewing Discussion Forum:
This site may earn a commission from merchant affiliate
links, including eBay, Amazon, and others.
My enclosure came with 8 total mounting brackets. 4 each with keyholes in opposite directions. Mounting was pretty easy though. I put a 3/4" x ~2.5" board of an appropriate width on the wall with two holes on each end directly over a stud. 3" screws keep it in place. I used lag screws that fit through the keyhole (take the bracket to home depot).
As far as alignment, mount the top first including the board and lag screws. I put the lag screws a bit above center so the bracket is mostly centered. Then hang the panel and mark where you want the bottom board -- mount that, and then finally put the bottom lag screws in place.
I painted it then since I was painting that wall anyway. The 'buttons' are just filling the screw holes.
BeerguyNC61
Well-Known Member
Nice job!
abarnett
Well-Known Member
Haven't done this myself, but I've seen people mount control panels with VESA TV mounts. They can usually handle the weight, and allow flexibility in positioning.

tjpfeister
Well-Known Member
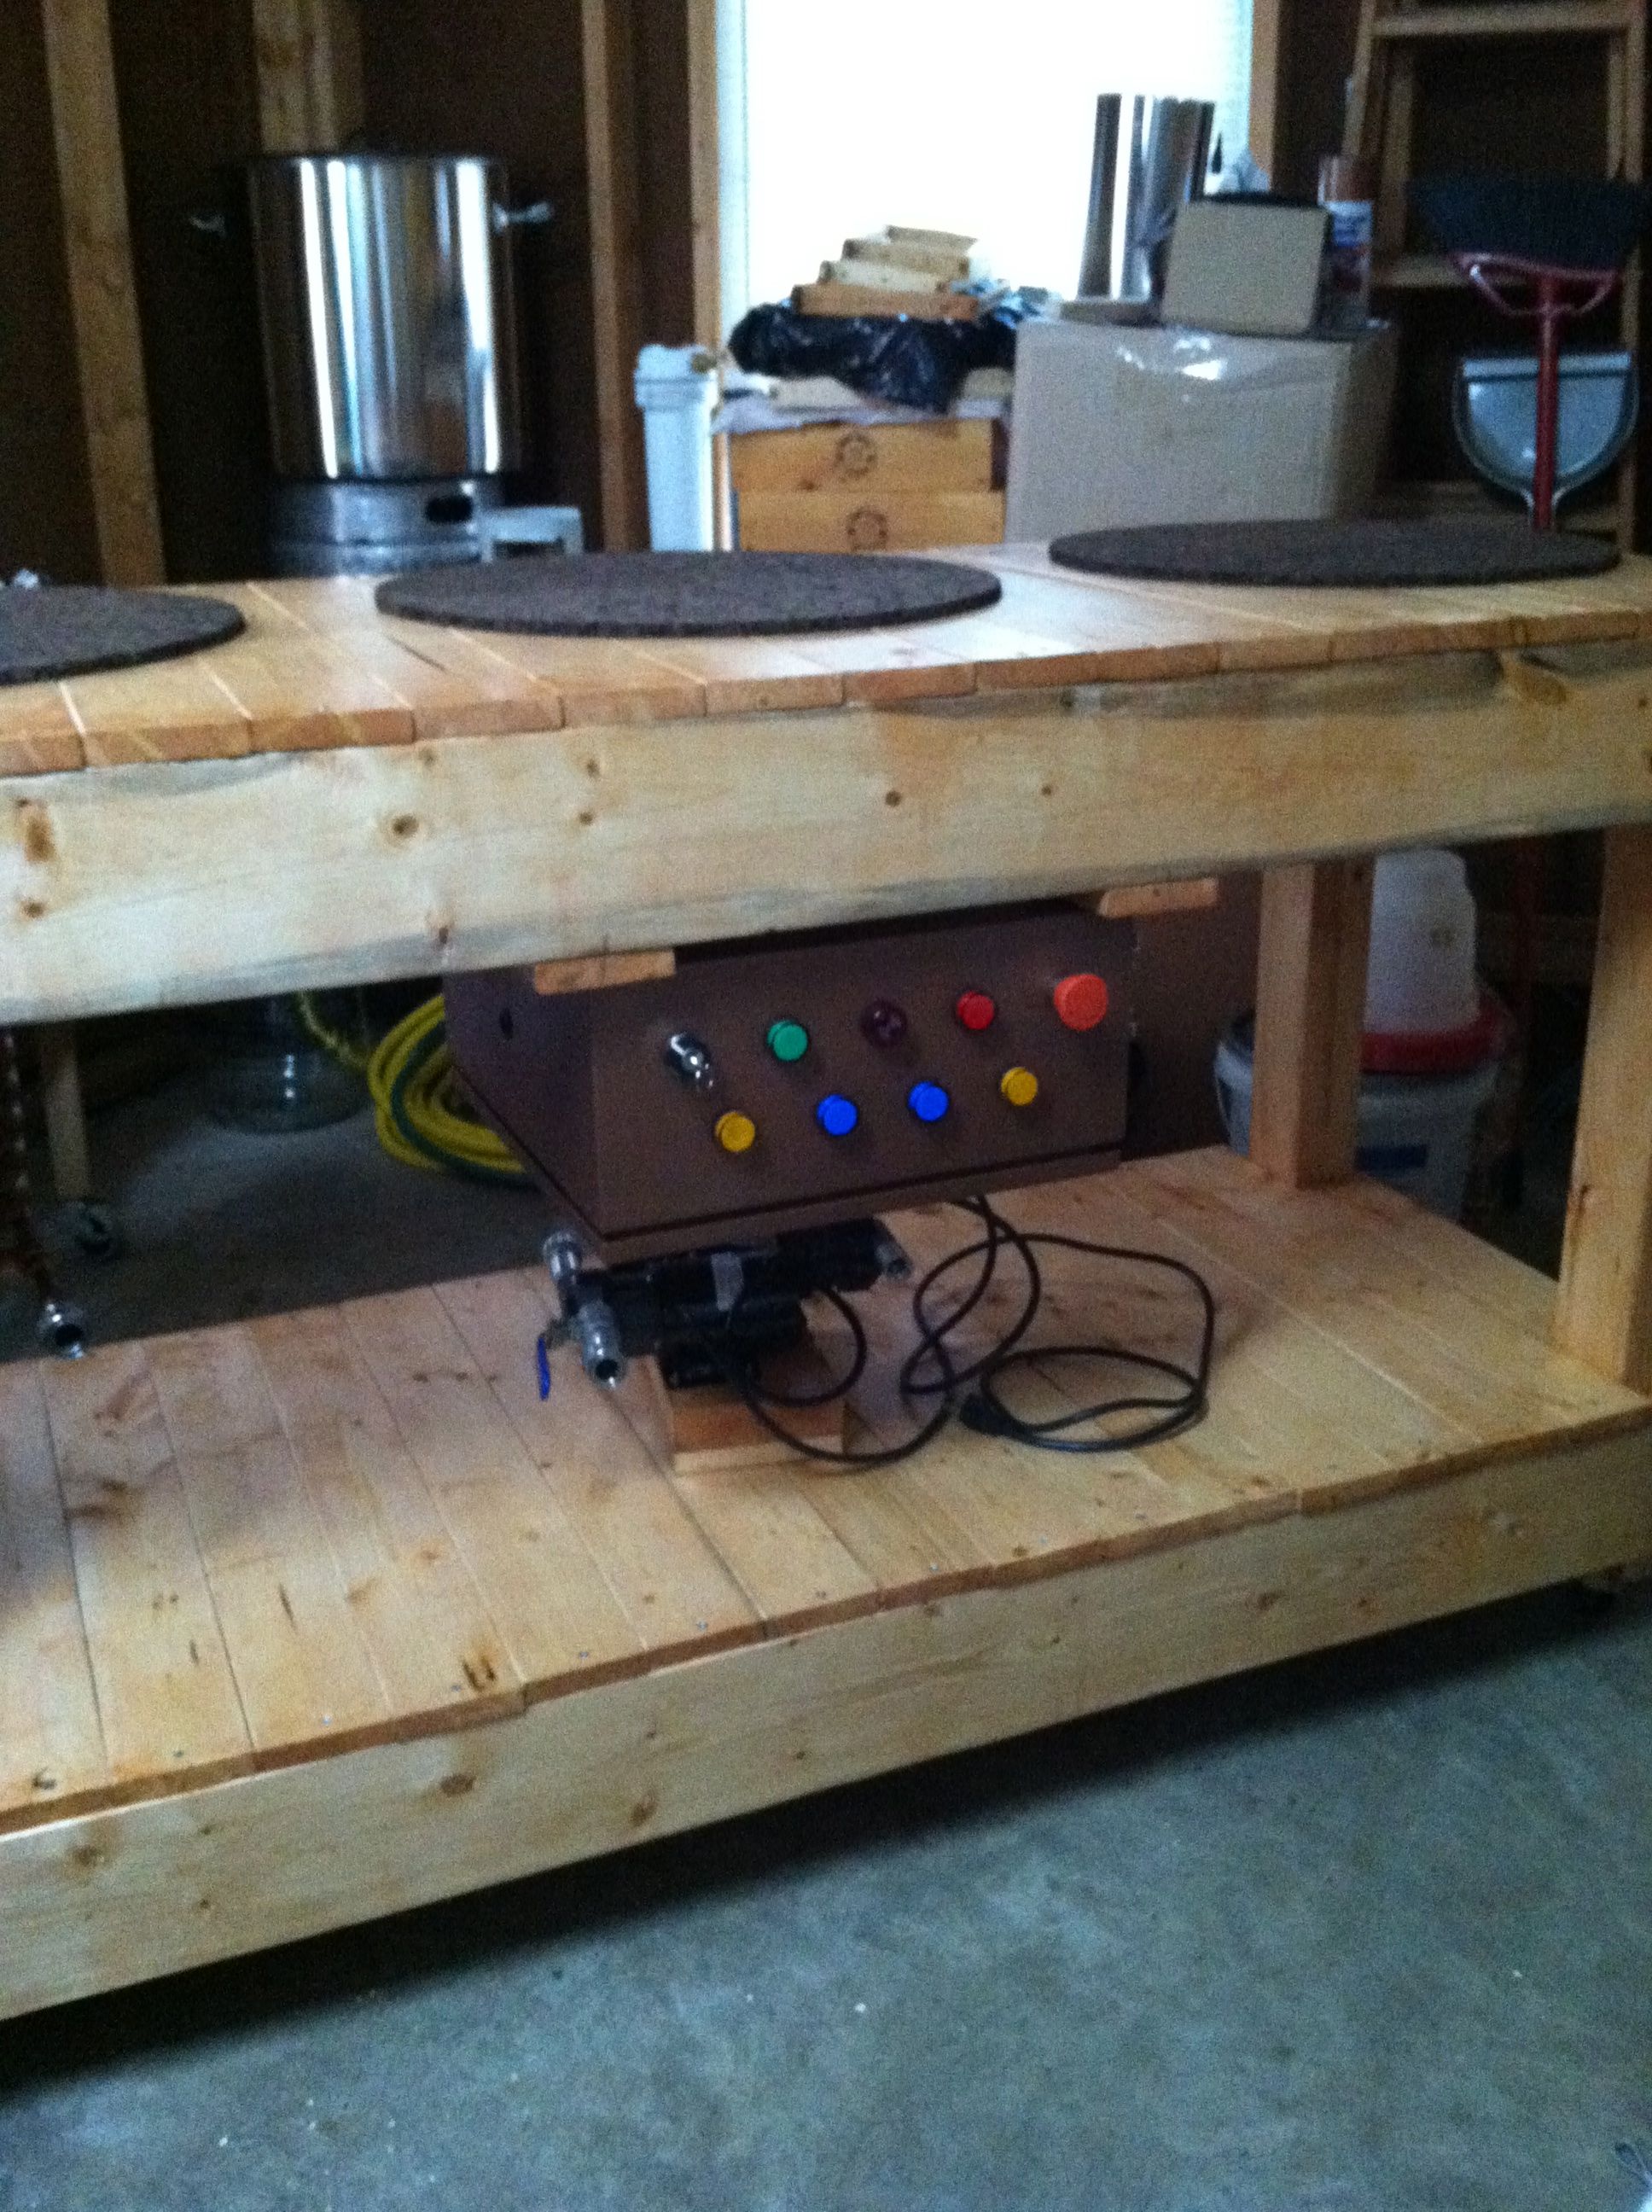
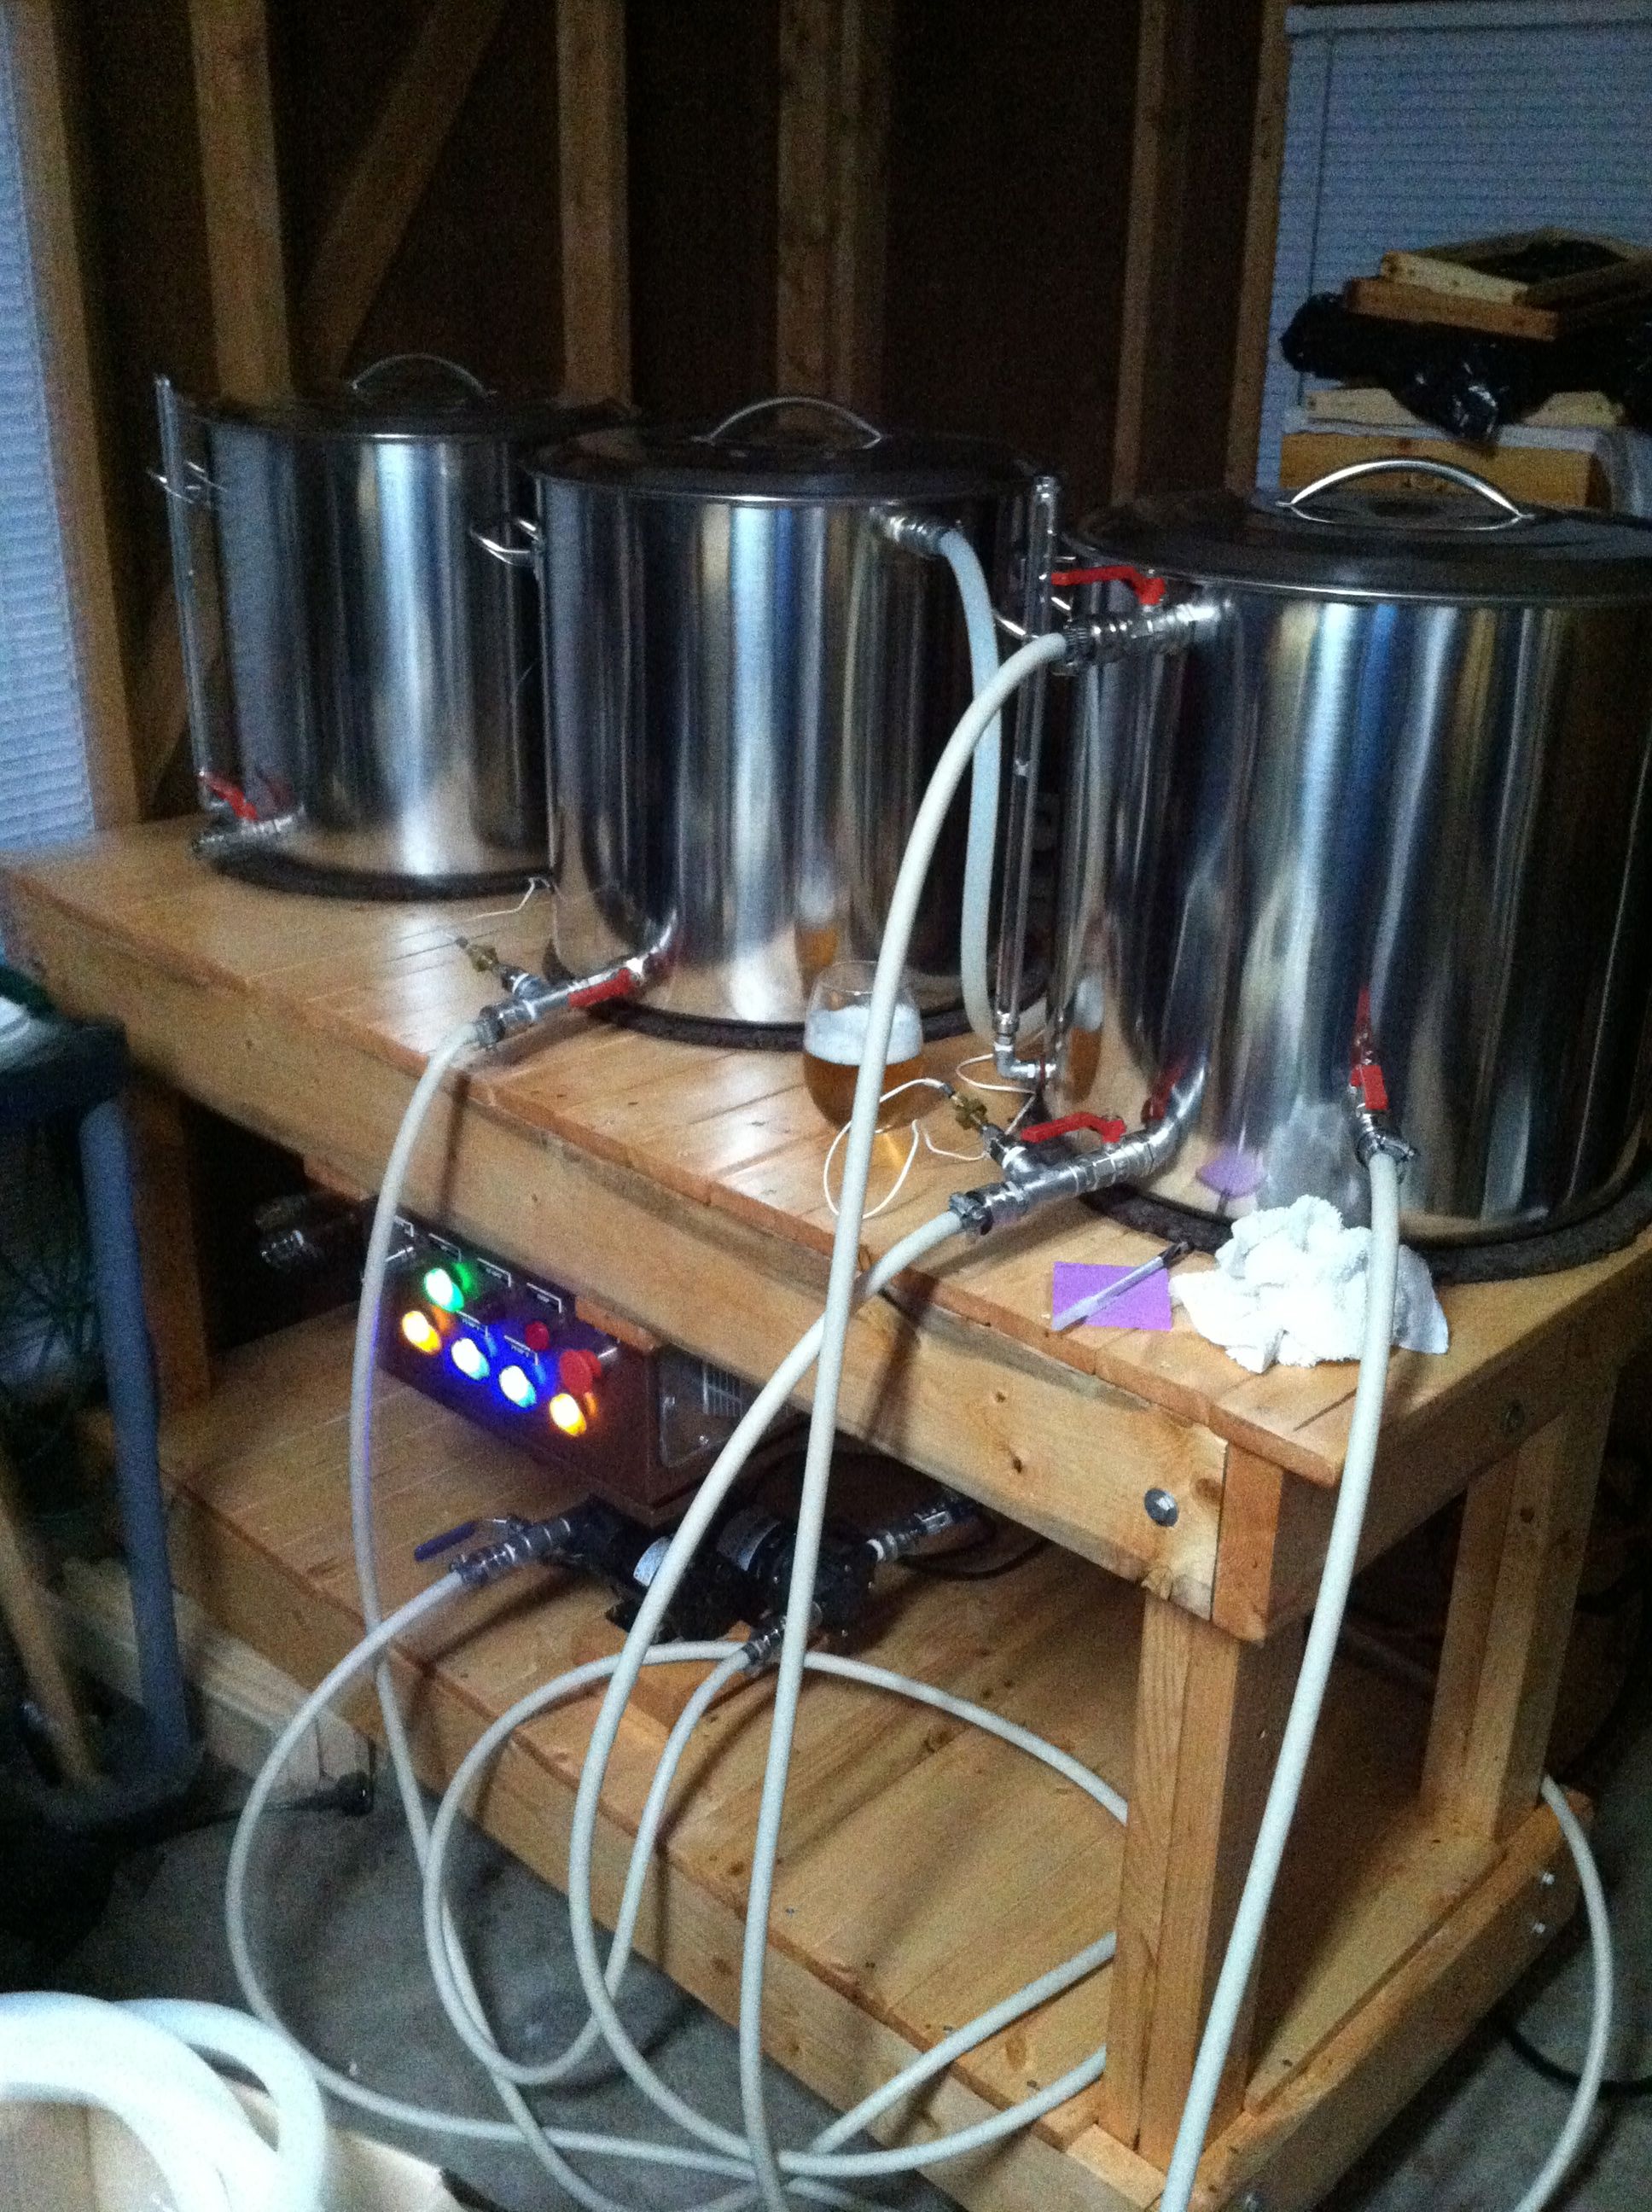
Conduit style. Gives you a little work room for notes, measurements, shaking dice.

I made a temporary support for the control panel, using a 2x4 bolted to the end of a kal-clone brew table, and using a flat screen TV pivoting arm mount (that you can't see in the picture). The control panel can swivel 180 degrees for storage.
I eventually will have the panel on the wall, but need to stud and sheet rock first. Project is definitely still on-going, and not operational yet.

I eventually will have the panel on the wall, but need to stud and sheet rock first. Project is definitely still on-going, and not operational yet.
terrazza said:Entire different approach, used 4" TCs and fittings to mount directly to tank.
Yeah we're gonna need some more info....that thing is straight out of the caves under Wayne Manor!
SmoothCrown
Member
Z-clips. They are used in woodworking to mount panels and whatnot. They are incredibly strong. They aren't really visible either. Plus a lot cheaper than a vesa mount. Here is a link http://www.orangealuminum.com/panel-clips.html


Mine is nothing fancy at all! It's a um, well, two by four. But I did paint it black to make it look nicer (but all that bling from the others makes me feel a little embarassed by my redneck two by four and Office Max stand).

BeerguyNC61
Well-Known Member
All you are missing is the duct tape!
All you are missing is the duct tape!
Oh, no, there is duct tape on that brewstand, I promise!

And I paid a LOT of money for those fancy lawnmower wheels- they were like $8 a set- so it's not like I'm cheap. (Ok, yes, I am. I'm cheap and my stand sucks).
Edit- I have replaced my cooler MLT with a tippy dump keg but the CP is exactly the same. I didn't change where/how the CP is attached to the stand, and I wanted the smaller footprint.
BeerguyNC61
Well-Known Member
So sexy when ya tawk goober speak......
terrazza, got any more details on your rig?
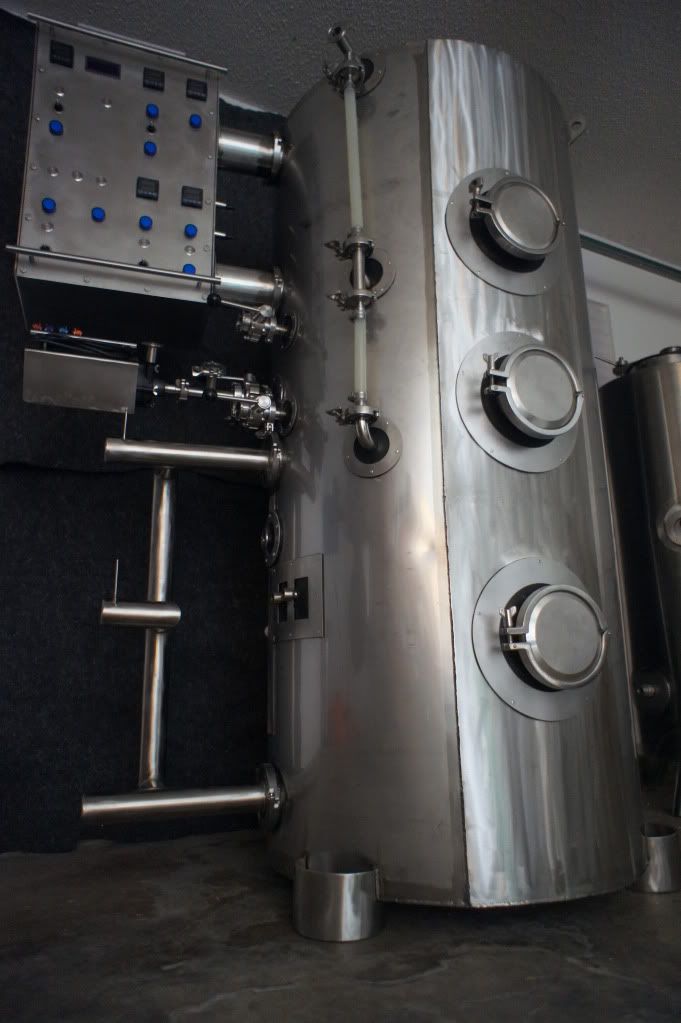
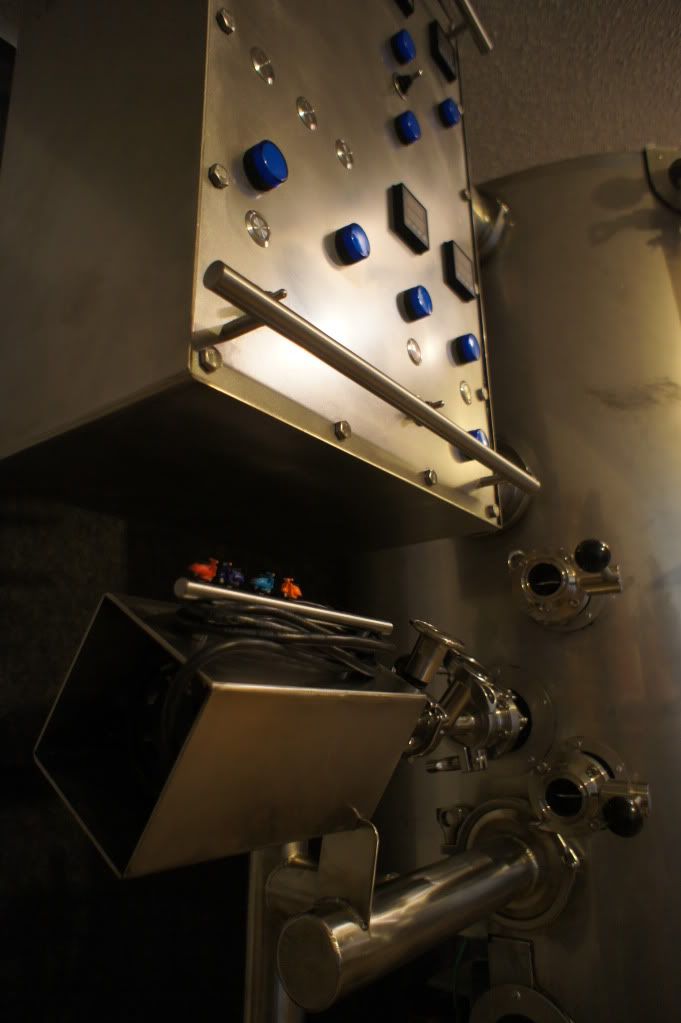
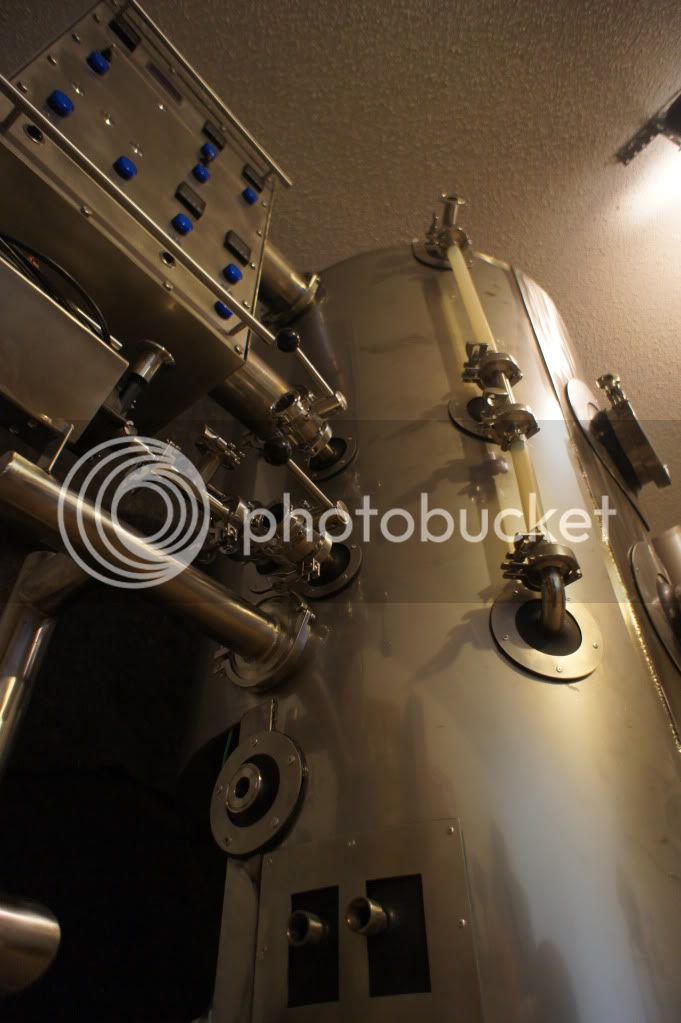
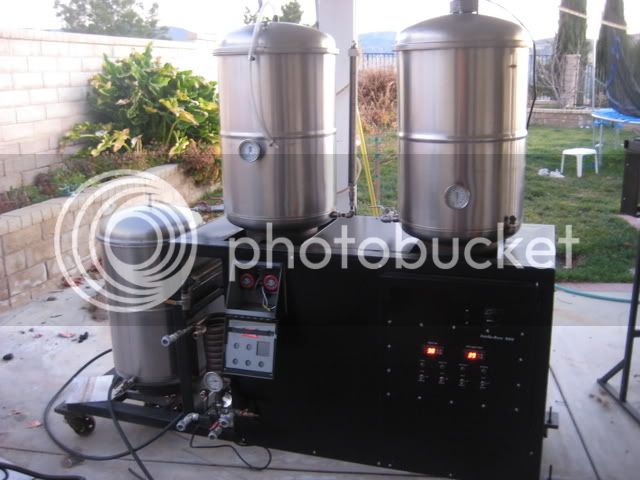
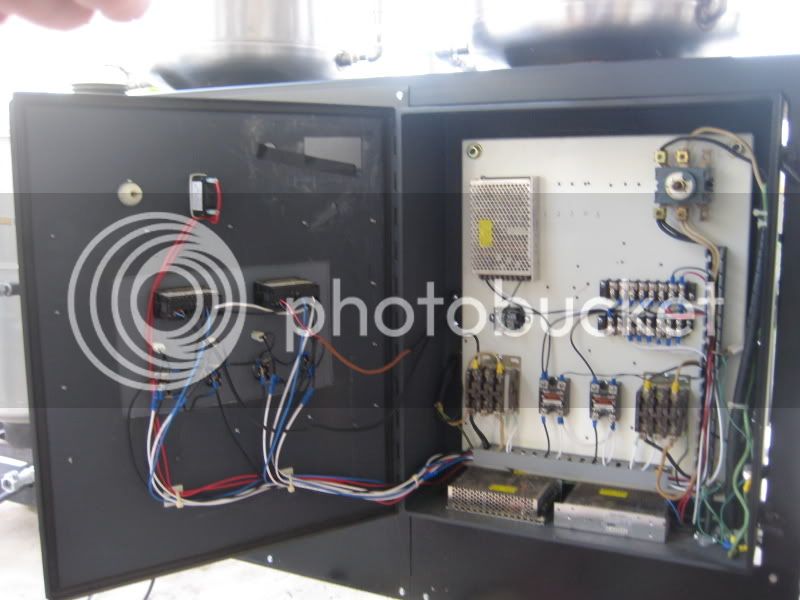
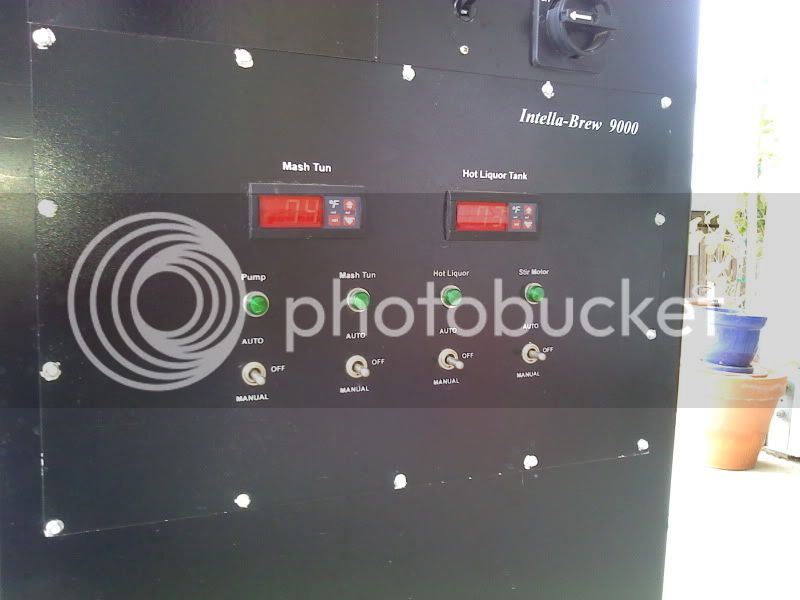
Oh, it's just been an ongoing project for a few yeas ago I started back when I saw kals design. Still not operational. Specs: 1.5bbl finished product (there is a stand-alone glycol jacketed fermenter you might see in the back ground), three compartment tank (mash tun up on top, water tank in the middle, and a glycol reservoir with cooling unit on the bottom). Nearly complete with this unit, but need to design a boil kettle still before I can get brewing. I have a 7 month old son now so things aren't moving with the same momentum with this, but all of those other builds look great to me. Kals was what inspired me to build this guy. Let me know if you want more info on the 4" triclamp assembly. Pretty simple, just using the 4" tube as a conduit run for the wires. I thought it would be cool to have the project box removable from the rig, but it's so heavy that I wish I had it all just welded together now...
lehr
Well-Known Member
The ones I have built use a pivoting arm mount.


SmoothCrown
Member
Yeah the z clips are great for a lot of things. They are strong enough to hold up tvs too.
Monster Mash
Well-Known Member
I integrated it right into the stand....
kosmokramer
Well-Known Member
Using a flat panel wall mount


BeerguyNC61
Well-Known Member
Those kegs look so shiny! How long did it take you to get them like that?
Have you started to drill the holes yet?
Have you started to drill the holes yet?
EnjoyGoodBeer
Well-Known Member
Wow those setups look expensive and intimidating. Thats how you guys brew? Looks great but way out of my range. Cheers!
Wow those setups look expensive and intimidating. Thats how you guys brew? Looks great but way out of my range. Cheers!
I know you're not talking about my rig!
But I agree- those other systems are awesome. I LOVE the look of Lehr's & Kosmo's shiny vessels and all the bling the others show.
They are NOT intimidating, though. Well, maybe at first. But when you know what each thing does, it's really simple and fun to use.
kosmokramer
Well-Known Member
Those kegs look so shiny! How long did it take you to get them like that?
Have you started to drill the holes yet?
I think between 6 and 8 hours each... one was petty bad. Alot of work but i am mostly happy.. with how they came out,
No holes drilled yet.... that is my big worry, drilling in the wrong spot.. a buddy is gonna tig them for me as soon as i drill so hopefully i can get it done this weekend
kosmokramer
Well-Known Member
Wow those setups look expensive and intimidating. Thats how you guys brew? Looks great but way out of my range. Cheers!
Its really not that bad as long as you take your time and are patient. im not quite done yet so i cant speak to ease of use but thats what i was going for... simple
Pj is a great asset to this sight and will help draw a diagram and even call u and walk u through the tough parts of your panel build..
Thanks Yoop... my swmbo calls me a ferret cause i get sidetracked by "shiny"... lol
Monster Mash
Well-Known Member
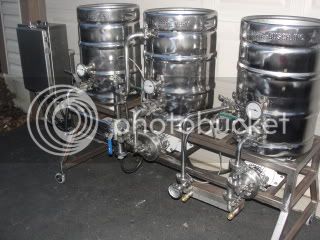
My pots started off looking like this....
I gave up on the polished look and just sanded them with 400 grit to give them a satin finish...
I gave up on the polished look and just sanded them with 400 grit to give them a satin finish...
kosmokramer
Well-Known Member
My pots started off looking like this....
I gave up on the polished look and just sanded them with 400 grit to give them a satin finish...
Looks great!
If you are going with a single tier, HLT, Mash tun, Boil kettle, going left to right, I decided to mount my panel to the left, with all cords coming out of the bottom. If mounted to the right of the boil kettle, you get the steam coming out, etc. The HLT just heats water, no stirring, no boiling, no splash.
gunmetal said:If mounted to the right of the boil kettle, you get the steam coming out, etc. The HLT just heats water, no stirring, no boiling, no splash.
This is a great point. I have been debating this myself and your point has convinced me as long as the electrician can make it work. Thanks for posting!
IrishBrewer74
Well-Known Member
I mounted my control panel with a part of a satellite dish mounting system. The part on the back of the panel will allow me to add some tilt angle to the panel and allow me to turn it side to side. It is then mounted to a patio mount stand. The plan will be to have the bottom bracket behind the panel and out of the way but I need bricks to counter weight or it will tip over.


Mine is a BCS controlled system. I went with Kal's stand and stuck casters under the legs. I have the panel mounted under the mash tun and a Netgear web adapter on the unit. I can control the whole thing from my iPhone. This pic is from my first wet test.
trimixdiver1
Well-Known Member
augiedoggy
Well-Known Member
If you are going with a single tier, HLT, Mash tun, Boil kettle, going left to right, I decided to mount my panel to the left, with all cords coming out of the bottom. If mounted to the right of the boil kettle, you get the steam coming out, etc. The HLT just heats water, no stirring, no boiling, no splash.
I have mine mounted next to my boil kettle since rearranging kettles about a year ago...
I was worried about this too but no issues or condensation that I can see so far. my cooling fan pulls air in from the far end and blows it out the top of my panel .
Originally, I used an articulating TV mount, but it was too flimsy. I ended up basically rebuilding the same thing out of much sturdier materials. I re-used the piece that mounts to the panel. Here's the part that I rebuilt...


FuzzeWuzze
I Love DIY
I just have thick probably 3/8" plywood behind my garage dry wall so I just used the hangers they gave with the panel and lag screwed it into the wall.
Nimbus3000
Well-Known Member
- Joined
- Feb 14, 2015
- Messages
- 61
- Reaction score
- 21
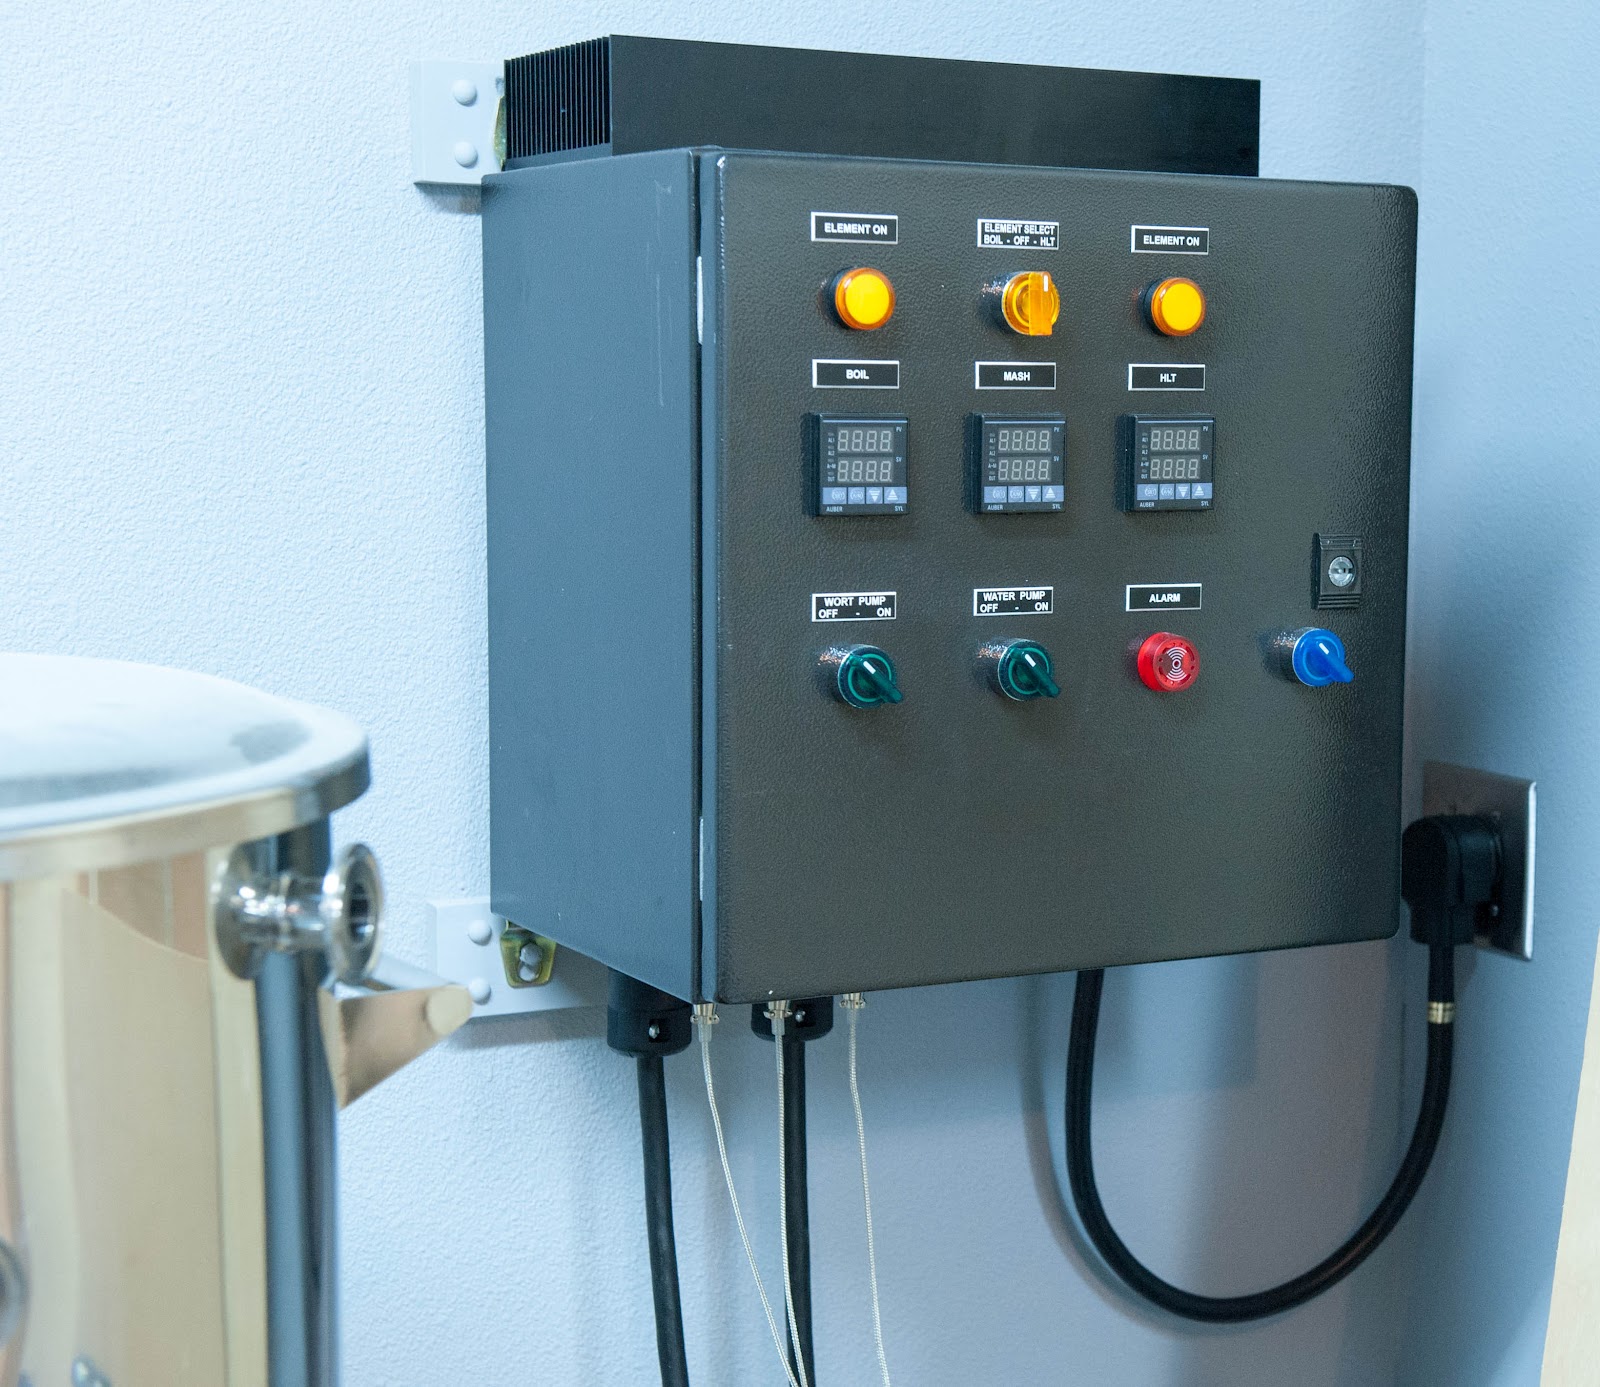
Posted this in the "Show Your Panel" thread but thought that I would post it here also. Just powered the panel up for the first time yesterday and since it did not burst into flame I figured I could post a few pictures. No temp sensors attached so the pid's and indicator lights are not working correctly.


I welded mine directly to the stand - but I dont recommend it - whenever you want to go bigger, you'll want to put a bigger panel in. I had to install a smaller panel for the boil control, but actually like it that way as the SSRV control is now right next to the BK.

Similar threads
- Replies
- 10
- Views
- 670
- Replies
- 14
- Views
- 1K
- Replies
- 2
- Views
- 669
