Kegerator Conversion with Danby DAR440BL?

Homebrew Talk - Beer, Wine, Mead, & Cider Brewing Discussion Forum

Help Support Homebrew Talk - Beer, Wine, Mead, & Cider Brewing Discussion Forum:

This site may earn a commission from merchant affiliate links, including eBay, Amazon, and others.
Okay so I ended up cutting out pieces of the shelving with a dremel in order to fit the kegs and it worked just fine! Ok for starters I put the first keg in on the right side and then I put the second keg in on the left side. Why is this important? Because I left a notch of the shelving on the top left of the door(looking at the door open) as it is the notch that turns the light off. This way both kegs fit in the fridge and the notch is still there to turn the light off without having to disable the light some way or another:rockin: Cool the the light function still works. Here are my pictures.

Cut the door with my dremel
IMG_1050.jpg
Light switch and Notch
IMG_1051.jpg
Sealed the cuts with foil tape
IMG_1056.jpg
Door closes and it makes a seal!
IMG_1057.jpg

Alright so it doesn't look as pretty as the other danby's with white boards and such but this type of build has the upside of having a working light in the fridge. Just a hunch but I'm also hoping that leaving most of the door with it's foam insulation will actually help keep the fridge well..... more insulated then If I took it off.:mug:
 
Awesome. I am glad I waited for someone braver than myself to trailblaze how to do this. Looks great. I will get to work on my own very soon.:D
 
You know, now that you mention it, I am not sure that I ever looked for screws on the second unit because I had already decided I was just going to cut out the shelves. I had tried a dremel, but found that a boxcutter worked better and gave me a cleaner cut which was easy to smooth out wth sand paper. I'll check for screws when I get home tonight.
 
Just randomly checked this thread...I've been using this fridge for almost 2 years now.

I took a slightly different path for the door...I just peeled back the rubber gasket a bit, removed all the screws, then took out the entire insert. When i put the gasket back in, it didn't have a 100% perfect seal anymore (between the screws it would "open up" a little bit). So, I went to HD and got some really inexpensive plastic sheets, and cut/drilled them so that it goes plastic - rubber - door again, but without all the parts sticking out the insert had. Works great now. For the light, i just used a small piece of gorilla tape on the switch. I didn't find the light useful anyway.

If you don't want to ever be able to put the door insert back in, instead of plastic, just use some silicone sealant to hold the rubber on the door.

The main reason I went this route is that there's a good chance i'll want to use this as a regular refrigerator again - I was thinking I'd be jumping to a chest freezer at some point . Glad I did, as the freezer is now in the basement waiting for conversion.
 
Ya I wanted to go that route and just unscrew the shelving for the same purpose of using the fridge as a normal fridge at some other point if i felt the need. Unfortunately the dar440bl model I received did not come with screws. They literally glued the shelving to the door and the seal depends on that door to stay on. I heard the fridges were back ordered a month or so ago and these are probably the "new" dar440bl models If I'm not mistaken.

76275d1348028369-kegerator-conversion-danby-dar440bl-img_1042.jpg

76276d1348028369-kegerator-conversion-danby-dar440bl-img_1043.jpg
 
Hey guys, I just got all of my materials in and will be starting this same conversion this weekend. Have the same door issue as you, appreciate the pictures. glad I didn't spend $30 on plexiglass before realizing this!
 
I decided to cut off all the door shelving as flat as I could. I then screwed a piece of plexiglass on top to make a completely flat surface. I then used foil tape to seal the edges of the plexiglass and cover the screws. This should prevent any moisture getting into the insulation.

image-1381626586.jpg
 
I like the idea of cutting the shelving as flat as possible and covering with plexiglass. I think I may do that to my frig and use a frosted plexiglass to give it a cleaner look. Sure would have been nice if they just let it the way it was with the panel being screwed in.
 
hbrew85 said:
Did anybody ever try fitting 10 pound co2 tank in there?

Pretty sure it won't fit on the hump in back, even at an angle. It should fit standing up next to the Cornie, but will limit you to a single keg :(
 
Looking at my Frig, the only way you might fit a 10lb tank is if you only put one keg in the frig. If all you have is a 10lb tank, just drill a hole in the frig and put it on the outside. I have seen several videos where people did that.
 
Looking at my Frig, the only way you might fit a 10lb tank is if you only put one keg in the frig. If all you have is a 10lb tank, just drill a hole in the frig and put it on the outside. I have seen several videos where people did that.
I do have a 5 pound co2 tank but was thinking about maybe getting another tank. Thought of getting a bigger one because price is just a lil higher on 10 pounder but I dont want to have co2 on the outside. Will probably get another 5 pound one or get a 20 pound one and just refill the little one.
 
RSNovi said:
I tried two 1/6 barrels lat night. It was a no go even after removing the molded in shelf ledges. Just not quite wide enough.

By any chance you think a 1/6 barrel and a ball lock will fit?
 
I got the glued-in shelving/gasket variety in the garage awaiting conversion. Too bad I already bought the plexiglass; Dremel + insulation tape it is. Thanks for the tip on the light notch; I probably would have missed that!

Has anybody validated these newer versions still only have a line in the top front? I did a hand-feel test and found the top right to get pretty warm, so I think that's still the case, but I wanted to get some secondhand confirmation on that. I'll probably do the corn starch + rubbing alcohol test just to be sure; they change one thing why not another?

Also, instead of buying a sacrificial cutting board, thinking my plexiglass might fit the bill as a support for the tower or is it not rigid enough? Perhaps if I go through the trouble of doubling or tripling it up? Its of no use to me otherwise now.
 
I didn't use a support plate inside the fridge for the tower mounting, just a large fender washer under each of the four screws. Works great, and one less thing to measure and cut up.
 
JusticeAle and dinertime - either of you guys finish this build?

I have the door off right now, ready to do this, and just realized the same problem with the screws. I started going around the outside with a putty knife to peel the plastic door molding out. But it appears to be solidly glued to all of the insulation across the full door, so its just breaking up the insulation.

I'm thinking step 2 for me is to just take a sawz-all down the door, hacking off the shelves and pieces that stick out. Then I'll tape up those cuts. Not nearly as nice of a finish though, but I can then use the door lining and the original door seal.

I'll work on drilling out the top hole in the interim. Hopefully someone has some good insight on how to best deal with the door.
 
Umm...nevermind. Somehow I didn't see there was a 3rd page to this thread, with answers and pictures. Thanks for posting that.

I think I'll go with the approach of cutting it all flat, and putting plex-glass on top. Time for the HomeDepot trip.
 
JusticeAle and dinertime - either of you guys finish this build?

I have the door off right now, ready to do this, and just realized the same problem with the screws. I started going around the outside with a putty knife to peel the plastic door molding out. But it appears to be solidly glued to all of the insulation across the full door, so its just breaking up the insulation.

I'm thinking step 2 for me is to just take a sawz-all down the door, hacking off the shelves and pieces that stick out. Then I'll tape up those cuts. Not nearly as nice of a finish though, but I can then use the door lining and the original door seal.

I'll work on drilling out the top hole in the interim. Hopefully someone has some good insight on how to best deal with the door.

Here are some picture of what I did. Also I used Silicone weather strip to seal the foam as it loos better than tape.

2012-10-14 14.55.12.jpg


2012-10-14 15.07.18.jpg


2012-10-14 15.07.24.jpg


2012-10-14 17.47.02.jpg


2012-10-14 15.21.19.jpg
 
Picture of my Danby door. I cut out all of the components sticking out past the door, and used aluminum foil tape. Not too concerned about looks since few will see the inside. But I do have a plexi-glass liner that is screwed on. You just can't tell in this picture. And the original rubber liner fit right back into its seal, over the edge of the cut plexi-glass.

You could use chalkboard or whiteboard paint on the inside, so that whatever you do on the inside isn't an issue. I'll probably just throw stickers on the inside piece of the door instead.

Not a difficult job. Easy to cut with a good utility knife. Just wish I hadn't spent time trying to pry the plastic of the door off. I did end up resealing it where I did that.

Danby_door.jpg
 
I put tape over the switch for the light. I'll never need that light on, so would rather have it off. But I can always remove tape if I want it.

All other parts of the build was followed through the original instructions for this model.

Those instructions, beside the door, are still spot on. Drilled the top hole 5.5" from rear, 10" from left.

I got the fridge for $170 - free shipping with Amazon Prime, so got it 2 days after i ordered. Too bad Keg Cowboy is 2 weeks behind my fridge order. Still haven't had a frosty beverage out of it yet.
 
Last edited by a moderator:
I'm thinking of buying a that Danby fridge to put under the counter with the tower on the countertop.
There would be about 1 inch between the top of the fridge and the countertop. What's the best way to keep the lines cold since the tower is not attached to the fridge?
 
Have you tried this before? Because my Danby 440BL will fit two. It's SUPER tight, but if you cut out the slots at the bottom of the fridge you can. I'm talking about the slots that the bottom shelf sat on.
 
Have you tried this before? Because my Danby 440BL will fit two. It's SUPER tight, but if you cut out the slots at the bottom of the fridge you can. I'm talking about the slots that the bottom shelf sat on.

I have not tried this. But I guess if you do cut them slots out that surely might work for 2 pin locks. Didnt think about that one.
 
Can anyone recommend a Temp probe for this fridge? I just ordered my from Amazon (god bless Prime) and am eager to get some cold beer flowing, just want to make sure it doesn't get too cold.

Thanks, Tim
 
I just picked up this fridge at Costco and I am looking forward to getting it set up with a two tap tower.

It seems loud though. :confused: It only seems to run for ten or 15 minutes at a time but I was surprised at how loud it is. It also seems to vibrate the glassware sitting on the side board next to it.

Does anyone else think their Danby is loud?

Don
 
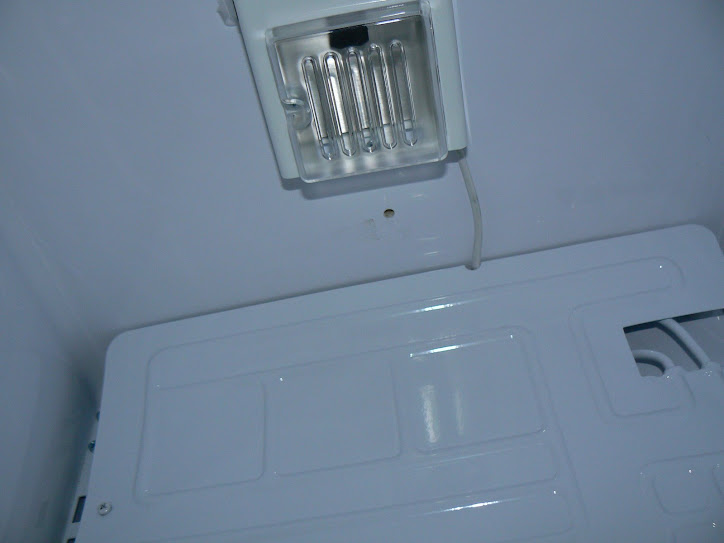
Looking to install the tower and I am noticing that my Danby is setup a little different than others I've seen online.

It seems that the thermostat and light electrical lines used to run straight across to the back of the unit like this:

danby+013.jpg


The one I bought this weekend looks like this:

2012-11-28_13-16-43_219.jpg


It now looks like the electrical lines crossover the area where the hole for the tower will be drilled. :cross:

Has anyone else run into this?

Don
 
Just got one myself and is sitting in the box at home ready to start on this weekend. Will check tonight to see if that is the case on all the new ones.
 
Mine was purchased recently, and didn't have the wire crossed over. Good thing yanking on the cord worked for you.

Also, its a little loud. But I keep the temp set low, so like you pointed out, its only on for a few minutes at a time. And even though its right next to the couch, between the furnace vent, loud girlfriend, whining dog, and TV, I don't notice it.
 
My conversion is coming along fine w/ the 'new' model issues (tab for thermo assembly in middle of back, moulded in door gasket, hole cutout in top w/o hitting anything).

Wondering what size holes folks may have drilled for using the default bolts coming from a beverage factory draft tower kit? I think I need to go up to 1/4" so they'll thread through, but concerned if I do that I'll def need a support through the bottom...

BTW it is kinda loud, but I'm putting it right outside my garage door so no big deal.
 
My conversion is coming along fine ...

Cheers! :mug:

Does your model have supports for the shelves that plug into brackets along the back or does it use molded supports on the sides of the fridge? I bought the one from Costco and it has the molded supports which I had to cut out in order to fit two corny kegs.

I posted some pics here: Danby DAR044

I haven't picked out my tower yet so I'm just using picnic taps for now.

Don
 
Back
Top