OP
OP
Don't forget to drill the stops out of the reducers. I only left enough tubing sticking out to clamps tubing on or whatever.


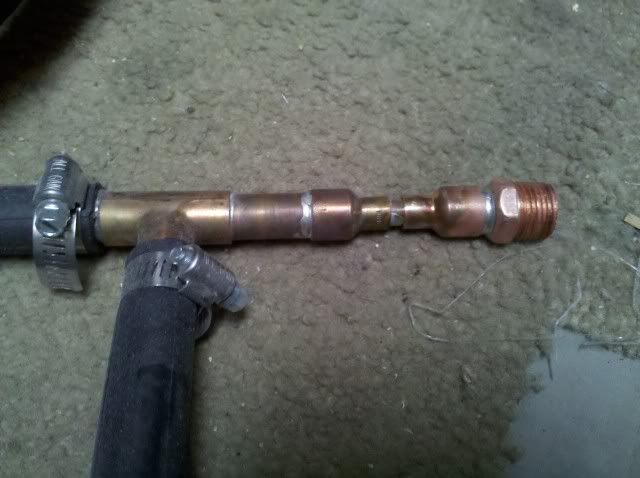
well I constructed my CFC last night and let me tell you it was a PITA....
I read a reply in the thread about having both coiled up and just twisting them into each other.
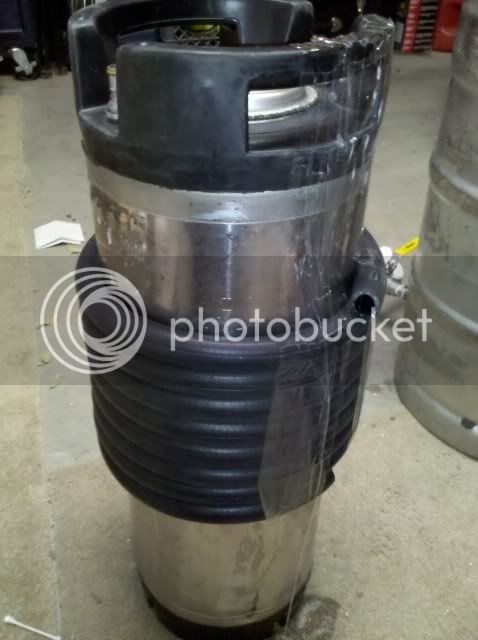
step one wrap hose around corny
step 2 wrap copper around corny to get same coil size.
well it started off easy, I had soapy water inside my hose but a few coils into to mix it became very hard to get the copper inside the hose.
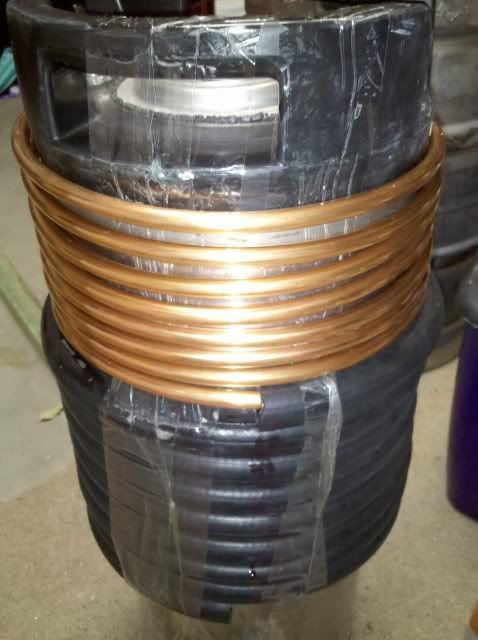
I ended up removing the hose and copper from my corny to give me more wiggle room. well roughly 35-45 minutes later I had copper out both ends. *sorry no photos* well next thing was trying to get my pre-built end pieces over the 3/8". I should have drilled out a wee bit larger hole because it was a PITA to try and put it together.
advise for anyone who is going to build this and hasn't yet.
DO NOT SOLDER YOUR 1/2X1/4 REDUCER UNTIL YOU HAVE YOUR 3/8" COPPER INSIDE OF YOUR RUBBER HOSE.
had I not had my reducer already soldered it would have been very easy to assemble.
sorry no photos of finished product.
but here's where I am at.
I have a keggle with 1/2" ball valve and barb fitting on it. *no pick up tube installed yet* I haven't decided on what direction to go with it. should I just get a piece of 3/8" ID tubing to connect my keggle to my CFC and use hose clamps OR is there a preferred method.
mind you I don't have QD's or tubing at all so im really open for suggestions on how to proceed. would the 1/2" ss QD and silicone tubing be the prefered method of attaching every thing?
I will be getting a pump, but not sure if I'll have one in time for my first brew.
-=Jason=-
What was the problem with soldering the reducer?
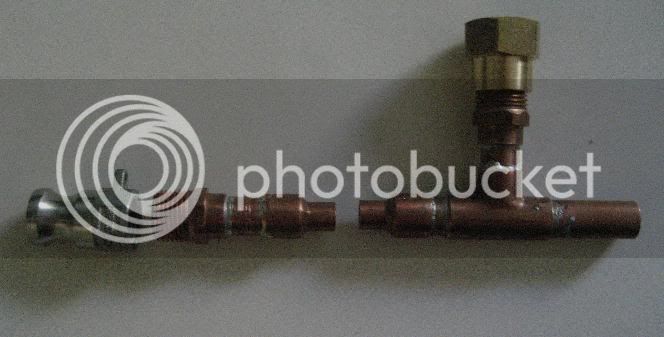
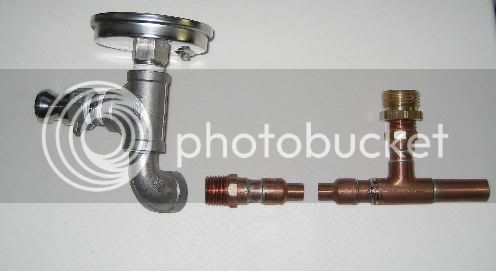
I am half way through building mine (also my first time soldering). Just waiting on the soft copper to deliver. I used another 1/2" to 1/4" reducing coupling, about an inch of 1/2" straight pipe then a 1/2" threaded fitting. This enables me to use my PFD QD's.
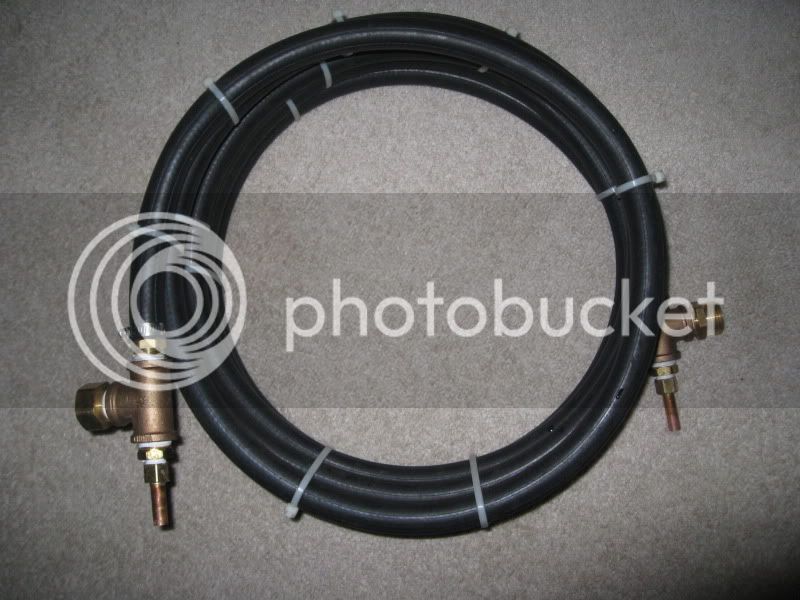
Wort in...
Wort out (0-100f thermometer attached)...
The second one I am making will be the conventional one featured on this thread. PM me if you are interested in it.
@Lacrossebrewer i soldered my fittings on an used Cam lock fittings. I had no leeks at all.
-=Jason=-

Did u look at home depot or lowes that's where I got mine
Keith_Mahoney said:I have the same problem. I have checked Home Depot, Lowes and Ace and still no luck.
Bobby_M said:I got mine at Lowes but of course it seems like they only get a new delivery of fittings once ever five years. Listen to Joeychopps. Drill a 1/4" or 5/16" hole in a tubing cap, put the flat side down over something with a hole (1/2" socket for example) then use a tapered punch to open the hole so the 3/8" tubing slips in tight. Sure, you can drill it right to 3/8" if you want but that doesn't make for a very sturdy solder joint.
Finished my CFC two nights ago, other than the hose clamps. Can't wait to give it a whirl. Cost me about $52 to build it.
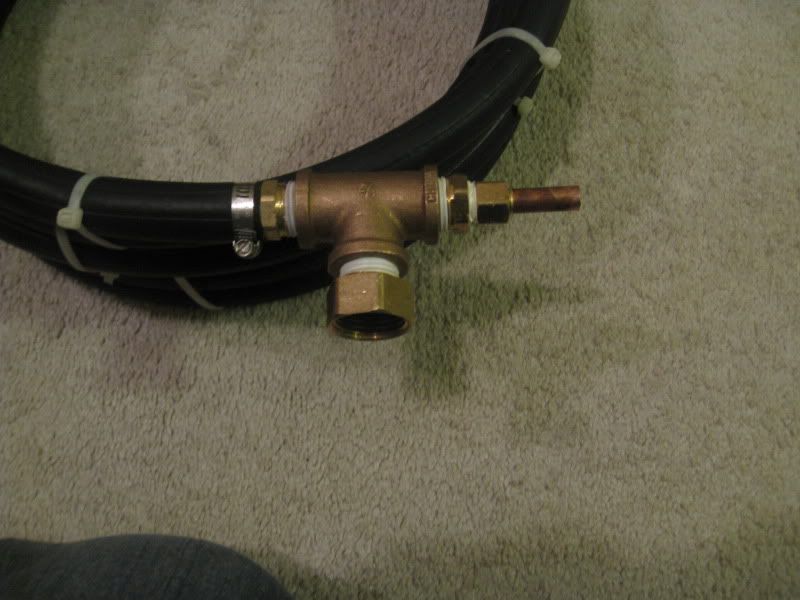
 and all soldered up. Since I went with a larger tube than the OP designed, it would have to cut down the amount of chilled water flowing through the hose. Will it still work, should I start over with the correct size tubing? I'm worried there may not be enough water to cool the wort and overheating the rubber hose (melting). Although, the increased flow of the wort with the larger tube may yield better cooling..... I'm giving myself a headache, anyone else done it this way? Did it work?
Enter your email address to join:


