My (soon to be) all electric brewery!

Homebrew Talk - Beer, Wine, Mead, & Cider Brewing Discussion Forum

Help Support Homebrew Talk - Beer, Wine, Mead, & Cider Brewing Discussion Forum:

This site may earn a commission from merchant affiliate links, including eBay, Amazon, and others.

rcbishop

Well-Known Member
Joined
Jan 9, 2011
Messages
63
Reaction score
3
Location
Austintown
Sorry the pics are kind of weak.. I'll take better ones once I get this thing built!

This project has three new goals -- to stop using propane, to have no metal fittings anywhere other than 304 stainless and to make it easier to do 10 gallon batches, as my old kettle was barely big enough for that. It is also designed to cut down on setup / cleanup time as much as possible, so I can be as close as possible to the theoretical 2 hour brew day. Not that I don't enjoy brewing beer.. I just don't have the kind of free time I did when I got into this hobby!

Anyway, I just ordered a new brew kettle last night from Brewers Hardware. The idea is to install a 5500W heating element in the 1.5" tri-clover port that it comes with, using an NPS -> TC fitting from the same vendor. I ordered Derrin's new fitting for the valve (it has 1/2" MNPT outside and 1/2" FNPT inside for a pickup tube), and another NPT port for the thermometer -- both to be welded into the kettle. After the valve, the fittings go back to 1.5" tri-clovers.

The brewery will consist of that kettle, a rectangular cooler MLT, and a little RIMS brew-cart that the cooler sits on top of. The brew cart is probably worthy of its own thread, but in a nutshell, here's what it consists of:

-Brewers Hardware RIMS tube
-March 809 pump
-Plate Chiller
-Mag-meter (electromagnetic flow sensor)
-Valves so I can backflush the chiller in place
-Electronic control panel

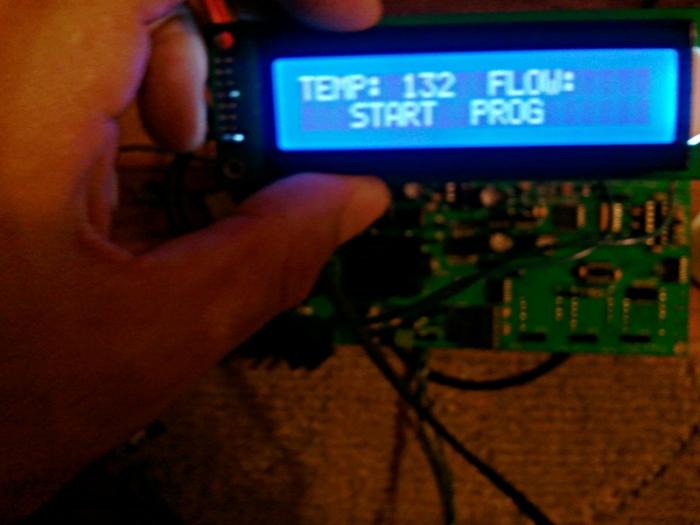
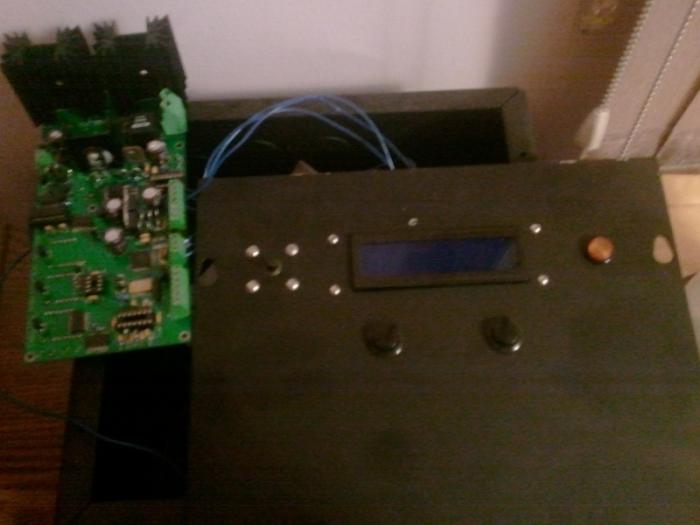
Since the kettle isn't here yet, I only have pictures of the brew cart. One pic shows the cart itself, and the other is the control panel. I'm going to redesign the board in the controller, because it needs some improvements, but it controls the temperature of the mash by adjusting the amount of power going to the element (it works like a light dimmer, instead of just being on or off). It also senses flow to give better temperature control and prevent dry-firing. The user interface is a little LCD panel with two buttons underneath, plus a rotary encoder and an "active" light. You can see how rough it still is from the pic of the display! The encoder makes it easy to enter numbers (you just spin it), and each of the two buttons always has its function displayed above it, in order to tab through the menus quickly. I think there may be a couple more lights and buttons by the time I'm done, but I haven't gotten that far on it yet!

Hopefully I'll get all this stuff up and running over the next month or so (most of the delay is in having the boards made). I can't wait to brew some beer in it!

brewcart.jpg


controller.jpg


display.jpg
 
I used to do HERMS.. I personally like RIMS better because it takes up less space (it's a 2 vessel system instead of 3), and I have instant control over the temperature of the wort.
 
Progress is always good!

The control board is designed now, so all I have to do is order it and hope it works right! I think I'm going to go with Gold Phoenix for board fabrication this time. Yeah, that means it will be Made in China, but this way I get 15 boards (instead of 1 or 2) for my $150... and I already want to use a second one to control the boil kettle.

The board has connections for a text LCD, temp and flow sensors, a rotary dial, some buttons and lights, and an isolated gate drive for a pair of SCRs (for the heater -- works like an SSR). On the hardware level, it should be equally good for zero-cross switching and phase fired control, so I will get to try both and see which one works better (I'm suspecting that PFC will be too noisy for the flow sensor).

Mostly to make it easier to write the firmware, I went with two PIC18F23K20 microcontrollers that will talk to each other over an SPI bus. Each MCU has a serial port, so I can connect a PC to both for debugging, or maybe, in the future, use that to daisy chain them together.

One MCU (U2) handles the stuff that requires precise timing:
-PID implementation
-Detect zero cross, maybe wait, and fire the heating element SCRs
-Drive the flow meter coil and read voltage from the flow meter
-Handle some GPIO, such as buttons and lights. There aren't any more pins on the other chip!

The other controller (U10) handles the tasks that don't have to be real-time:
-Drive the LCD display
-Regulate the backlight current for the LCD
-Monitor the encoder wheel
-Maybe take commands from a PC in the future

Also, according to BH, the kettle should have shipped yesterday, or will ship Monday.. can't wait to get that!

2012-10-31 23.11.53_2.jpg


2012-11-01 16.34.35.jpg
 
Heh.. sorry about that. I like electronics almost as much as making beer.

But the idea is that it's kind of an all-in-one board for the RIMS system.. just another way to do the control panel.. that hopefully won't be too much work to program.
 
The kettle and PC boards both came in today.

The best course of action would probably be to mock everything up and see what else I'll need to finish my project -- so of course I started a batch the minute the boxes were opened! The brewday actually went reasonably well, but was a little longer than usual.

The first pic is one of the PC boards that will drive the new RIMS cart (which didn't get used today) and control the brew kettle heating element.

Pic #2 is the new kettle with the old RIMS system. Notice how the hose coming off the kettle is spliced into the (old) vinyl tubing -- turns out the old tubing is way too big to go on that barb fitting! I never even thought to check that. Thankfully, the silicone hose is really stretchy.

Pic #3 shows how the heating element is mounted. The little metal box is tack welded onto the back of the element.

Pic #4 is the beginning of the boil. As it turns out, 5500W is a little excessive to boil 12 gallons with! On the upside, it was already boiling while the second runnings were still being pumped in... I had to do the boil with the wort circulating through the plate chiller (with the water off) to keep it inside the kettle.

I can't wait to get it finished, but the kettle by itself is pretty awesome. The quality is fantastic, like everything I've seen that came from Brewers Hardware. One thing I am liking about these heating elements that I don't see mentioned much is that the element is the only thing that gets that scum on it (that you have to scrub off). With propane, the whole bottom of the kettle would be coated in that stuff.

The next step will be to build a couple of the boards and try it with the new RIMS cart.

2012-11-13 01.04.22.jpg


2012-11-12 19.54.48.jpg


2012-11-12 19.21.44.jpg


2012-11-12 22.34.12.jpg


2012-11-12 21.17.16.jpg
 
I'm drinking the first beer from my first all-electric batch now! Well, I guess some of my early batches (about 10 years ago) were boiled on an electric stove, so that might not technically be true...

Anyway, the beer is a 10 gallon batch of a nut brown recipe from in Beer Captured -- the Gritty McDuff clone. I don't think I've ever had the real thing, but that clone recipe has been one of my regular brews forever.

The parts for the first two boards came in, and I put them together... mostly as originally designed. I found a couple little screwups and smoked one chip, but that is pretty normal for the first time around with any design. This gives me enough that I can work on the firmware now, and hopefully have two finished boards this week.

After that, the brew cart and kettle control should both be done within a couple days.

ERCS_boards.jpg
 
Software is SUCH a pain!!! I hate it! It's not that I'm bad at it, but it hit me today that the feeling I get from writing software is the same as when I was a kid, doing homework. Lame!

No wonder it's gone so slow, when I almost never want to work on it... lol

Fortunately, the software is almost done now, so I will soon be back to the much more enjoyable part where I build stuff and brew beer in it. One of those boards is installed in the brew kettle control box now, and has been used for a couple batches. It turned out to be really nice!

So far, the heat control screen is completely done, along with all the "utility" stuff (like the functions that write to the screen, drive the element, handle the front panel, etc.). The config / calibration menus are also in.

The "heat" screen lets you control the heat from 0-100%, and displays temperature and time. It's meant to control the element during the boil, and does a great job there. I notice I'm getting a lot of use out of the "stopwatch" feature, which was kind of an afterthought.

The last thing to do is the temperature control screen, where you set a temperature and the system regulates to it. It will be used in both the RIMS cart and the kettle. I think about 15% of the software work is left to do, to get this part done (which means it's 85% done!). I've implemented PIDs in PICs before, but it will be kind of a pain, so wish me luck!

2013-04-03 01.32.24.jpg


2013-04-06 22.13.08.jpg
 
Now (finally), the software is in a state where it should be usable! The temperature regulation screen is in and the PID loop is working in a way that looks reasonable. There's no guarantee that I won't find any problems (actually I probably will), but I can now move on with the build.

There are still a couple more features I need to get in, like the flow sensor and serial communication, but these are simple compared to what got done in the last two days. The flow sensor actually needs some more thought on the electronics side, as it is looking at such a tiny signal -- it may need to be built into its own module.

There are some small (electrical) parts I should be getting tomorrow, so I can get the thing in its box and installed on the RIMS cart. Then I'll be able to finally try it out.. can't wait!

Hopefully I can brew a batch with it this week, and get some pics posted.
 
OK.. lots of progress, lots of pics, so it will have to be two posts! The brew cart is built and a little bit tested (I powered it up and let it pulse power to a table lamp, through a transformer), and I have the ingredients on hand for its first brew. The electronics are the same as what is driving my kettle, except heavier, so just knowing it's wired right means I feel pretty confident that it won't explode when I go to make a beer in it!

The brew will be a nut brown.. just now noticing it's the same recipe I posted about at the end of November, which was the first beer that came from the new kettle... coincidence?

The pics are as follows:

-Brew cart mostly unassembled. This is much like the state it was in for the first pictures, except that the control box is installed.

-The mounting for the plate chiller is installed. This just happened to turn out really easy -- the chiller is exactly 2 inches thick, so the two pieces of square tubing fit perfectly. The lid will sit on top of the brew cart, locking the chiller in place.

-This small box houses the incoming power, as well as the two SCRs that control the heating element. This is a view from below the brew cart, as the box is mounted to the underside of the upper lid. The wire ends are tinned inside the wire nuts, and I added some zip ties before closing the box up, so it looks uglier than it really is! These SCRs, with this heat sink, should barely get warm at full load.

-Control box with the front panel off. On the panel you can see the LCD, buttons, encoder (spin-wheel), and power switch. In the box, there's the PCB, a little fan that isn't really necessary, an XLR jack for the temperature sensor, and a power transformer.

RIMS1.jpg


RIMS2.jpg


RIMS3.jpg


RIMS4.jpg
 
And four more pics..

-The rear of the brew cart. The valves allow the plate chiller to be bypassed during mash, used for chilling, and flushed forward and in reverse for cleaning. In the last 15 minutes of the boil, with the chiller in the loop, the RIMS tube can be used to help re-heat the wort before it goes back to the boil (I can set the target temp to maybe 210), which helps alleviate the issue I always ran into before -- I would have to crank the heat to 100% and wait a few extra minutes for the wort to start boiling again. When the late hop additions are meant to last one or two minutes, that isn't the time to have the boil go soft! The other side of the coin is before the mash -- who wants to wait around for the strike water to warm up, when you have 11kW of heat available?

-Left side of the brew cart. This pic gives a good idea of the size of the heat sink the SCRs are mounted to -- these things are definitely overkill for this application, even without the fan.

-Right side of the brew cart. Somehow, I wound up with way too many of those 1.5" tri clover fittings, which should come in handy at some point. Also, notice how the temperature sensor (a Microchip MCP9700A -- I don't think I ever actually posted anything about that) is flopping out and not in its tube -- still gotta take care of that detail.. lol

-Front of the brew cart. Counterclockwise from the top left, around the LCD:
Start
Stop
Enter
Back
Encoder (spinwheel)

The green light off to the right comes on solid anytime any heat is on.

Now I just have to brew a batch with it! I still need some tubing though -- ordered 25' of silicone hose from Amazon yesterday -- and I want to pitch onto a couple yeast cakes that still need another few days... It's moving along though!

RIMS5.jpg


RIMS6.jpg


RIMS7.jpg


RIMS8.jpg
 

Latest posts

Back
Top