Hop Rehab E-Herms build

Homebrew Talk - Beer, Wine, Mead, & Cider Brewing Discussion Forum

Help Support Homebrew Talk - Beer, Wine, Mead, & Cider Brewing Discussion Forum:

This site may earn a commission from merchant affiliate links, including eBay, Amazon, and others.
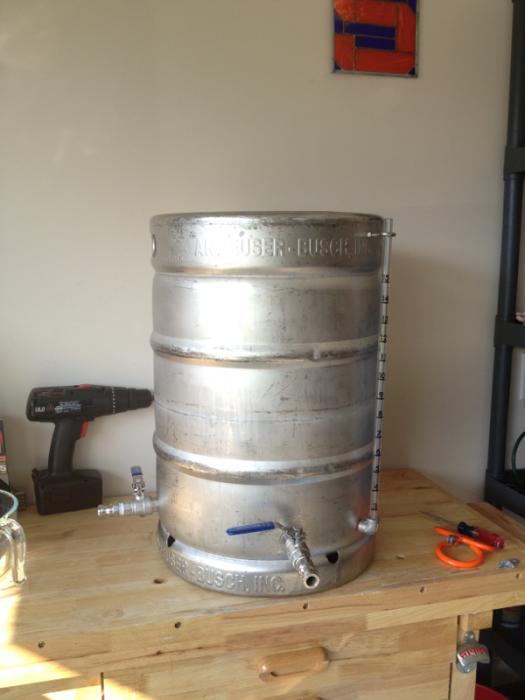
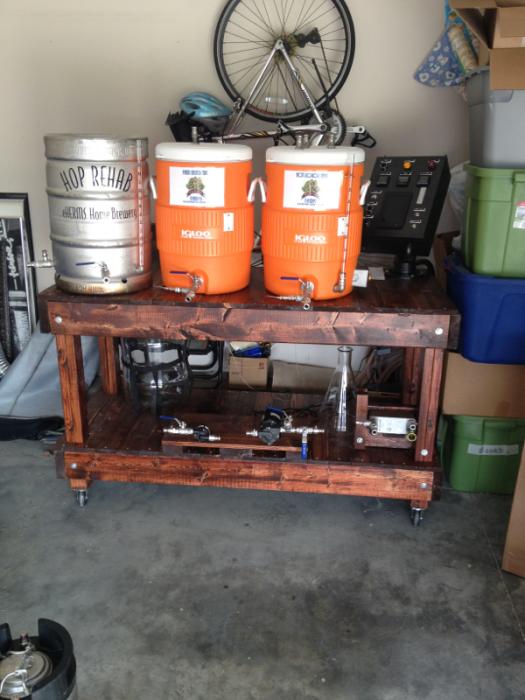
I finally finished the build this weekend! There are a few minor things I want to add/fix still but she works! I made an milk stout on the maiden voyage. Overall it went very well but there is certainly learning curve to optimizing the process. It's the first time I've brewed with pumps and the whole priming thing is annoying but I think I'm getting the hang of it.

image-1322946642.jpg


image-3780394290.jpg


image-1509119066.jpg


image-4237097522.jpg


image-1200377093.jpg


image-3325820146.jpg


image-3835995472.jpg


image-2236809752.jpg


image-1363171010.jpg


image-3861834170.jpg


image-319741367.jpg


image-3056128454.jpg
 
Nicely done! I really like how you mounted your panel, I might be steeling you stoled idea lol. Cheers looks great
 
Looks slick! You digging all that work space under your panel? I really like your element housing, looks good and the additional light falls into the category of "Bling-bling!" (Chicks dig blinking lights)
 
tjpfeister said:
Looks slick! You digging all that work space under your panel? I really like your element housing, looks good and the additional light falls into the category of "Bling-bling!" (Chicks dig blinking lights)

Thanks man! Yea loving the extra space. I used it a ton more then I even thought I would. It was a beautiful resting spot for my beersmith brewing steps printout, but doubled as a weighing station for hops, additives and more. Thanks again for your help.
 
BadNewsBrewery said:
Looking great!

Thanks for the comments, and a special thanks for all your info along the way. Your help and Kal's site were the 2 most critical pieces of my success. It wasn't all that long ago I had no clue what words like contactor, SSR, DIN, and heat sink meant. You helped me answer a lot of questions and gave me some extra confidence to carry on with the build. It also gave me rationale to spend a lot more money (I don't thank you for that) haha.
Like I said I have almost no experience with any manual labor-like activities or electricity. Most of me can't even believe this thing works! Thanks again man!
 
alien said:
Loads of nifty ideas. What is the screen and what software is running on it?

It's very high tech software made by one if the software engineers for apple... No no just kidding. Its a simple digital photo frame. I have the photo frame switch between 2 images my brewery logo and my internal wiring diagram. I wanted to add something different besides a power on/off light and thought this was cool and simple enough.
Thanks for the nice comments.
 
Finished brew number 2 on the new system. Brewing itself is a blast and I hair my gravity. The cleaning process still sucks, no matter how great the equipment. :)

image-3779672059.jpg


image-3860750308.jpg


image-3815844915.jpg


image-2720632285.jpg
 
I made a label for my first brew on the electric system. I keg my beer now but I still bottle one and make a label for it. it serves as a wonderful memory once it's gone. :(

image-2910838250.jpg


image-1489816676.jpg


image-2761532521.jpg
 
I made a label for my first brew on the electric system. I keg my beer now but I still bottle one and make a label for it. it serves as a wonderful memory once it's gone. :(

That's cool that you make/keep a bottle from every batch. I have one bottle left of a stout that I made over 2 years ago that won the Dick's Brewing homebrew competition. I don't know if I can ever crack it but I also know that it's probably past its prime now.
 
That's cool that you make/keep a bottle from every batch. I have one bottle left of a stout that I made over 2 years ago that won the Dick's Brewing homebrew competition. I don't know if I can ever crack it but I also know that it's probably past its prime now.

At this point you might as well just hang onto that last bottle and save it as a memory of your award winning beer. A trophy of sorts.
Right now I have one bottle from all 17 batches I have made on top of my refrigerator. I plan to eventually make a nice shelf to display them. I started doing it as a nerdy little project but it's turned out to be an interesting conversation piece with guests.
 
Excellent build!

Do you have any comments on the JSL-71 timer? I was planning on going with the ASL-51 and just noticed that this one was also available.
 
summerofgeorge said:
Excellent build!

Do you have any comments on the JSL-71 timer? I was planning on going with the ASL-51 and just noticed that this one was also available.

To me it was a no brainer to go with the jsl-71 mostly for the reason that it better matches the look of the auber PIDs. The asl-51 is all red where the jsl has the same, red top green bottom, color combo.

I can't comment much on the functionality difference as I've never used the ASL-51. I can say that the JSL is very easy to use, easy to wire, and I can't think of any complaints. Auber seems to think the JSL has more to offer than the ASL and they don't tend to steer many wrong.

On another note I installed a reset button on my control panel which I never use. If you were thinking of doing this I wouldn't.

I'd be happy to help with any other questions.

Corey
 
I also got the JSL-71 since it seemed easy to wire up and to use, it matches my 2352's, and it was inexpensive. My only complaint is that there is no way to stop the timer without it turning the alarm/output relay on or losing the option of using the second timer as a convenient preset. I'm just being particular but I don't like to see the green "out" indicator continuously lit up when I'm done using the timer. I wish there was a way to get it back to a neutral state, like when you first power it up. If you hit the "stop" key while it's counting down, it resets the time and sends a signal to the alarm relay. If you hit the "reset" key while it's counting down, it resets the time and restarts the timer.

Auber has been kind enough to offer to try to reprogram a button or two to make that happen but I told them I would use it for a month or two and go from there. If they get enough people interested in a true "stop/reset" function, they would offer it as an option. Luckily, I have an external switch for my alarm. If someone didn't have an external alarm switch there would be no way to turn the alarm off unless you reset it (which it then starts counting down again) or change some programming settings and lose the option to have a second alarm as a convenient preset.

This is my first fancy timer but I would think that these things would have a way to simply reset them without sending a signal to the output relay or restarting the timer. Just my 2 cents.
 
Good point. I too have an external on/off switch for the alarm. This had reduced the aggravation of the alarm tripping. For the most part I always have the timer running so there isn't much of an issue but I have found that to be annoying during the sparging and cooling processes when the timer isn't used.
 
I don't have time to read to far backwards in this as I'm about to rush out the door, but:
1) I too have an run/silence/pause switch on my timer/alarm
2) I actually use my timer for the sparge and cooling as well, not because there is a deadline, but I like to time the steps and put them into my notes. (A 75 min sparge on my system always results in 90% efficiency, so I like to time it)
 
Newest addition to the Hop Rehab home brewery! For now i'll still be boiling with propane, but I plan to be moving back to NY soon, and then it's 100% electric :)

image-3546322182.jpg
 
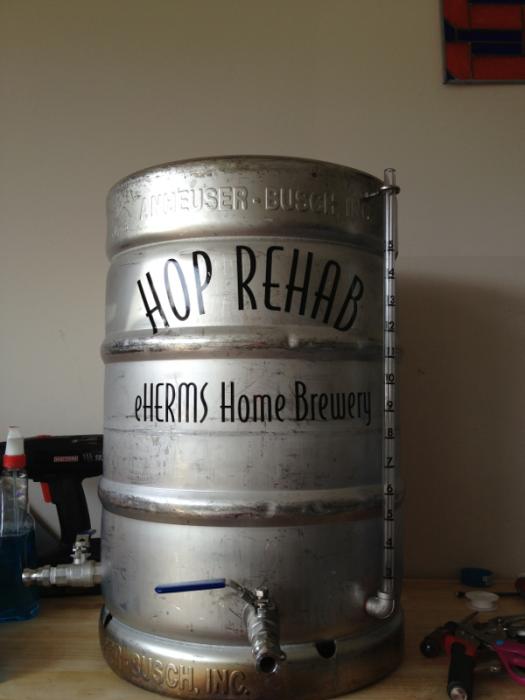
Update... I got some vinyl lettering to go on the keg. I think it adds a little something to it. I should have polished it but I didn't think i had it in me.

image-3244993560.jpg


image-4080378652.jpg
 
smittygouv30 said:
Slow progress marches on. I got the compression fittings to the HERMs coil installed and prepared the element housing. Hopefully today I'll get the switchcraft receptacle on the back plate installed now that the JB weld has sat over night.

Nice build! Can you provide more details on how you mounted the water heater element in your HLT.
 
I noticed that you have your SSR and heatsink mounted to the DIN rail. Any issues with the heat so far?

Not a bit. I've reached in to touch right after the MASH/sparge after it's turned off. I definitely wouldn't even say its hot, its warm. Also, I'm using a pretty small cramped enclosure and still no problems. I'm not sure if the SSR temp issue is overplayed or if i'm just getting lucky. It's been used for about 8 brew sessions so far.

To me I wanted to maintain the enclosure as water tight as possible so I definitely didn't want to install a fan in the side. The other option of mounting the heat sink to the top like most, seemed like a lot of extra work. I did mount it on the DIN rail strategically so nothing would come contact with any part of the SSR or heat sink, just in case.

Corey
 
Nice build! Can you provide more details on how you mounted the water heater element in your HLT.

I pretty much followed Kal's guide but decided to use a single-gang box instead of 2-gang. I felt it would look cleaner mounted to the side of the cooler.

http://www.theelectricbrewery.com/heating-elements?page=3

I did have to bend the heating element a little bit to prevent it from touching the other side of the cooler wall. I used a dremel to cut the outline for the gangbox, then used a wood chisel to chip out the insulation and expose the internal wall, lastly I used a hole punch to make the whole to fit the threaded base of the element into the cooler. If I remember correctly I had a tough time getting the lock nut to grab the threads of the heating element. It's worked great and has been completely water tight. I used a food grade silicone inside the gangbox to further seal the inside and protect the electrical components, just in case.

Any specific questions you have, fire away.

Corey
 
I'm not sure if the SSR temp issue is overplayed or if i'm just getting lucky.
SSRs are meant to run fairly warm since that's their function. Even though the heat sink will wick away all or most of the heat, the rest of the SSR can still get warm.

The issue that would concern me is the other electronics in the enclosure that will run warmer than if the heat sink was on the outside. The heat sink raises the air temperature inside.

Most electronics will last longer if run cooler, especially true if it contains any electrolytic capacitors (and just about everything that isn't just a simple switch, light, or relay contains e-caps). e-caps eventually dry out and stop working regardless of temperature but running things hotter accelerates the process. Sort of like drying out something by placing it in the stove at low heat, vs just leaving it out on the counter. The PIDs are the first thing that comes to mind. The other things should be ok.

Kal
 
kal said:
SSRs are meant to run fairly warm since that's their function. Even though the heat sink will wick away all or most of the heat, the rest of the SSR can still get warm.

The issue that would concern me is the other electronics in the enclosure that will run warmer than if the heat sink was on the outside. The heat sink raises the air temperature inside.

Most electronics will last longer if run cooler, especially true if it contains any electrolytic capacitors (and just about everything that isn't just a simple switch, light, or relay contains e-caps). e-caps eventually dry out and stop working regardless of temperature but running things hotter accelerates the process. Sort of like drying out something by placing it in the stove at low heat, vs just leaving it out on the counter. The PIDs are the first thing that comes to mind. The other things should be ok.

Kal

That makes a lot more sense. Of course my PIDs are located right above the SSR and heat sink too. At this point ill run the risk of having to replace a PID a little sooner than planned. Thanks for the inside kal.

Corey
 
Back
Top