How to put fittings on a Chillus Convolutus CFC

Homebrew Talk - Beer, Wine, Mead, & Cider Brewing Discussion Forum

Help Support Homebrew Talk - Beer, Wine, Mead, & Cider Brewing Discussion Forum:

This site may earn a commission from merchant affiliate links, including eBay, Amazon, and others.

ScubaSteve

Well-Known Member
Joined
May 21, 2007
Messages
3,673
Reaction score
91
Hey all-

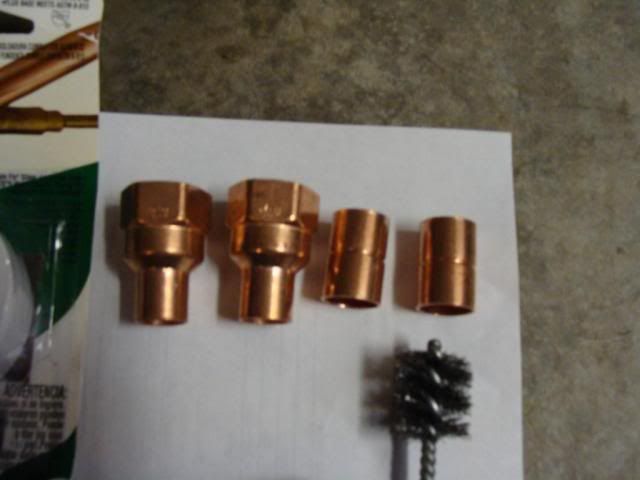
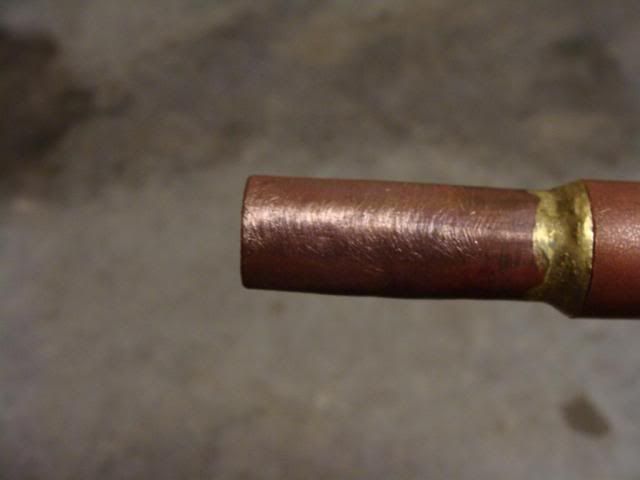
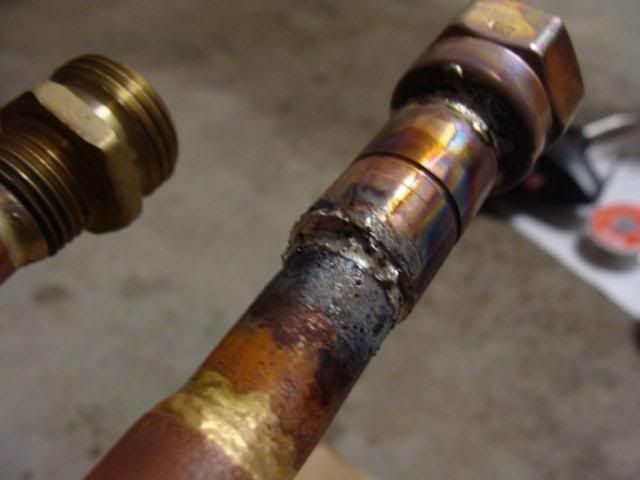
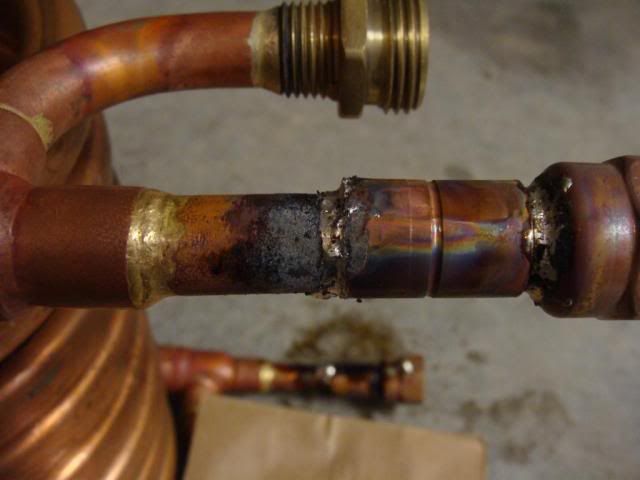
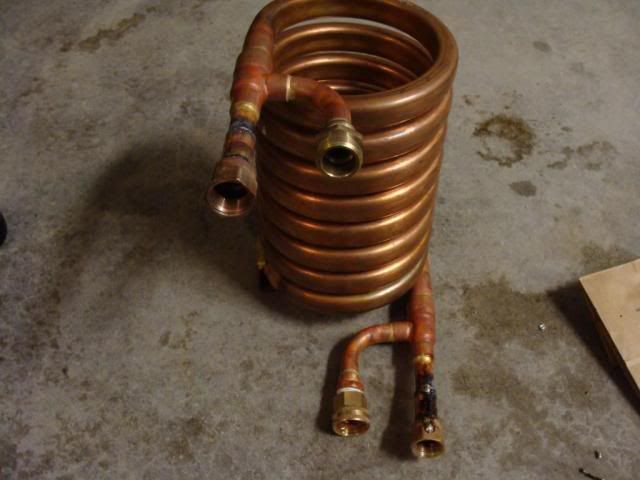
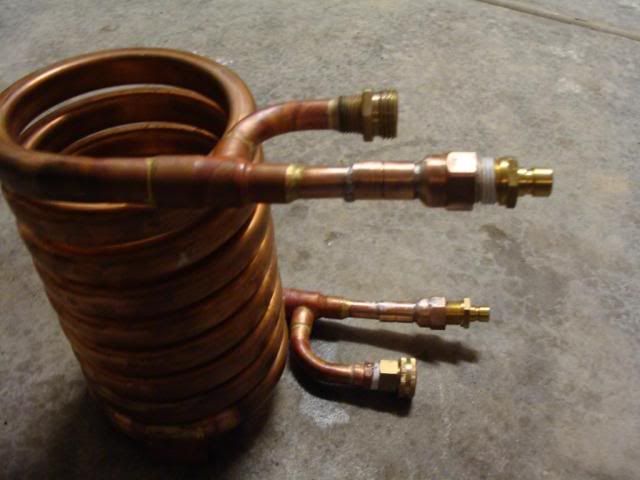
I've been slowly gathering parts for my rig build....today I needed to make it so that my high temp hoses with qd's would fit on my Chillus Convolutus.

Here's what it looks like at MoreBeer, selling for $155:

phpThumb.php


Not to be confused with the ChillZilla CFC, selling at NB for $190:

chillzilla-cropped.jpg


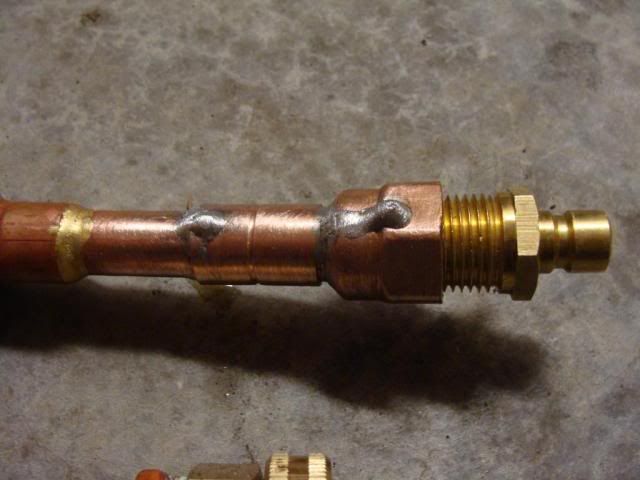
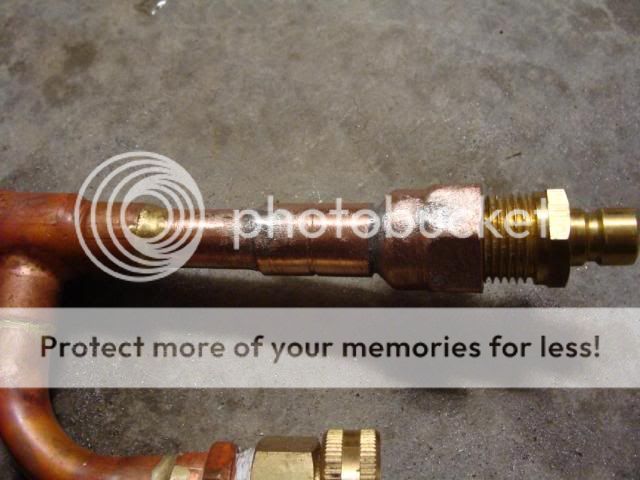
See the difference with the fittings? I guess the designers of both figured it would be easy to just slip a hose over the wort in/out. In truth, it is, but I use quick disconnects with silicone tubing....so I needed a quick and easy way to use the chiller. They're both pretty much the same chiller, but I think I prefer the B3 version because all fittings are facing forward. This makes for a better interface if you have it on a shelf on your rig and are taking hoses on/off with qd's. Plus it's cheaper :D
 
Here's the parts and equipment I started with:

DSC02676-1.jpg


I used a basic propane torch with flux and solder, as well as a wire brush. The fittings include:

2) 1/2"FIPxSweat adapters
2) 1/2" x 1/2" couplers with the crimp, or "stop" in the center

Here's a closer look:

DSC02677.jpg


NOTE: The inner tubing of the Chillus Convolutus is a really odd size. It's smaller than 1/2", but bigger than 3/8"...something like 7/16". You can't fit a 1/2" coupler over it snugly; it's a bit loose. That's why I was a little nervous about soldering a joint with a big gap. I hope it doesn't leak!
 
Next, I prepped all the surfaces to be joined. I used the wire brush and sandpaper,making it look bright and shiny:

DSC02680.jpg


Don't ask me what the chiller was originally brazed with. All I know is that it didn't even flinch when heated. I like to think it's solid gold.

Then, I brushed on some flux on the areas and set the fittings in place.

I heated the joints for a good while with the torch, getting them super hot...and melted the solder in. The 1/2" couplers at the end fit the adapters like a glove, so the joint came out beautiful and didn't require much solder. The chiller outputs were an odd size, so there was a bit of a gap to fill on the inboard side of the coupler. I just kept the joint heated and kept laying in the solder until it was packed. It didn't turn out very pretty...

DSC02684.jpg


And yet another jacked up looking joint:

DSC02683.jpg


Notice how it turns down slightly? Gravity caused the loose fittings to hang on the tubing rather than fitting snugly in place. When I soldered it, the top needed more solder, so I had to go back and forth and pack it in.
 
Here's the chiller with all the fittings soldered on:

DSC02685.jpg


The copper cleaned up nice with a wire brush and sandpaper, but you can see that being liberal with the solder left me with some extra cleanup:

DSC02688.jpg


I went to town with a grinding stone drill bit. You could probably get better results with a Dremel. Here's what it looked like after grinding down the solder. I gave up after a while, but I might come back to it (it's tougher than you might think!):

DSC02689.jpg
 
And here's the finished product!

DSC02690.jpg


See how the bottom fitting turns up a bit? That was the one I mentioned earlier, but it turned out to be a blessing in disguise. The raised angle makes it very ergonomic for hooking a QD to...especially in my brewing rig where things can be hard to reach.

All in all, I have to say it went well. I was worried about ruining an expensive piece of equipment....especially because I'd never soldered any piping before! I could have just used pieces of hose and hose clamps to attach the female 1/2" adapters to the wort in/out of the chiller, but I wanted something a little more aesthetic and permanent. Now, I get to mount this bad-boy in my rig!:ban:
 
Just a tip (even though it's been awhile since I've done any piping)- The black gunk was from overheating, or holding the torch too close. If you apply more flux on top of this you can normally shine and even it out, save you some elbow greese next time. Looks good, and thanks for the tutorial! (I'm thinking merge this with your unclogging videos and sticky in the DIY?)
 
Nice work, ScubaSteve! Just my $0.02, soldering those on is a lot easier (and cheaper) than using compression fittings and works a hell of a lot better. Don't ask me how I know...
 
Yeah, I tried the compression fittings, and found myself manhandling the chiller. I stopped halfway through and returned the fittings.

Bobby- I actually tried 3/8 first, and I think it was too small. Like I said, this is a really odd size. I guess the convoluted tubing B3 got their hands on was an unusual size.

That is weird. This is a quote from their site - "The inner tube is made from 12' of 5/8" convoluted (twisted) copperwhich continually turbulates the wort as it flows through. The outertube is made from 7/8" copper."
That means a 1/2" fitting should fit properly unless they are reducing it in the connector.... which wouldn't make much sense.
 
I tried 5/8" compression fittings and they didnt work. They don't specify whether that's ID or OD. All I know is that it was a wierd size, and after 3 trips to HD I figured I had to compromise. In my case...1/2" worked well enough. I imagine someone having more skill/experience with soldering would get even better results. FWIW, I wouldn't trust a compression fitting if it weren't the right fit. Too much trauma to the tube could ruin the chiller!
 
I did a DIY IC chiller, bout the compression fitting.. After a couple hours, I soldiered it... Was a little hard with 30 watt iron, flux, and soldier (lol) but it looks good and works :)
 
Hi all,

When you are dealing with pipe, measurements should always be referring to I.D.

This is not always true. Soft copper in particular is supplied with either the ID or the OD specified. I believe that HVAC folks use the stuff with a specified OD.

Also, there are two possible reasons for the weird fit... The first is exactly what we are talking about. Your water fittings were made for tubing with a specified ID, the tubing in the chiller may have a specific OD (the convoluted stuff is made for HVAC applications). Second, there is a possibility that the tubing is a metric spec (unlikely IMO).

HVAC folks usually don't connect copper to copper with fittings, they generally swage one piece and slide the other inside. A swage tool slightly enlarges the ID of the end of the tubing allowing the other piece to slip inside. Swaging may have solved your problem, though it may have been aesthetically unappealing.

Adam
 
Its been a while since this thread was used, but I'm about to solder on some fittings. The inner pipe is very thin, which is why the 1/2" fittings are super loose. I'm going to do the same as the OP and just pack the joint full of solder, but I'm also going to flare out the end of the pipe a bit to make it sit better while I'm working.

EDIT: Worked great, EXCEPT... I forgot to put flux on the fitting before I slipped it over the pipe. I then flared out the pipe enough that I couldn't get it off and ended up making an ugly looking connection on the inside of the fitting with a slightly mangled pipe. I'll just need to make sure I recirculate some boiling water through to kill off anything that can hide in that ripple. The second fitting looks awesome, nice and flush.
 
Back
Top