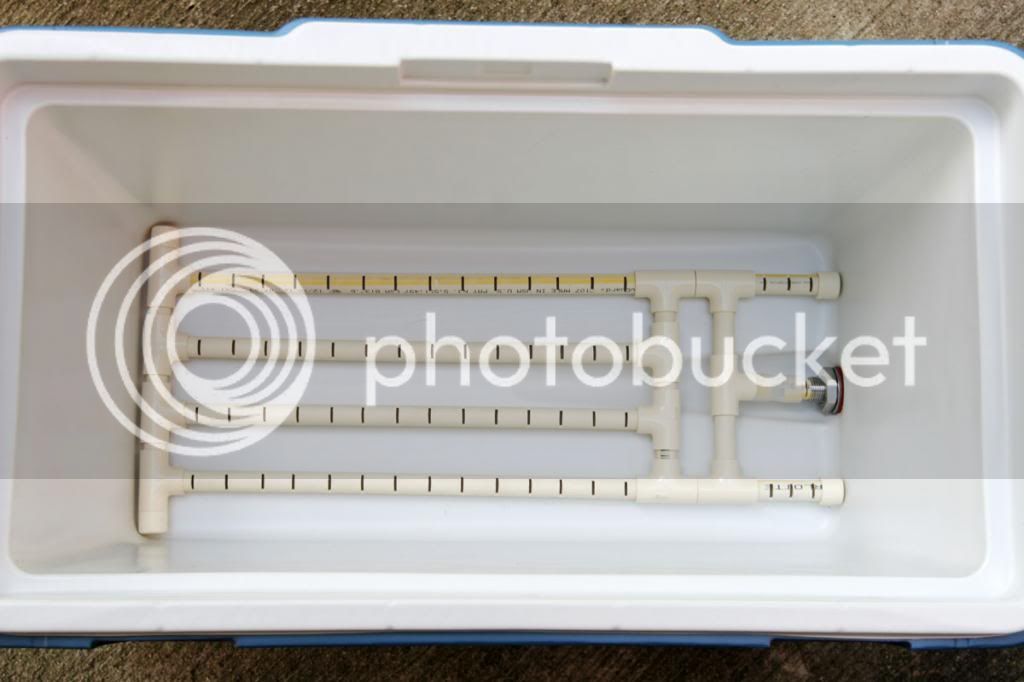
Im about to make a mash tun with coleman xtreme cooler 36qt.
Which one is better by all means? Price,Working time, Better quallity, better durability and all other means...just what is better for me to use as a mash tun..
option 1:

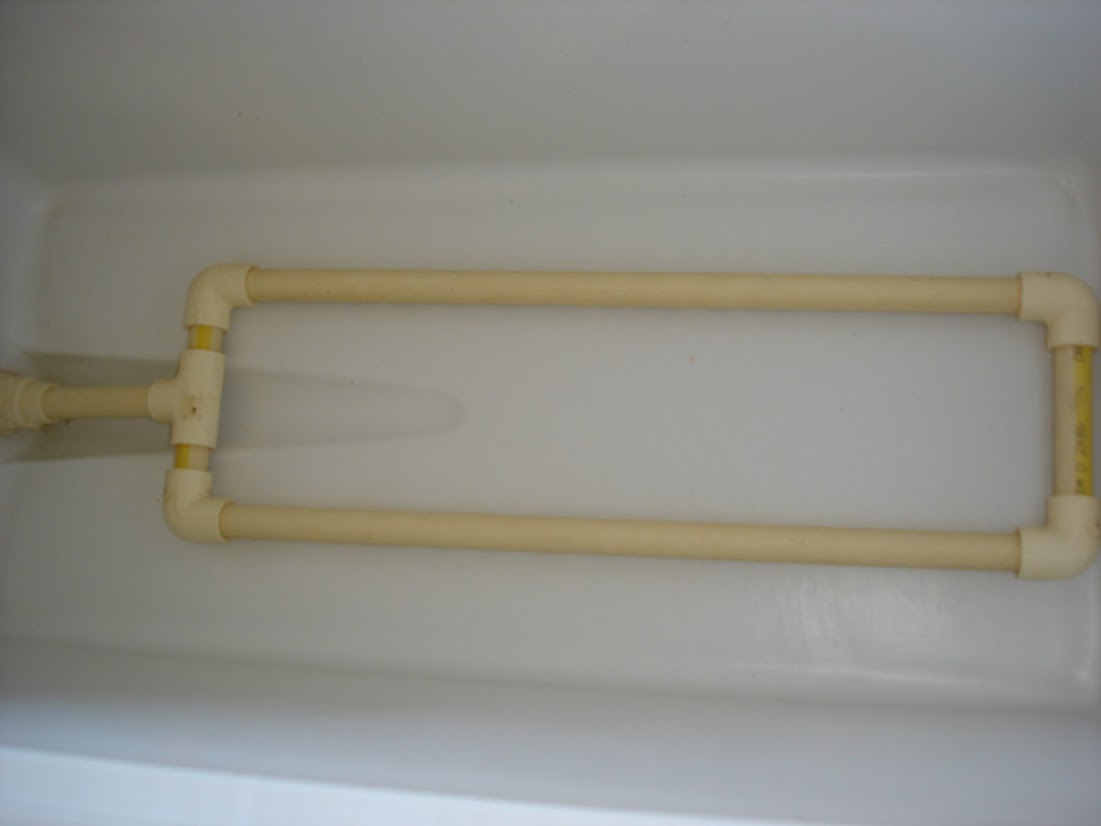
option 2:
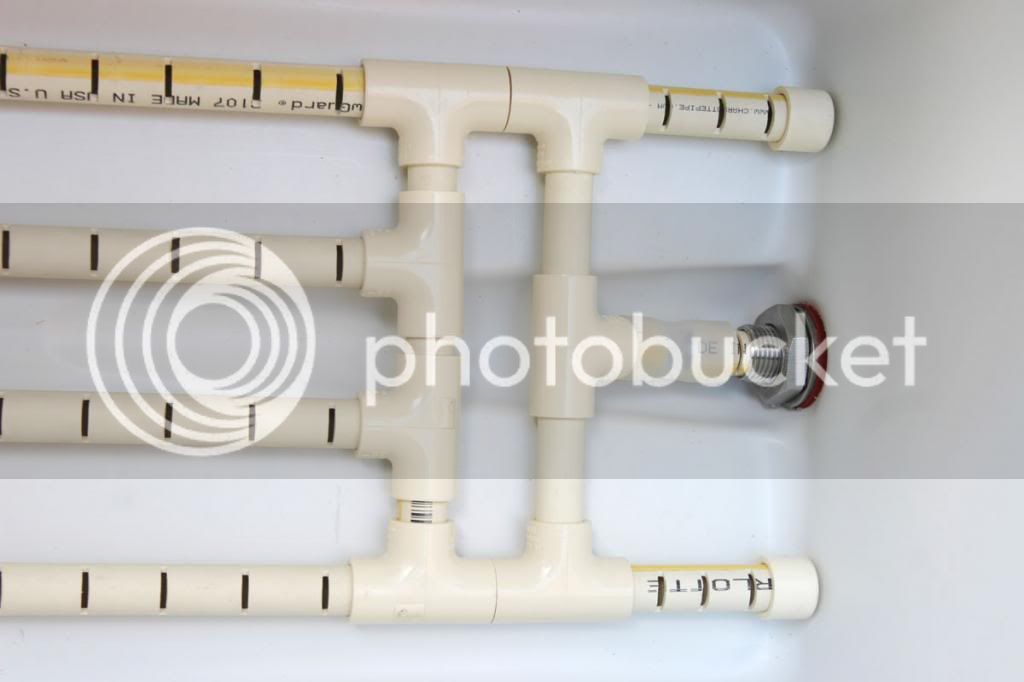
(btw, Should I use copper for this or cpvc? and holes up or down?)

and on the out side, what should I connect to the valve?
Which one is better by all means? Price,Working time, Better quallity, better durability and all other means...just what is better for me to use as a mash tun..
option 1:
option 2:
(btw, Should I use copper for this or cpvc? and holes up or down?)
and on the out side, what should I connect to the valve?