Electrical Brewery Build My Story

Homebrew Talk - Beer, Wine, Mead, & Cider Brewing Discussion Forum

Help Support Homebrew Talk - Beer, Wine, Mead, & Cider Brewing Discussion Forum:

This site may earn a commission from merchant affiliate links, including eBay, Amazon, and others.

CCB451

Supporting Member
HBT Supporter
Joined
Jan 28, 2012
Messages
34
Reaction score
1
Location
Hugo
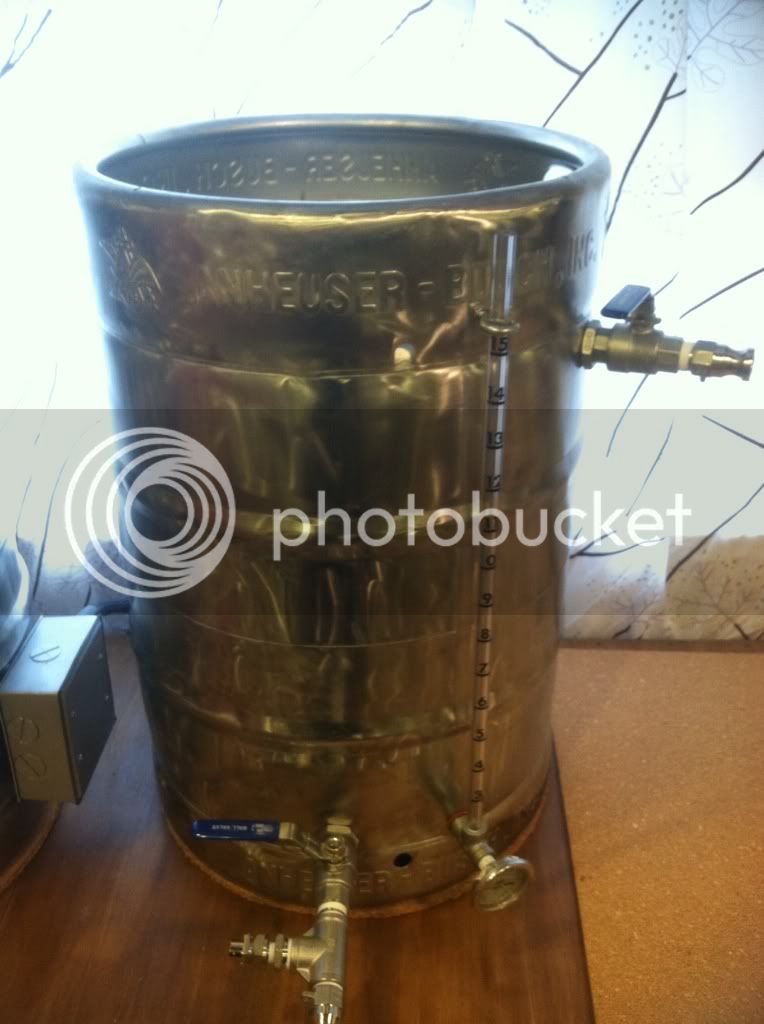
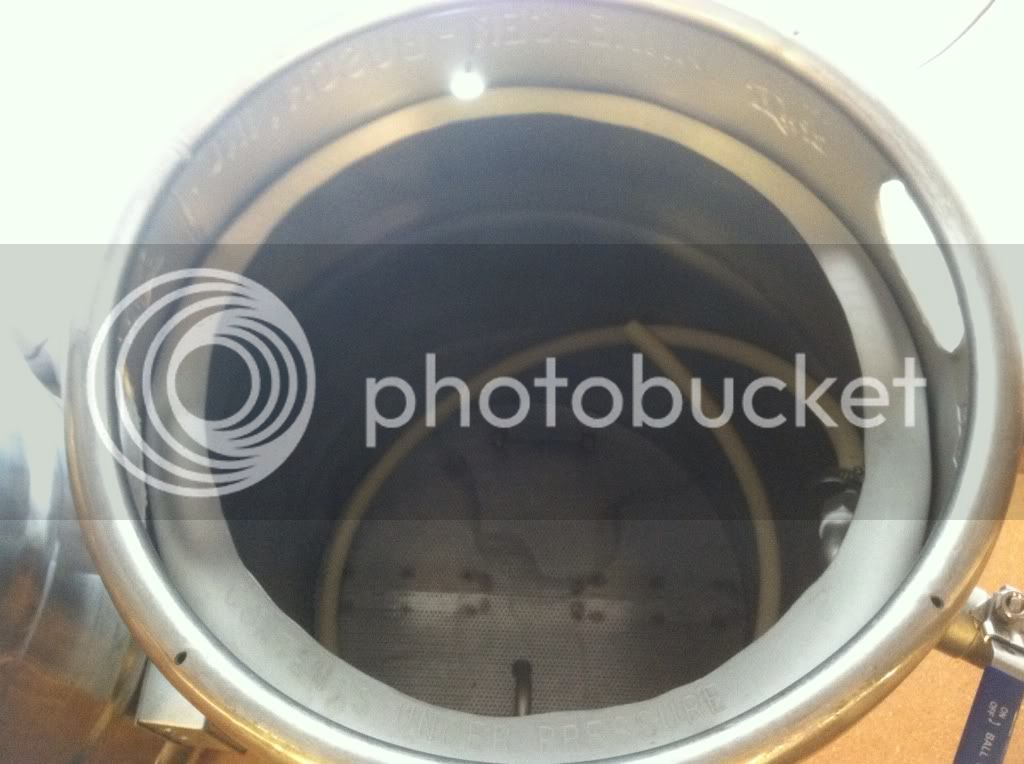
I have been doing 5 gallon batches for a long time now and have been doing all grain for quite a while now. I have been disenchanted with my current setup with my cooler mash tun and not being able to hold a consistent temperature during the mash. I have been trying many different things to make this more consistent. When I found out about The Electric Brewery and the consistency that you can maintain with that setup I knew that was what I wanted to build.

I would like to thank this sight and all of the information that I have found on here for giving me the motivation to undertake this project. I would like to thank Kal for his wonderful site and the step by step instructions contained on his site.

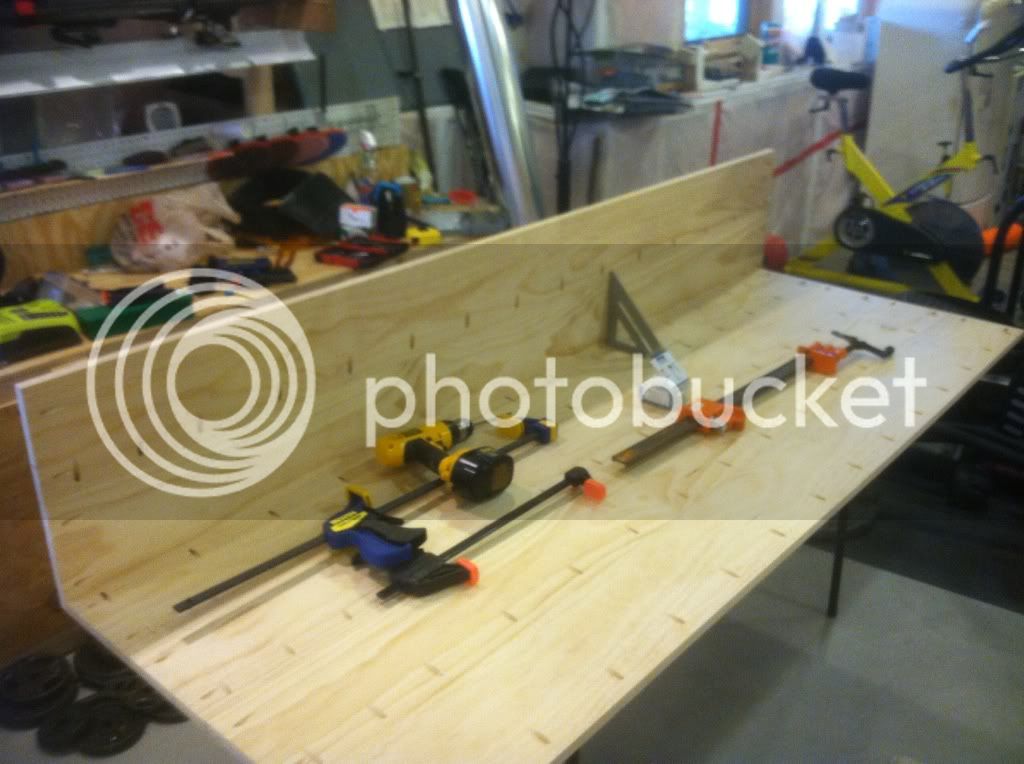
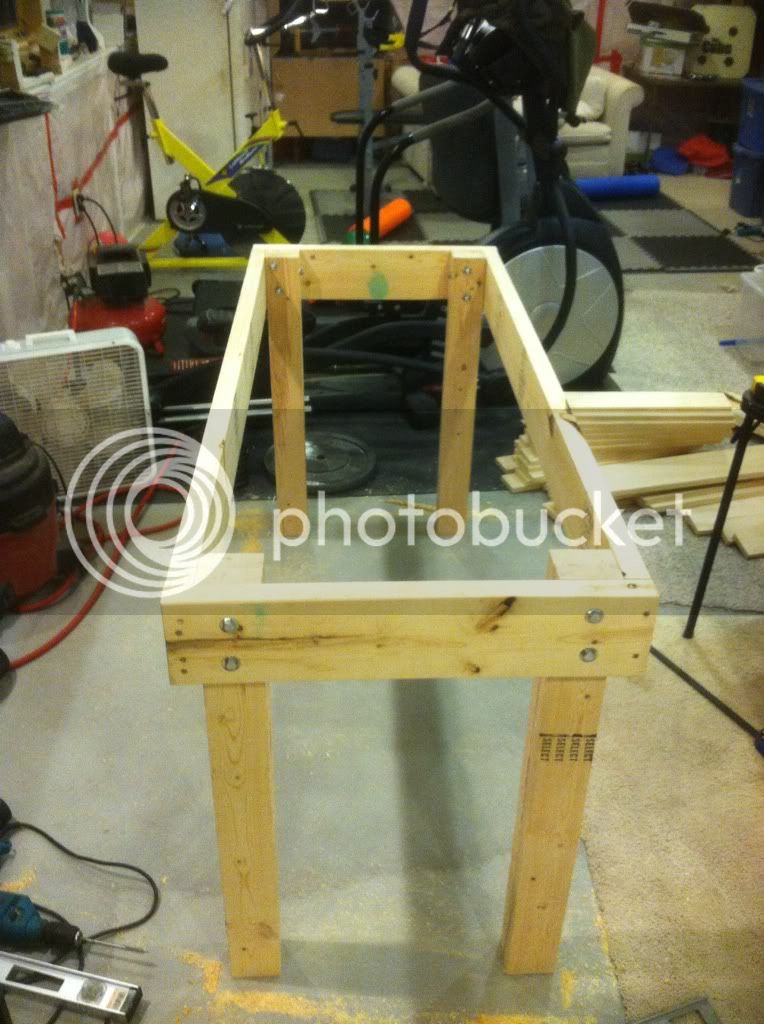
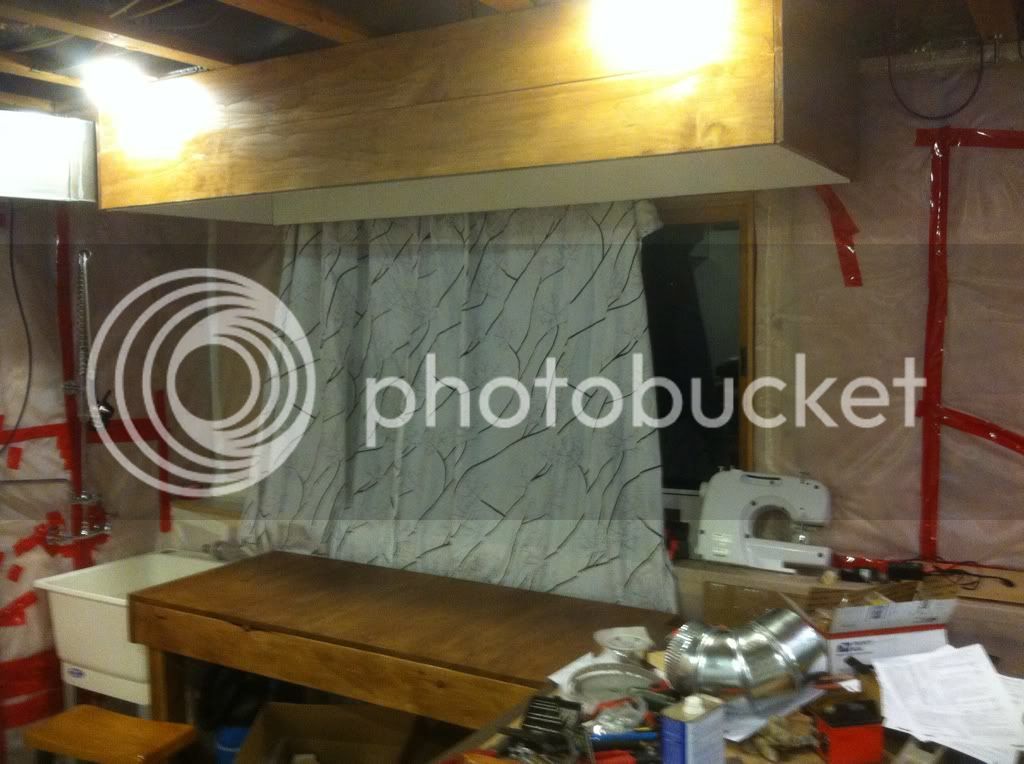
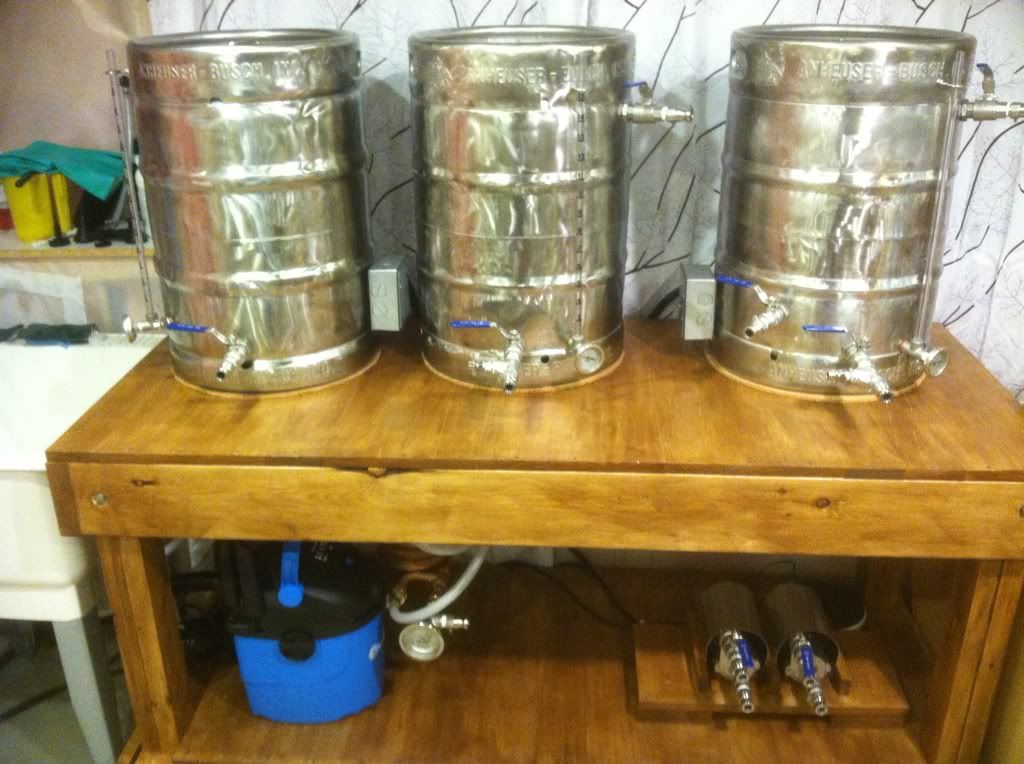
I have been following Kal's instructions for building my electric brewery. I decided to start with the brew bench while I am waiting for all of the other components and it will also give me more space to work with.:D

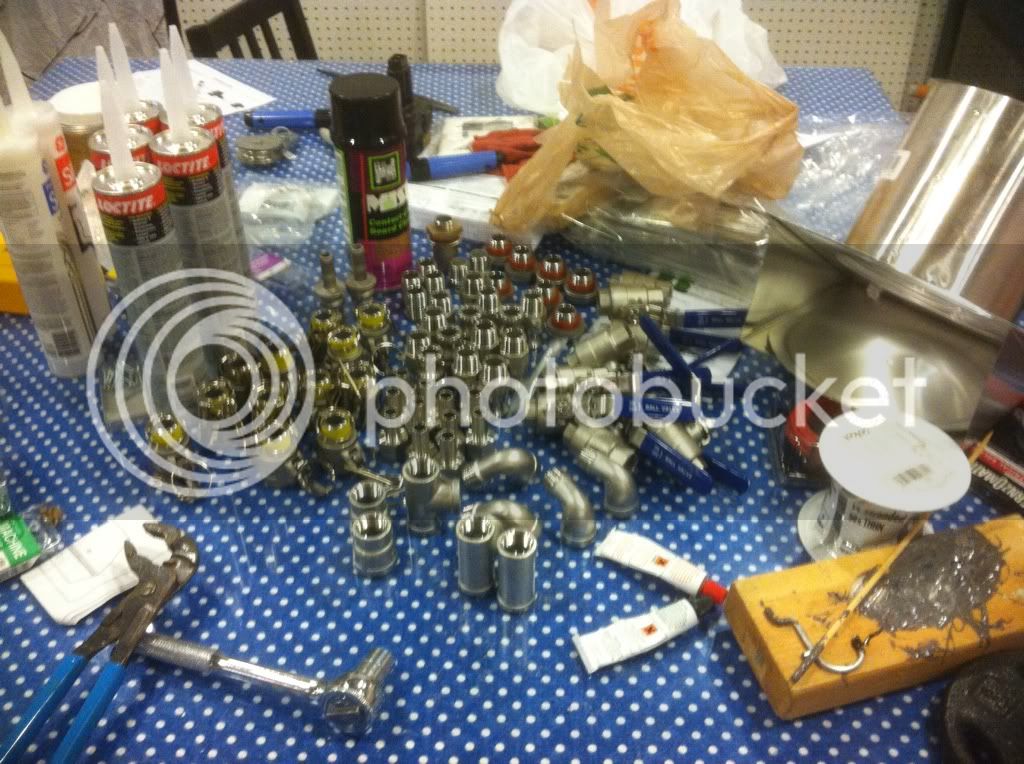
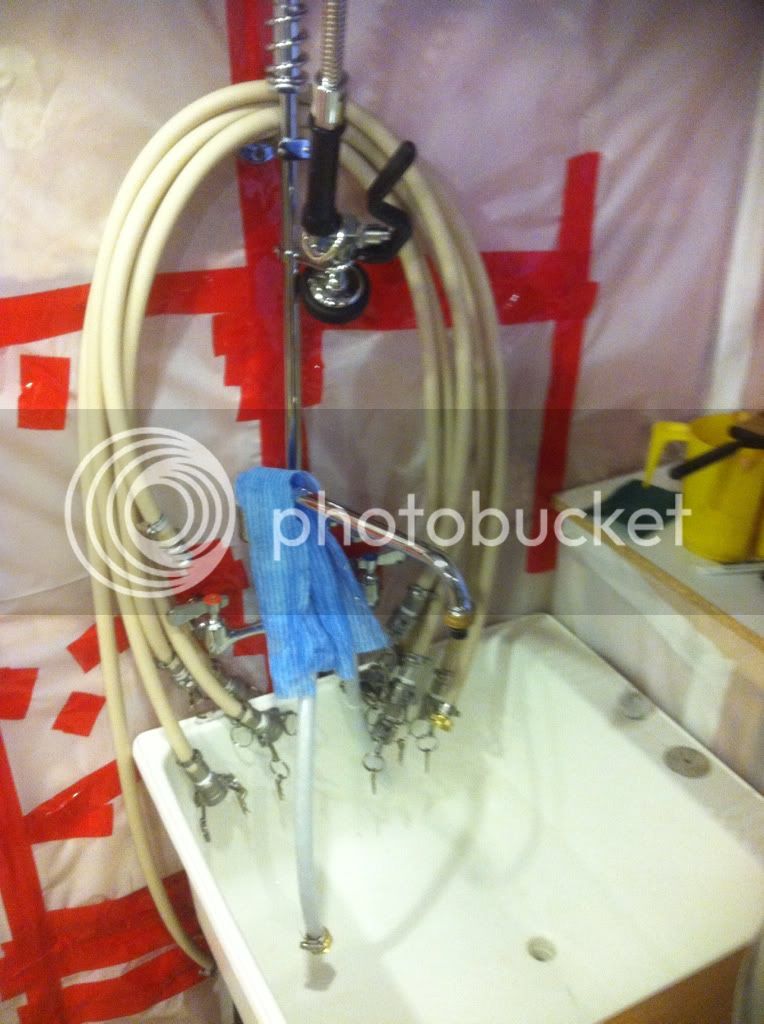
After the brew bench I built the vent hood, I chose to make mine out of wood to save a bit on the cost. Then I added a sink and prerinse faucet.

photo 2.JPG


photo 1.JPG
 
Looking good so far. I need to make myself a vent hood for my ebrewery. When I was doing propane I would just leave the garage door open and the steam would blow out. Now I don’t plan on opening the door if I don’t have to.
 
Looks good so far! Post more pics as your build progresses...

Are you going to line the vent hood with something? (Plastic?)

Kal
 
Kal I did line the inside of the hood with Plas-Tex water proof wall pannel, and then calked the seams so no moisture should get to the wood.
 
I have been spend a lot of time building lately, so have not had time to post pictures for awhile, but am taking a break tonight to do just that.

Have made a lot of progress I feel in the last two weeks due to many way too late nights in the build process(have seen the sun rise a couple of times).

So far I have completed the Boil Kettle, MLT Kettle, Transfer pumps, Wort Chiller, Hoses, Power cables and have most of the components installed into the control panel.

boil inside.jpg


boil.jpg


chiller.jpg


mlt inside.jpg


mlt.jpg
 
Picture of the Pumps, hoses and the control panel. The only thing I am waiting on is the Amp meter to get here on the slow boat from China.

pumps.jpg


control panel.jpg


hoses.jpg
 
I tried to coil up the heat exchanger stainless steel tubing and failed miserable. Got so irritated with myself for hot stopping at the first kink, but after I ruined the first coil and said many choice words directed at the expensive pile of scrap stainless tubing, I started reading the forum closer and learned what I should have done to begin with. I got another coil of tubing from McMaster Carr today and promptly sent it to psbuckland for him to coil it up for me to the proper size, as he has the correct tools to do the job right.:cross:

Can't wait to get it back and installed to complete all of my Kettles.

hex.jpg
 
One thing I can't stand about HomeBrewTalk is their picture handling. I wanna see your pictures larger, so do yourself a favor and use photobucket.com. Upload your photos there then just post the
 
One thing I can't stand about HomeBrewTalk is their picture handling. I wanna see your pictures larger, so do yourself a favor and use photobucket.com. Upload your photos there then just post the links. I'm not trying to be rude, I'm just saying don't waste your time attaching the images because they're practically useless, wheras hosting at photobucket makes them large and in charge![/quote]

A big +1 there. I really want to see the pics bigger. It looks like an awesome build. That coil is sweet:cross:!
 
Ha I was looking on my phone so they didn’t seem all that bad. Now I get on the computer and they are like little avatars. Photobucket FTW! They even have an app for android (maybe iphone too) that will automatically upload your photos for you, then you just copy the image link and paste it in your threads at HBT or other places.
 
Couple questions:

1. What are you using as an exhaust fan? I have been looking around, and dont want to drop +$100 on one. Would a $50 bathroom vent (50 to 80 cfm) be enough?

2. How many silicone hoses do you have? I've figured I will need 5 - 3 in order to recirculate through the hex with one pump and 2 to agitate HLT water. Similar situation when chilling for me, although I see you have a CFC so it will be a bit different.
 
For the fan I used the Vortex 6" inline fan I got it off of amazon.

As far as number of hoses I made 5 with camlocks, and one with a fitting to attach to the sink tor filling water.
 
Ok so it took a bit for me to figure out Photo bucket, and then all of the picture downloaded from my phone, and I could not figure out how to pick and choose which ones I wanted uploaded to Photo Bucket, so that took almost a full day for all of the pictures to load. Long story short I have larger pictures to post now.

Here is the area before starting.
38879efd.jpg


Installing the sink.
187ef0ff.jpg


Building Vent Hood.
833b50f0.jpg


Building brew bench
fe0e10e5.jpg
 
Here are more pictures.

Pile of fittings.
e6df8618.jpg


Installing the Vent hood.
da1282db.jpg


Control panel under construction.
072a1b4b.jpg


Control Panel another view
43999b7a.jpg
 
I got my CP all wired up tonight, everything seems to work except the timer.

I used the Auber ASL-51, the timer gets power, but will not start counting no matter what reset button I press. I have tried a few different function and relay combinations and still nothing. I have looked at HBT and Electric Brewer forums, and I have the timer wired the same as others are doing and that works fine for them.

Any suggestions?

Thanks,
 
Having an issue with my counterflow chiller. To cool 5 gal from boil to 70F is taking 20 min plus. My tap water is 58F, and even the discharge water is only 75F. Have checked and made triple sure that the water and wort are flowing in opposite directions.:mad:
 
What is your plan to isolate the heat from the pots from the wood?
I am planning a wood stand also, except I was going to tile the top.
 
how fast are you running off wort? i've never used one so take this with a grain of salt, but i've heard of issues with it where it's running off too fast and not cooling down fast enough
 
To isolate the pots from the wood I got 1/4" thick cork and cut it to the size of the kegs, so they are sitting on cork pads.
 
I am running off my wort at a trickle. If I slow it down any more the flow stops. My immersion chiller cools my wort faster than the counterflow does.
 
That does sound odd. I have a DIY counterflow, but they still still perform close to the same. My input water is around 80*, and while pumping my wort as fast as my march pump can, the wort exits the CFC around 95-100F. After the whole batch is chilled to 120* or so, I use ice water as the cooling water. At this point my wort exits at 60F.

With your inlet water at 58*, you may need to recirculate the wort back into the kettle if your target pitch temp is in the low 60s. CFCs are efficient, but not quite that efficient at cooling the wort temp down to the inlet water temp. I think you might have better results if you pump the chilled wort back int the kettle at a faster rate. Once the whole batch has cooled into the mid-150s (maybe 5 minutes.) I'd bet you could get by with a single pass with much faster flow
 
Thank you for the suggestion on recirculating the wort, that sounds like a great idea, will definitely give it a try on the next batch.
 
Back
Top