Brutus 10 clone v.1

Homebrew Talk - Beer, Wine, Mead, & Cider Brewing Discussion Forum

Help Support Homebrew Talk - Beer, Wine, Mead, & Cider Brewing Discussion Forum:

This site may earn a commission from merchant affiliate links, including eBay, Amazon, and others.

MontereyPaul

Member
Joined
Sep 29, 2008
Messages
10
Reaction score
1
Location
Monterey
I took the time and got the plans to Lonnie's Brutus 10 online. Since I got the plans, I got ahold of a few sanke kegs ($20 each), square tube metal ($250), and misc parts (+- 400).
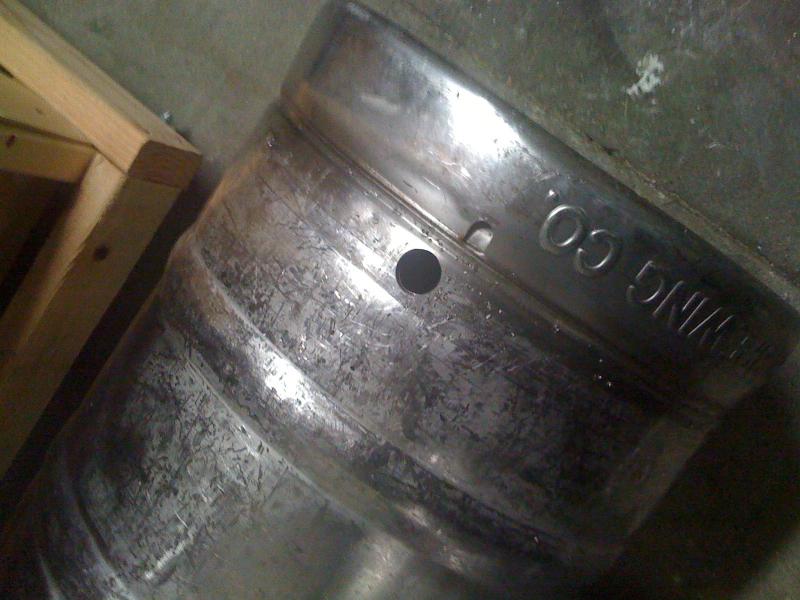
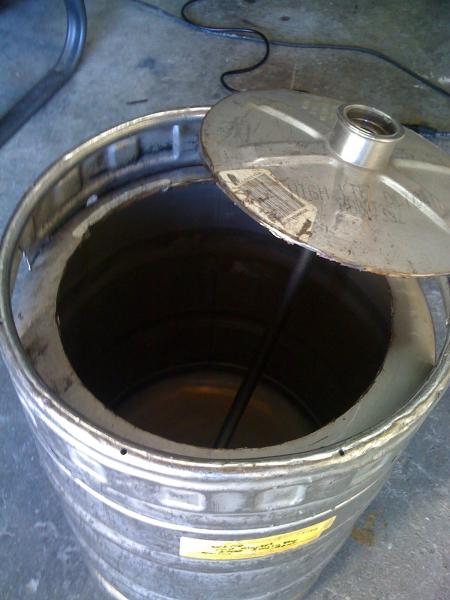
The first thing I did was to cut the tops off the kegs. I used an angle grinder with a $2 cutting wheel (granted, I needed a new wheel for each keg, but what is $4?). Next, I finished off the kegs with the grinding wheel.
268207435212.jpg
 
I drilled the holes for the keg... I got the couplers from Morebeer.com and the fittings from Bargainfittings.com. I was able to hook up with a few stainless steel dome lids from a discount kitchen supply place in Gliroy, CA

I decided to use a "t" fitting for the sightglass and thermometer. However, here was the problem I faced... I started the holes in my kegs before I got all my gear. I did not leave enough room for the thermometer with the ball valve below (yes, I made inline holes with only a 2 inch gap between the two). My resolution to this problem will be a 90 degree elbow for the ball valve and attaching the sighglass seperately...(see what I mean at homebrewstuff.com).

I am still trying to hook up with someone that can weld my kegs for cheap...I was quoted $75 per keg from a local fabricator. I am gonna hold out for a cheaper welder, possibly someone with the gear and a gift of welding.

435396435212.jpg
 
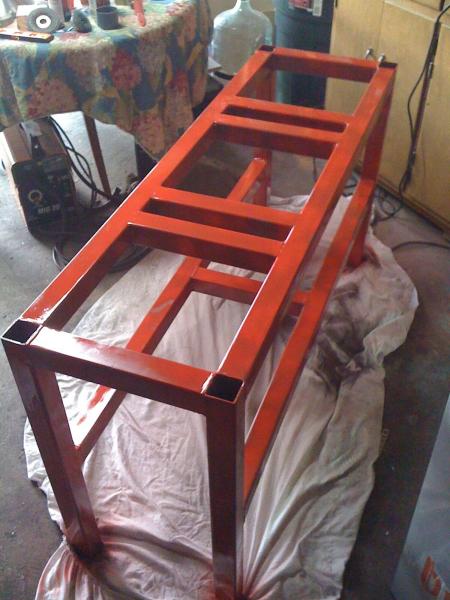
I started with the welding of the keg stand. I am using a MIG welder (just electric, w/o shielding gas). This is my first experience with welding, so I am expecting a few problems.
I got all the metal from onlinemetals.com ... they are able to custom cut all the pieces. If you go this route, double check all the sizes when they ship. I had to grind down 3 to get the right size (they were off by atleast 1/8 inch).
I tack welded the frame together (this actually took only a few hours), then reenforced the tacks by completing the welds...

651976435212.jpg
 
After finishing the welding, I a little time with grinder, and worked on the welds. As, again, this is my first welding experience, I had plenty to grind down. I am now able to truly appreciate a PROFESSIONAL WELDER for their craft!

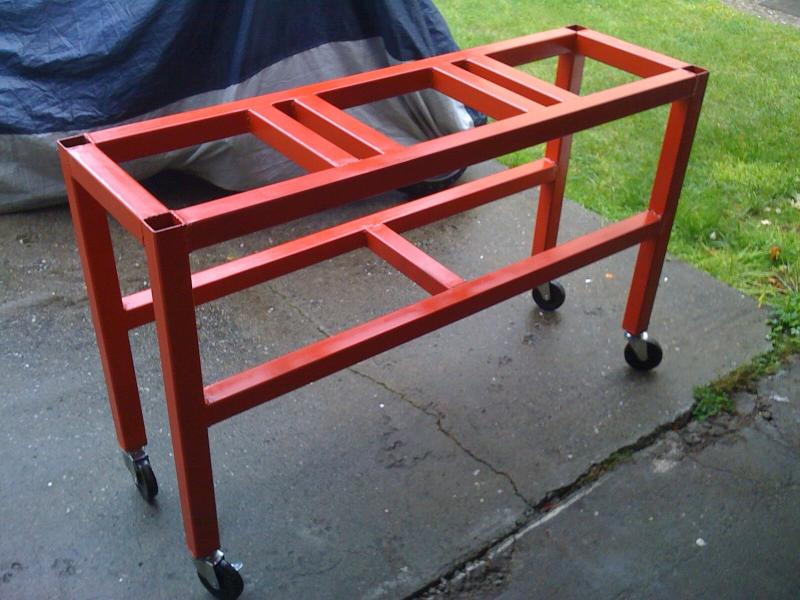
After the grinding was done to my satisfaction, I sanded down the stand and cleaned it, then hit it with some primer (+2000 degrees) and finished it off with some high heat red paint...

251976435212.jpg
 
Looks awesome, I am looking at taking some MIG welding classes and hope to be able to do this kind of work. I am no expert but nice work.
 
I put my wheels on the stand today. One thing that I couldn't find about building one of these was how to get the wheels on. So, here's how I did it:

I went to home depot and bought a 2 inch flat metal strip, .120 thick . I also bought 3/8 inch nuts, which can screw onto the stem of the wheels that I already own. I also bought some washers.

I cut the strip into 2x2 pieces and drilled a 3/8 inch hole in the center of each. I then took a 3/8 in nut, and welded it over the hole. I was then able to weld the 2x2 piece onto the bottom of the stand. I placed the "nut" side into the tube, and added a second nut with washer to the wheel stem so I can adjust height or balance, and tighten it down the adjustment.

I finished up the second coat of paint, and am now working on affixing the burners to the stand.

I have a 1 inch metal strip which I have bent to make a recessed holder for my burners. I have cut a hole to attach the screw bottom of the burner, and now just need a nut to secure it. If this works out, the rest of the stand will follow.
 
Great job brother! I love the way it looks!

As far as the caster attachments, they are in my plans. They are called leveling tubes, tube inserts, or threaded inserts, McMaster Carr part number 60945K31. Works like a charm.

Keep the pics coming!
 
Lonnie, thanks for the info. I reviewed the plans, and sure enough, there were the parts. Sadly, I get way too excited about a new build and have a tendency to take things under my will.

That being said, the welding went great and now my brew stand can take my weight (with no problem) at 225 lbs, so I am sure the brew weight shouldn't be a problem.

562275535212.jpg
 
Back
Top