Electric Heating Element for RIMs/eHERMS

Homebrew Talk - Beer, Wine, Mead, & Cider Brewing Discussion Forum

Help Support Homebrew Talk - Beer, Wine, Mead, & Cider Brewing Discussion Forum:

This site may earn a commission from merchant affiliate links, including eBay, Amazon, and others.

rosienej

Well-Known Member
Joined
May 18, 2011
Messages
177
Reaction score
2
Location
Colchester
A reader suggested that I document this work in its own thread (part of it appears in another thread). Here it goes.

This thread is to document an approach to a RIMS or eHERMS heating element which can be used with insulated vessels to maintain and adjust temperatures for mashes for 5 to 10 gallon batches.

I have been using two of these elements with 2+ hour mash schedules from dough in to mash out under PID control for 5 and ten gallon batches with reasonable, repeatable results.

NOTES:
Always use GFI circuits.
Always verify flow through the pipe


Design Goals
1) Use easy to obtain parts (McMaster Carr for example)
2) Safe to use on 110V 20Amp Circuit (16amp budget)
3) Easy to clean, no internal heating elements does not require dis-assembly to clean
4) Modular, can add additional watts as required (subject to the amperage limits)​

Back of the envelope calculation
The 8ft 624 Watt 120VAC Extreme-Temperature heat tape requires 5.2 Amps. If the system uses two of these heaters + a PID (budget 1 Amp), plus a March pump (budget 1.5Amps) We get approx 13Amps, which is less than 80% of a 20 Amp Circuit.​

Parts [McMaster Carr is one source]
1) Extreme-Temperature Heat Cable 13 Watts/Square Inch, 8 ft Length, 624 Watts, 120 V, :: make sure that the tape can be used over metal. See Laboratory Electric Heating Elements Tapes Heating Jackets Heating Blankets Insulated Resistant Wire for precautions.
2) Ultra-High Temp Foil-Faced Insulation Strip 1/2" Thick, 3" X 12', :: make sure that the insulation can withstand direct contact with the heating element. Fiberglass is NOT okay to use.
3) 18” of ½ stainless steel pipe threaded both ends
4) (2) ½ inch stainless steel Female Pipe Tees
5) (2) ½ inch stainless steel Square Head Plugs​

If there is interest I will take photos on the new build as the parts come in.

As always, safety first.
 
ive never seen someone try to heat the mash tun using tape. neat idea. i might keep that in mind for when i redesign my HERMS tank/mash tun setup eventually.
 
Ummm... YES! I would LOVE to follow this build. I have not made up my mind on HERMS or RIMS yet and I am interested in seeing this option. I am just not too keen on the idea of a heating element confined in a make-shift tube that has to be sealed up with thinned down JB weld. This, otoh, is external heating...
 
Just put in an order.
1) I didn't purchase the insulation (I have some left over from the last build)
2) I picked up a 3 inch threaded pipe to connect the systems.

------------------------------------------ McMaster -----------------------------
1 1 each 4550T141 Extreme-Temperature Heat Cable 13 Watts/Square Inch, 8 ft Length, 624 Watts, 120 V today $73.46 each 73.46
2 2 each 4452K434 Type 316 Stainless STL Threaded Pipe Fitting 1/2 Pipe Size, Tee, 150 PSI today $10.31 each 20.62
3 2 each 4452K124 Type 316 Stainless STL Threaded Pipe Fitting 1/2 Pipe Size, Square Head Plug, 150 PSI today $4.28 each 8.56
4 1 each 4816K124 Standard-Wall Type 316/316L SS Threaded Pipe 1/2 Pipe Size X 18" Length today $23.89 each 23.89
5 1 each 4548K175 Std-Wall Type 316/316L SS Thrd Pipe Nipple 1/2 Pipe Size X 3" Length today $5.37 each 5.37​
 
Once I build my heater, I will be mounting the pair in a box, to make the setup a little nicer. To prevent overheating, I will put in series one the following thermal fuse on each heater, outside of the insulation.

THERMAL FUSE 128C 10A AXIAL - SDF DF128S

These are one shot use, but for less than 1 buck each, we can keep the setup from safe if we loose flow and don't notice.

Joel
 
So essentially an ERIMS (external RIMS) tube? Seems very simple, eliminates scorching.
Will it heat enough depending on the flow of wort?
Also, putting the heating tubes in a box, seems like adding heat to heat in an enclosed area.

Just thoughts. But very interested.
 
So essentially an ERIMS (external RIMS) tube? Seems very simple, eliminates scorching.
Will it heat enough depending on the flow of wort?
Also, putting the heating tubes in a box, seems like adding heat to heat in an enclosed area.

Just thoughts. But very interested.

I have been using it with 2+ hour mash schedules for mashes of 5 and 10 gallon batches. From dough in to mash out largely unattended. It works well.

The current system uses two different types of heat tape for a total of 1024 Watts, one test showed the system can raise 5 gallons of water (insulated Gott cooler and pipes, constant circulation) approx 1 degree every 6 minutes. It does depend on ambient temp etc.

I am upping the wattage a bit with the new build, and the new system with two elements will have 1248 Watts.

I think, having more insulation the better. Installing in the enclosed box with the clean-outs on the ends of the heating pipes exposed should improve the performance. Of course I need the thermal fuses to keep everything safe if flow is stopped, or the heater is left on by mistake.

I found the following site to be helpful. Calculating Heat Loss - Features - Process Heating

Thanks for the interest. I will be posting pictures of the build process as the parts come in.

Joel
 
Sounds good, I have been contemplating an ERIMS for a while myself using heating tape. Any chance you could post some pics when you finish the build?
 
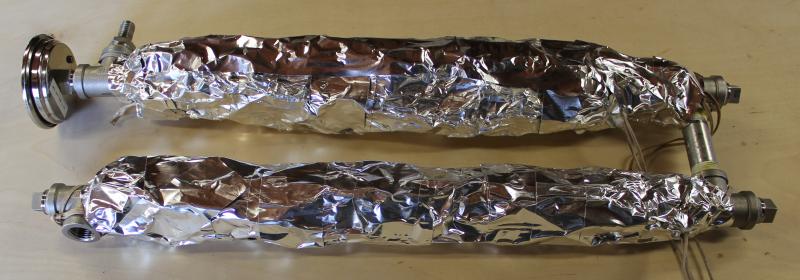
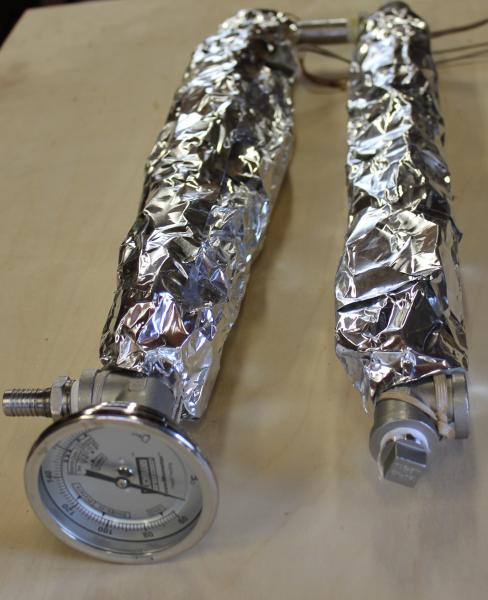
Here is the assembly for the pipe.
2 Tees, 2 Plugs, 1 18 inch pipe, 1 pipe heater, + insulation.

2d0dyq1.png


The thermal fuse is to be attached in series with one of the leads and taped to the outside of the insulation.
 
wow very interesting idea. makes me want to start on my project now... Where are you going to be sourcing the heating wrap from?
 
(2) questions.
- Does the heat tape come with it's own tie offs?
- Does all 8 feet of the tape really wrap just 18" of pipe?

Yes and Yes. The tape has the tie offs attached, and As shown, the tape, closely packed covers the 18" of pipe.
 
The following is an older picture of the heater installed in the RIMs which I have been using for a few years. This rebuild is to refine the system.

30vj612.jpg
 
Thanks for breaking this out of the other thread. Loving the extra pictures, that helps a lot. :rockin:
 
Thanks for breaking this out of the other thread. Loving the extra pictures, that helps a lot. :rockin:

Your welcome. Let me know if you have questions or need more photos.

Things to finish up.
1) Add the thermal fuses
2) Build an enclosure
3) Rewire the SSR (Solid State Relay) and PID closer to the enclosure.
 
I am using the following thermal cut-off by the heaters, since I am going to enclose the two tubes in a box.

(I am using Mouser.com as the supplier)

Per Heating tube.

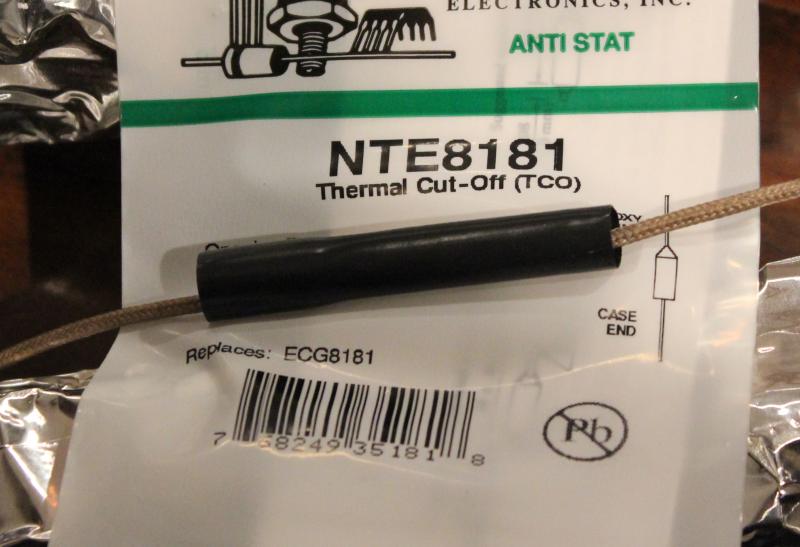
364 Degree F Thermal Cutoff, 526-NTE8181. Install this on the hot leg of the heater.

High temp Heat shring tubing, 4.75mm dia. 650-CJ6775-00

I will post pictures as these come in and I build.

-Joel

DESIGN GOALS

I want to keep the temperature external to the insulation well below the ignition temperature of wood
(See http://www.fpl.fs.fed.us/documnts/fplmisc/rpt1464.pdf
and http://www.swst.org/teach/teach2/properties2.pdf )

I selected 364 Degrees F on the outside of the insulation by the pipe as a not to exceed temperature, and it would be a temperature
which would suggest a problem with the system (no flow etc). 364 Degrees F should never occur in normal operation, so I will not be swapping
thermal fuses every brew cycle.

You could select a more conservative thermal rating, 250 degrees F if you are not enclosing the heaters, or if want a greater safety margin.
 
Great concept but I wonder about the excessive use of tees. I think I understand that you wanted to be able to remove the plugs to clean out the interior of the pipe, but that's also a lot of extra inside threads that are harder to clean. You can't don't have access to the bridging pipe between the two assemblies.

If it were me, I'd go with a 36" length of 5/8" OD thinwall stainless tubing. On one end you can just clamp your silicone tubing. The other end, if you wanted a tee for temp probe insertion could go to a compression fitting and then one tee.

I'm not knocking your choices, just food for thought.

Good idea. Thanks.

I have yet to pull the plugs and run a wirebrush down the tubes... Typically, I simply fill up the mash tun after I dump the grains and run some PBW through the system... and then flush with clean water...

I think you could go with a completely enclosed system, or as you suggest.

Joel
 
I will mount the thermal fuses this weekend, and maybe put the mess in the box.

Too many projects.

1) Heater needs to be finished
2) Wifi and RF temp. build starting (see thread)
3) Beer in the bag needs to be finished... still rather good :mug:
 
cool idea, looking forward to seeing how it works out.

Thanks for the interest.

It works really well, I have been using it for 3+ years and many 5 and 10 gallon batches. This thread is to document the build process. I decided to make the system a little more refined.

Joel
 
I am mounting the thermal fuses in the middle of the pipes (outside of the insulation).

The photos show how to attach. Use crimp connectors, and you will need high temp insulation (I selected high temp heat shrink, but you could use an appropriate insulating sleeve).

The fuse will be installed on the "hot" side of the pipe heater.

Next step, enclose it in a box.

ThermalInstall1.jpg


ThermalInstall2.jpg
 
Boxed it up.


Finishing steps.

1) Drill a hole of side of the box, bring the wires out to the Solid State Relay
2) Mount the box for the SSR on the side of the heater
3) Mount the PID on the heater.

I will post the the final pictures this weekend. I will log and post the temp response of the system when I test my brewmeter(s).

Joel

Boxed.jpg
 
This is awesome to see, and now that I've completed a whopping ONE all-grain batch, I will start planning on a similar set-up.

Thanks!

-Mac
 
This is awesome to see, and now that I've completed a whopping ONE all-grain batch, I will start planning on a similar set-up.

Thanks!

-Mac

Send any questions. I will be posting some final pictures of the current build.

Joel
 

Latest posts

Back
Top