Not another Fermentation Chamber project.

Homebrew Talk - Beer, Wine, Mead, & Cider Brewing Discussion Forum

Help Support Homebrew Talk - Beer, Wine, Mead, & Cider Brewing Discussion Forum:

This site may earn a commission from merchant affiliate links, including eBay, Amazon, and others.

dbarrm

Well-Known Member
Joined
Mar 10, 2011
Messages
109
Reaction score
1
Location
Cape Coral
Well to be true it is. Living in South Florida its really hard to keep steady fermenting temps and I'm not cool with only brewing during the winter months. When the door to my mini fridge decided to rust off I was lucky enough to talk the wife into letting me gut the thing and build a fermentation chamber.

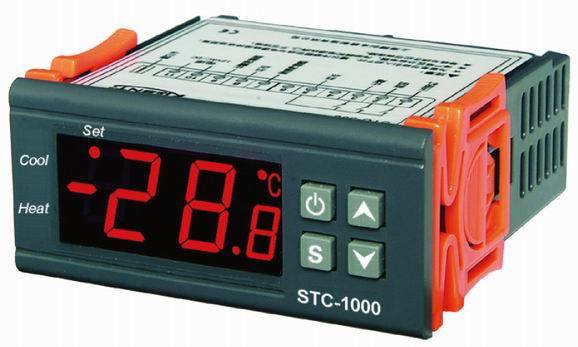
The chamber will be large enough to hold two carboys with two corny kegs between them. The fridge guts will be built into the chamber and ill be using a STC-1000 temp controller to control it. I'll also be putting in a PC fan for air movement.

The STC-1000 resets to 50F when power is lost so I need to figure out if I want to put it on an UPS or make up some power loss indicator to let me know I need to reset it.

Ill be getting most of the wood for free from a very large shipping box we received at work. Ill end up covering it with paneling later on. We are still in the process of unloading the box so the build wont start for a few days.

The pics below are of the items I have on hand.

Fridgeguts.jpg


Programmable-Controller-STC-1000-.jpg


405987287_726.jpg


Dan
 
Lost power this weekend and my controller kept the numbers I had set it to. Cool, now no need for an UPS.

Dan
 
I know its been a long time from my last post but like I said I'm doing this on a budget and I finally got the materials I needed to start.

I started this past weekend and the pics below show what I did.

IMG_6836Large.jpg

IMG_6838Large.jpg

IMG_6839Large.jpg

IMG_6842Large.jpg

IMG_6845Large.jpg

IMG_6847Large.jpg


Dan
 
Tonight I put on the bottom and wheels, mounted the compressor and condenser, and started sealing all the seems.

IMG_6851Large.jpg

IMG_6850Large.jpg

IMG_6849Large.jpg

IMG_6853Large.jpg

IMG_6854Large.jpg

IMG_6852Large.jpg


Dan
 
SCORE , I'm home this weekend and was cleaning out the shed this morning when I found a roll of this and two kits of gray epoxy paint. Its the type where you have to mix the hardener with the paint. I've used this stuff before for my john boat. If you mix it up and don't use it, the next day it will be a solid piece of gray rubber. I plan on putting a few coats on everything and then putting the reflectix insulation on the back to protect the wood from the heat of the condenser.

Dan
 
Not sure how much wood you have in total. Pretty sure if you doubled the wood up and made inside and outside walls it would keep the cold in a lot better!

can't wait to afford a similar project.
 
Awesome man!

This is pretty much exactly what mine will be like except a few things.
- I gutted a "redbull fridge" like the ones you see in gas stations so now I have a fridge unit in the shape of a cube.
- I'm in washington so I have to include a way to heat it. I was thinking of going with a reptile lamp.

Other than that I will be probably using your chamber as a good template. How are you imagining the doors?
 
Also, i am not sure how sturdy it currently is... I would put some 45* braces, this may just be me invoking the spirit of my grandfather though. He always reinforced everything
 
Not sure how much wood you have in total. Pretty sure if you doubled the wood up and made inside and outside walls it would keep the cold in a lot better!

can't wait to afford a similar project.

It will have 3 layers of R-5 insulation (R-15) plus the 3/4 plywood (R .94) Plus the plastic sheathing (who knows)

So Ill have a R value of R 16 + Adding more wood inside will just add more weight and not worth the extra .94 R.

Dan
 
Awesome man!

This is pretty much exactly what mine will be like except a few things.
- I gutted a "redbull fridge" like the ones you see in gas stations so now I have a fridge unit in the shape of a cube.
- I'm in washington so I have to include a way to heat it. I was thinking of going with a reptile lamp.

Other than that I will be probably using your chamber as a good template. How are you imagining the doors?

I plan on putting a 3/4" plywood facing on the front with cutouts for the doors. Then Ill use more 3/4" plywood but about 1 to 2 inches bigger then the holes for the doors. Ill place 3 layers of insulation on the back of the doors where they go into the holes so it has the same R value as the rest of the chamber.

Ill use a good seal around the overlay and use a latch to hold the doors shut tight.

Dan
 
Also, i am not sure how sturdy it currently is... I would put some 45* braces, this may just be me invoking the spirit of my grandfather though. He always reinforced everything

It is very sturdy and when I put on the plywood sides, insulation inside and plastic sheathing over the insulation its not going anywhere. Plus I've sealed all the seams outside and will do so inside with each layer of insulation and plastic sheathing.

This this is a beast.

Dan
 
Always check the dates on the products you use. The silicone I used to seal the chamber expired Jan 11. I put it on last week and yesterday it was still wet. So last night I scraped it all off and cleaned up the areas where it was used. I reapplied new silicone last night and it was dry enough after a few hours to put a coat of epoxy paint on it.

Tonight Ill put the second coat of paint.

Dan
 
Am planning a similar project stripping a small rusted out frig to install in a
new 38DD mother of fermentation chiller.

Any suggestions on bending the refrigeration lines and freezer box without kinking?
 
I was lucky and didnt have to bend mine much but they do sell small pipe benders. Just make sure if you do have to bend any of the lines you do it on something round.

Dan
 
Installed a few pieces of insulation last night. Worked out a few more issues and problems. If all goes well, when I get my tax refund Ill be able to acquire the rest of the supplies and finish this bad boy.

Dan
 
I know its been awhile since my last update but nothing has happened the past two weeks. Last night I got off my lazy ass and went over to my buddy's house to do some work. I installed the first piece of insulation along the back wall. Making the cut along the insulation for the refrigeration line was a lot easier then I expected. I used construction adhesive to attach it to the back wall and to put the foam back in the stop where I had to cut the channel for the line to pass through. Tonight Ill put the other two layers along the back along with the standoff's which will hold the cold plate.

I should have my tax refund deposited on Wednesday, after that I'll be able to go to the store and get the rest of the materials needed to finish this bad boy.

I forgot my camera last night but Ill take some tonight showing the process I'm using to insulate the back and support the cold place.

Dan
 
Ended up not going over to my buddy's to work last night but did get my taxes today so Ill be getting the rest of the stuff today.

Dan
 
OK, lots to update, I left work early Tuesday to do some building, well I called in sick yesterday and worked all day on it to try to get it done by this weekend. Also I left my camera at home so I had to use my cell phone to take pics. They are not the best but you will get the idea.

I installed the insulation against the back wall and mounted the cold plate. I used 2 inch wooden dowels to hold the cold plate. I ran a long screw through the back wall and insulation. Then using a big washer I screwed the wooden dowel to the end of the screw sticking out of the insulation.

1120.jpg

1119.jpg


Next I insulated the top.

1117.jpg


Then I added the 2X2's around the top and placed the temp controller.

1113.jpg

1116.jpg

1115.jpg


I also attached thermal insulation on the back.

1114.jpg


After each layer of insulation I sealed all the seams with silicone then taped them.

Tonight I plan on cutting out the front piece of wood with the door holes and then placing the insulation along the front. I have Friday off so I plan on working on it all day and I hope finish the inside of it. Then Ill start temp testing and I plan on putting a batch of brew in it on Sunday.

The outside will still need to be stained and coated with Polyurethane.

Dan
 
So many delays. Some day Ill get to finish this thing. Life keeps getting in the way.

Dan
 
What a day, got a lot done today, First I put a second coat of paint on the inside of all the panels. Then I cut out the door holes.

1128.jpg


Next I cut out the little trap door where the temp controller goes.
1124.jpg

1125.jpg


Then I clamped the front onto the frame and got it square. After it was all aligned where I wanted it, I pulled one clamp off at a time and put construction adhesive along the frame and re-clamped. I kept doing this until I had the adhesive all around the frame where the front attaches. Then I screwed the front to the frame.

1126.jpg


Here it is with the clamps removed.

1123.jpg


I then installed the last of the insulation to the top and bottom of the chamber. You cant really see it in the pic below but its done.

1121.jpg


Here is how it looked when I left .

1122.jpg


Tomorrow Ill attach the sides and put in the side insulation. Run the wires through the top and attach the top and make the doors. I hope to have all the construction done tomorrow and start the temp testing.

Dan
 
Yea progress. I got one of the sides put on along with all the internal insulation for that side plus all the insulation for the front. Got it all sealed up and taped. I was going to get the other side done and start working on the doors but beer got in the way and I ended up getting drunk and hanging with friends. Pics below show what I did get done.

IMG_0921.jpg

IMG_0924.jpg

IMG_0923.jpg

IMG_0919.jpg


Getting ready to go over and get to work. More pics to come tonight.

Dan
 
ITS ALIVE, kinda.

Put on the other side today and insulation today, Its now totally insulated and boxed in but the doors.

IMG_0926.jpg


Cut out the support floor. Its that stuff you find on the back of entertainment centers, that brown press stuff. I covered it with 2 layers of poly to seal it.

IMG_0925.jpg

IMG_0928.jpg


Started the wiring, I will post a schematic later when its all done. In this first pic you can see the wires coming from the compressor going to the terminal board (TB), Plus the main power cable coming in to the TB

IMG_0931.jpg


In these next few pics you can see the wiring for the fans. The temp probe will also go in the hole on the top and just down about an inch.

IMG_0930.jpg

IMG_0932.jpg

IMG_0929.jpg


I gutted an old DC power supply I had laying around for an old phone or something. Im going to use this to power the fans but it will be wired into the TB so I dont have to have two power plugs going to the unit. I put it inside a project box I had and will attach it to the side of the unit. You can see the two screws sticking out of the wood above the TB in one of the pics.

IMG_0933.jpg

IMG_0934.jpg


In this last pic I have the power run from the TB to where the DC power supply will mount.

IMG_0936.jpg


I have not run the lines from the temp controller yet so I powered up the compresses directly and powered up the DC power supply to check that all is working. The compressor came on and was nice and quiet. Using my infrared thermometer I check the cold place after about 3 minutes of running and it was 24 degrees. (SWEET)

I tried to get the fans to work but the DC power supply is not working. Looking at it I think I broke a solder run when I was taking it apart, no problem, Ill just fix it tomorrow at work.

Im also going to run two digital thermometer probes into the chamber to attach to the fermentation buckets to be able to check there temps.


Tomorrow Ill start the doors and finish the wiring I hope.

Dan
 
Working mostly on wiring last night. Wired up the temp controller, routed and secured the wires, turned it all on and did a temp test.

At first when I turned on the controller the compressor wouldn't turn on. I thought something was wrong and I was looking over all my wiring to see if I had something wrong when all of the sudden it kicked on. I forgot all about the compressor delay. As you can see from the last pic I filled the door holes with insulation to see how it would cool. There were so many gaps in the front that cold air was coming out everywhere. I also need to get the fans wired in cuz after about an hour of running the bottom of the chamber was at 52 while the top wall still 69. The cold plate frosted all up due to the leaks and the high humidity yesterday. Drip plate is next to put in after the doors and fans.

IMG_0938.jpg

IMG_0939.jpg

IMG_0940.jpg

IMG_0941.jpg


Dan
 
I dont know why I keep putting off making the doors but Im running out of other things to do. Last night I removed the single power supply and installed a plug and just used two transformers for the fans, I also installed the fans. Did another temp test with insulation over the doors and with the fans on it cooled down much faster. It dropped from 80 to 57 in about 30 minutes.

Here are some pics of the fans I installed. The fan with the lights is installed between the two doors up top. You can get a good idea of the placement from the pics I took from inside the chamber. I had to get small to fit in there. The second fan draws in air from one of the large flat sides and shoots it out the small side. I have it hanging behind the cold plate.

In the pic that shows the wires coming in from the top you can see the temp sensor from the controller.

IMG_0943.jpg


IMG_0947.jpg


IMG_0946.jpg


IMG_0945.jpg


IMG_0948.jpg


Dan
 
Built the doors tonight. They came out ok in my opinion. Tomorrow Ill insulate them and I hope hang them.

1130.jpg

1129.jpg

1131.jpg


Dan
 
Tonight I attached the doors, not perfect but much better then I thought I'd do. I also make the safety cover for the terminal board and taped up the fan wires inside. Still need to insulate the doors, Ill get that done this weekend.

1132.jpg


1133.jpg


1134.jpg


1135.jpg


1136.jpg


1137.jpg


Dan
 
I have 2 mini-fridges collecting dust in my basement and plan to make a fermentation chamber. I have a STC-1000 temp controller on order. Is it possible/advisable to plug both fridges into the same circuit on a single STC-1000 controller?
 
I have 2 mini-fridges collecting dust in my basement and plan to make a fermentation chamber. I have a STC-1000 temp controller on order. Is it possible/advisable to plug both fridges into the same circuit on a single STC-1000 controller?

Use an external SSR and it will work fine.
 
ITS ALIVE

And she is doing well. Yesterday I finished the seal, added the door locks and insulated the doors. Now the doors only have one layer of insulation right now but I can add the other two layers at any time. Ill probably do that today while brewing.

As you can see in the pic's I used double locks for each door. The seal is perfect and there is no light leaks. I used an infer red thermometer to check for leaks around the doors and nothing, not a one.

I turned her on last night around 7:30 and set to for 68 degrees and waited a few hours before I started timing the on/off cycle. When I left around 10:30 the average on/off cycle was as follows.

3 minutes of compressor on time to get to temp.
24 minutes of compressor off time.

I have my temp controller set with a +/- 2 degree range.

Here are the pics from yesterday.

IMG_0949.jpg

IMG_0950.jpg

IMG_0955.jpg

IMG_0953.jpg

IMG_0958.jpg

IMG_0956.jpg

IMG_0964.jpg


Dan
 
The next step will be the finishing, sanding, staining and adding the trim. I will wait a few weeks to make sure everything is working right then ill do the finishing.

Dan
 
Awesome build!!! I'm working on a fermentation chamber also and I had one question. I just stripped apart a mini fridge like you did. It has a temperature controller on it already. I have a stc-1000 that I'm going to use. Do I just need to remove the original thermostat or leave it? I wasn't planning on doing a power block like you did. Thanks for the inspiration.
 
Awesome build!!! I'm working on a fermentation chamber also and I had one question. I just stripped apart a mini fridge like you did. It has a temperature controller on it already. I have a stc-1000 that I'm going to use. Do I just need to remove the original thermostat or leave it? I wasn't planning on doing a power block like you did. Thanks for the inspiration.

Yes, take out the old thermostat and wire in the STC-1000. One wire straight to the compressor and one goes through the cold relay on the STC-1000.

Dan
 
Back
Top