Unveiling my brewery & garage build

Homebrew Talk - Beer, Wine, Mead, & Cider Brewing Discussion Forum

Help Support Homebrew Talk - Beer, Wine, Mead, & Cider Brewing Discussion Forum:

This site may earn a commission from merchant affiliate links, including eBay, Amazon, and others.
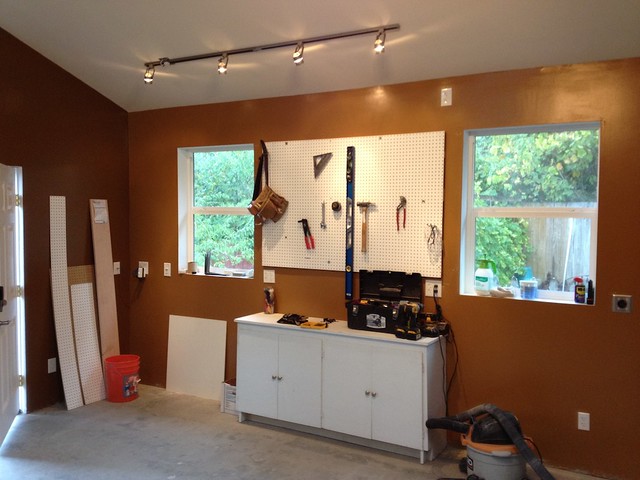
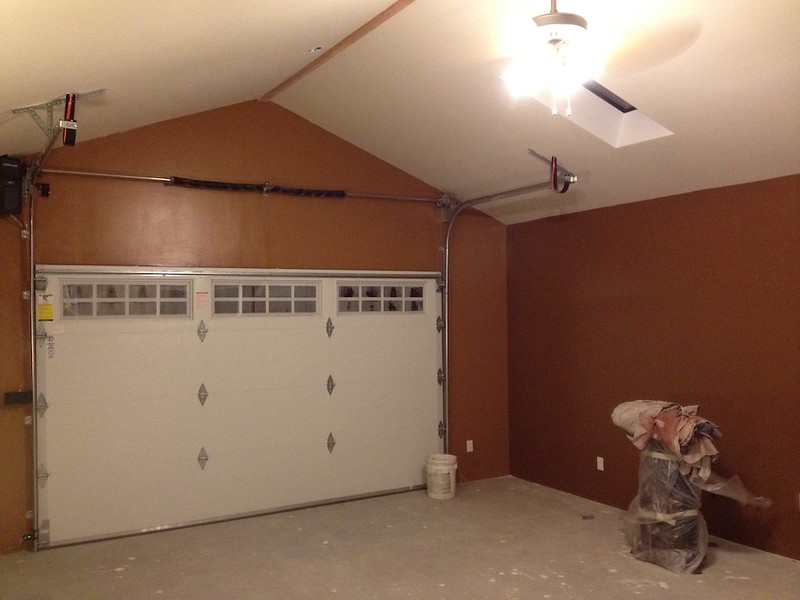
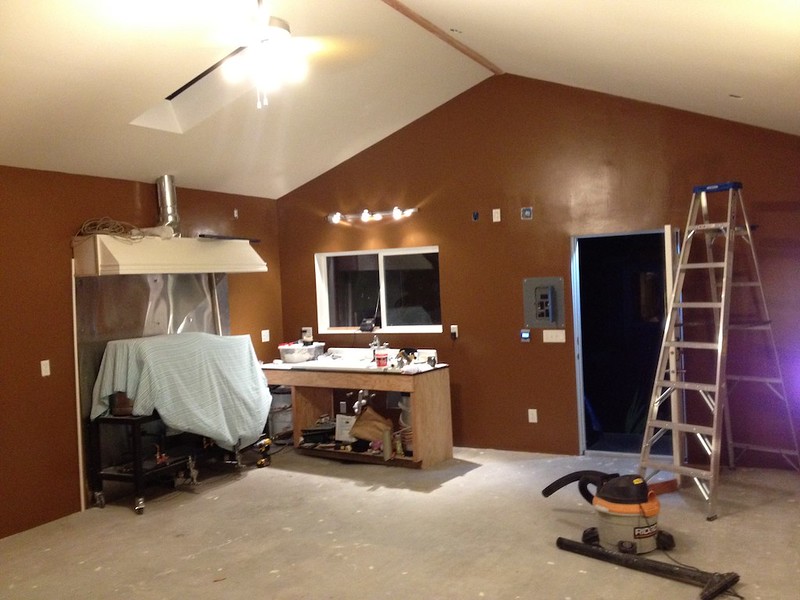
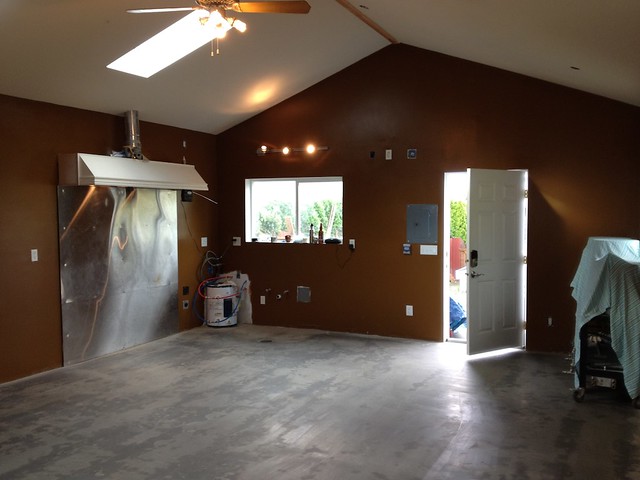
As mentioned above, I've turned my attention to my fermentation setup in the new garage. I've contemplated a lot of options from a purpose built chamber, to multiple chest freezers, to an awesome two door commercial fridge I almost bought (it was a killer deal). Ultimately I settled on a large side by side fridge/freezer which I will convert into a dual zone fermentation chamber. The laggering side (freezer) will do double duty and be able to serve from a keg or two, making sure I can keep something on tap in the garage. Most of the beers will still be on tap in the house from a coffin keezer I plan to build in there. Once both of those projects are done, I'll pass on my 2 tap mini-fridge kegerator (currently serving the house) to a friend who is just getting into kegging.

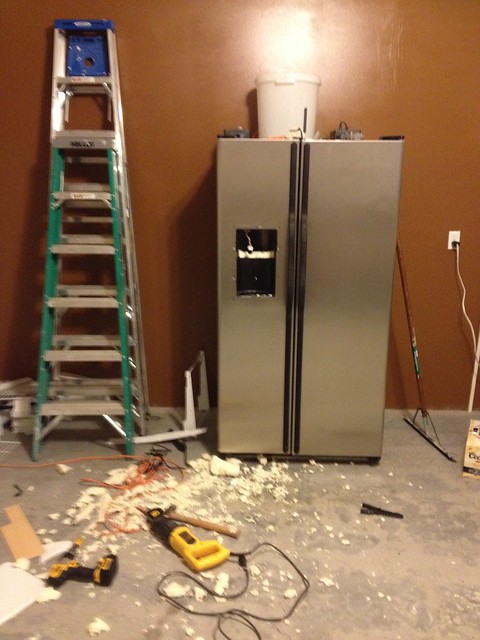
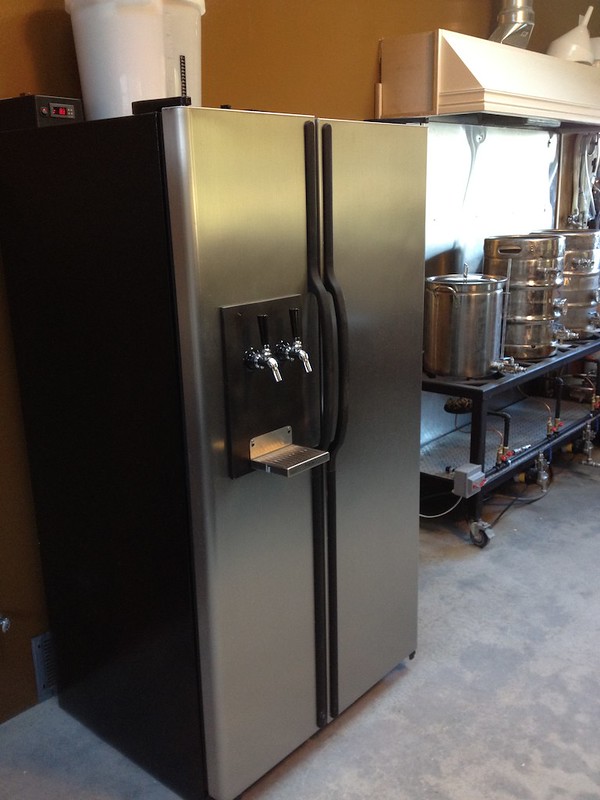
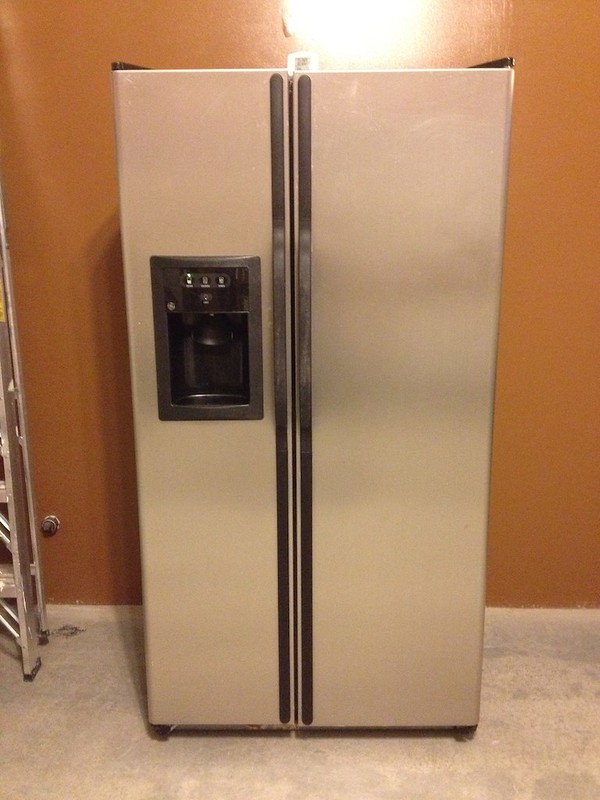
I did fairly well on craigslist, and picked up this nice GE stainless steel 25cf side by side for $200. It's a little more than I had planned to spend, but it is way nicer than I had planned on getting too.

Poor fridge, you have no idea what is about to happen to you.
8119977745_db84c0e4b2_c.jpg


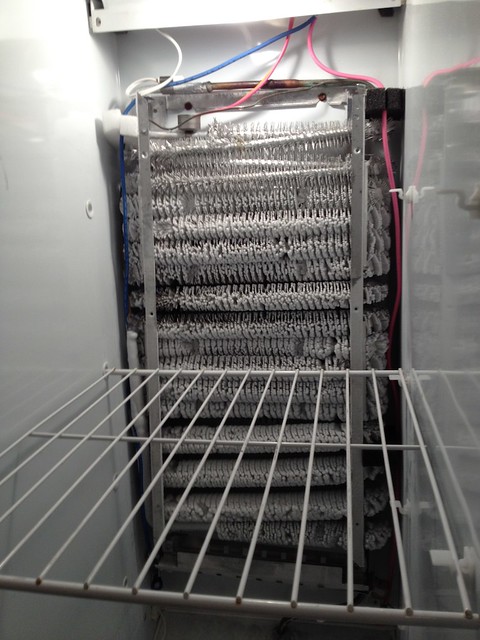
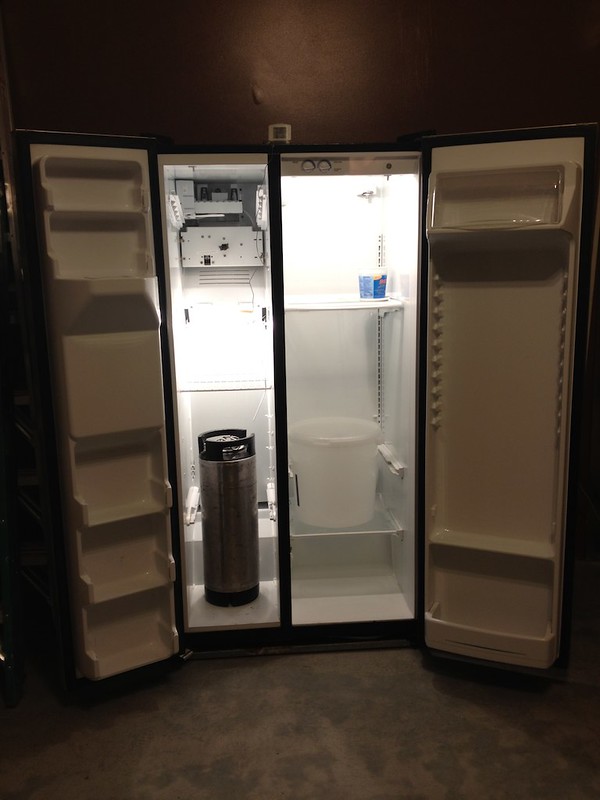
Inside with most shelves removed, temperature testing (it works great)
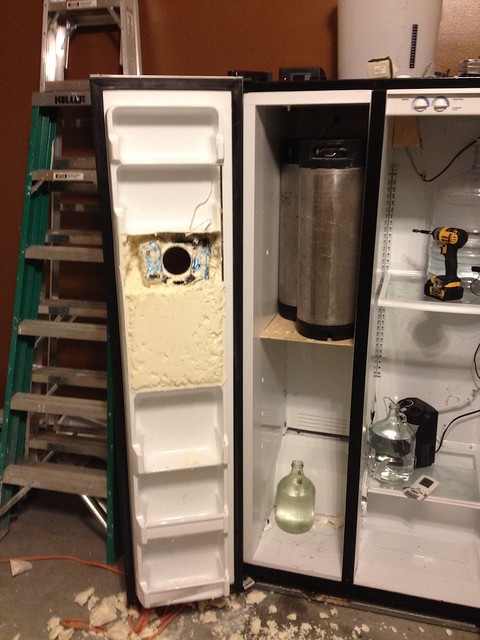
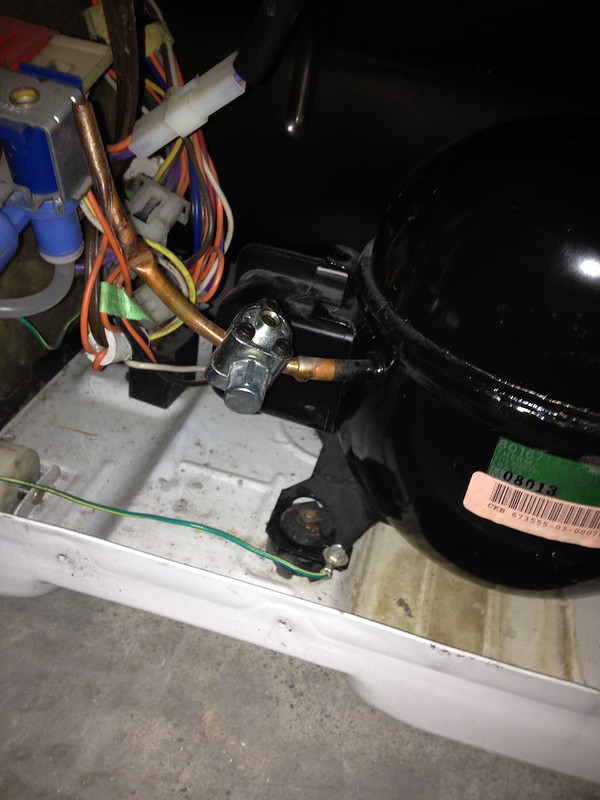
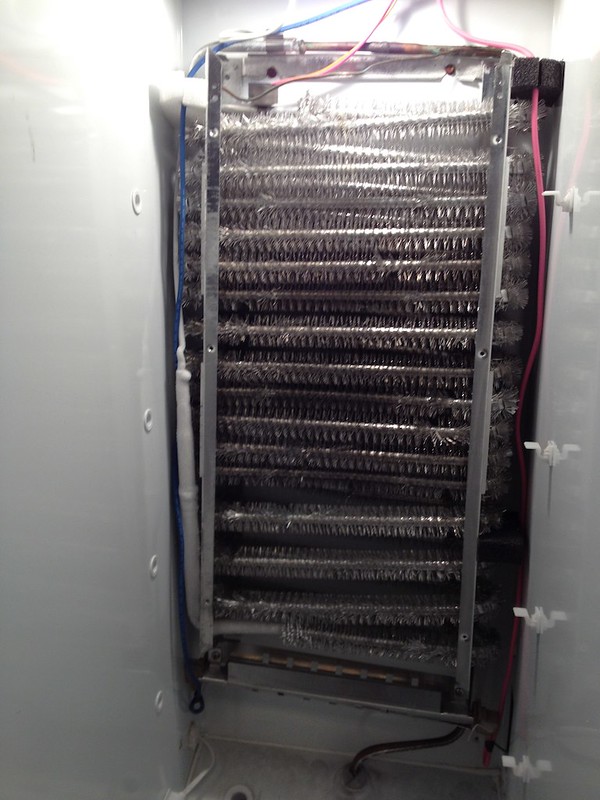
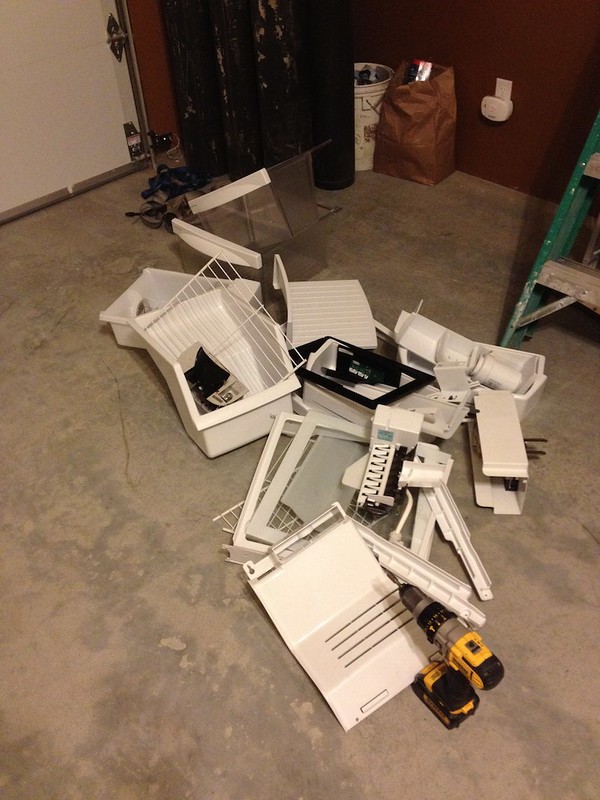
8120033491_b00b0d316d_c.jpg


Fridge guts
8120046382_2fe4c1ef8d_c.jpg


Based on my initial tests with empty bottles, I am confident I can fit 4x 6 gallon better bottles in the fridge side. I believe I could also fit one 14 gallon conical and two better bottles in that side in the future. The freezer will take two better bottles or at least 2 corny kegs. I won't know for sure until I get more of the door disassembled, but I *think* I can fit three.

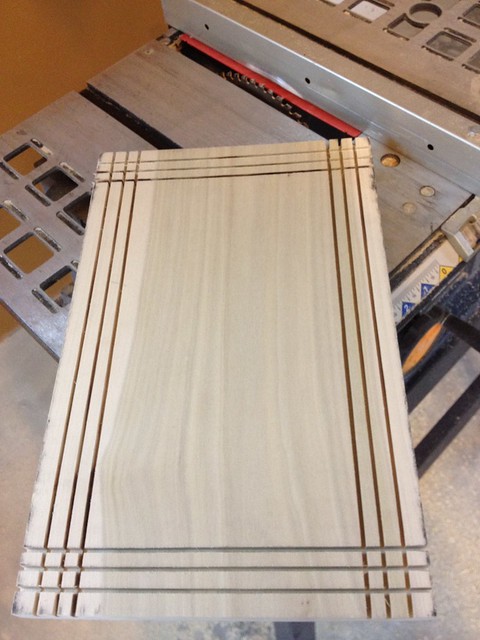
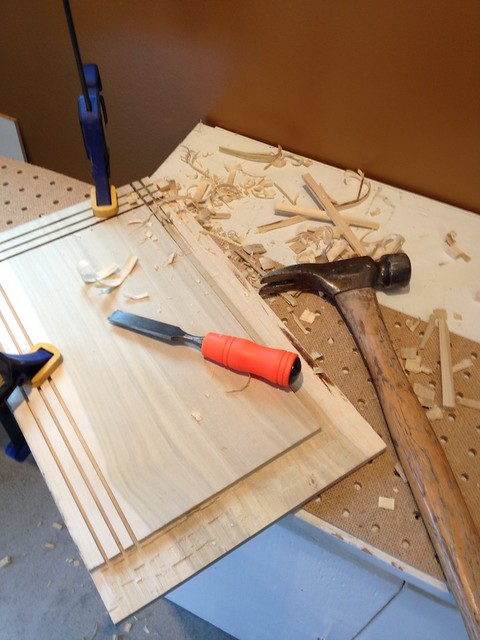
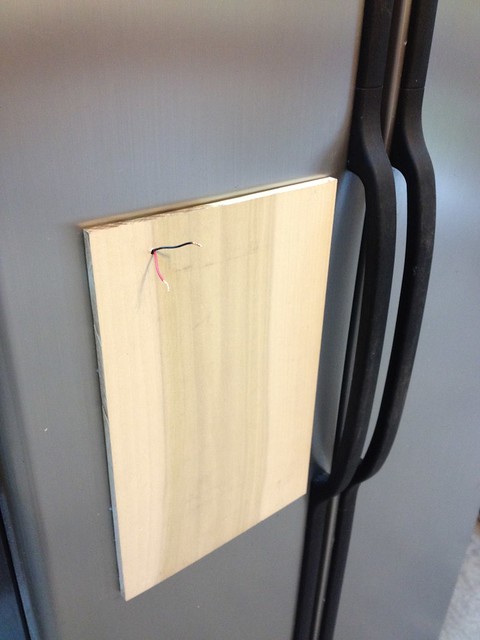
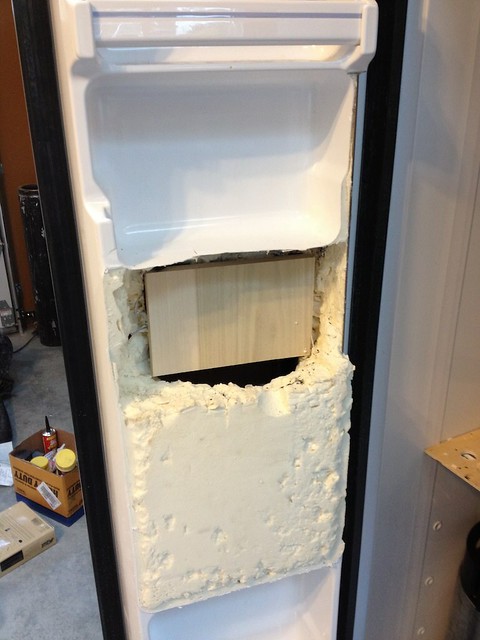
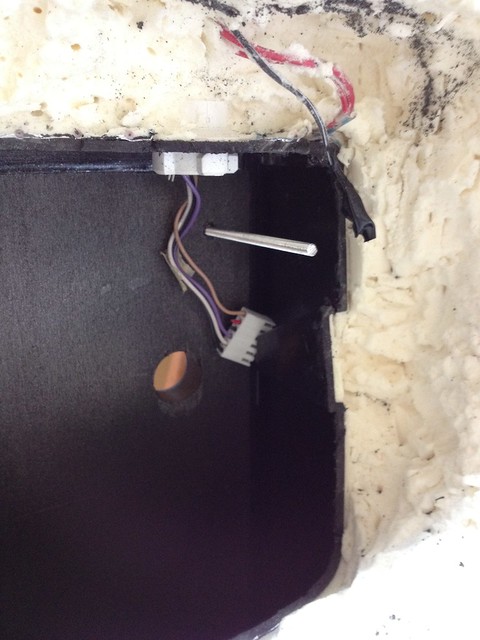
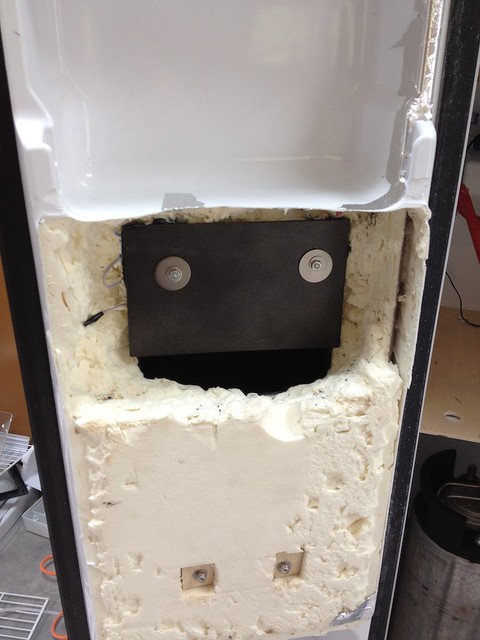
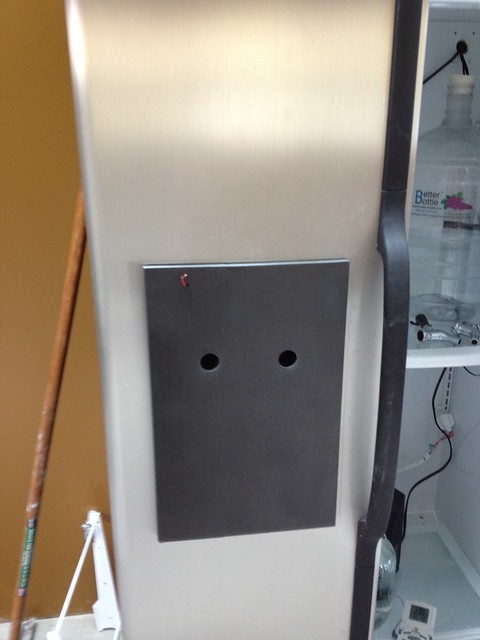
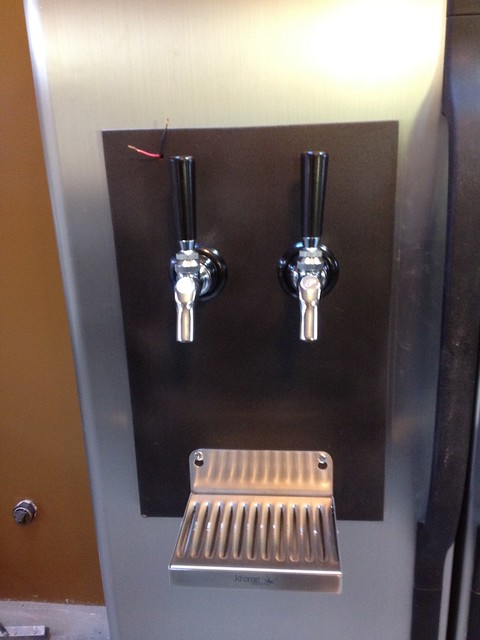
Wiring for temp controllers and a dispensing setup in the freezer door start tomorrow. It'll wind up similar to this one, though I'm going to keep my temp controllers in separate boxes for now, as I intend to control the chamber with a BCS-462 in the futre, so I don't want the holes.
 
A minor setback on the fridge situation here. It turns out that not all fridges with 'analog' temperature control dials are controllable in the method described in the previously linked thread. My fridge is newer and despite having analog looking control dials, it is actually fully digitally controlled by a computer circuit board.

Long story short, I can't simply connect an external temp controller like the HTC-1000 or a LOVE controller in the way I had planned. I've done some more research and I've figured out a way to make it all work with a modern digitally controlled fridge, but it's more work and will require more modification of the fridge. Its a work in progress, so I'll post back as I get more results.

What I have done:

* Using two HTC-1000 temp controllers, one single stage (for the freezer), one dual stage (for the fridge).

* The freezer controller is used to control the power to the entire cabinet (the original wall plug), just like we have all done with our freezers, etc. There was some concern about doing this with a modern fridge, what with it's automatic defrost, evaporator control, compressor timing, etc. As far as I can tell, as long as the compressor delay time is set higher than about 5 minutes on your temp controller (F3 on an HTC-1000), it is a non issue. There are some threads supporting this idea, but we'll see how it goes.

* The fridge side temp controller is connected to a small space heater for heat, and for cooling a 4" 120v computer chassis fan that I have mounted over the hole connecting the two compartments, previously occupied by the damper flap/motor. On top of the fan I've placed a piece of cardboard (though I plan to replace this with some thin rubber for a better seal), which provides thermal separation between the two compartments when the fan is not running. When it is running, the flap blows open (slightly) to allow airflow. I would have loved to have simply hacked/repurposed the old damper control, but I discovered that it is actually a stepper motor, which requires a computerized control module to run (it's not as simple as applying/cutting power to get it to open/close).

I do have some experience with adruino projects and some basic stepper motor control, so I know what is possible and I know I COULD make it work. I may build a more advanced Arduino based control for all aspects of the fridge in the future, but for now I've removed the damper and gone with the fan & flap approach.

The experience so far:

I've tried a couple of combinations of set points on my two HTC-1000 controllers and found that this solution works pretty well. For testing, I've brought the freezer side down to 1ºC, and then set the fridge side to various temps between 7ºC and 15ºC. The control methods seem to work pretty well, and eventually both sides settle in at their desired set points. I have not yet set the fridge side to a higher ale temperature requiring the heater to be more involved, and I'll be really curious to see how that effects the freezer side.

One thing I have observed, not necessarily a problem, since the fan I've installed in place of the damper moves a lot more air than the previous method which relied on convection to cycle the air, the fridge side tends to steal a lot of the cold air from the freezer when initially lowering the temps (say setting the fridge side from 10ºf to 1ºF to cold crash). The fridge temp lowers and the freezer temp raises (slightly, a few degrees) until the compressor has a chance to catch up. Eventually, both sides settle in again at their desired set points.

So far so good! It is going to be a process of continuous improvement though I feel. I'll post a follow up as the strategy evolves. I have observed that the built in fridge functions (automatic coil defrost, etc) seem to work just fine with this method. When dropping them temps from high to low and working the compressor hard, I've observed the heating element kick on after a while and take care of the ice build up, before resuming cooling.

If I had to do it over again, I'd definitely have bought an older fridge with true analog control as suggested in the thread I linked to above. I thought this was what I was buying, until I got it home and took a closer look at the wiring. These older style control panels have 120v wired through the nobs, so you can simply wire in your temperature controllers in place of these nobs.

I'll add some pictures of the solution I have in place, after I confirm it works well with the heat brought into the equation.
 
I put together a rough timelapse from the webcam I had aimed at the garage build this spring/summer. The camera isn't the greatest and it got bumped a few times (as well as stuff put in front of it), but it is still kind of neat to see the progression.

This covers the build from the forming of the slab to the final exterior paint, from April - August. When this video ends, there was still a ton of work to be done inside, but it didn't make for very interesting viewing from outdoors.

I make a few brief appearances in this, but you see a lot more of my contractor. I guess we know who really gets the credit for this build.

 
Last edited by a moderator:
Nice job. That's pretty cool. Did you have a ton of JPG's that got stitched together to make the video or did the camera capture the time lapse with a built in function? I did this for the building of our pool several years ago, but all the video editing programs I tried choked when I tried to sequence about 100,000 still images. I'd still like to do it if you can suggest a good program.
 
I used Time Lapse Assembler on the mac to stitch together jpegs that my camera uploaded to my nas device. This one was only about 3000 images, but I've used this program before with 30,000+ and it did fine.

It seems like it only loads the current image into memory and when writing to h.264 output files it doesn't keep the output file in memory either, so it's pretty lightweight.
 
There are a few updates to share with those of you following along on my progress. It has been a month of ups and downs on the project, but for the most part I am absolutely loving my garage now that I am somewhat moved in.

I've been puting together some of the non brewing areas of the building a little more. There are many enjoyable evenings of work remaining, but the building of the garage spaces and the working in those spaces have begun to blend together.

Pegboard and cabinet sitting where the workbench will go
8120032481_fb03c1698b_z.jpg


I didn't want to buy a new TV so I've repurposed a 24" computer monitor for the time being, connected to an AppleTV. So far I've found I use it most for internet radio streams, but it'll be nice to be able to put on some TV shows. Not so good for watching live sports though :(
8120032911_3241390e8f_z.jpg


Meanwhile work has begun on the conversion of the freezer side of my fridge to add serving capabilities. It's messy work, but fun. The whole fridge project reminds me of being that kid that takes apart his dad's stereo and then tries to put it back together.
8145171747_264be0d193_z.jpg

8145205182_e11350a481_z.jpg


For the tap board I'm using a piece of poplar board. It's 1", so it's actually 3/4" thick. I cut it down to size to fit the hole vacated by the door front assembly, and then decided I wanted to notch out the edges so it sits into the hole a little, and has a thinner appearance on the door front.
8145205814_91fa5b67a5_z.jpg


I resisted the temptation to go out and buy a router & table for this job (though I want one and will buy in the future at some point), and instead decided to bust out my chisels - one of my favorite tools.
8145174577_0e68fc0d42_z.jpg


Its a nice fit, and will be even better after some sanding. When stripping out the in-door assembly, I left the 12v DC leads exposed so I can use them for lighting. I'm still not sure how I'll utilize it exactly, but I plan to place a narrow piece of trim on the top of the bar with some soft LED lights under them, subtly illuminating the taps and your glass when filling.
8145174075_ce24c8a7ed_z.jpg


From the back of the door
8145622357_198b93f07a_z.jpg


I expect to have the board drilled and painted, and the door assembly (minus the shanks) in the next couple of days. I'm hosting a party for a friend in the garage next week, and have promised them beer on tap (without having to treck into the kegerator in the house).. it's good to have motivation.
 
Great Job Fall-line,
and please keep the updates coming! I can appreciate your angst with the side-by-side, thinking it's going to be a straight forward conversion, and then finding out you need to deal with digital over analog. Ouch!!

By the way, very early in this post, you mentioned

"Stainless steel backing. I had planned to use cheap whiteboard material, but heat was definitely going to be an issue. Stainless sheets were $250 (as opposed to $100 for the white board), and protect the wall from heat, as well as looking infinitely cooler"

Did those sheets cost you $250 each (for a 4'x8'?), or was that $250 total for the entire SS backsplash?? I'm trying to design that part of my brewery now, and am wondering what my options are.

Thanks, and good luck with the party!
 
Well I have some good news and bad news to share. The painting went great. We went for a 'beer colored' theme (two tone brown). I hate picking out paint colors so I steeped back and let my wife choose. What she came up with is darker and bolder than I would have, but that's exactly why I let her do it. I like the final result. We went with a semi-gloss finish to make for easier cleanup.

8094487905_00a0685a8c_c.jpg

8094500553_0a909030bc_c.jpg


The floor project on the other hand was a big helping of DIY fail. :mad: In fact, it's hard for me to share this.. but you take the bad with the good I guess. The slab as it was poured was too rough to 'dry grind' so we had to start with a wet grind. This created a ton of slurry which was extremely difficult to get off of the freshly ground and porous surface. We scraped and squeegeed as much as was possible, before moving onto the dry honing and polishing steps, assuming these would pull the remaining dry slurry off the surface.. well it didn't. Even after restarting the whole process 1/2 way through the day and doing it dry (now that the slab was smoother), I still wasn't able to get the ground in slurry removed. The rental was only for 24 hours and the unit was reserved the following day, so I had no choice but to declare defeat and finish the job as best I could. There were other problems with the machine and the pads that I rented that I won't go into. They issued me partial credit, but the damage was done.

The slab is sealed and water tight.. for now. It's ugly, and I don't expect the seal to hold up well as the sections of ground in slurry start to break down over time. I'm going to sit on it for a week or so and see how it goes, but I'm looking at bringing in a contractor to fix it for me. I think I know enough now to do it right the next time, but after the day I had on Sunday, I don't want to ever do that again.

8094500265_69ab95197c_z.jpg

A few years back I rented a diamond grinder to do my 90 year old basement floor. I then used a 100% solids epoxy on it. The diamond grinding was just a horrid experience. Absolutely brutal. The older the cement, the harder it is and with a 90 year old floor I put in an 18 hour day on it. When I returned the grinder, I didn't say a word, but the guy behind the counter nodded to me and said, "every floor is it's own special brand of hell."

I'm not 100% happy with the epoxy I got from epoxy-coat.com. It holds up fairly well, but it has scratched in a few spots from metal mops. We got white and even though it's in the basement with just one small window, it has yellowed. This really bothers me because we paid extra for an additive that was supposed to prevent this.

If I had it to do again I would have definitely stained it.

Great build, sir.
 
When I returned the grinder, I didn't say a word, but the guy behind the counter nodded to me and said, "every floor is it's own special brand of hell."
...
Great build, sir.

Thanks, Dgonza. I can definitely empathize with the special brand of hell statement. It was definitely one of the most unpleasant DIY projects I've ever tackled in 10+ years of home ownership.

After living with the less than ideal floor for a few weeks now, I'm satisfied enough with it to let it be until next spring. I did get a *very* reasonable quote from a pro that I have worked with before however to fix it, and I plan to hire him to do so. He's a great guy and we had a good time talking about the floor and the beer brewing operation when he was over. Since I've done all the hard work on it already, It will actually cost LESS (only a few bucks less, but still) for him to finish and seal the floor than it would for me to rent the machine and do it myself again. I'm looking forward to that, but am happy to just live with it in the mean time while I have so many other things to focus on.
 
What an awesome project! I wish I had my own garage to set up my brew-space; I'm totally envious.

If you ever decide to have any local homebrewers stop by and drool over your brewery (and trade some homebrew) let me know. I live in Longview but my girlfriend is in Woodinville so I'm up that way every other weekend.

Keep up the great work!

Cheers!
 
Well Damn.. my shiny new fridge that I bought for a steal on craigslist turns out to have a freon leak. I'm investigating doing a DIY recharge, but it looks like someone has already done that recently, indicating a serious leak. Even the newer 134a stuff is a killer on our ozone layer, so I'm leaning towards just scrapping it and starting over with the search for refrigerators.

It's a shame. It was working ok when I brought it home. I unplugged it for a few days and put a ton of work into it to convert it, and only then found the real problem.
 
A piece of advice for anyone looking to purchase a used fridge or freezer. Inspect the condensor coils (inside the freezer, usually behind a panel) closely. They should have a thin layer of frost on them. Mine did when I bought it, but no longer . Also take a close look at the back of the unit. Look at the compressor, and the copper lines that lead from it. If you see any sort of a 'tap', installed these lines, you know someone has recharged the refrigerant, and you almost certainly have a leak. (see photo below)

Yes you can re-charge it again yourself, but it's terrible for the ozone layer. If you have a refrigerant leak, you should really consider scrapping the fridge.

The silver 'tap' hanging off the copper pigtail is a bad sign.. if you see this on a fridge you are buying, don't!
8167379737_814e04b647_c.jpg


If your refrigerant is low, your evaporator coils will only have a little bit of frost at the beginning, they should have frost all the way through.
8167410572_e7e04cd159_c.jpg
 
Have you seen the beer keg urinal's? That would be perfect for your place.

Sorry to hear about the fridge.

Yeah, there is a local brew pub here that has an awesome one. It's one of those projects I look forward to tackling in the distant future on some long winter weekend when I have nothing better to do than screw around in the shop.
 
Awesome job fall-line! Great design and implementation on it. One question though - have you parked a car in this garage yet? :D

Believe it or not, I have! I've put my car in there a few nights, and brought my wife's car in when I was working on her lights.

I'm not really able to drive a car into it right now though.. I had to build a gravel curb at the edge of the alleyway to keep water runoff from entering the door during our last big rain. Until I get that paved, it is off limits to car traffic.
 
Well Damn.. my shiny new fridge that I bought for a steal on craigslist turns out to have a freon leak. I'm investigating doing a DIY recharge, but it looks like someone has already done that recently, indicating a serious leak. Even the newer 134a stuff is a killer on our ozone layer, so I'm leaning towards just scrapping it and starting over with the search for refrigerators.

It's a shame. It was working ok when I brought it home. I unplugged it for a few days and put a ton of work into it to convert it, and only then found the real problem.

I did a little (ok, a LOT) more research on this subject, and in the end curiosity got the better of me. I realized that either way, I'm going to be polluting, it's just a matter of the air or the land(fill). I discovered that 134a refrigerant used by fridges, your car's A/C, etc has a Global Warming Potential score of 3400, when it is released into the atmosphere (it breaks down over time, but this is the worst case scenario. Carbon dioxide's score is 1, for reference.

This means that 1 oz of 134a = 3400 oz of co2 in terms of "relative impact" on the atmosphere, according to the best scale we have fore measuring such things. 3400 / 16 (oz to a lb) = 212.5lb. There are approximately 20lbs of co2 released for every gallon of gas that you burn, so that means releasing 1oz of 134a into the atmosphere is approximately as bad as driving your car long enough to burn 11 gallons of gas..

My fridge takes 4oz of 134a, so even if I fill it all the way up and it all leaks out, it's only a couple of tanks of gas worth of atmospheric impact.. according to the references above, and the shaky math.. The impact is definitely there, but it's not the massive guilt inducing amount I had feared.

Armed with that knowledge I trudged off to the auto parts store to get a few items: A can of 134a, an a/c recharge pressure gauge, and an adapter to connect the snap on socket to my tap's threaded socket (note, my fridge already had one of these installed)

I watched a youtube video, and got to work.

Recharging the refrigerant
8187020066_88f6ed80dc_z.jpg


Almost instantly I could hear the compressor start to work harder. I went around front and looked inside the freezer and I could see frost forming on the remaining coils before my eyes. I didn't do the recharge very scientifically. I just added a little bit, then waited a few minutes and looked at the frost pattern, then repeated until the frost got almost to the top of the coils (not all the way as I didn't want to overfill.) I should have used my kitchen scale (the same I use to measure hops) to meeter out ~4oz, to be more precise.

After about 30 minutes of filling, waiting, and watching, the coils had a nice layer of frost, and the temp in the freezer had fallen from 40ºF (ambient temp in the garage was 51ºF for comparison) to -2ºF!

The coils, after recharging. Compare to the picture on the previous page.
8185977573_b3ac760732_z.jpg


Now, there is no guarantee that this will last. The refrigerant may leak out over the next few weeks and I'll be back to square one, having polluted the atmosphere. I talked to the guy I bought the fridge from however and he said he had no knowledge of it being recharged in the past. The last service record I could find for it was from 2003.. so there is a chance that the leak is so slow that this will last, and keep this massive thing out of the landfill for years to come.

I'll keep you posted. I'm keeping my fingers crossed!

NOTE: 134a, despite the justification I wrote above is still nasty stuff. Please be very careful with it for your own health, an the health of our environment.
 
Last edited by a moderator:
I can empathize on finishing the concrete, I've been involved with an ongoing project to refinish 25,000 sq ft of 20 year old concrete, from 30 grit all the way to 3500 all dry. We are doing it all dry with a giant shop vac that runs on 240, and using a floor scrubber between grits
 
We did a test run on about 1000 sq ft from start to finish, took us 16 hours but we learned a lot. We're moving a bit faster than that now but the equipment only goes so fast
 
Now that my fridge is tentatively working (so far, it is holding temperatures great with very little compressor activity), I can show you the rest of the conversion process, that started back in post #206.

I decided to try and install my tap board without any visible mounting hardware, so I got a length of threaded 8-32 rod, and some threaded insert nuts that I screwed and epoxied into the back of my board.

Here is the threaded rod secured in the insert nut, from the back of the board
8159259063_3ba7eae509_z.jpg


It's bolted to the door with 4 sets of these rod/insert nut combinations, using a small piece of painted plywood for the backer. I've insulated thoroughly between the pieces of wood.
8159260025_e9d852d7ba_z.jpg


Front the front, fully mounted and ready for the shanks
8159259825_ef793d646b_z.jpg


Now with shanks and drip tray installed
8189315430_9405b4aa6e_z.jpg


And the final product. I really like how it came out. I hope the fridge lasts!
8189314876_1669fc0542_c.jpg
 
Progress..slow progress.. on the outside of the building. The new rain tanks have arrived. The space they are going is exactly 1/2" wider than the tanks, so I'm going to have to wrestle them in place and then go into my neighbors yard to reach through the fence plumb then up. Once we get a few days of dry weather, I'll get on it.

8188234881_27d0f3cb5f_z.jpg


Meanwhile the deck construction is about to begin. That guy in the picture above is my contractor, calling in an order for materials for the deck, which will cover up the mud pit he is standing in. He and I will be working on the deck build together, though I'm getting to the point in this whole project where I'm ready to step back and let him just get it done.
 
www.superbrightleds.com makes some quality LEDs you could use for the light strip on your tap. Amazing build! You have inspired (and crushed) every man to read this. We are all jealous of your progress and the potential, and understanding of your pain and sorrow.
-Kevin
 
...
After about 30 minutes of filling, waiting, and watching, the coils had a nice layer of frost, and the temp in the freezer had fallen from 40ºF (ambient temp in the garage was 51ºF for comparison) to -2ºF!

The coils, after recharging. Compare to the picture on the previous page.
8185977573_b3ac760732_z.jpg


Now, there is no guarantee that this will last. The refrigerant may leak out over the next few weeks and I'll be back to square one, having polluted the atmosphere. I talked to the guy I bought the fridge from however and he said he had no knowledge of it being recharged in the past. The last service record I could find for it was from 2003.. so there is a chance that the leak is so slow that this will last, and keep this massive thing out of the landfill for years to come.

I'll keep you posted. I'm keeping my fingers crossed!

A small update here, it's been 2 weeks and so far there has been no perceptible change in the cooling capability of the freezer. I'll give it a couple more weeks to empty the kegs in there, then I'll pull off the back panel and do another frost pattern exam, but it looks like it'll hold up for a while. Problem solved? Perhaps, more like problem successfully mitigated..
 
I've been slowing down, both in terms of getting work accomplished and taking pictures to document it. The last major effort in this project is now underway though, as the deck is starting to take shape
8262596524_96e1ceb7e4_z.jpg


Meanwhile I've been occupying myself with beer and cider making, and thoroughly enjoying the garage. The brew stand is working great, though a few changes will be coming in the next few months, mainly automation related.
 
Where do you live? I'm in colorado and am looking for ideas in my backyard, I was wondering what area and what soils you have to deal with for your concrete foundations
 
I'm in Western Washington, schwibbidy. Sadly I don't think my experiences with my soil here will be of much help to you. When in doubt, bring in an engineer with experience in your area.

Best of luck with your build.
 
No snow at my place, though there is snow all around the city this morning. I live about 1/4 mile from the water, so it has to be really cold to snow here.

Even so, all we have going on is the deck build and some landscaping, so no damage can be done from the snow. Thanks for asking though!
 
Back
Top