
PaulHilgeman
Well-Known Member
- Joined
- Mar 14, 2008
- Messages
- 270
- Reaction score
- 7
I decided to add some temperature monitors for my MT and BK in my system.
I wanted a cheap, LED temperature monitor that was panel mounted. It had to be dis-connectible since it was connecting to the MT and BK which get removed for cleaning etc. Because of this, I didn't want to have to deal with Thermocouples, specialized wire, fragile wire, and specialized connectors. The two obvious alternatives are the DS18B20 sensors and Pt100 RTD sensors. I chose the Pt100 sensors because they have small size, and are compatible with most PIDs. This also gives me a solution that I can just use XLR patch cables to connect back to my system with.
I started with the Omega 1PT100KN1515CLA for $12.00: http://www.omega.com/ppt/pptsc.asp?ref=1PT100KN_2PT100KN&ttID2=1PT100KN_2PT100KN
I used the eBay 1/2NPT Thermowells. I am sure this link will expire soon, but a search should pull them up, they were $9.99: http://cgi.ebay.com/THERMOWELL-304ss-1-2-FPT-x-2-1-2-L-x-1-2-MTP-279ER21-/200520533079?pt=LH_DefaultDomain_0&hash=item2eaff48457
The rest was made up of XLR connectors, a little shrink tube, and some electrical tape.
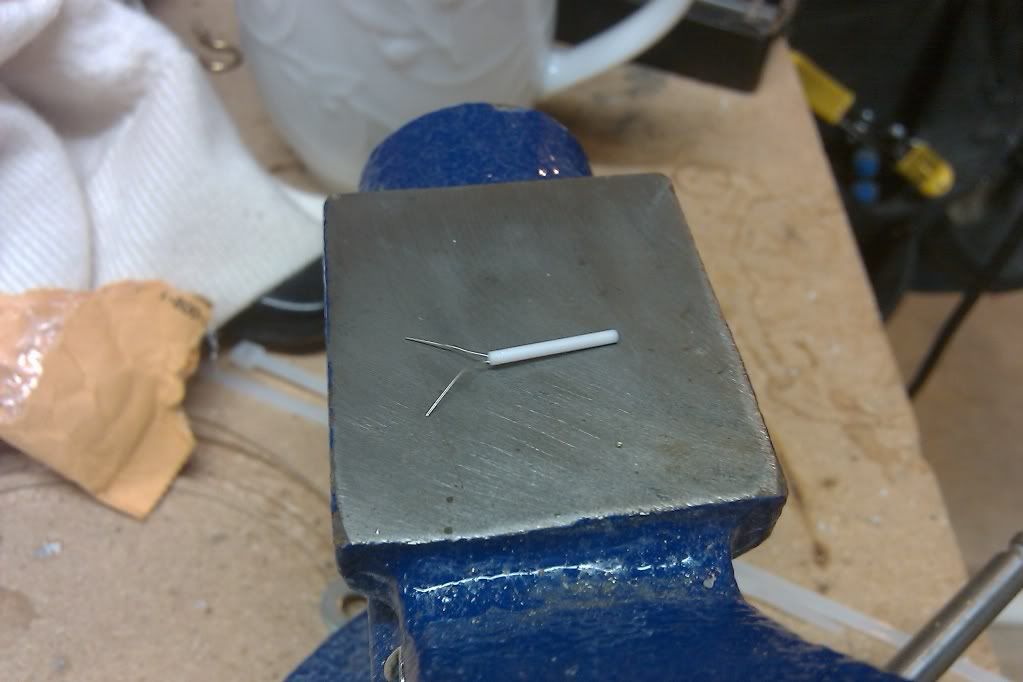
The sensors are tiny, so make some short lead-out wires, tack-solder them on, and wrap them in shrink tube. Then wrap the whole assembly in shrink tube. Depending on how fast of a response you want, leave more of the sensor protruding. The way I did these, I get perfectly fine response for the MT and BK. If I were doing these in a RIMS tube, I would probably choose a lower mass thermowell and find a way to get good contact inside of the thermowell. These simply float in the thermowell, but when going from 60-140 in a bucket of water, it took about a minute to get within 1° of actual.
Here are the tiny lead-out wires:
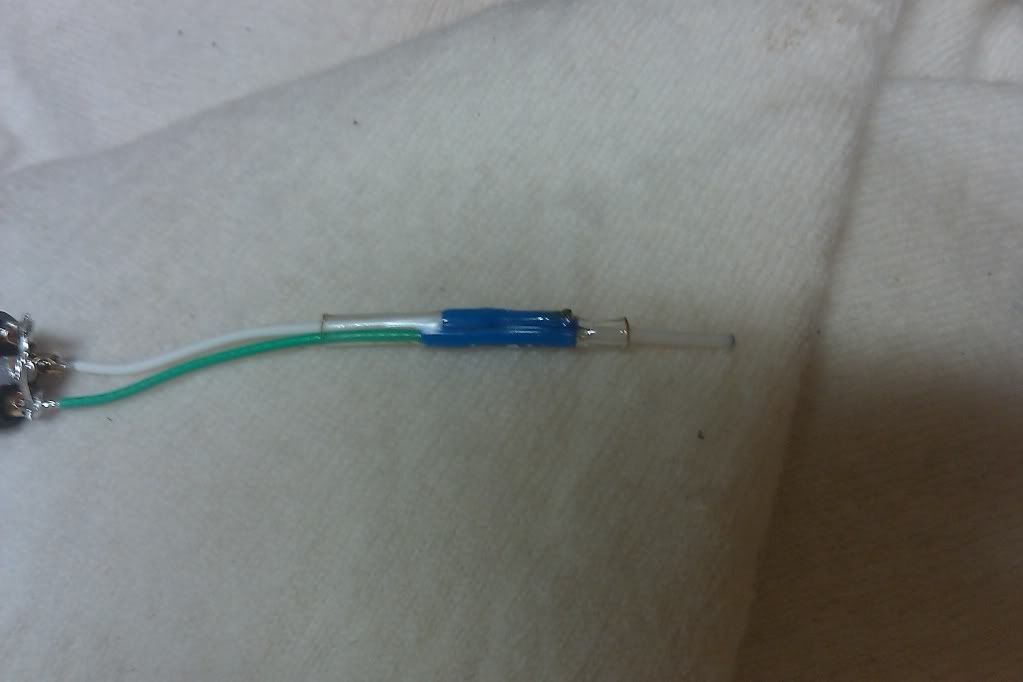
The blue shrink tube starts at about 1/16" ID, it goes over each solder joint all of the way up to the body of the Pt100. The clear covers both of those and provides some strain releif and structure by holding the actual sensor body:
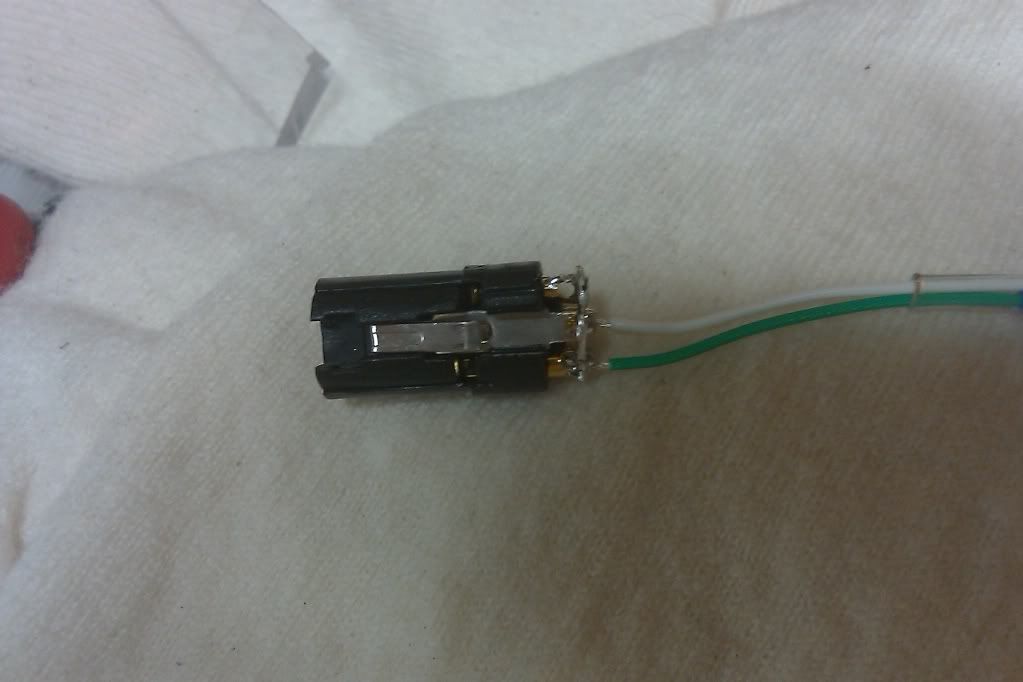
The other side of my lead-out wires connects to the XLR connector. I jumper two of the 3 connector pins together in order to provide the loop-resistance measurement for the PID (White wire connects to the lower of the 3 pins, hard to see in that picture):
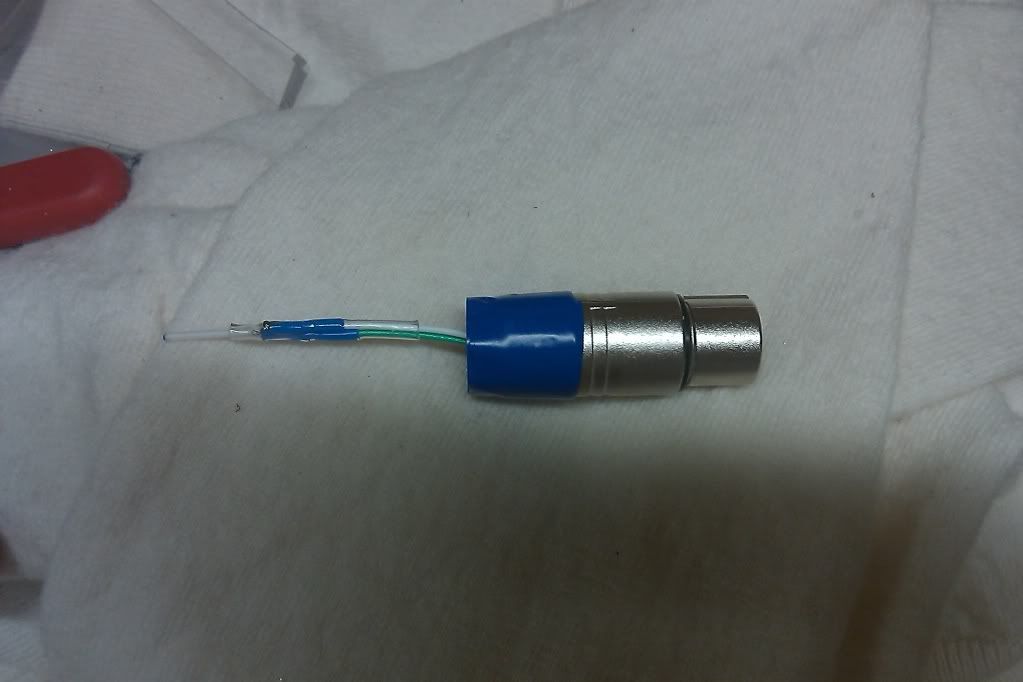
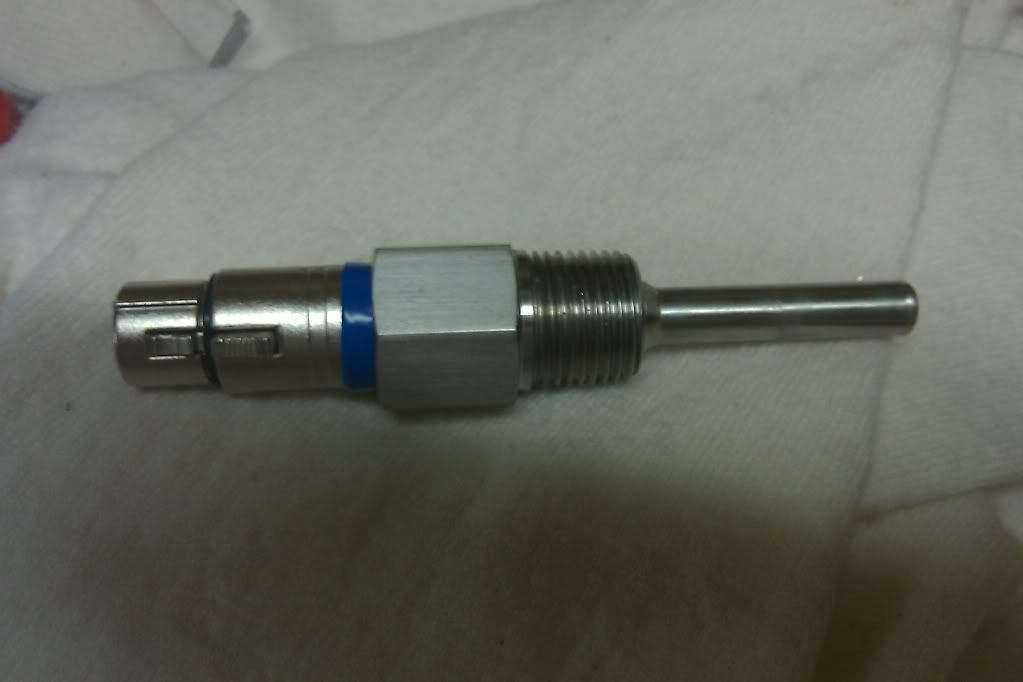
The XLR connector is assembled but without the rubber boot, and 2 wraps of electrcal tape are applied around the body:
This then threads directly into the 1/2" FNPT threading on the thermowell:
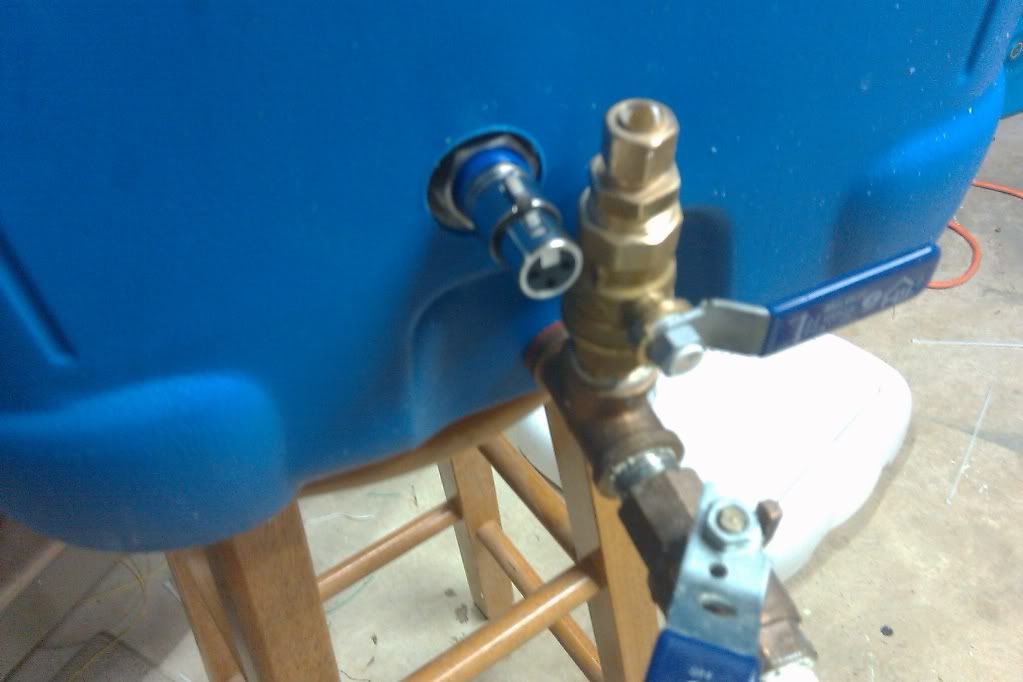
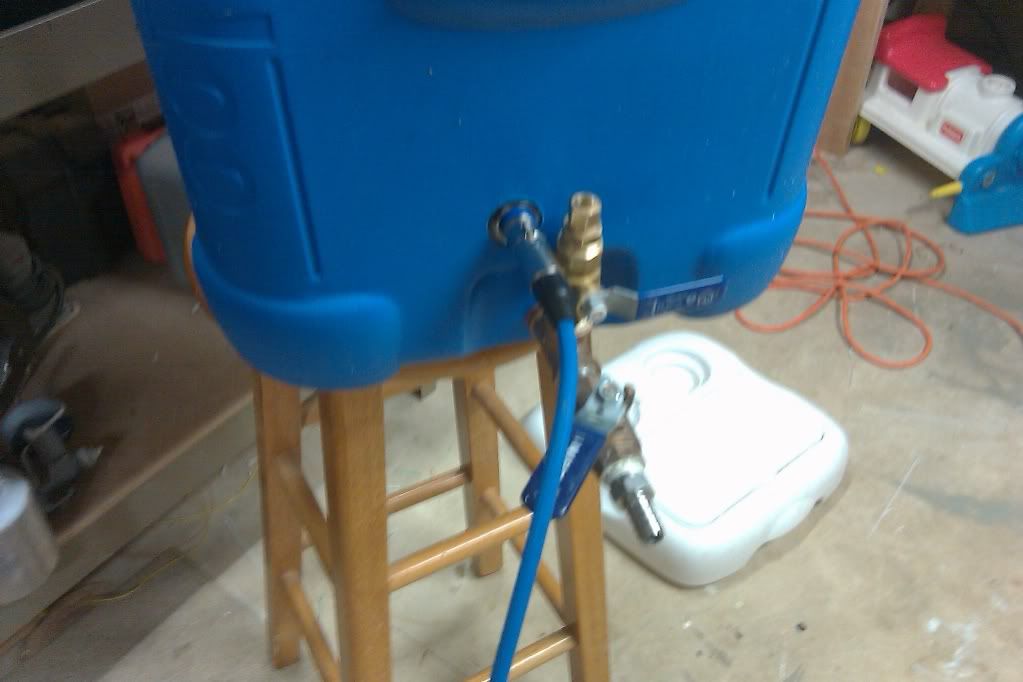
It all connects into a vessel like any other 1/2" MNPT threaded item would:
Enjoy.
I wanted a cheap, LED temperature monitor that was panel mounted. It had to be dis-connectible since it was connecting to the MT and BK which get removed for cleaning etc. Because of this, I didn't want to have to deal with Thermocouples, specialized wire, fragile wire, and specialized connectors. The two obvious alternatives are the DS18B20 sensors and Pt100 RTD sensors. I chose the Pt100 sensors because they have small size, and are compatible with most PIDs. This also gives me a solution that I can just use XLR patch cables to connect back to my system with.
I started with the Omega 1PT100KN1515CLA for $12.00: http://www.omega.com/ppt/pptsc.asp?ref=1PT100KN_2PT100KN&ttID2=1PT100KN_2PT100KN
I used the eBay 1/2NPT Thermowells. I am sure this link will expire soon, but a search should pull them up, they were $9.99: http://cgi.ebay.com/THERMOWELL-304ss-1-2-FPT-x-2-1-2-L-x-1-2-MTP-279ER21-/200520533079?pt=LH_DefaultDomain_0&hash=item2eaff48457
The rest was made up of XLR connectors, a little shrink tube, and some electrical tape.
The sensors are tiny, so make some short lead-out wires, tack-solder them on, and wrap them in shrink tube. Then wrap the whole assembly in shrink tube. Depending on how fast of a response you want, leave more of the sensor protruding. The way I did these, I get perfectly fine response for the MT and BK. If I were doing these in a RIMS tube, I would probably choose a lower mass thermowell and find a way to get good contact inside of the thermowell. These simply float in the thermowell, but when going from 60-140 in a bucket of water, it took about a minute to get within 1° of actual.
Here are the tiny lead-out wires:
The blue shrink tube starts at about 1/16" ID, it goes over each solder joint all of the way up to the body of the Pt100. The clear covers both of those and provides some strain releif and structure by holding the actual sensor body:
The other side of my lead-out wires connects to the XLR connector. I jumper two of the 3 connector pins together in order to provide the loop-resistance measurement for the PID (White wire connects to the lower of the 3 pins, hard to see in that picture):
The XLR connector is assembled but without the rubber boot, and 2 wraps of electrcal tape are applied around the body:
This then threads directly into the 1/2" FNPT threading on the thermowell:
It all connects into a vessel like any other 1/2" MNPT threaded item would:
Enjoy.

