
I just completed my first eBiab build. I could not have done it without the people and resources provided by this site. A special thanks goes out to P-J with supplying so many diagrams that he inadvertently created mine, to the Electric Brewery for inspiration, and everyone else for proving over and over that it CAN be done.
Pot:
60 qt aluminum bayou classic with steamer pot
5500 watt heating element
Ball valve - Bargain Fittings
RTD Temperature sensor
Control Panel:
8.5" x 11" Plastic Tote
Auber 2352 PID
LED Light
50a DPST Light Switch
15a SPST Switch
There are many eBiab builds on this forum, and each one of them provide an insight into the build. I want to pay the community back and post my lessons learned. I hope that I can prove this concept to someone else, and maybe kick them off the fence and into eBiab.
-----------------------------------------------------------------------
I do not have a GFI Breaker. So for safety, I went with the Spa Panel. I used a range plug because as I live in an apartment, I do not always have a dryer, but an electric range is fairly constant.
Lesson Learned: Much to my surprise, the Spa Panel doesn't come with an outlet hole in it! No-one mentions how they mounted the plug into the Spa panel, I just assumed it was already there. Upon asking, the answer was a bi metal hole saw. I bought the 2 1/8" size which turned out to be a fraction too large. If you don't need a perfect cut, than it works just fine. 2" is probably the accurate size, perhaps someone can correct me on this.
Also, due to the stiffness of 8G wire, I'm unsure as to how people are mounting the range outlet securely to the panel, as I can't find a way to possibly put any nuts on the outlet screws, so for the time being, I'm leaving the Spa panel face plate off.
Spa Panel Arrangement:
I can unplug the stove and plug in the Spa panel by reaching behind the drawer that slides out at the bottom then drop the just cord behind the stove:
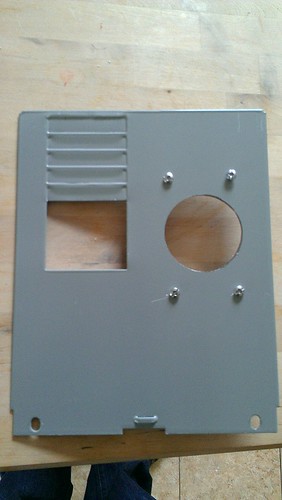
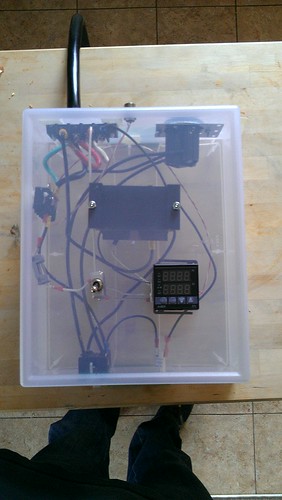
When making a control panel, I know that I wanted an enclosure with two switches, one for the PID and one for the element. I also wanted an indicator light for the element and an e-stop button. Because I didn't want to pay into the $60 dollar range, I foolishly went with a 6x6x6 metal enclosure.
Size Estimate FAIL:
Lesson Learned: Never underestimate how big of an enclosure you really need. More space if never bad. If in doubt, go two sizes bigger.
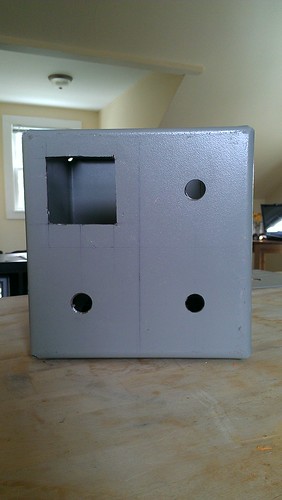
Still after the failure of the metal box, I couldn't afford to go with a larger metal enclosure...so...I decided to give a plastic tote a try. Why not? It's naturally insulated, heck of a lot easier to work with, and cheaper to replace if needed due to a cutting error.
I was quite bummed after the failure to assemble the metal enclosure... It took me several days to make the cuts, clean it up, and grind down the edges. So I was pleasantly surprised when the plastic tote only about took 25 minutes to drill all of the holes.
The 25 amp DPST switch was next up on the problem list.
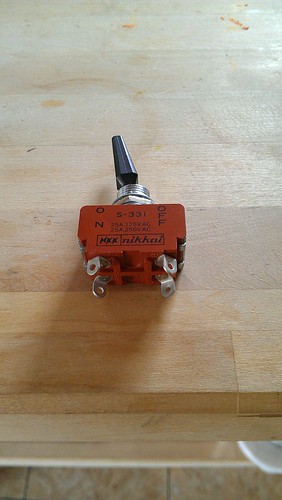
There is no possible way I could solder 10G wire to those tiny posts. So, in one of my many trips to Home Debit, I tried to find a screw small enough to fit through the holes, so I could put a hole terminal on the wire, and bolt them together...but alas, it was smaller than their smallest screw..a 4# metric. An employee very politely told me that I would never be able to use that switch. Instead, he directed me to a DPST Light switch used for heaters...with huge terminal screws I could use 10G wire with ease...for $11. Thank you Home Debit employee!
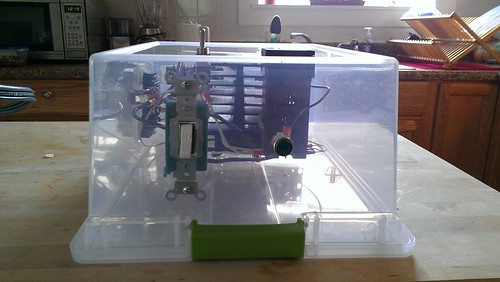
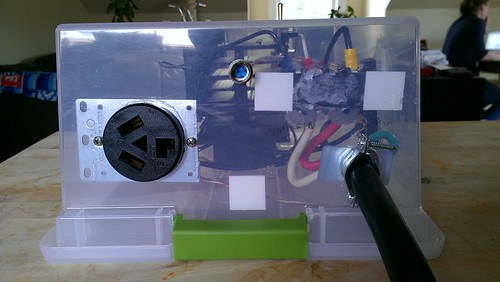
Completed Control Panel:
Top:
Front:
Back:
The brew pot is a whole new monster.
Apart from being absolutely terrifying to drill into a $100+ brew kettle, there were dimension concerns.

There was a significant curve at the bottom of the kettle that would prevent flush mounting of the ball valve and heating element. After checking and re-checking, it looked like I could get a flush mount if I centered everything around 2" off the bottom. Holes drilled, element and valve tentatively placed...and steamer basket now rests on the element/ball valve.
I specifically bought the pot with the steamer basket to use with a large grain bag in with eBiab system. So...
Lesson Learned:
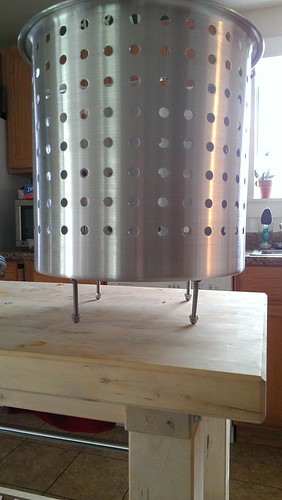
3" Carriage bolts with a couple of nuts and washers make great legs. Height adjustable too!
Next hurdle. With the gang box on, the threads weren't quite long enough for the lock nut to tighten onto the element.
Lesson learned:
Most heating elements have an black o-ring already attached.
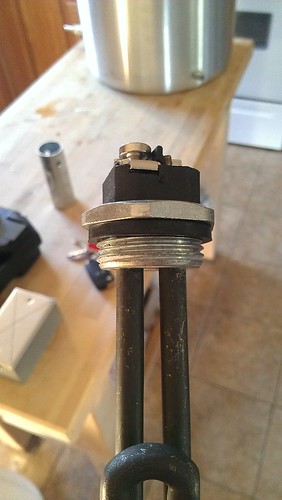
I haven't seen a post that addresses this, but in order for the Electric Brewer's method of securing the element to work, the black o-ring must be removed.
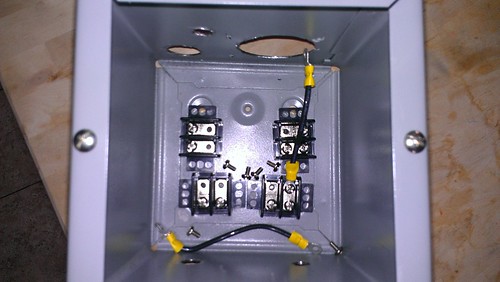
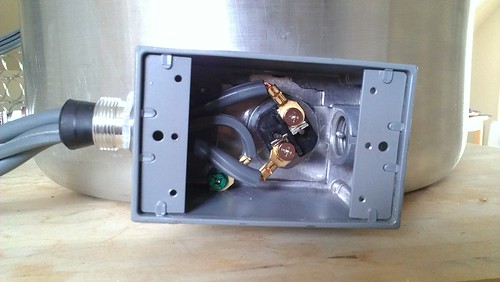
Wiring the heating element also proved to be a hurdle. The box was so large it extended past the bottom of the pot, so a single gang box was the answer.
Next step is to fill the pot and check for leaks...and of course, it leaked like a sieve.
Lesson learned:
I have read this tip multiple times and I guess I didn't realize how much so....all the fittings dryed up when I tightened them down...I mean REALLY tightened them down. Again, I say, REALLY tighten them down.
So now, everything is wired up, assembled, and leak checked...the big moment...flip the switch! ...Nothing... *sigh*
*Rummage around the spa panel a minute*
Flip the switch! We have another eBiab, I repeat, we have another eBiab build!
Pot:
60 qt aluminum bayou classic with steamer pot
5500 watt heating element
Ball valve - Bargain Fittings
RTD Temperature sensor
Control Panel:
8.5" x 11" Plastic Tote
Auber 2352 PID
LED Light
50a DPST Light Switch
15a SPST Switch
There are many eBiab builds on this forum, and each one of them provide an insight into the build. I want to pay the community back and post my lessons learned. I hope that I can prove this concept to someone else, and maybe kick them off the fence and into eBiab.
-----------------------------------------------------------------------
I do not have a GFI Breaker. So for safety, I went with the Spa Panel. I used a range plug because as I live in an apartment, I do not always have a dryer, but an electric range is fairly constant.
Lesson Learned: Much to my surprise, the Spa Panel doesn't come with an outlet hole in it! No-one mentions how they mounted the plug into the Spa panel, I just assumed it was already there. Upon asking, the answer was a bi metal hole saw. I bought the 2 1/8" size which turned out to be a fraction too large. If you don't need a perfect cut, than it works just fine. 2" is probably the accurate size, perhaps someone can correct me on this.
Also, due to the stiffness of 8G wire, I'm unsure as to how people are mounting the range outlet securely to the panel, as I can't find a way to possibly put any nuts on the outlet screws, so for the time being, I'm leaving the Spa panel face plate off.
Spa Panel Arrangement:
I can unplug the stove and plug in the Spa panel by reaching behind the drawer that slides out at the bottom then drop the just cord behind the stove:
When making a control panel, I know that I wanted an enclosure with two switches, one for the PID and one for the element. I also wanted an indicator light for the element and an e-stop button. Because I didn't want to pay into the $60 dollar range, I foolishly went with a 6x6x6 metal enclosure.
Size Estimate FAIL:
Lesson Learned: Never underestimate how big of an enclosure you really need. More space if never bad. If in doubt, go two sizes bigger.
Still after the failure of the metal box, I couldn't afford to go with a larger metal enclosure...so...I decided to give a plastic tote a try. Why not? It's naturally insulated, heck of a lot easier to work with, and cheaper to replace if needed due to a cutting error.
I was quite bummed after the failure to assemble the metal enclosure... It took me several days to make the cuts, clean it up, and grind down the edges. So I was pleasantly surprised when the plastic tote only about took 25 minutes to drill all of the holes.
The 25 amp DPST switch was next up on the problem list.
There is no possible way I could solder 10G wire to those tiny posts. So, in one of my many trips to Home Debit, I tried to find a screw small enough to fit through the holes, so I could put a hole terminal on the wire, and bolt them together...but alas, it was smaller than their smallest screw..a 4# metric. An employee very politely told me that I would never be able to use that switch. Instead, he directed me to a DPST Light switch used for heaters...with huge terminal screws I could use 10G wire with ease...for $11. Thank you Home Debit employee!
Completed Control Panel:
Top:
Front:
Back:
The brew pot is a whole new monster.
Apart from being absolutely terrifying to drill into a $100+ brew kettle, there were dimension concerns.
There was a significant curve at the bottom of the kettle that would prevent flush mounting of the ball valve and heating element. After checking and re-checking, it looked like I could get a flush mount if I centered everything around 2" off the bottom. Holes drilled, element and valve tentatively placed...and steamer basket now rests on the element/ball valve.
I specifically bought the pot with the steamer basket to use with a large grain bag in with eBiab system. So...
Lesson Learned:
3" Carriage bolts with a couple of nuts and washers make great legs. Height adjustable too!
Next hurdle. With the gang box on, the threads weren't quite long enough for the lock nut to tighten onto the element.
Lesson learned:
Most heating elements have an black o-ring already attached.
I haven't seen a post that addresses this, but in order for the Electric Brewer's method of securing the element to work, the black o-ring must be removed.
Wiring the heating element also proved to be a hurdle. The box was so large it extended past the bottom of the pot, so a single gang box was the answer.
Next step is to fill the pot and check for leaks...and of course, it leaked like a sieve.
Lesson learned:
I have read this tip multiple times and I guess I didn't realize how much so....all the fittings dryed up when I tightened them down...I mean REALLY tightened them down. Again, I say, REALLY tighten them down.
So now, everything is wired up, assembled, and leak checked...the big moment...flip the switch! ...Nothing... *sigh*
*Rummage around the spa panel a minute*
Flip the switch! We have another eBiab, I repeat, we have another eBiab build!
") Pushing in the sides of the bag as well, just get every last drop from it.
Pushing in the sides of the bag as well, just get every last drop from it.