Jersh's Coffin keezer build - second attempt

Homebrew Talk - Beer, Wine, Mead, & Cider Brewing Discussion Forum

Help Support Homebrew Talk - Beer, Wine, Mead, & Cider Brewing Discussion Forum:

This site may earn a commission from merchant affiliate links, including eBay, Amazon, and others.

Jersh

Well-Known Member
Joined
Nov 26, 2008
Messages
483
Reaction score
21
Location
Tampa, FL
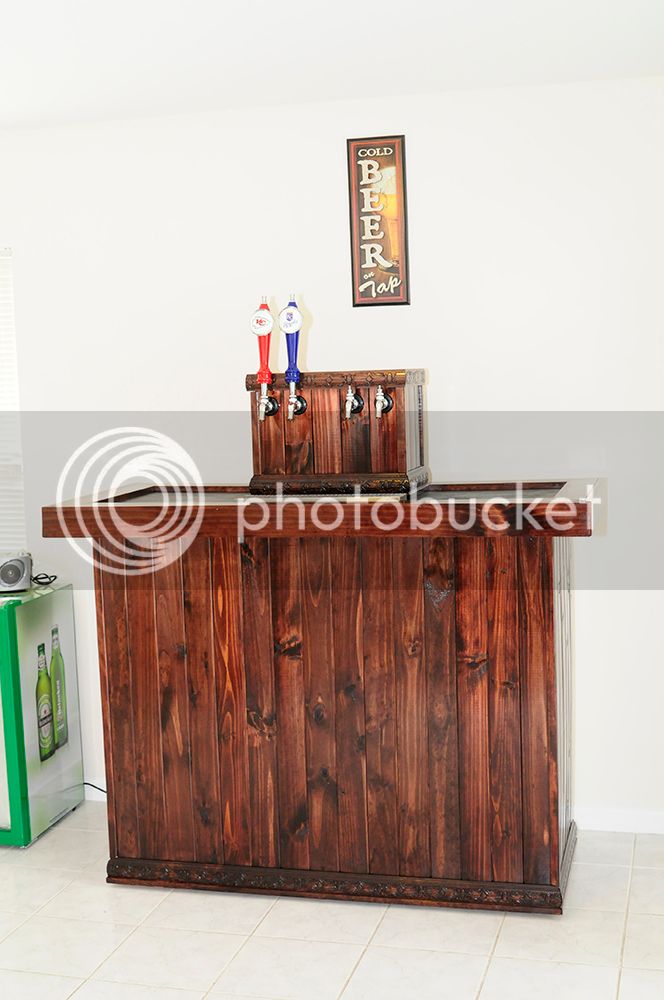
I built my first coffin keezer back in the summer of 2010 using an old Whirlpool freezer that was the perfect size to hold 6 cornies on the floor and 2 on the hump with a collar. It was my first attempt at a project like this and I learned A LOT from the build. Unfortunately the compressor crapped out on the freezer about this time last year and I was forced to scrap the entire thing due to the way I built it. Using my Sawzall to tear apart that keezer was one of the hardest things I've ever had to do. I tried to get it fixed but nobody would even come out to look at it because it was fully encased in tongue-and-groove pine paneling and the freezer couldn't be removed.

Which leads me to the three key lessons I learned from my first build. 1) Build the cabinet so that the freezer can be easily removed if necessary. 2) Use a freezer that you can easily swap out with a same-sized unit if needed. 3) Use a new or relatively new freezer, not one that is 10+ years old.

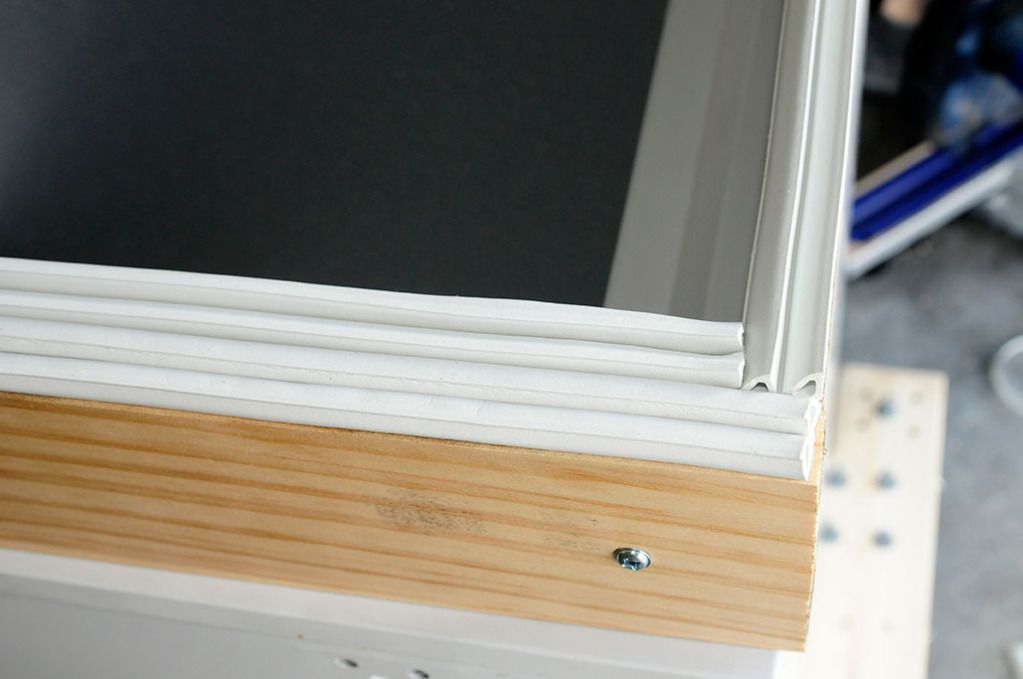
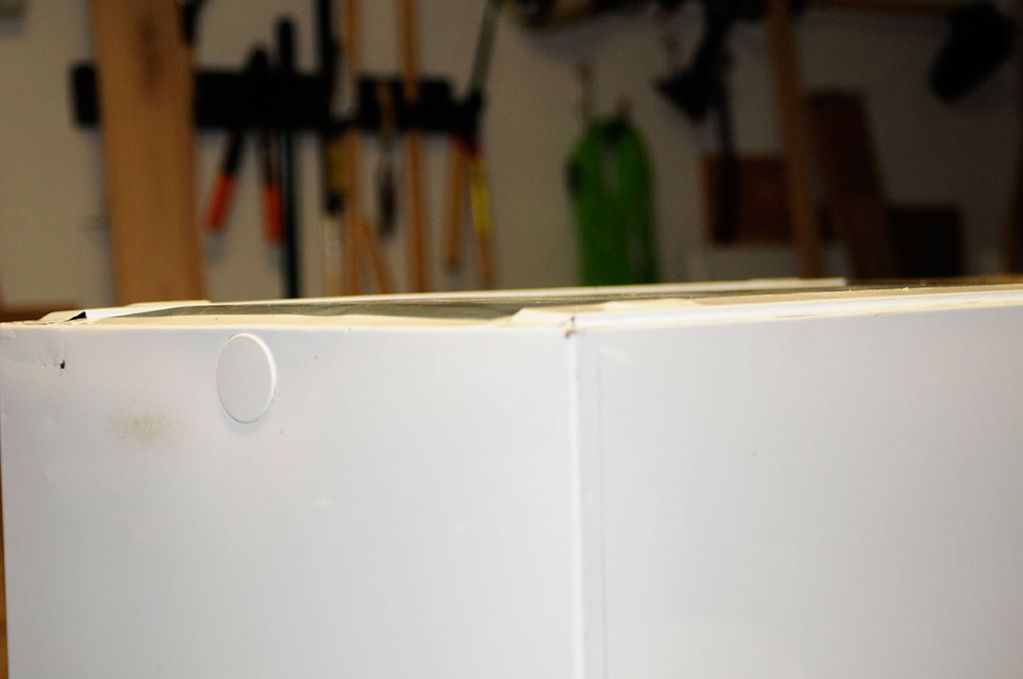
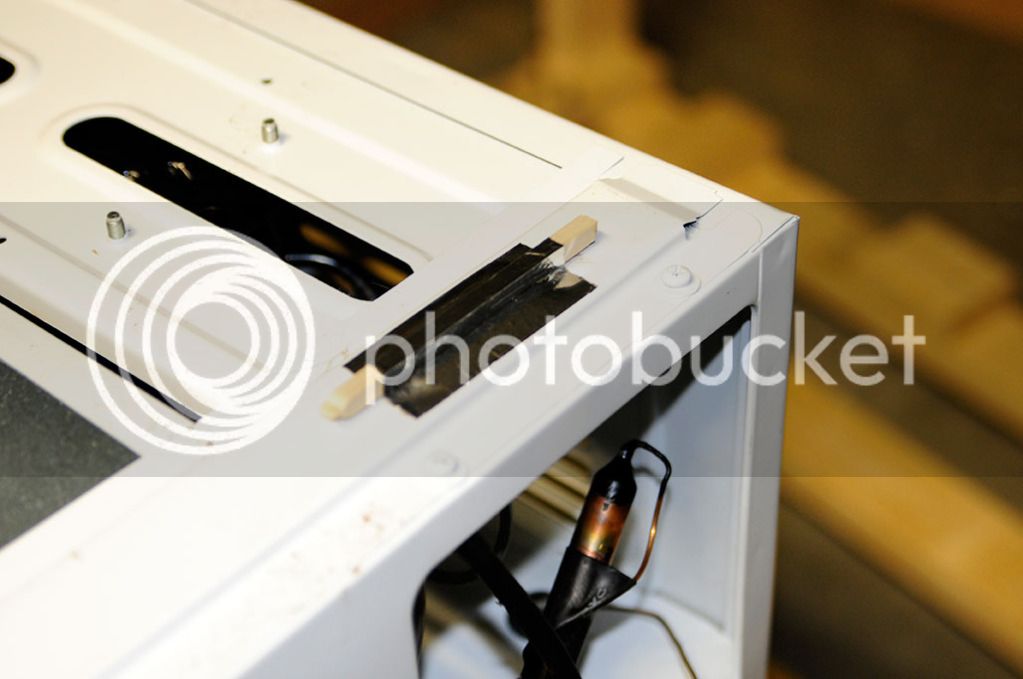
My original keezer had a 6 inch collar that was connected to the freezer with liquid nails. I attached the t & g pine directly to the collar and also to the base that I build. There was a small plastic ridge around the upper lip of the freezer that I didn't account for so there was also a small buldge in paneling, creating a small gap of about 0.5 cm between the panels and the freezer skin. The pine would get pretty warm while the compressor was running and I'm pretty sure that this caused the compressor to run much more than it should have, and this is what caused the compressor to die.

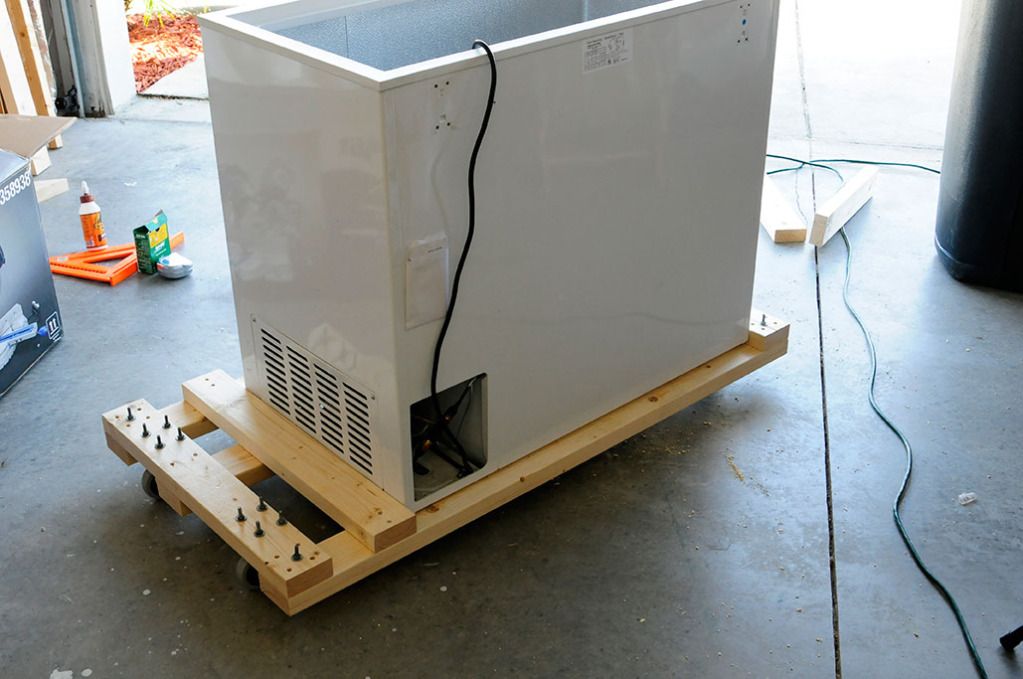
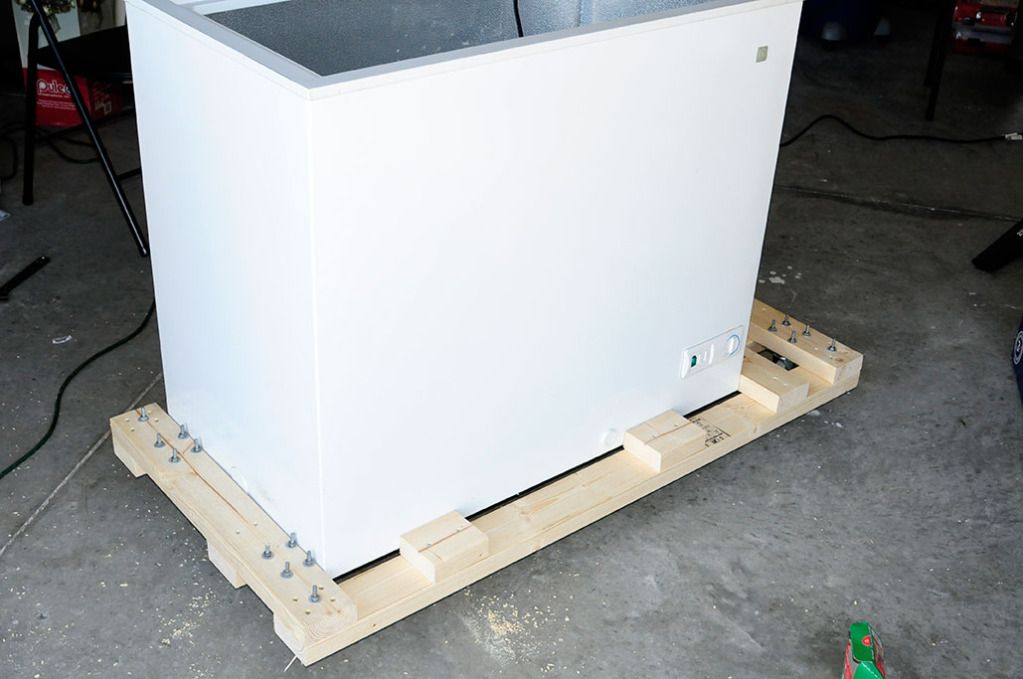
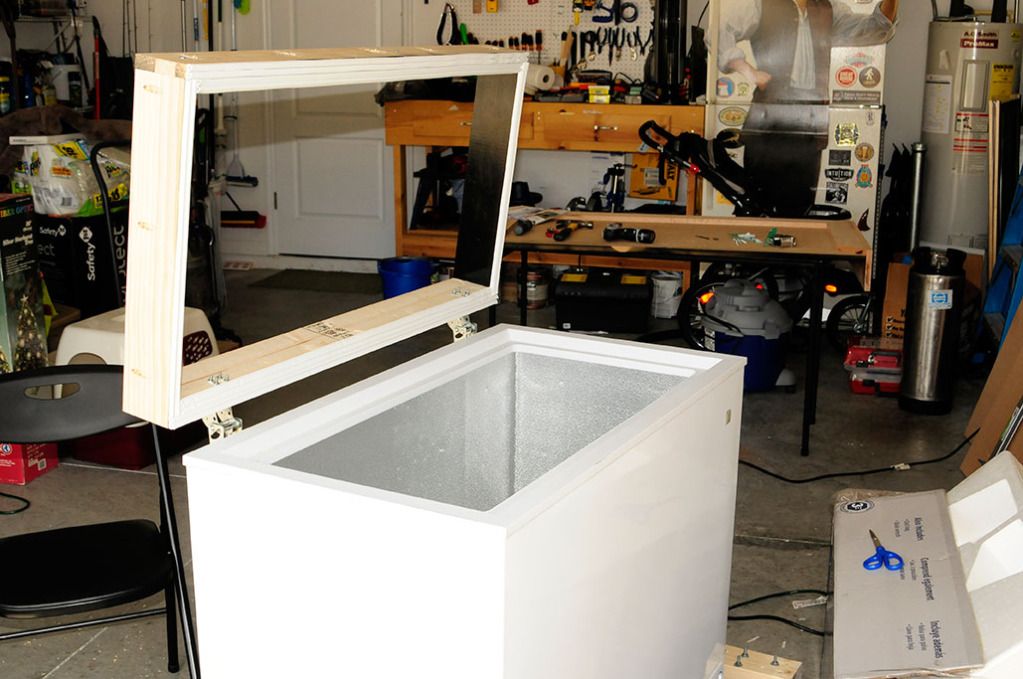
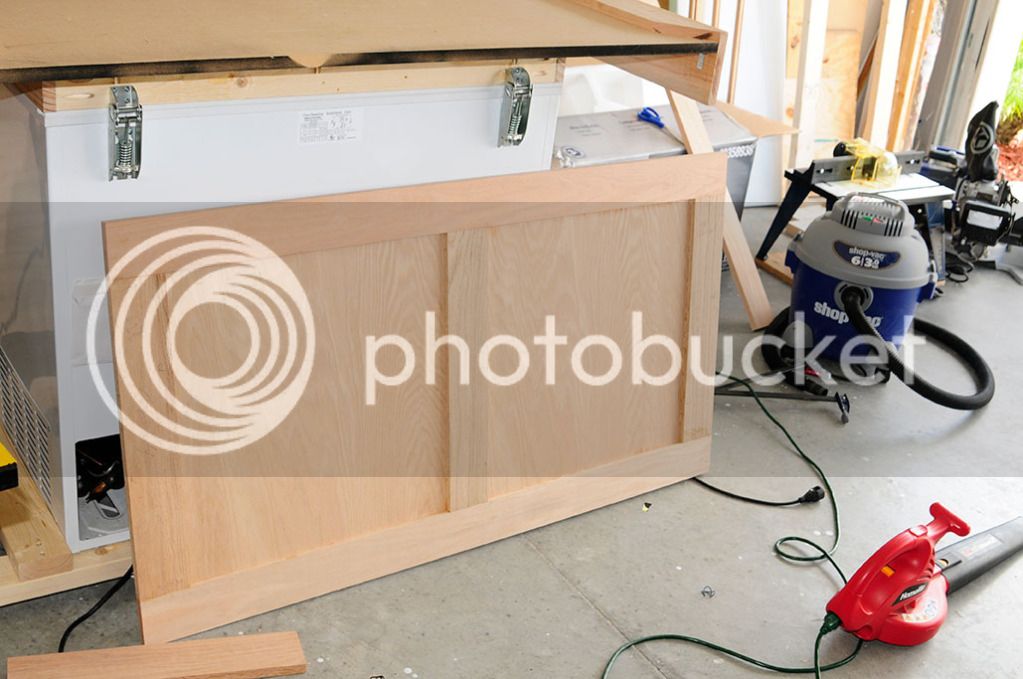
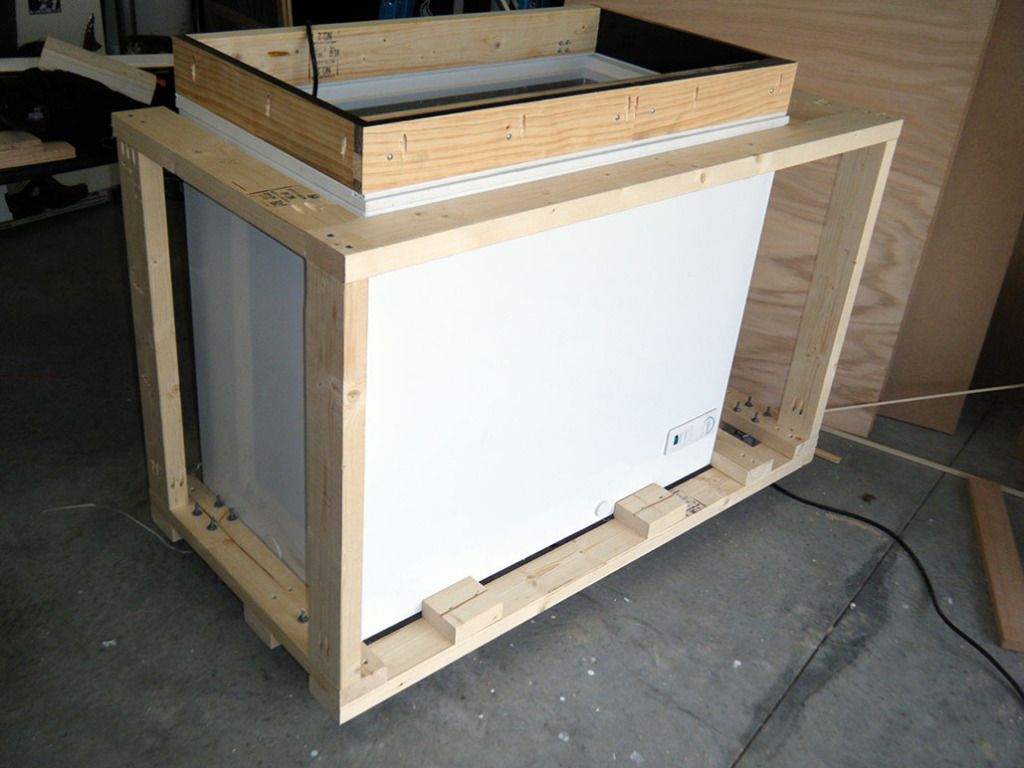
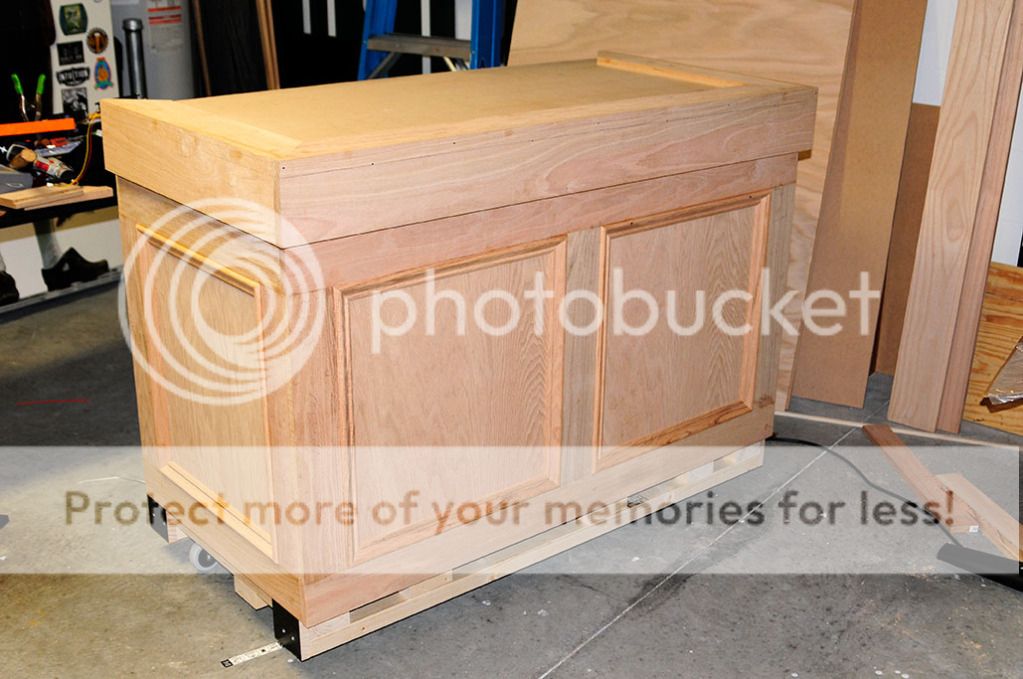
I am now embarking on my second attempt at a coffin keezer build, armed with much more knowledge, better tools, and a fair amount more wood working experience than I had in 2010 with my first build. I will be using the 7.0 GE freezer that has been used by many others. This unit was attractive to me because it can hold 4 on the floor and one on the hump (I will be putting a 2.5 or 3 gallon on the hump). I considered the 8.8 and 10.2 Danby freezers but am trying to keep the scale of this build a little smaller than my last build. I picked up a used 7.0 GE from Craigslist for $100, it's 2 years old and is in very good condition.

I was initially worried that SWMBO would not allow me to build a new keezer, however she is in full support of my build. In fact, she even surprised me with an AWESOME idea that I hadn't even considered. There was really only one place in our house that I could put this keezer and that was in the landing directly inside of the front door, it would literally be the first thing you saw when you can in the house. I was fine with it being there but SWMBO wasn't so sure. We kept the first keezer in the living room until our son was born in Sept 2011, it was then moved into my office. The office has since been converted to a playroom for our son and we have changed the layout of our living room and the keezer will no longer fit. SWMBO's idea was to sell the formal dining room table and put the keezer in that room, converting the space to more of a bar/game room. I was shocked when she suggested this but it's perfect. We have only used the dining room table 3 times in the 2 years since we moved in to this house, so we will not miss it. The only downer is that I'm probably going to loose my a$$ on the table, I paid $1800 new for it and will be doing good if I get $1000 for it.

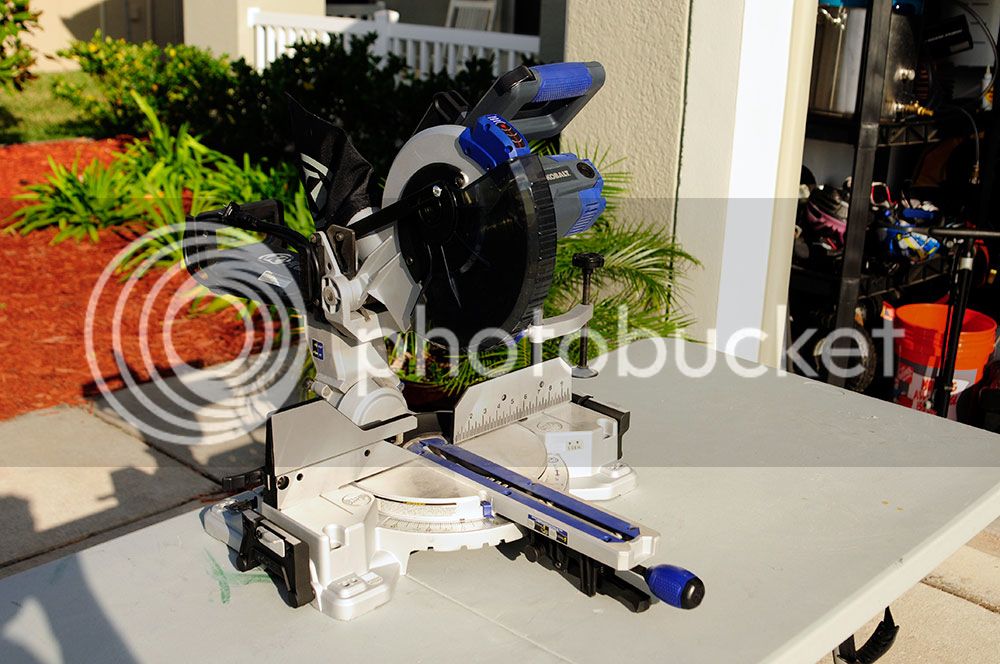
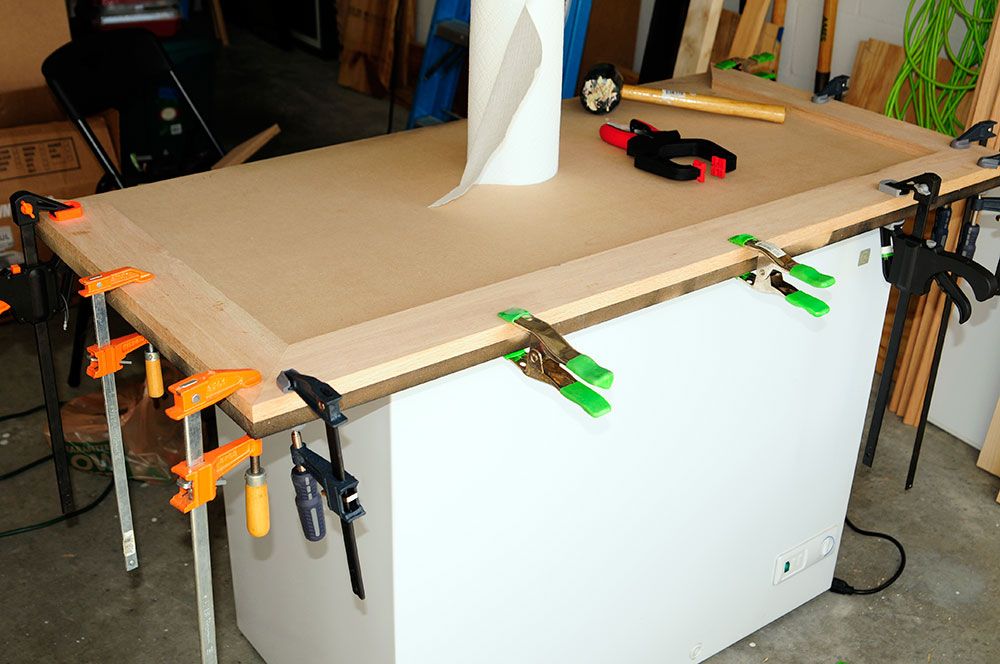
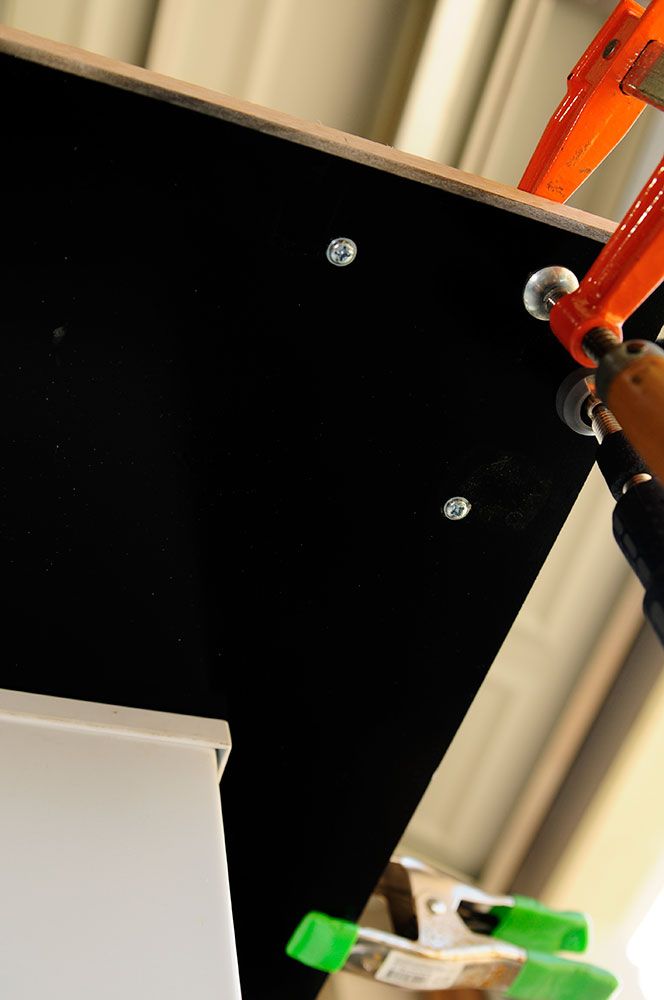
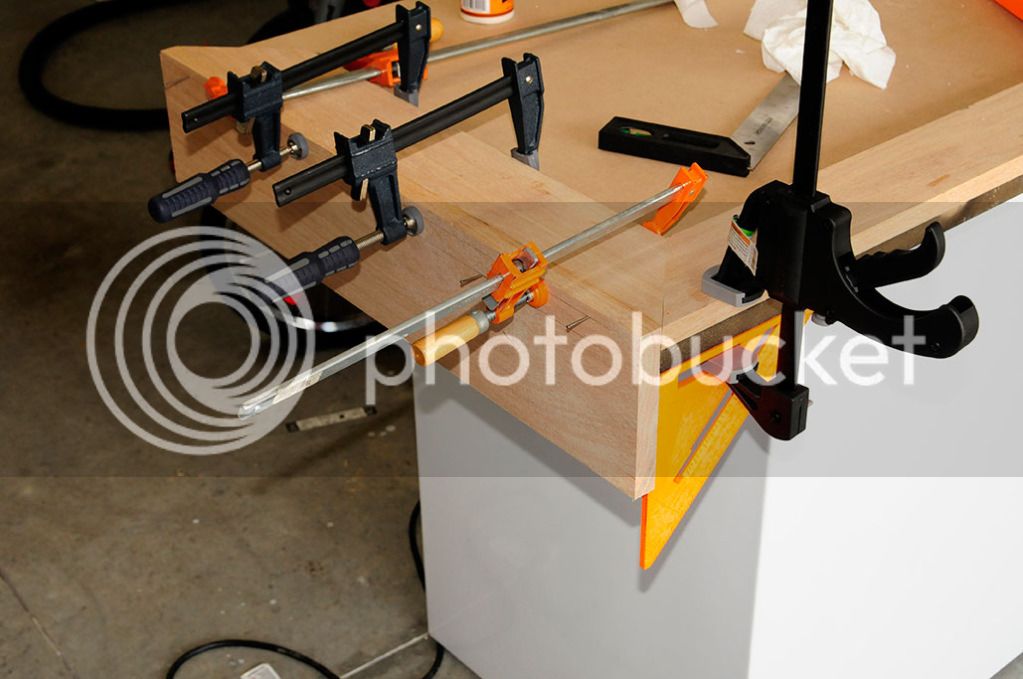
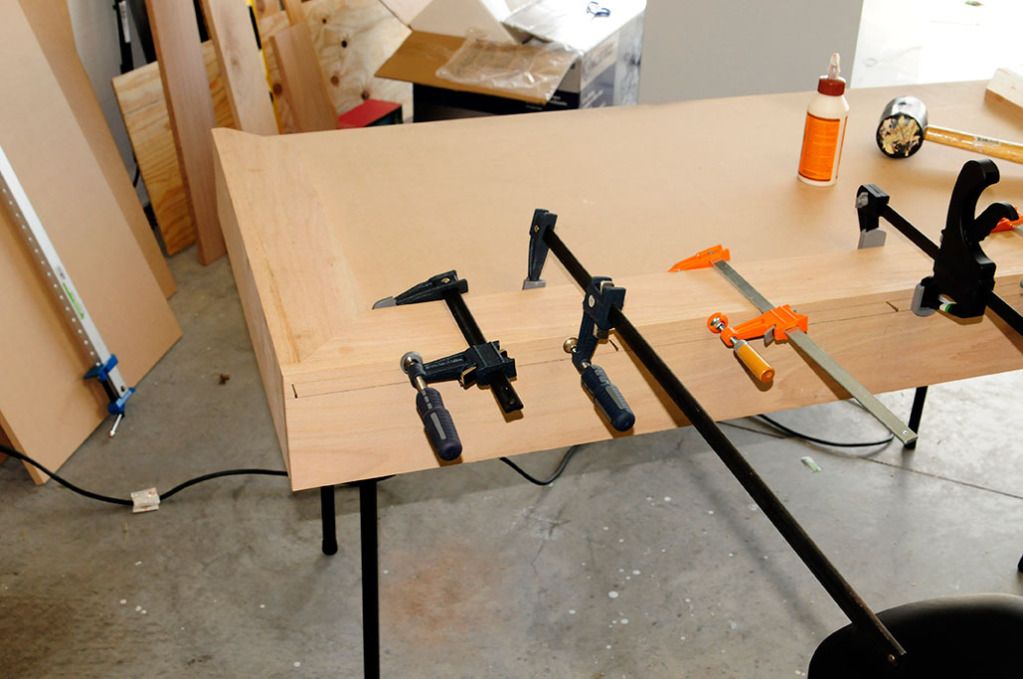
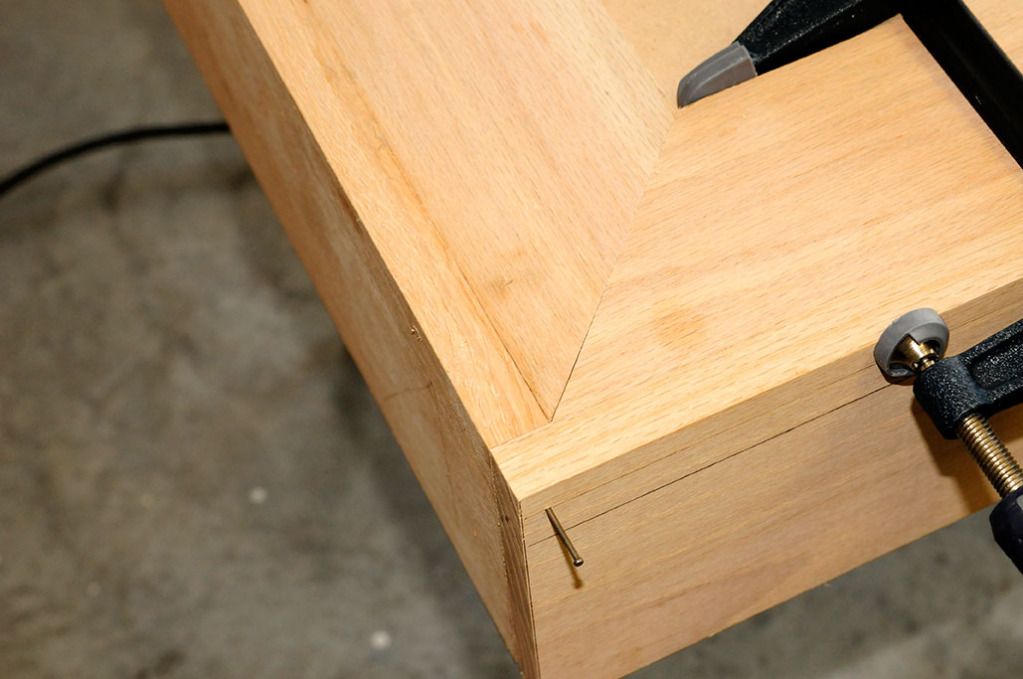
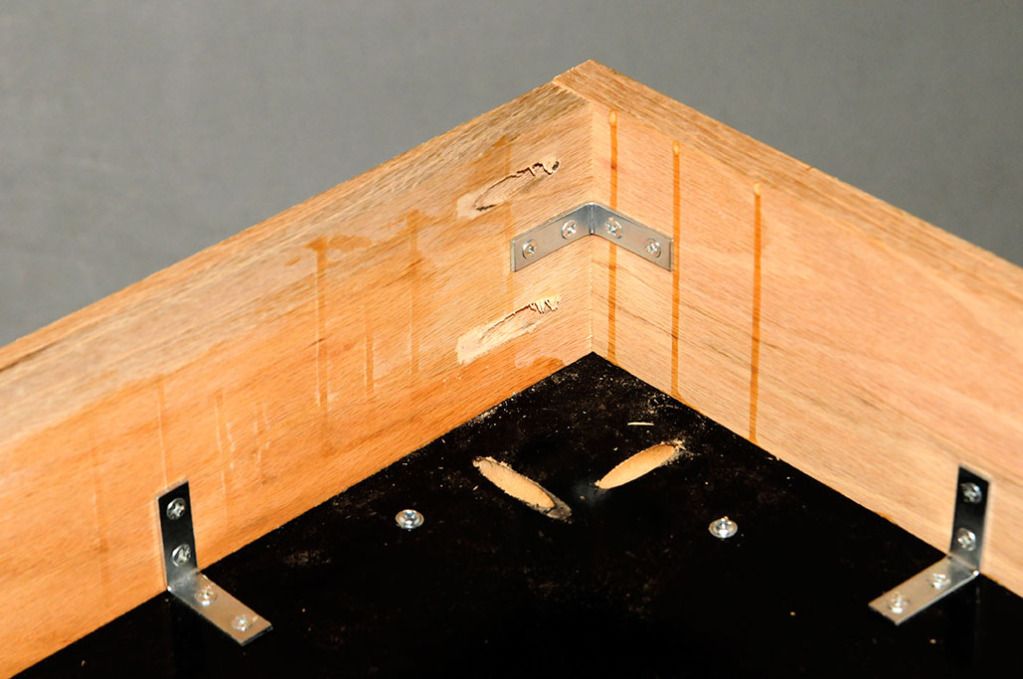
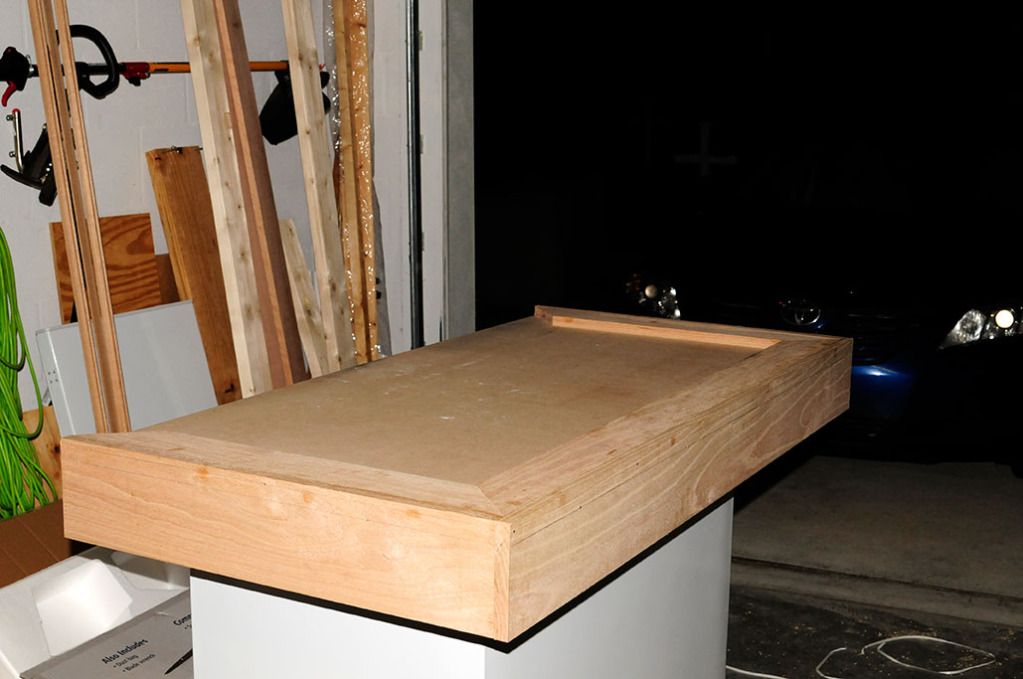
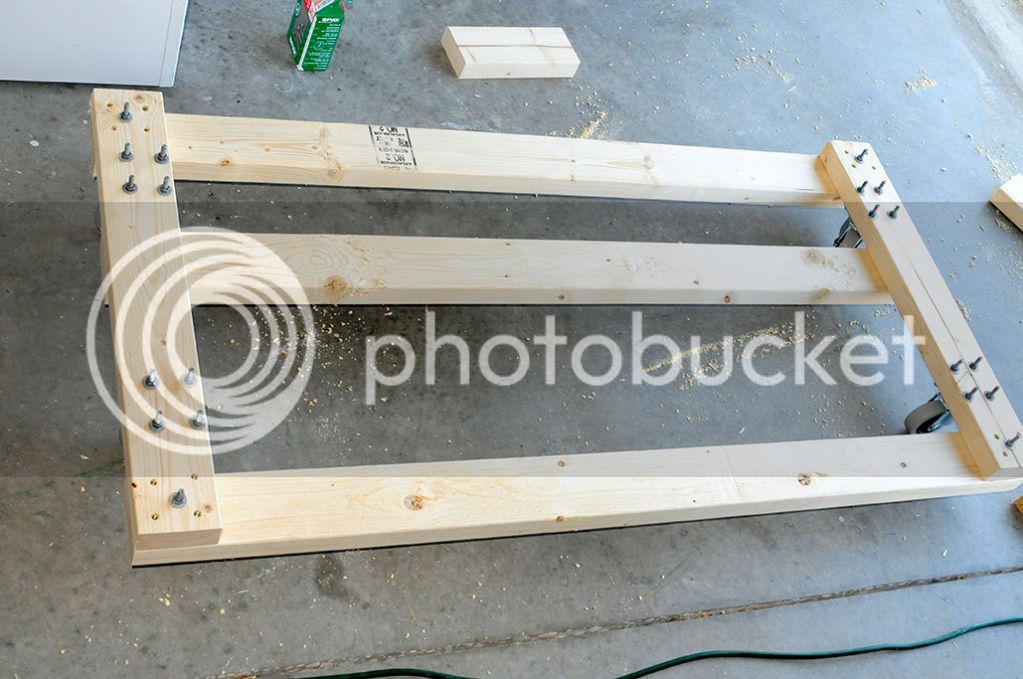
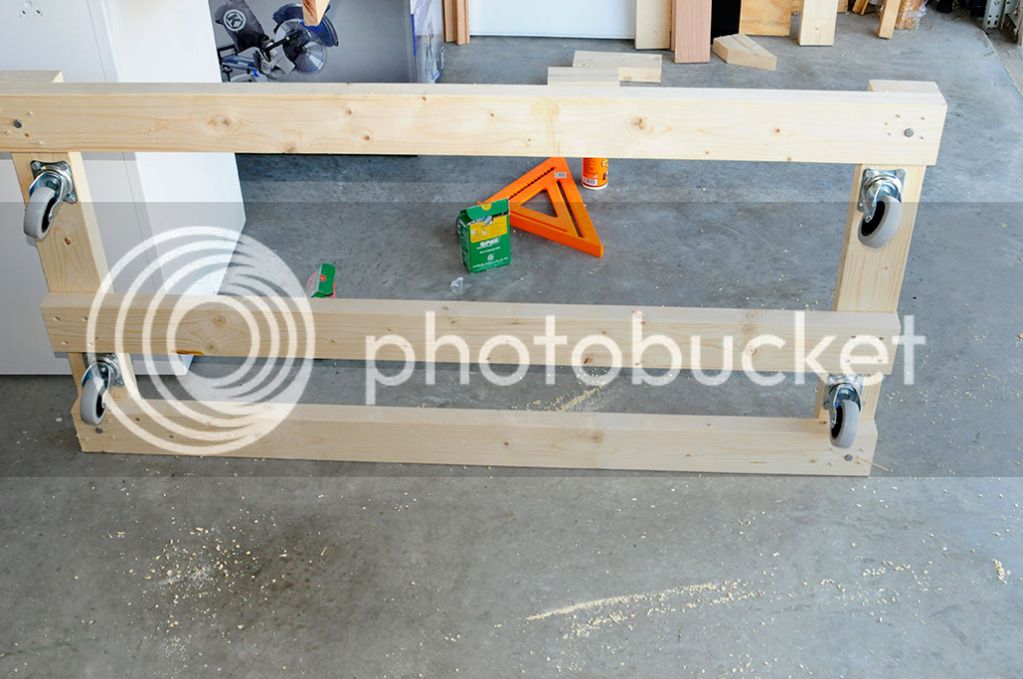
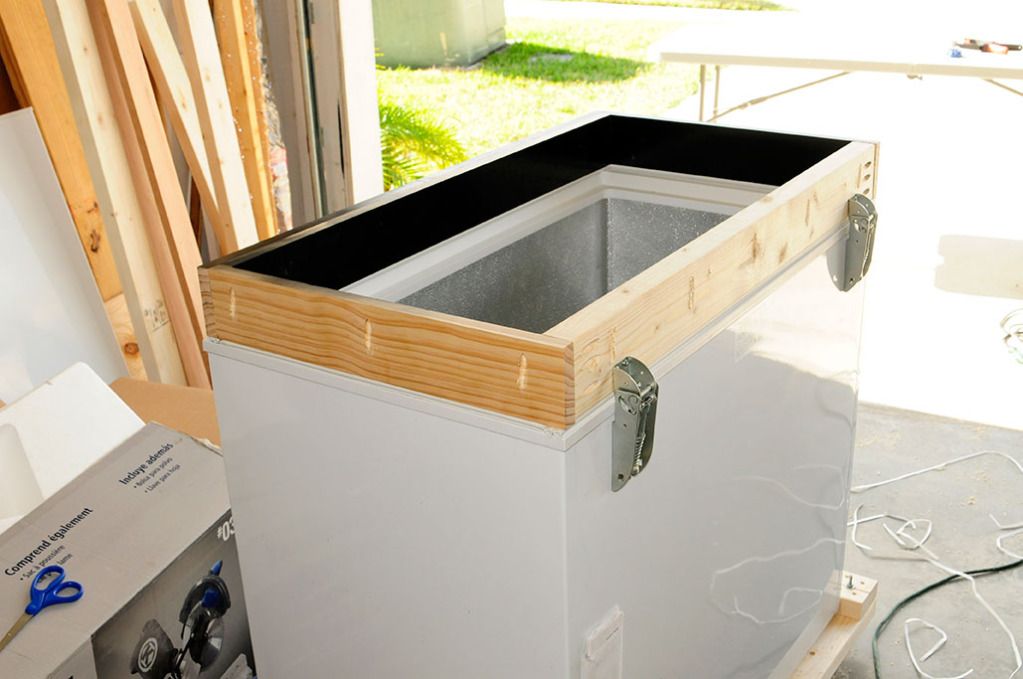
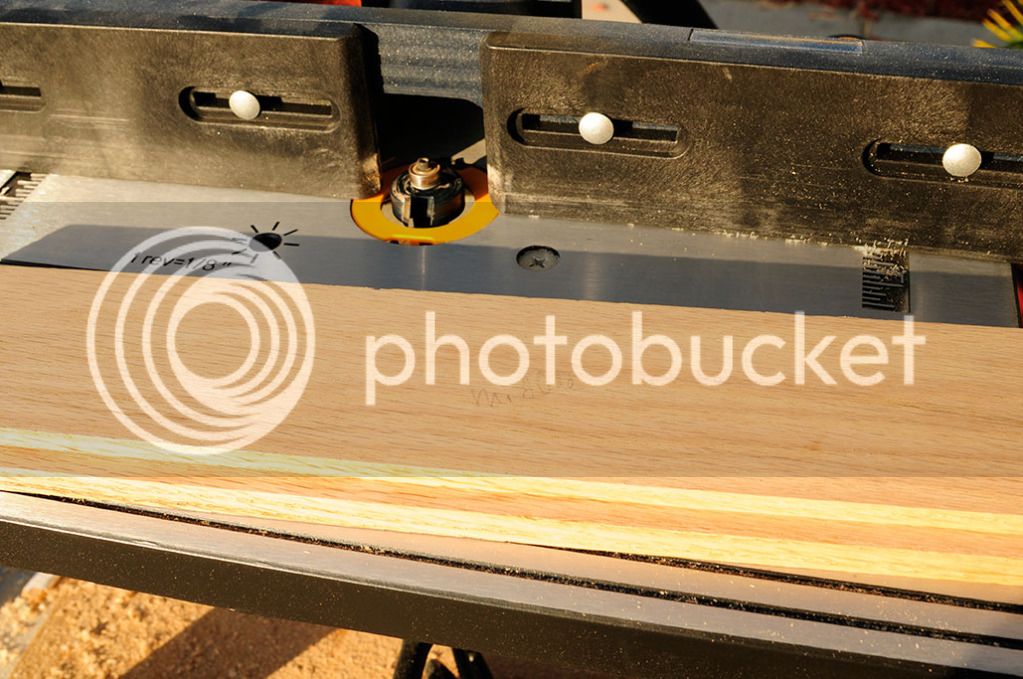
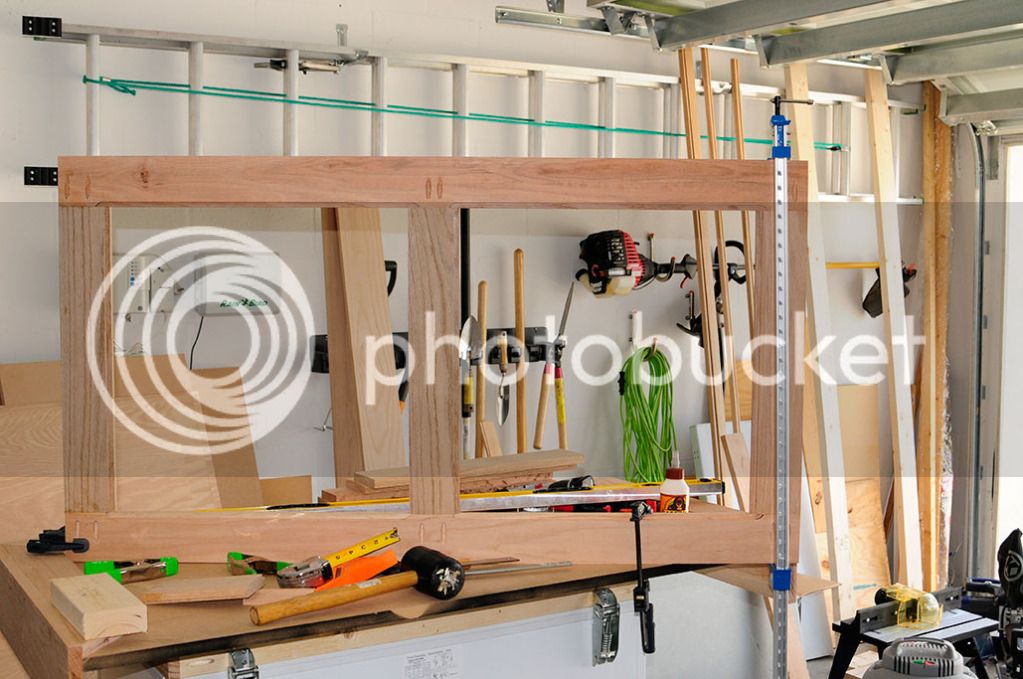
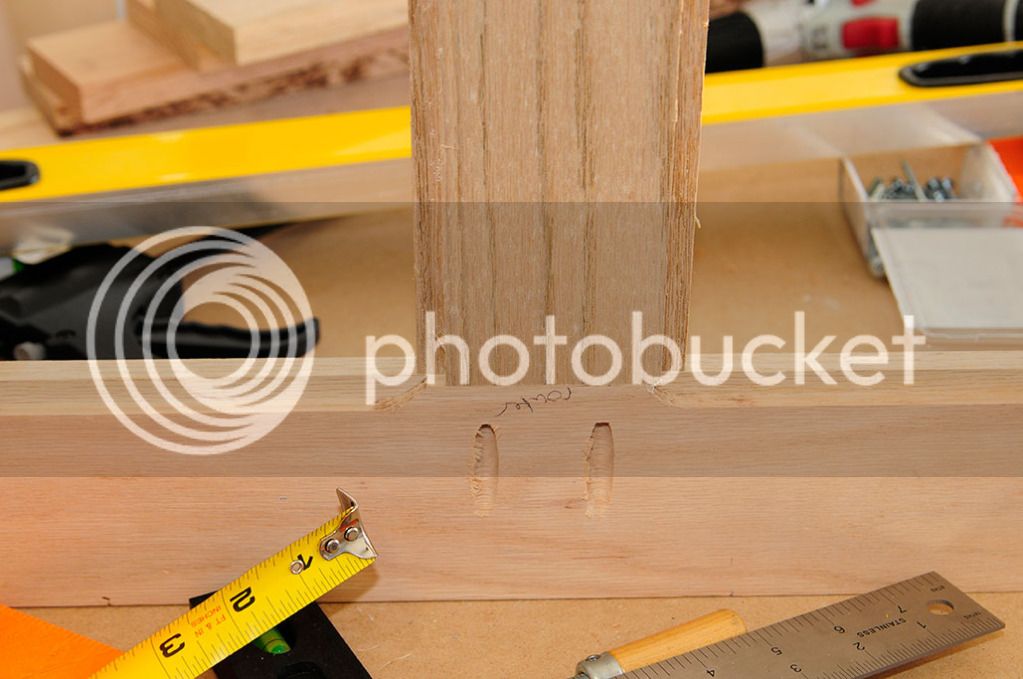
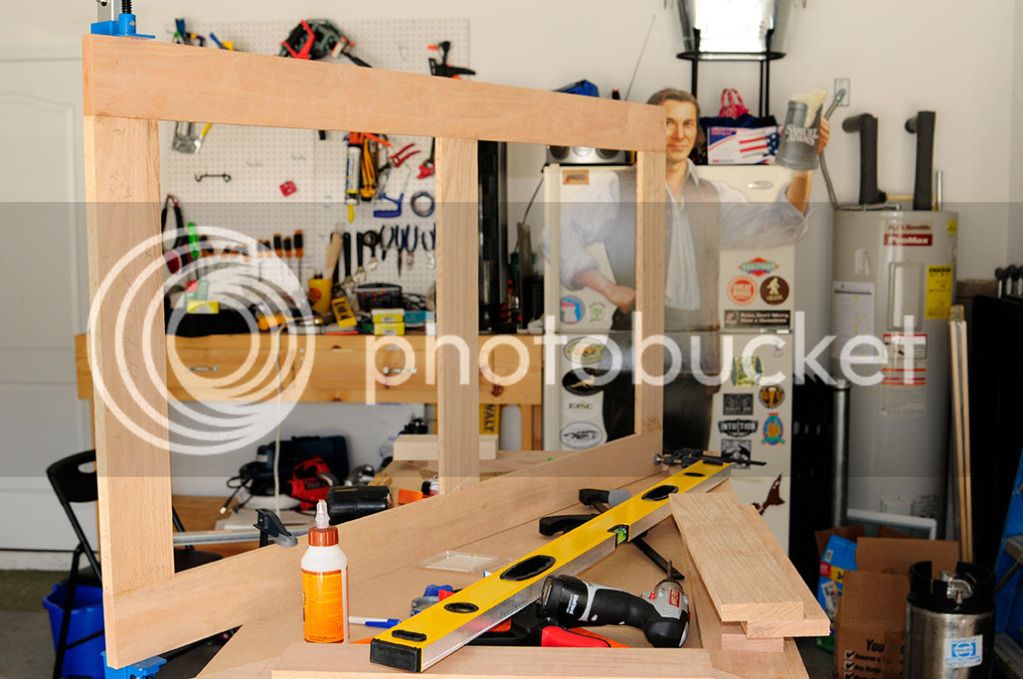
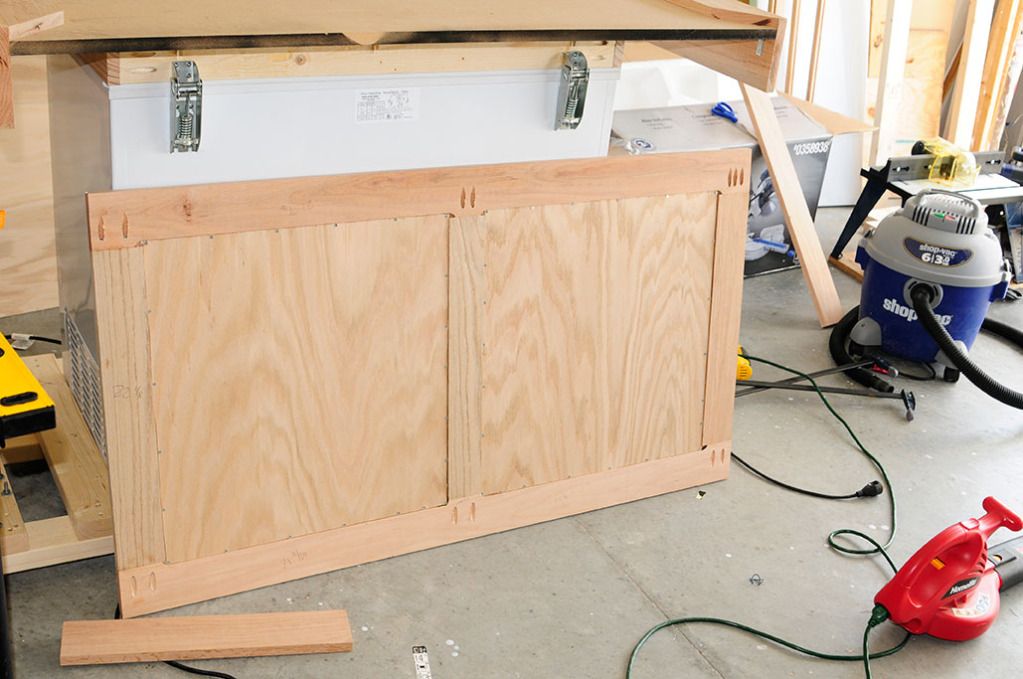
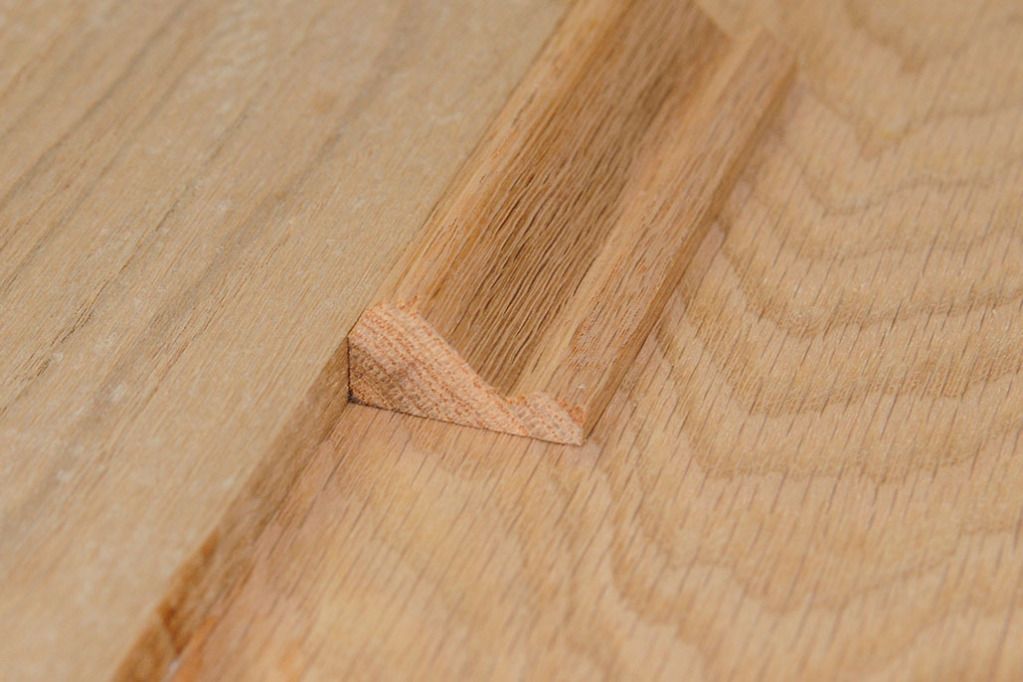
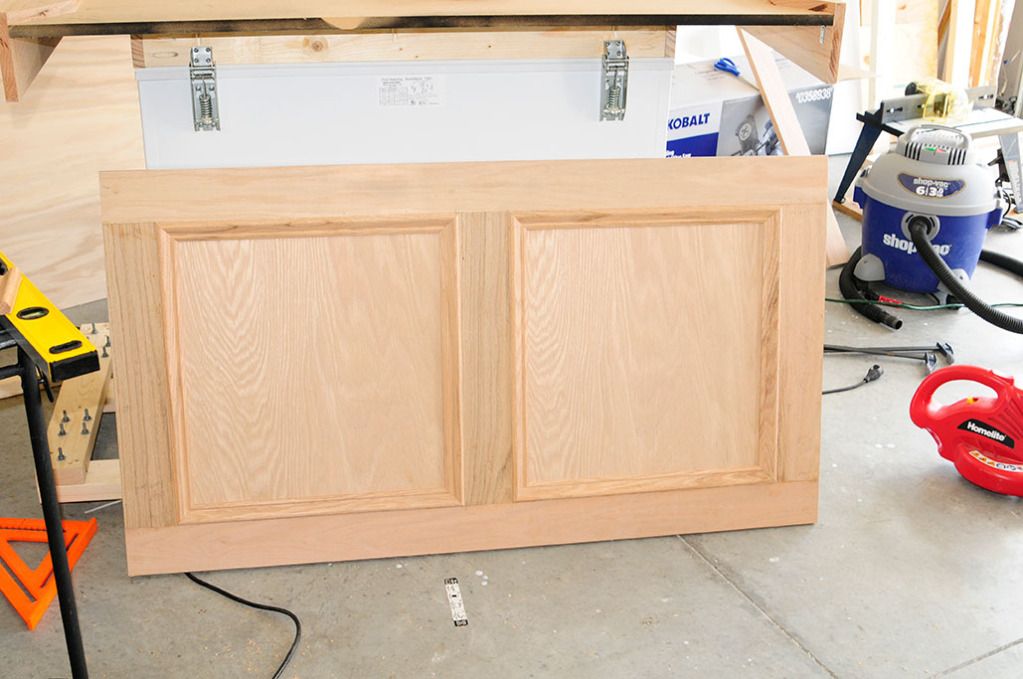
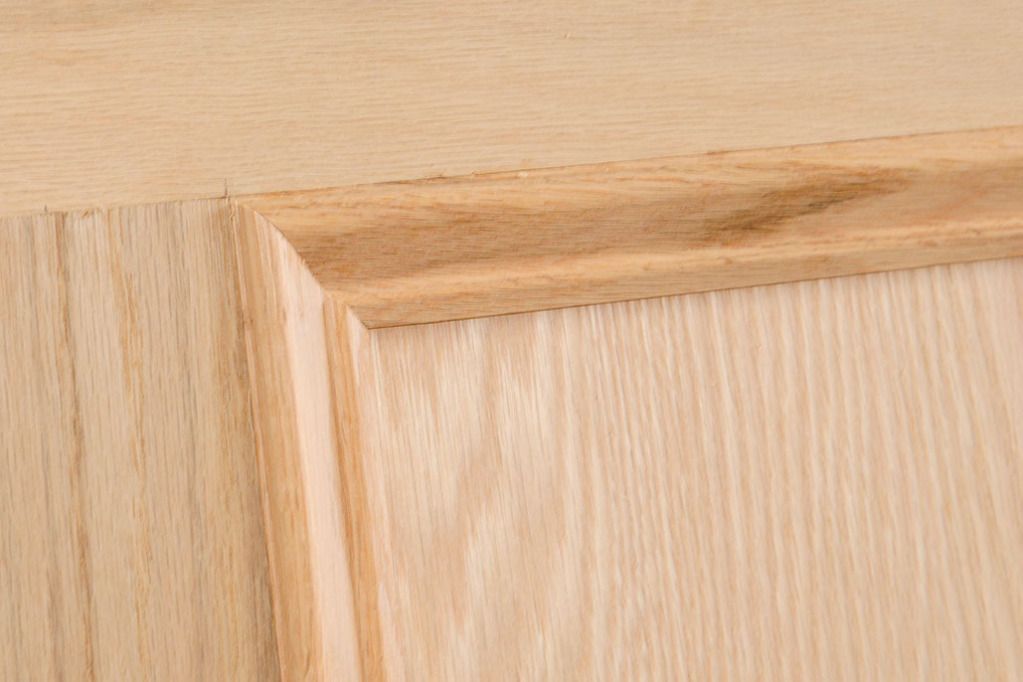
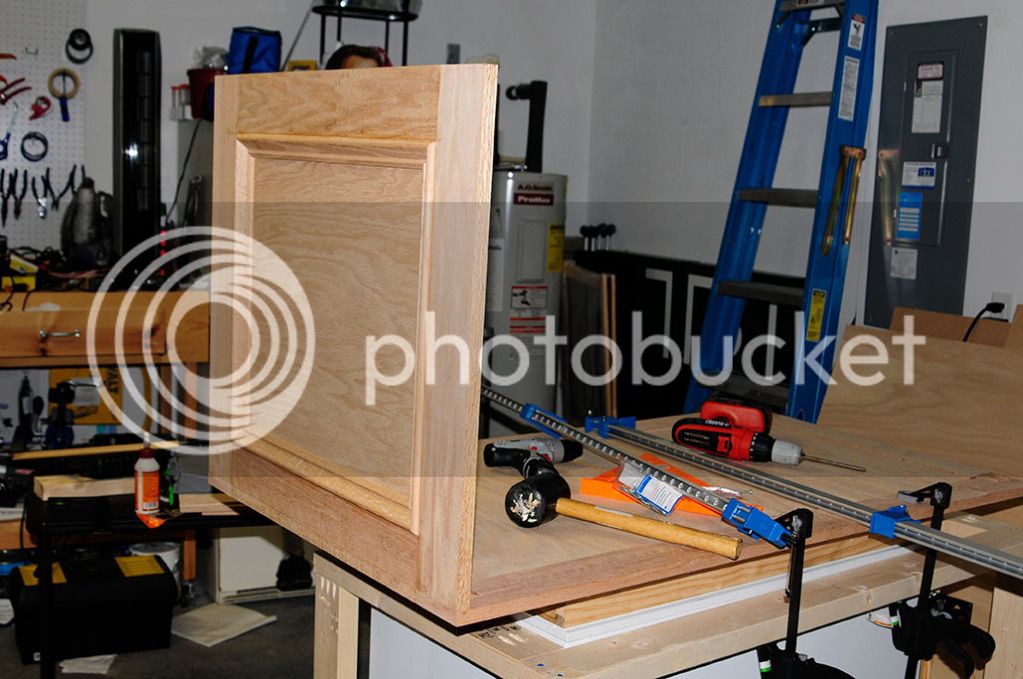
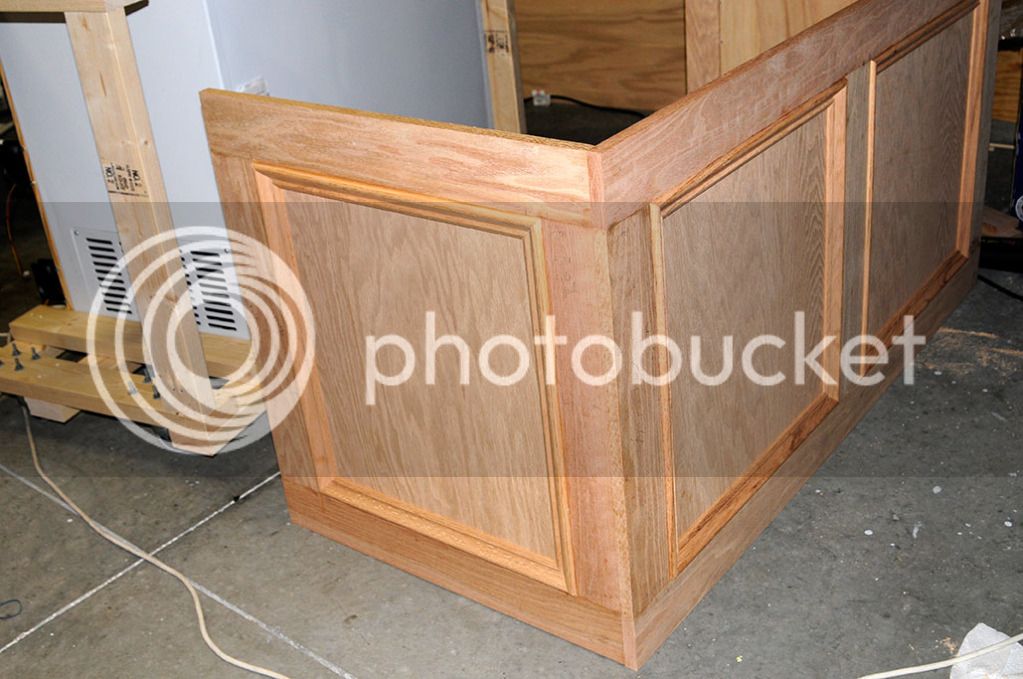
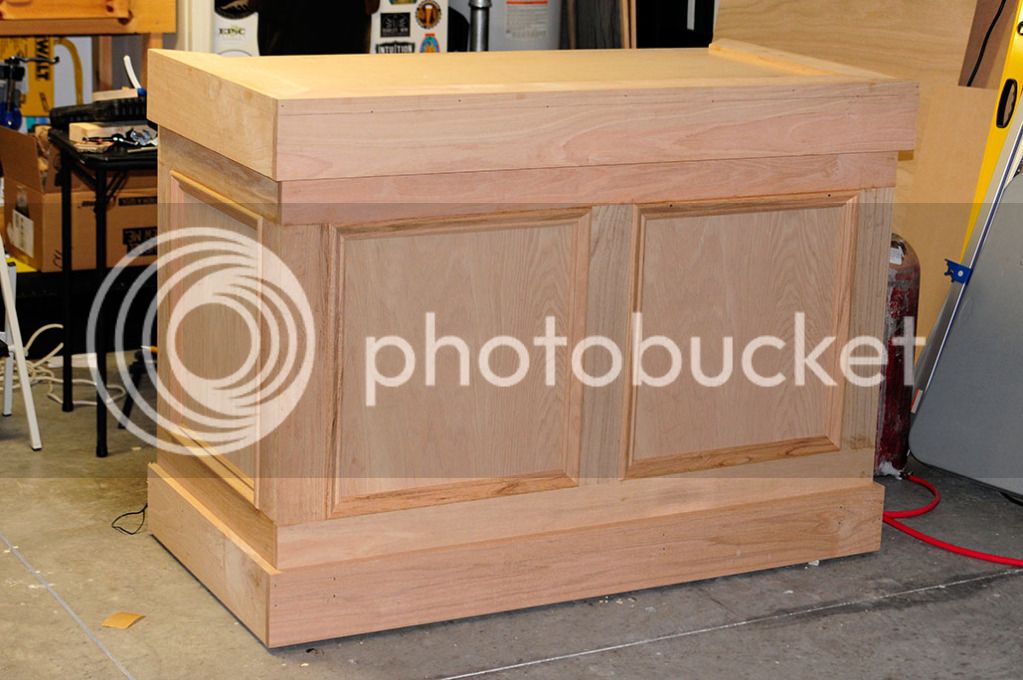
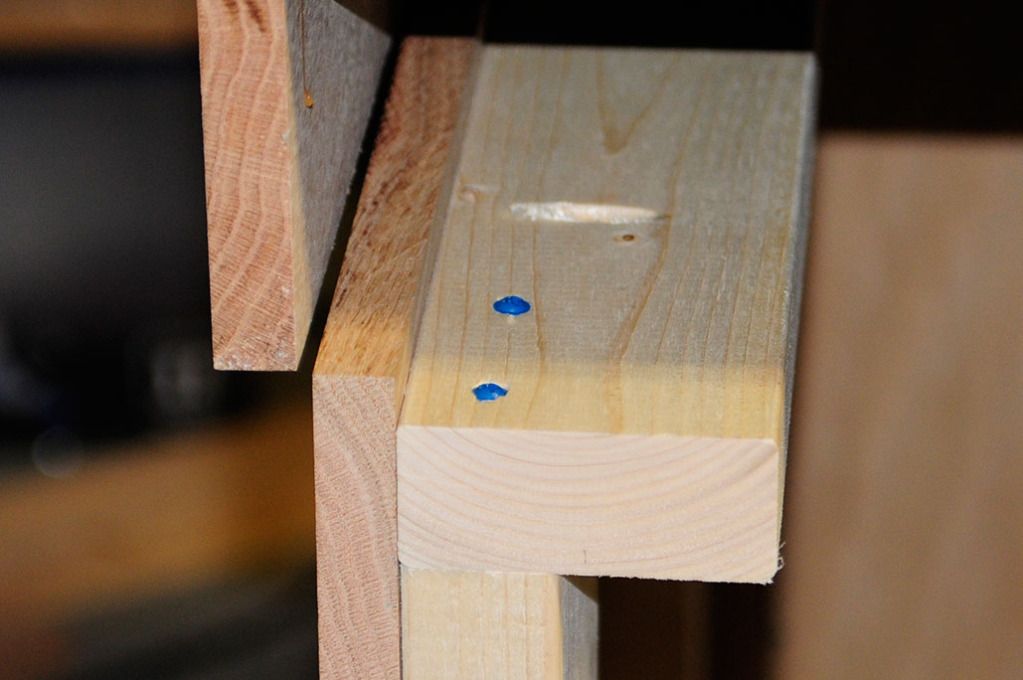
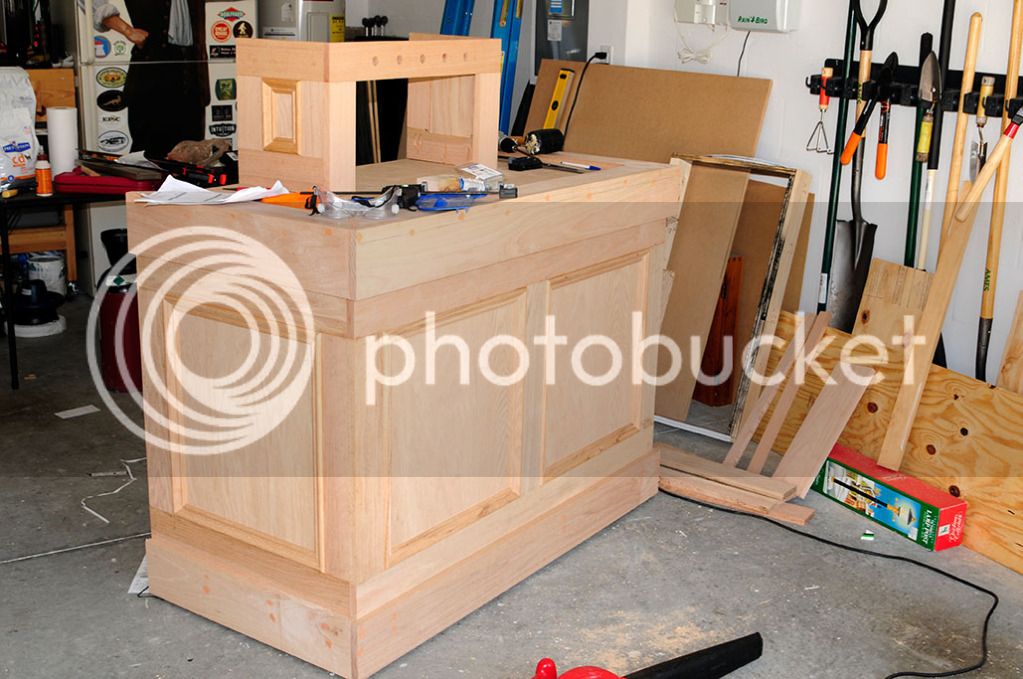
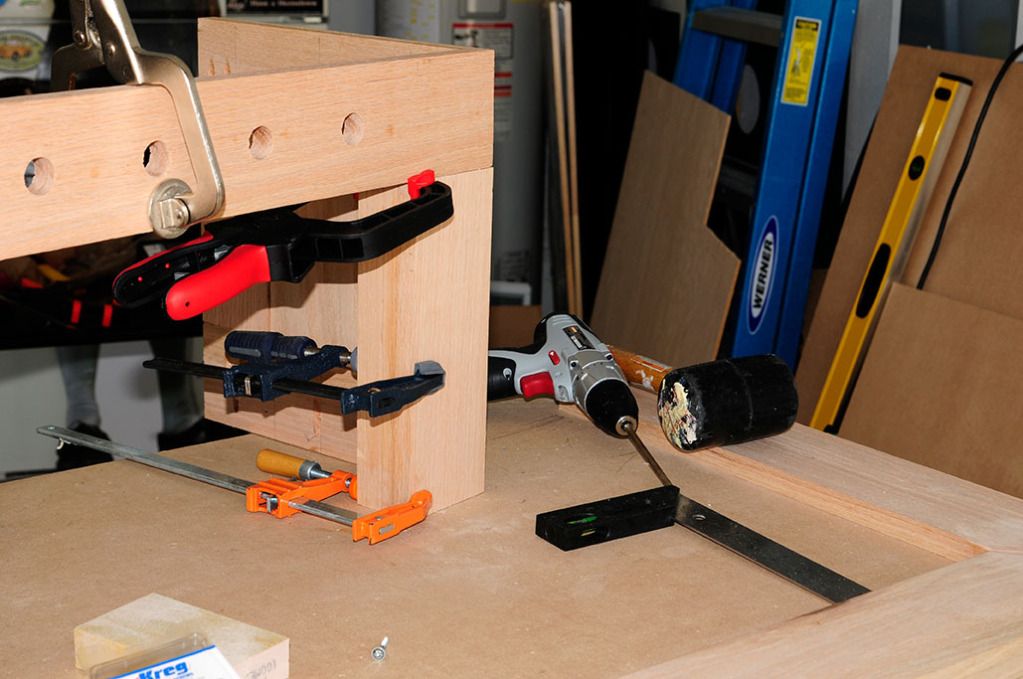
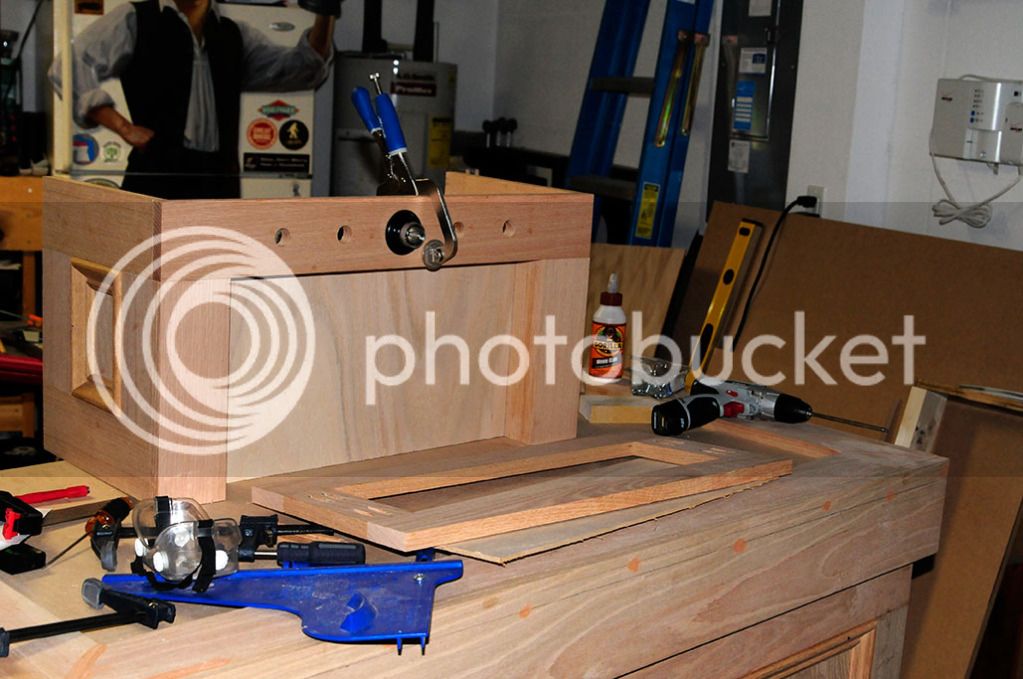
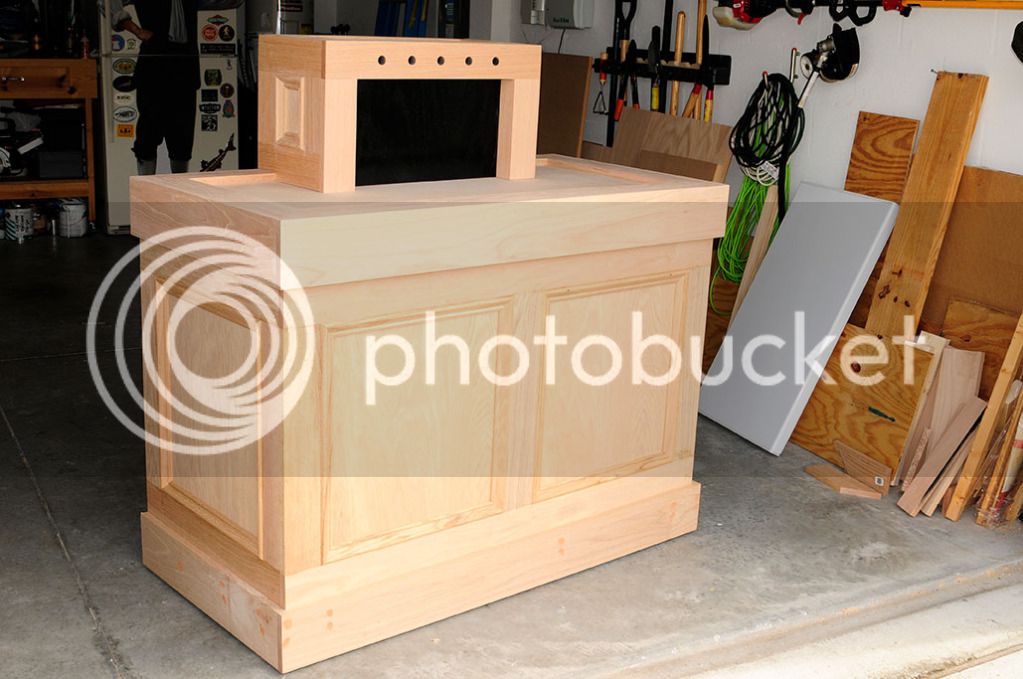
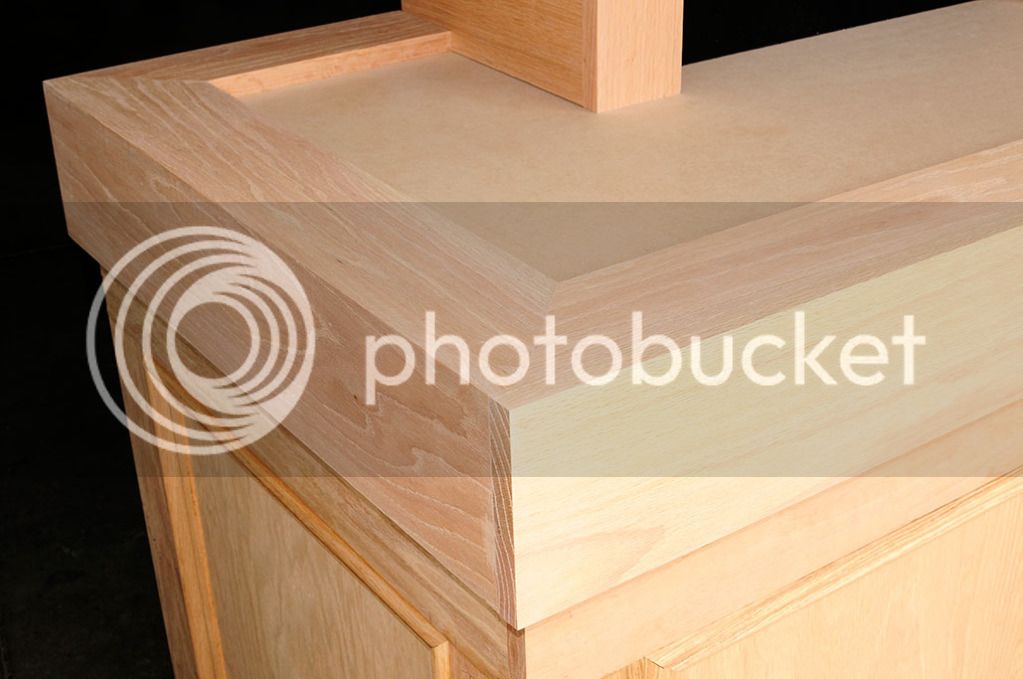
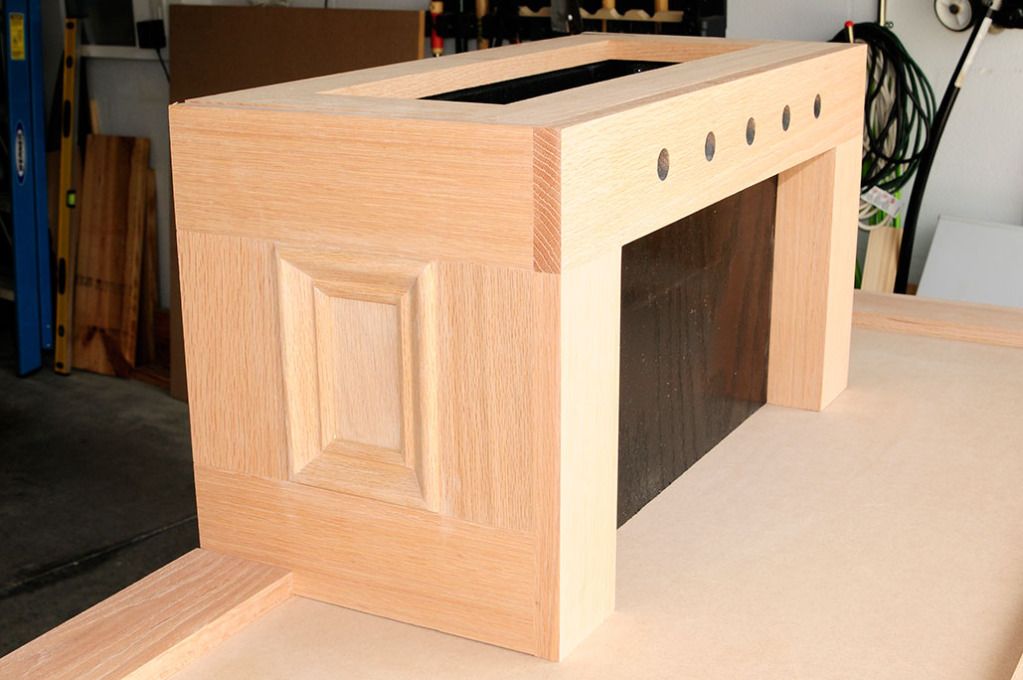
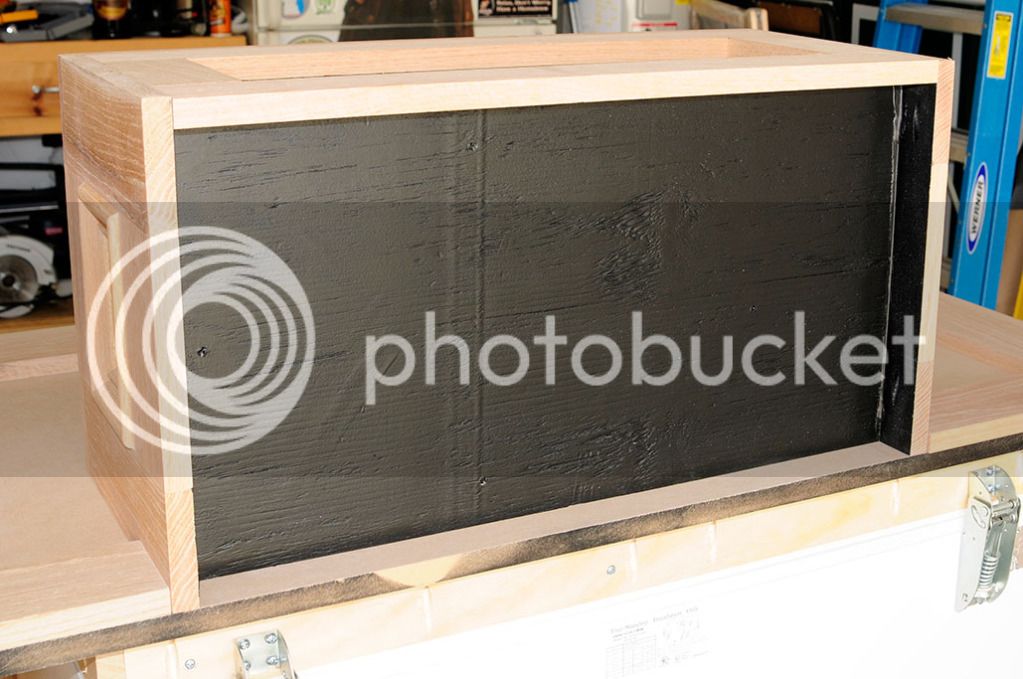
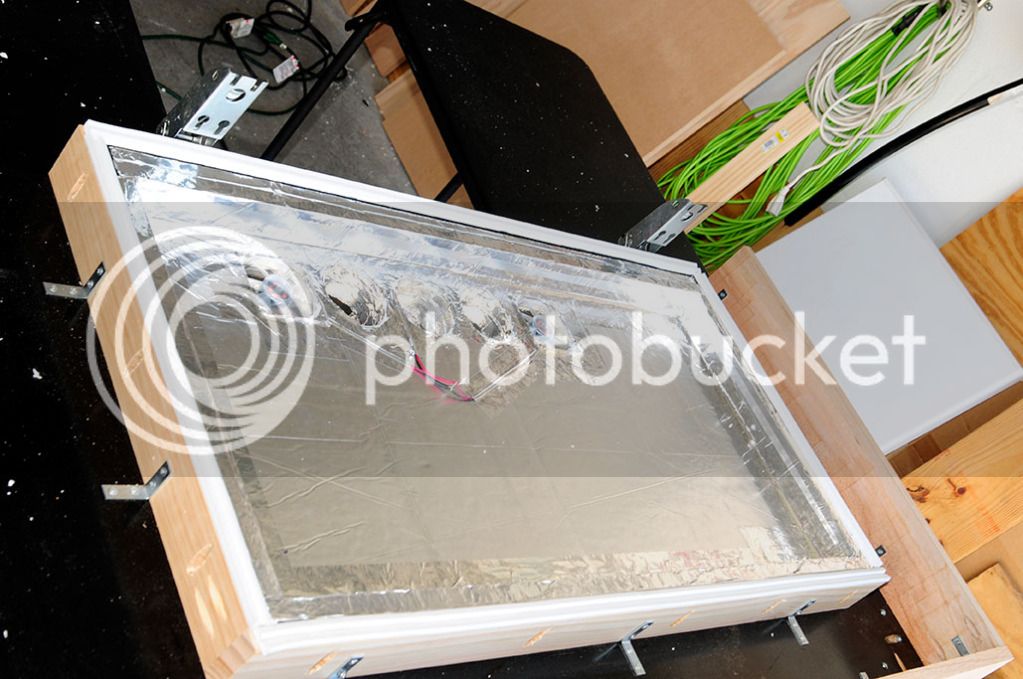
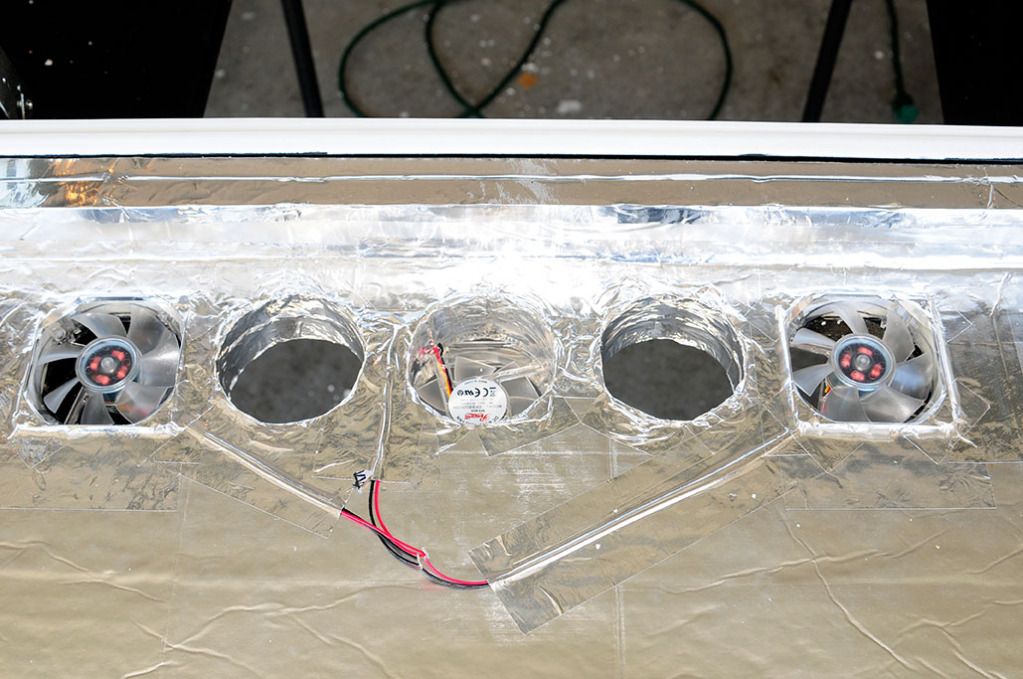
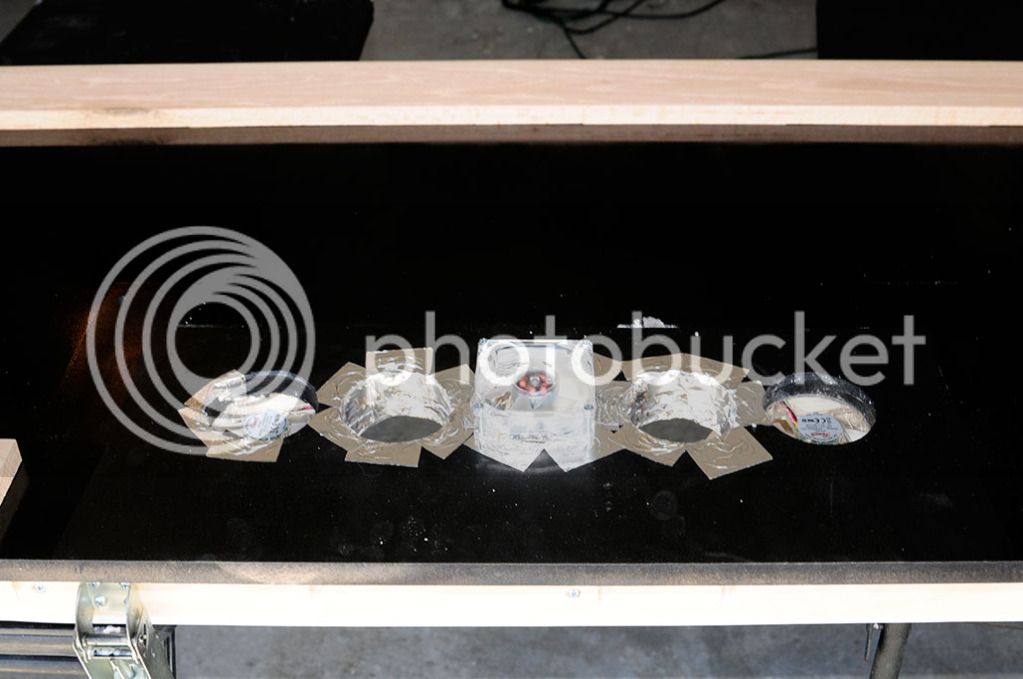
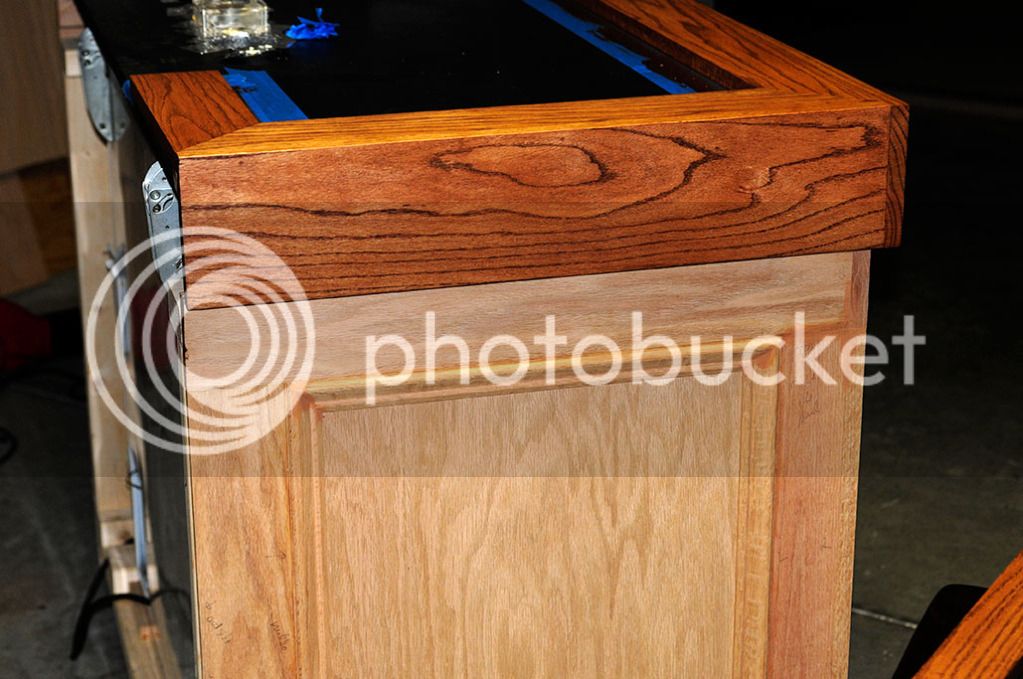
Anyways, enough of my long winded first post. I will be starting construction this week and hope to get most of the cabinet and lid built. I will try to take as many photos as possible and will post them back here as I have time.

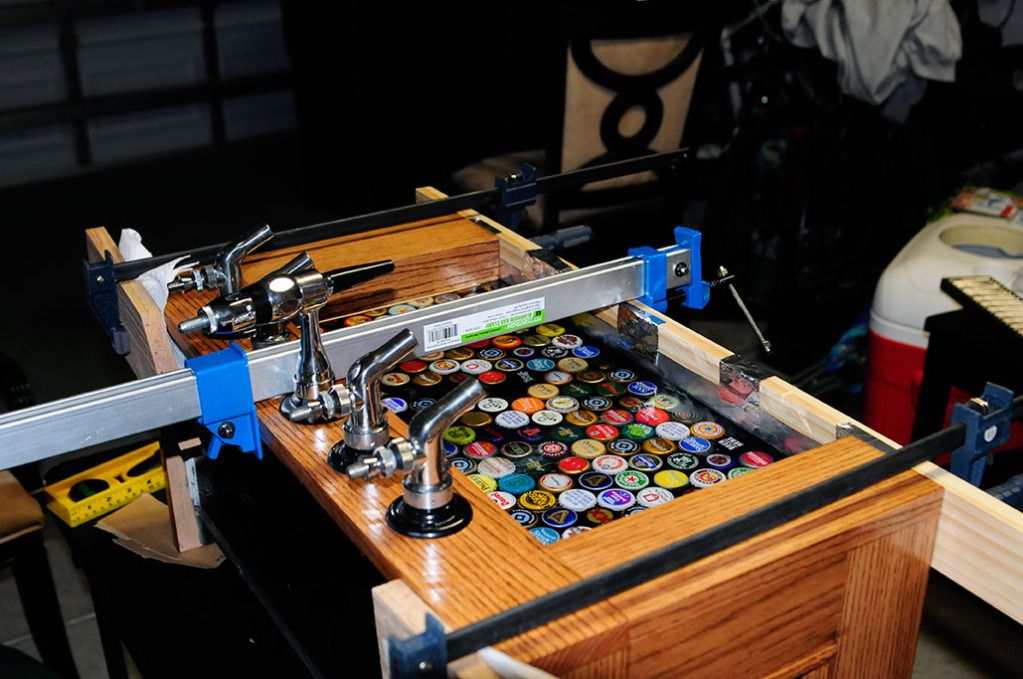
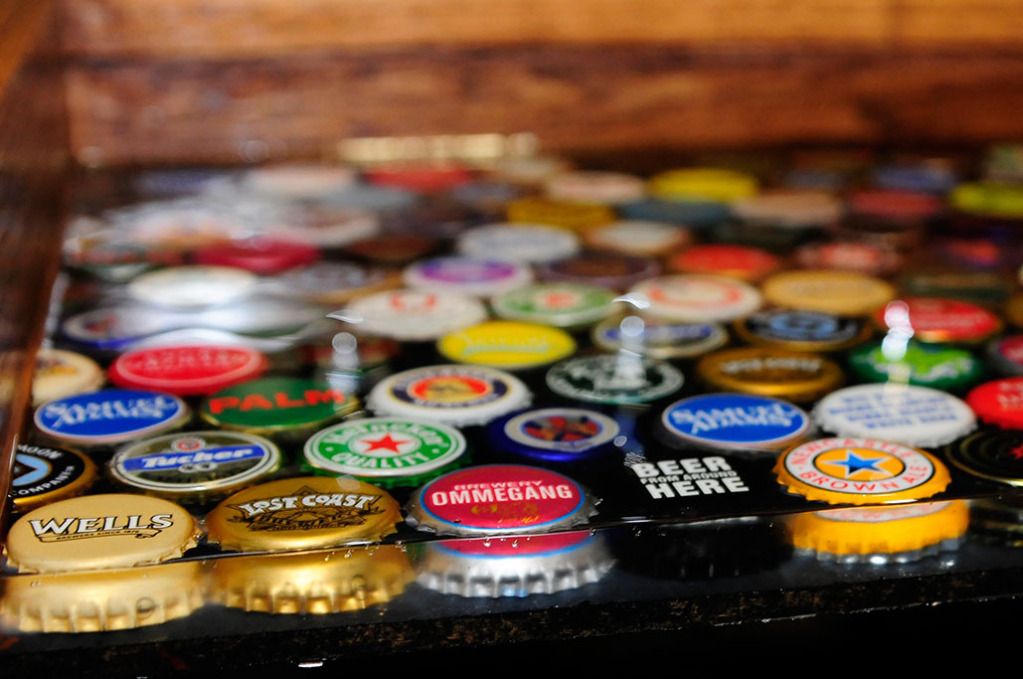
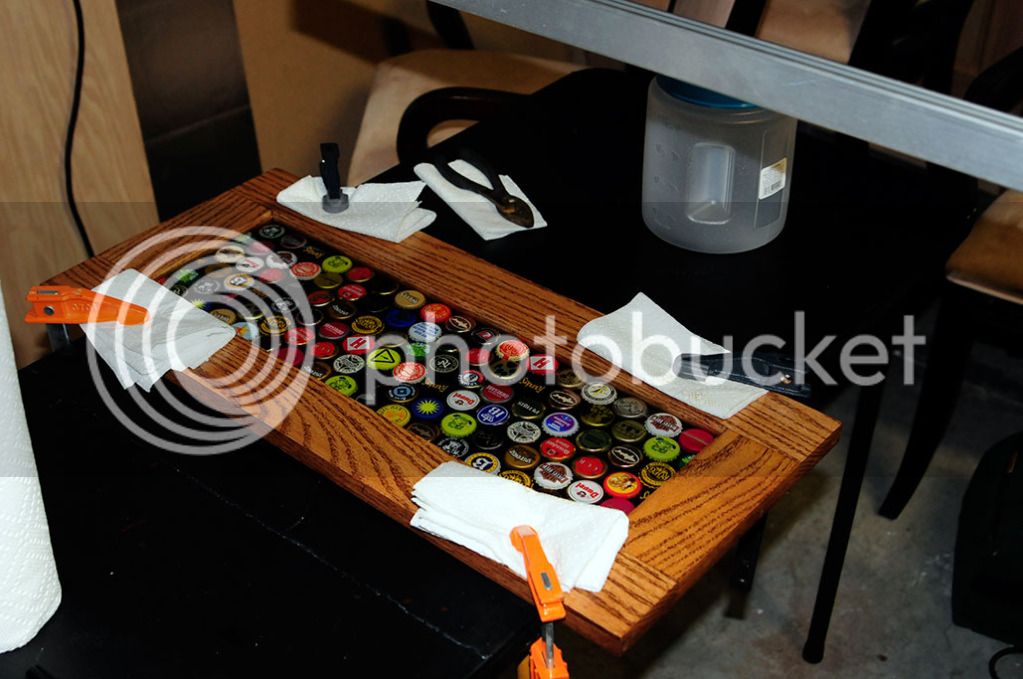
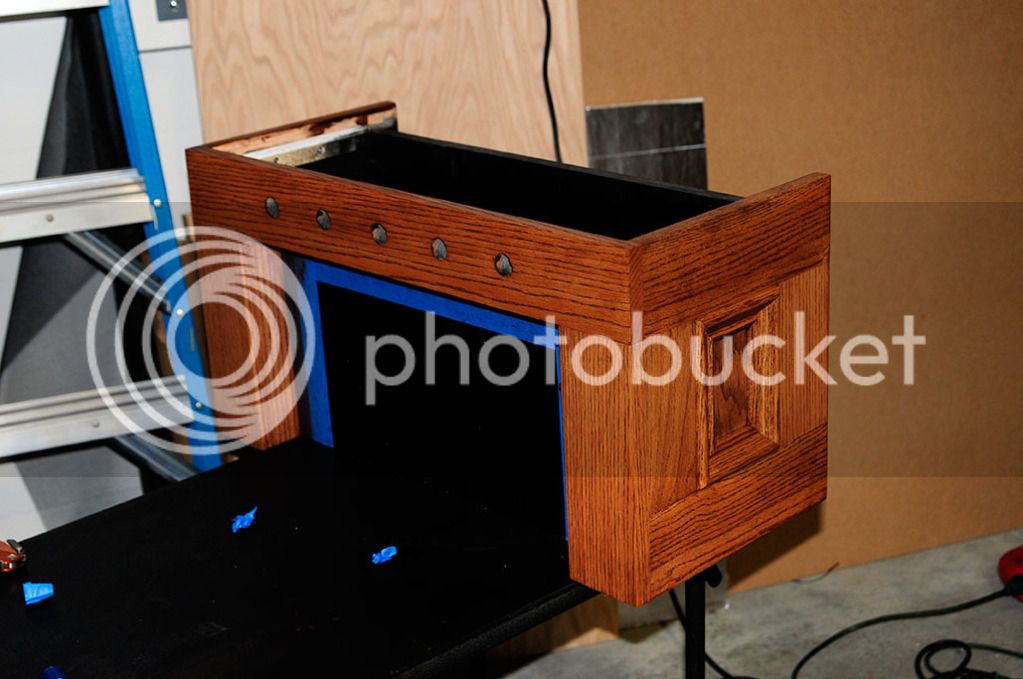
In loving memory of my first keezer, here is a photo of her after I finished construction.... I eventually added a 5th nitro tap in the middle.

bar_zps39893f35.jpg
 
Nice work. Hope you choose the same stain on #2. Did you have to burn some of the wood to get the dark spots?
 
Thanks Bilc16.... I do plan on using the same stain for the new build, however all visible surfaces will be oak instead of the cheap pine/white wood that I used on the first build. No burning for the dark spots on v.1, just crappy wood that was a PITA to stain
 
Well at least you have something to look forward to and keep you occupied. Oh wait, you have a son who is now nearing 1.5yrs old...your hands are already full! That means no sawing or hammering after he is sleeping and you'll have to baby-proof everything and block all the stairs and keep everything out of his reach...and...and...and :eek: I went through all that back in the 90s and wish I could do it again. But now, one is in her 3rd yr of college and the other is a Jr in High School. Now that I think about it I stopped brewing beer shortly after my 2nd daughter was born and sold all my stuff which included quite a few cornies and keggles. I started brewing again in 2009.

BTW, that stain color will look very nice. If you like a big bold grain in your wood, oak will be a good choice. I believe the GE has a vent on the side like my Magic Chef which I believe is just a re-branded GE. I went to HD and bought a wooden AC register and mounted it into the side where that vent is. I also built a bottom into my lower frame instead of just going with the furniture dolly type structure. The freezer slides in and out of the entire structure with ease. I left several inches of air gap on the sides and front.

The 2.5gal kegs are a good idea and I have two of them. They both fit right on the hump with no collar. One of them hangs off just a little but I still have room for at least three 5gals on the floor. I posted a photo below of my 7.0 Magic Chef with two 5s and two 2.5s. A third 5 will fit on the floor with two 2.5s on the shelf. I'm told that it will hold four 5s on the floor, but not with that 2.5 hanging off the shelf. One more thing: the 2.5s are stackable, but they are too tall and will require a collar even sitting on the floor of the keezer.

DSC_0298.jpg
 
Thanks Limulus, your posts are where I actually learned about those 2.5 gallon cornies. I haven't ordered any yet but will be ordering at least 2 soon.

My design is going to incorporate a hidden 4 inch collar that will serve 2 purposes... first is to allow for stacking the 2.5 gallon cornies on the floor, and 2nd is for a place to route my gas lines from outside to inside... In my original build I included a hidden compartment on the side with the compressor vent and stored my CO2 and beer gas tanks there instead inside or out in the open. With this build I'm going to take it a step further and mount my two secondary regulators and 2 air distributors on the outside as well.
 
Well I guess I've officially started construction, albeit this first step is a baby step. I picked up the 1x4s that will be used for the collar as well as a piece of 3/4" MDF that will be the bar top/lid. I put a few coats of paint on the sides that will be 'inside' to hopefully help seal the wood from any potential condensation/moisture that may build. I'm using 1x4 for the collar to shave a few pounds of lid-weight. I'm debating whether I should use a 2x4 for the rear portion of the collar since that will be holding the full weight of the lid when it's open...

0106131.jpg


Here is what I plan on using for the bar top...

0106132.jpg


I've been collecting caps for the last year and also had one of the bartenders at my local beer bar save caps for me as well. I calculated that I would need 680 to cover the entire top, not accounting for the coffin. Not sure if I have enough here, these are the ones that I sorted out, I have about 2x this many in another bucket that I culled out that I can get into if needed.

And last but certainly not least, I thought it was appropriate to crack one of my homebrews... This is my KBS clone that I barrel-aged in a 5 gallon whiskey barrel from a local distillery.

0106133.jpg
 
Well I snuck out of work a few hours early today and stopped at Lowe's to get most of the lumber and hardware that I'll need for this build. They didn't have enough decent 1x4 red oak so I'll have to go searching for more at a different store but I got enough to get started. I also picked up this bad boy, it's a Kobalt 10" Sliding Compound miter saw... I had previously been using an older Craftsman saw, this new saw blows that old saw out of the water.

011013a.jpg


After making a bunch of test cuts on scrap lumber to make sure the new saw was properly aligned I got started on attaching 1x4's to the MDF top. Here are the front and sides glued and clamped. I'll attach the back later, the back isn't as important to me right now.

011013b.jpg


The angles for this saw are spot on, here is one of my mitered corners

011013c.jpg


I also put in some 1 1/4" screws up through the bottom to provide additional support. This photo is looking up from underneath. The next step will be to wrap the front and sides with 1x6s, I will tackle that tomorrow or Saturday after the glue has a day to fully cure.

011013d.jpg
 
If you haven't gotten too far yet, I'd ditch the MDF. A) heavy as all hell, B) once any moisture hit it, it's toast. If you get any condensation build up on the back, or any leaks anywhere, and you'll be hosed.
 
I also used a little MDF and particle board on my build. The particle board is being used as my top and I used some MDF on my coffin. I veneered the MDF with Mahogany and Mottled Mokore. It has a really good barrier on it, but moisture will eventually find a way in. As for the particle board...I simply coated the hell out of it with Kilz primer and am hoping it lasts...at least a couple of years.
 
If you haven't gotten too far yet, I'd ditch the MDF. A) heavy as all hell, B) once any moisture hit it, it's toast. If you get any condensation build up on the back, or any leaks anywhere, and you'll be hosed.

I think I'm far enough into it that I don't want to ditch the MDF.... I wonder if coating the entire inner surface with this stuff would be sufficient to protect from moisture: http://www.rustoleum.com/CBGProduct.asp?pid=563
 
Well I made some decent progress yesterday and today.... I am building my top first so I know what the actual bar height will be, I will then use that info to build the cabinet to the correct height.

Here I have the first side of the 1x6 skirt glued and clamped on to the top.

011213a.jpg


Here I have attached the front 1x6, glued and clamped as well. Also using 1 1/4" finishing nails

011213b.jpg


I'm pretty pleased with how the corners came together...

011213c.jpg


Here is the lid turned upside down to show how I attached everything on the underside.. I used pocket screws and L-brackets to attach the side 1x6s to the front 1x6 and also did the same to attach the MDF lid to the 1x6

011213d.jpg


Here is the pseudo finished top... I still need to countersink the nails and add the 1x4s to the back but will not do that until I finish building the coffin.

011213e.jpg
 
I then put together the base... I wasn't thinking when I put the single 4" bolt through each corner, I'm going to have to take them out and move them closer to the inside edge, I think their current placement will interfere with the rough framing that the cabinet will eventually be attached to

011213f.jpg


I'm trying to keep this thing from being too tall, so to shave 1.5" I attached the casters to the cross beams

011213g.jpg


Here's the freezer on the base. The extra space next to the compressor space will be for CO2 and beer-gas tank storage

011213h.jpg


Here's the view from the front with a couple 2x4 scraps as spacers

011213i.jpg


After finishing the base I put together the collar. My design has the collar opening with the lid. I used storm door weather stripping as a seal

011213j.jpg


Here is the collar 'open'

011213k.jpg


And closed... Again, more pocket jig use here as well, just thinking ahead for when it comes time to attach the top to the collar.

011213l.jpg
 
Looking nice. What are you going to do for your lid support? I believe the collar and your top are going to be too much for those stock hinges. I've seen some others here that use the spring lifts from SUV tailgates. Heavy Duty!!
 
Looking nice. What are you going to do for your lid support? I believe the collar and your top are going to be too much for those stock hinges. I've seen some others here that use the spring lifts from SUV tailgates. Heavy Duty!!

I haven't quite decided what I'm going to do for support. You are correct, the top is pretty heavy, especially now that I added the 1x6 skirt. My first keezer did not need any support, the coffin was pretty heavy and it balanced the lid very nicely, I was able to keep it open without any support using the stock hinges. I don't think I'll have that luxury with this build. I stopped at the auto part store and looked at the hydrolic piston-style lift supports that they sell, I think I may try to retrofit a couple of those into this build.
 
Well I've managed to annoy my wife by spending every spare minute while my 15 month old is napping or asleep for the night out in the garage tinkering with the new build. I've made some more progress, so time for another photo update...

I've started building the panels that will eventually come together to be the main cabinet that wraps the freezer. I cut the 1x4s to size, dry fit them to find the best fit, and then used a rabbet bit on my router table to make an offset where I can mount 1/4" oak plywood.

011513a.jpg


Here is the rear view of the front panel after it was glued and screwed. You can see the rabbet cuts.

011513b.jpg


I didn't make one of the rabbet cuts long enough, had to use the Dremel to finish the job

011513c.jpg


Here is the frame from the front

011513d.jpg


Here is the front view of the panel with the oak plywood glued and screwed

011513e.jpg


Here is the rear view. I glued the panel to the frame and also used some 1/2" screws

011513f.jpg


Here is why I used the rabbet to make an offset for the plywood.... I'm going to trim the inside of the frame with this molding. I adjusted the depth of the rabbet cut so that it would allow the back edge of the molding to sit flush with the frame. You can't really see it in this image but there is a lip on the back of the molding where it sits up against the frame, the lip is very narrow, only about 1/32", but this lip is what I wanted to be flush with the frame.

011513g.jpg


Here is the panel with the molding attached....

011513h.jpg


Here's a closer view of the molding

011513i.jpg


Next step is to build and trim out similar panels for the sides. Hopefully I can get that done over the weekend, I won't have any time to get more done this week.
 
ok, that's what i thought. If you had a table saw available, I was going to suggest some halflap joints for your dolly. That would help with your height issue. You could do the same I suppose with the router, but would need to get the depth set the first time through I suppose.
 
ok, that's what i thought. If you had a table saw available, I was going to suggest some halflap joints for your dolly. That would help with your height issue. You could do the same I suppose with the router, but would need to get the depth set the first time through I suppose.

Eh, the height is exactly where I want it, it's right at 40" from floor to the top lip of the lid. I do have access to a table saw, only problem is that it belongs to my wife's uncle, and he's a recovering alchoholic in AA, so I'm trying to avoid involving him or his services in this build as much as possible.
 
Looking forward to the rest of this build. I have a fridge converted to a 3 tap kegerator in my garage but would like to replace it with a Keezer. However losing the extra freezer space would suck. Can't wait to see the finished project and probably steal some ideas...
 
Looking forward to the rest of this build. I have a fridge converted to a 3 tap kegerator in my garage but would like to replace it with a Keezer. However losing the extra freezer space would suck. Can't wait to see the finished project and probably steal some ideas...

Thanks, I'm looking forward to the rest of the build as well LOL. Today was the first day this week that I didn't tinker with something on the build. I did stop and buy the rest of the lumber that I need and also ordered all the case fans that I plan on building in to it.... I hope to get an hour or two in on Friday and a few on Saturday, if there is any more noteworthy progress I'll be sure to post up.
 
Well I spent a few more hours out in the garage today and got a few more things done... I got the side panels framed and trimed, no photos of those because they are basically the same as the front panel which was previously posted.

I then built the frame that the cabinet will be attached to...

011913a.jpg


I was very pleasantly surprised to receive my package from NewEgg with my PC case fans that will be used to move air around the freezer and also to cool the coffin... I wanted to find a way to attach the fans to the frame, but then this idea popped into my head... why not mount them with magnets to the side of the freezer? After some more thinking I decided to get some outside corner trim from Home Depot and mount the fans to that, and then use magnet tape to hold everything to the freezer. Here are a few photos of how I mounted everything, it works perfectly!

011913b.jpg


011913c.jpg


011913d.jpg


More to come later tonight hopefully, my wife is out of town for the evening so I'll stay up late working after my son goes to bed for the night.
 
So the magnet tape didn't stick to the wood, it all seperated after about an hour. So I am attaching the magnet tape to the wood with Gorilla Glue, pretty sure that should do the trick.... I'll post back tomorrow with more photos from tonight and an update on the magnet situation
 
Here's a few more photos from last night...

Got the cabinet panels all put together.. I'm very happy with how it turned out.

011913e.jpg


011913f.jpg


Test fitting the cabinet around the frame... it's a snug fit but that's good....

011913g.jpg


Test fitting the top... The top is just sitting on the collar, it's not attached yet.

011913h.jpg


All looks well in the photos but in reality I discovered a major problem when I put the top on... I designed the top so that there would be a 1/8" gap around the entire top between the 1x6 skirt and the cabinet. I also designed it so there would be 1/8" overlap between the two. The gap around is fine, however the overlap is not, it's fine on one side and off by almost 1/4" on the other side. After taking loads of measurements I was able to determine there was something with the freezer itself that was off. So I took everything apart, flipped the freezer over, and low and behold the bottom was dented and protruding out on one side (the side without the compressor). The interior of the freezer doesn't appear to be dented, so I'm assuming this is just poor manufacturing/QC. This picture doesn't really do it justice but you can get the idea:

011913i.jpg


So my first attempt at fixing this was to use a 1/4" wooden dowel as a shim on the low side. When free standing the two sides are off by exactly 1/4" so this should work, and when standing on the garage floor it did work, it leveled it out perfectly. Here is how shimmed with the dowels:

011913j.jpg


However, after putting the freezer back on the frame I still had the same problem because the shims are free floating on the frame, there is only two 2x4's going under the bottom for support, and the shims didn't line up with those 2x4's. So to fix the problem I think I'm going to use my leftover 3/4" MDF to put down on the frame for the freezer to sit on, that way the shims will work. I'll also have to build a new collar out of 1x3" lumber instead of the 1x4 like is now. My original height calculations should still be pretty close though, I'm adding 3/4" with the MDF base and 1/4" with the shim, but losing a full inch with the collar.
 
Well I spent several hours out in the garage again this afternoon and evening and was able to finish up construction on the main cabinet. I didn't have my camera with me so I didn't get any photos 'in process' today. Oh well.

My strategy for leveling out the freezer worked perfectly. I had to play around with the position of the 1/4" shims to get it level but I was able to get it to within less than 1/16" difference so I was ok with that. Other than that small imperfection everything else came together pretty much exactly as I have envisioned. I was hoping to keep 1/4" gap around the bottom but ended up having to go with 3/8" instead. This will be in a carpeted room so the gap shouldn't be too noticeable.

Here is the cabinet after I attached the 1x6" around the bottom.

012213a.jpg


Here is a photo of how the fans fit in... I probably went overboard on fans in the cabinet but I would rather have too much air flow than not enough. I put 3 fans on the non-hump side blowing from front of freezer to the rear. I put 5 along the front, 3 along the end farthest from the compressor, blowing toward the compressor, and another 2 in the middle blowing toward the compressor

012213b.jpg


Here is a photo from the back, this compartment next to the compressor is where I'll store the CO2 and beer-gas tanks. I probably should have given myself another 2 inches or so but oh well, they both fit just a little snug. I may end up having to cut the 2x4 along the top of the frame, my current 20lb CO2 tank doesn't have the plastic collar/handle so it fits, however I'm sure at some point I'll get a trade tank that has a handle and I don't think the handle will fit.

012213c.jpg


Here's a closer up photo of the gap that I left around the lid...

012213d.jpg
 
Well I spent a pretty good amount of time out in the garage today working on the coffin... I am about done with it, I'm just trying to figure out how I want to built it so that I can still access everything inside... I can't decide if I want to build a hinged back or if I want to have a removable top... Right now I'm leaning towards a removable top.

Anyways, here is a photo the coffin after I got the sides and front put together... I'm not sure if I like how the molding looks on the side of the coffin... I wanted to keep it consistent with the base, but it's so small that I can't decide if I like it or not...

012713a.jpg


Here's a view of from the back as I was gluing on 1x2's to create an offset... You can also see the 1/4" recess at the top that will be used to mount/hide LED light strip.

012713b.jpg


Here is the 1x2 offset from the front.

012713c.jpg


Here it is with the plywood that the backsplash will be attached to....

012713d.jpg


And that's the last photo for now. I still have to finish the top and back of the coffin, after that I'm done with construction and ready to start sanding and finishing this bad boy!
 
Looking really good. Classy with that red oak. I was talking with the wife (Trying to convince her) about building a keezer with the coffin on top and putting it inside. I will def show her yours to let her get a good idea of how nice they can look. Keep up the good work. Cheers!
 
Looking really good. Classy with that red oak. I was talking with the wife (Trying to convince her) about building a keezer with the coffin on top and putting it inside. I will def show her yours to let her get a good idea of how nice they can look. Keep up the good work. Cheers!

Thanks! Yeah the red oak is really nice, I can't wait to see how it looks after it's stained and has the poly coat on it. I've started the arduous task of sanding but it's moving along faster than I thought. I have the lid done, I spent about 3 hours on it yesterday to make it as perfect as I can get it. I figure that will be the part that gets touched and examined the most and I'm ecstatic at how clean all my joints look after sanding... I did a pretty good job of matching up the grains for the butt-joints, my wife couldn't even tell there was a joint until I pointed it out to her.
 
Well I'm excited to say that I am finally finished with construction... I cut the last 2 pieces of 1x4 trim today and got them installed along the back of the top after I got the coffin in to place. Here is the final product... Still have LOTS of sanding to do, I have the coffin and the lid all sanded and ready for staining but I haven't started with the cabinet yet.

020713a_zpsb1e4a918.jpg


I'm very happy with how clean everything looks after sanding...

020713b_zps07280db6.jpg


Here's a closer view of the coffin.... The black backsplash is going to get covered in beer bottle caps and then about 3/8" of clear epoxy... I'm also going to do the same for the entire bar top and also the top of the coffin...

020713c_zps5c5f918d.jpg


Here's a photo of the back of the coffin. I just used an old scrap piece of 3/4" plywood for the back piece, I figure nobody will ever see it since it will be pushed up against the wall. I gave myself about 1 3/4" to mount my temp controller, secondary regs, air distributors, etc. My gas lines will all enter through holes drilled in this back panel. I used a 'spray on rubber' to seal this back piece as well as the entire inside of the coffin. I'm going to use the same stuff to seal the bottom side of the lid and the inside of the collar.

020713d_zps4e5eec84.jpg


I am hoping to get all the sanding done within the next week or two and then I'll start staining... more photos to come as I start the staining process.
 
Looks great, how dark are you going with the stain?


Thanks. I haven't decided yet. I like darker stains but I want to be careful and not go too dark and end up hiding some of the grain character of the red oak. Right now I'm considering the Minwax Red Mahogany, I have some from my previous keezer build that I'm going to test on a scrap piece of red oak and see how it looks. If it's too dark I'll go with either the Sedona Red or Red Oak... That is, unless I decide to try the Minwax Gelstain, if I go that route I'll probably use the Mahogany, it doesn't look to be as dark as the traditional Red Mahogany.
 
Well, after several weeks of craziness at work and a couple weekends away from home, I finally found some time today to do some more work on my keezer.

Last week I was able to get the interior of the lid insulated. I put about 5 coats of sprayable rubber sealer over the interior of the lid before installing the insulation. I tried to seal the insulation as best as possible with HVAC aluminum tape.

022413a_zpsf17c1526.jpg


I also installed my fans to help keep the coffin cool... The two fans on the outside are blowing up into the coffin. The middle fan is blow down from the coffin into the main keezer chamber. Hopefully this is enough to not only keep the coffin cool but also to stir up the air inside the keezer to help with temperature statification. The other two holes will be for the beer lines and gas line (gas lines will enter from back of coffin)

022413b_zps94c9f3da.jpg


Here's a view of the top, the fan in the middle is blowing down into the main chamber.

022413c_zpsa40c0ed0.jpg


Tonight I started staining some... I got the lid and coffin completed. I ended up going with the Minwax GelStain Hickory color... I was going to use the traditional Minwax Red Mahogony, but after testing it I didn't like how it looked with the red oak, it was wayyyyy to red for my liking. The hickory is perfect. I'm still torn as to whether I want to put another coat. This is just one coat. The photos make it look a little darker than it really is. I'm afraid it will end up darker than I want if I add another coat. So we'll see, I have a hidden area that I can test tomorrow with a second coat.

022413d_zpsf4e9a42d.jpg


022413e_zps68a6448f.jpg
 
The black backsplash is going to get covered in beer bottle caps and then about 3/8" of clear epoxy... I'm also going to do the same for the entire bar top and also the top of the coffin...

yeah? Lay it out first, especially after you finish staining the pieces that will be stained. This is looking really nice. I like the idea of bottle caps, but not on something like this. I mean, this looks like a real nice piece of furniture. I know it's been done before, but these keezers with the nice tile make it look really classy, not like a piece of frat furniture.

Really like the way this has come out though, you've done an outstanding job. I just used my pocket hole jig for the first time before christmas. Amazing what that tool can do! Congrats again on the build!


Thanks, yeah I do have some reservations about the bottle caps 'cheapening' things a bit, but I also don't think the tile is the answer for me either... This is going into our game room, so I think the bottle caps will keep it more festive.

As for the pocket jib, yeah it is an amazing little $20 tool... If you don't have it, the Kreg clamp is also well worth the extra $20... I started just using a cheapo plastic clamp that I had, and it was a PITA. After it that clamp broke I bought the Kreg clamp and it is soooooo much better, it's easier to attach and it holds the jig much more securely.

I did have one momentary freak out with the jig... I thought I had somehow managed to warp/bend the bit, all of sudden when I was drilling it started making an awful racket, so I thought it was warped and was making noise as it spun in the jig... So I went out, bought a new bit, and still had the noise... So I thought something was wrong with my jig, and then I realized I had inadvertently switched my drill to 'hammer' mode :drunk: whoopsies
 
So over the weekend I got around to laying the bottle caps on the coffin box and pouring the epoxy.... I was a little concerned with how I would seal the 'open' end of the coffin box but I came up with a solution that worked perfectly... I took a long piece of 'non-stick' aluminum foil and folded it over on itself about 6 times or so... I then taped it on to a scrap piece of 1x3 and used bar clamps to hold it against the bottle of the coffin that is open... I also ran a piece of aluminum foil tape all along the joint between the coffin and the 1x3 to hopefully hold in any potential leaks. i didn't figure the epoxy would leak too much since it's so thick. I didn't lose a drop, and when I undid the clamps the board and foil came off cleanly without any effort at all... It really worked perfectly. my only regret is not laying the caps flush with the bottom of the coffin, I offset them by the height of a bottle cap, hoping the pattern I'm laying would look pretty seamless going from bar top to coffin backsplash. I'm afraid it's not going to look as seamless as I hoped, in fact there's going to be somewhat of a gap in the caps that I'm not thrill about but I'll deal with it.

Here are some pics: You can't really 'see' the epoxy in the first and third images because it's so brilliantly clear

030513a_zps60714fc5.jpg


030513b_zpsc0ad3bbd.jpg


030513c_zps1692a012.jpg
 
I collected some, some friends collected some, and a lot came from my local beer bar. I built some cheap and easy openers that do not damage the caps...Gave them to my buddies and one of the bartenders at the beer bar. He used it when he wasn't super busy and just threw them in a bag for me. The openers are basically just a screw/nail put into a square wooden dowel. Put a bottle cap upside down on the towel and insert the screw to where the head is at the level of the rim of the cap.... Then, when you open the beer, you put the screw under the rim of the cap and push down on the other end of the wooden down to pry it up... The dowel maintains pressure on the surface of the cap so it doesn't get bent.
 
here is a photo of my bottle cap opener that I used to collect these caps...

opener.jpg
 

Latest posts

Back
Top