Mash tun woes

Homebrew Talk - Beer, Wine, Mead, & Cider Brewing Discussion Forum

Help Support Homebrew Talk - Beer, Wine, Mead, & Cider Brewing Discussion Forum:

This site may earn a commission from merchant affiliate links, including eBay, Amazon, and others.

lostspring

Well-Known Member
Joined
Feb 23, 2009
Messages
83
Reaction score
0
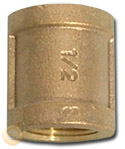
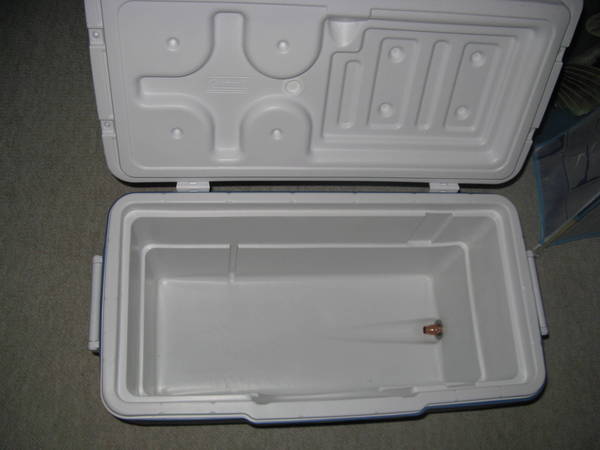
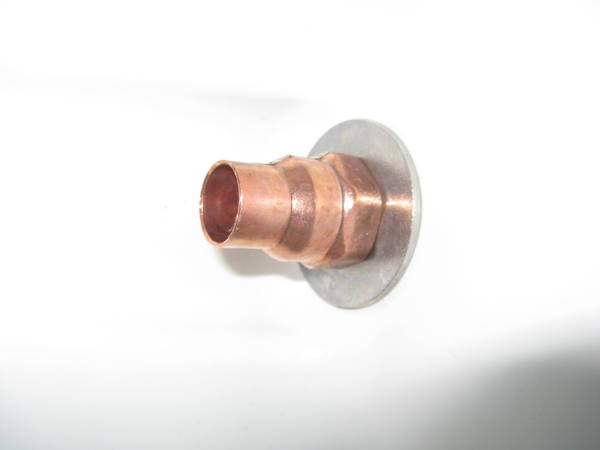
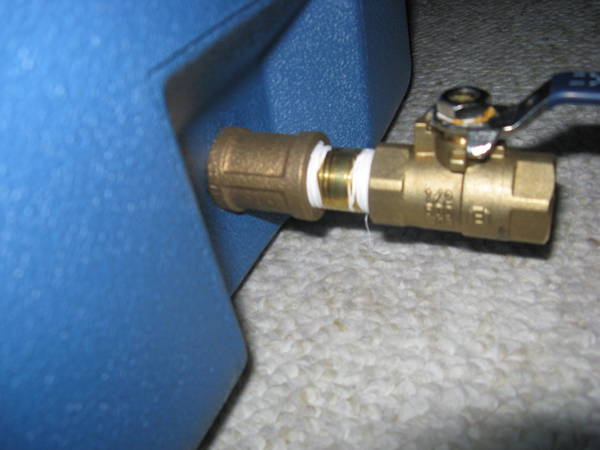
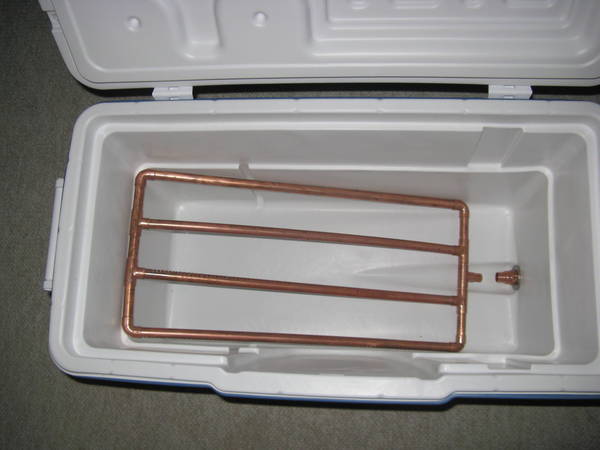
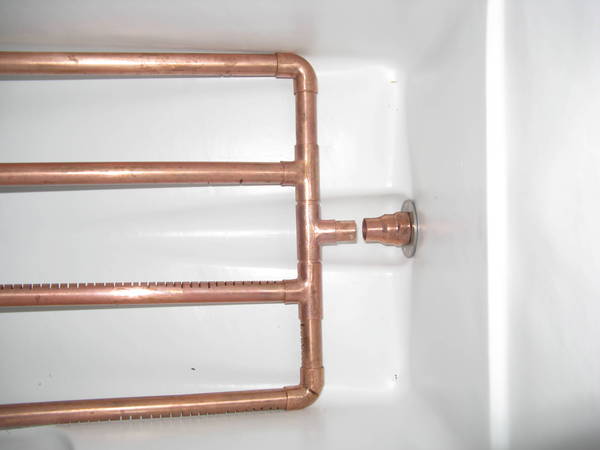
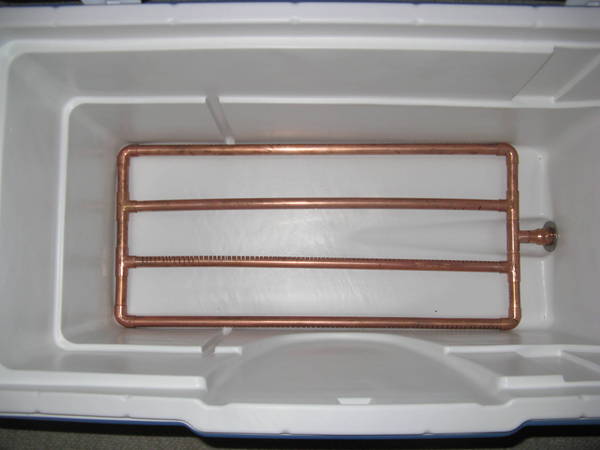
I can't believe I am having this much trouble. I watched the youtube vidios and read all I could find. I have a Coleman xtreme cooler with a drain. I took it apart and measured the hole, 1". I bought a ball valve and a 1"union. The problem I am having is trying to make the connections on the inside of the cooler. I have the copper tubing to make the manifold but am having an unbelievable time trying to make the connection from the manifold to the union. I want to use a small piece of copper tubing to join the manifold to the union. Well, looks like a 60 mile round trip to do some more looking.
As long as I am there a stop at LHBS for the ingrediants for my first AG brew, a Bee Cave Haus Ale.
I just can't believe these parts are that hard to find!
 
I have a thread in DIY about a 5 gal MLT...It shows how to do it...
You need a 1/2" FPT by 1/2 tube copper fitting...*
I sweated a 1/2" MPT by 1/2 tube copper fitting to one end
and screwed the same fitting in the other end...
That leaves a 1/2" MPT sticking out of the cooler and 1/2 tube sticking in the cooler..
A tight fitting manifold holds everything in place...
The female fittings I found at Home Cheapo worked...*
The ones at OSH are slightly larger and did not fit...
 
I have the same rig. I went to Menards and bought hose that fit into the drain tightly. No need to take the drain out or modify it at all. Just warm up the hose in hot water and work it through the hole. Never leaks. Just converted my 48 qt. cooler to the 70 qt. extreme cooler in about 5 minutes. The best part is if you need the cooler this summer just pull the hose out, shut the plug and it's a cooler again. When you're ready to brew just insert the hose back in the drain and connect your stainless braid, or what ever you're using, and your mash tun is back in action. I found a PEX valve that fit the hose perfectly as well. ~$3 and a couple hose clamps. It can't get any easier than that!! :)
 
I use the 70qt Xtreme and got don't have a leak problem. I'm at work now so I'll take pics later of my set-up. If I recall I have a 1/2" male threaded nipple
246496_front200.jpg
that extends thru the cooler wall. The inside of the cooler has the rubber washer that came with the cooler, followed by a 7/8" stainless washer that is pressed against the cooler wall with a female 1/2" threaded copper fitting
251637_front200.jpg
. The copper fitting screws onto the threaded coupling pressing the stainless washer against the rubber washer. On the outside I have a 1/2" female x female threaded brass coupling
brass-fitting-couplings.jpg
that screws onto the other side of the threaded coupling extending thru the cooler wall. This gives the leverage needed on the outside of the cooler to keep pressure against the washers on the inside (and also gives enough distance from the cooler so that the ball valve handle doesn't hit the cooler). Another 1/2" male threaded nipple with a brass ball valve and 1/2" brass barb completes the set up.

I have a 1/2" copper manifold and I didn't solder it, just dry fit. I built it tight to the sides so that when you put it in place it has very little room to move and fits into the copper coupling nicely. I'll take pics later tonight, this post is probably confusing to read
 
OK...here's the inside
Mashtun_001.JPG

Here's the inside fitting, a female copper coupling pressing a stainless washer against the rubber grommet that was part of the factory cooler spigot all attached to a threaded brass nipple.
Mashtun_002.JPG

Here's the outside of the fixture, a brass coupling screws onto the brass threaded nipple that extends out thru the cooler wall, another threaded nipple and brass ball valve.
Mashtun_003.JPG

Here's a shot of the manifold...I made the slits with a metal cutoff wheel on a Rotozip.
Mashtun_004.JPG
 
Here's a shot of the manifold in the mashtun...
Mashtun_005.JPG

Here's another...closer look.
Mashtun_007.JPG

And another...
Mashtun_006.JPG


The ball valve is solid and doesn't have much play. No leaks at any of the fittings. The interior manifold fits snug with about 1/4" to spare on either end and am able to move it around for a tight fit. Nothing soldered, all of it is dry fit and disassembled after use. easy smeasy. If I ever do fly sparging, I'll be removing the two lengths of manifold pipe along the outer walls and just putting copper caps on the ends of the connecting pipes to prevent channeling down the side of the cooler wall (which I have witnessed while batch sparging).

Thats how I did it, hope this helps someone.
 
Looks like about how mine is, but I used cpvc. And put epoxy in the cooler hole before I tightened it seems to be good. works well.
Jack
 
Thanks for the help guys
Illin8-That is the setup I am trying to make,yours looks good. I hadn't thought about the second nipple outside of the cooler,a better idea then mine. I am having a hard time finding the threaded copper reducer on the inside, We are going to a larger town today for some other things so I will get to look again.
 
The second nipple keeps the valve out away from hitting the cooler too. The 1/2" female threaded coupling is fairly easy to find at any big box retailer...you may have to look hard at a local hardware store though.
 
If I ever do fly sparging, I'll be removing the two lengths of manifold pipe along the outer walls and just putting copper caps on the ends of the connecting pipes to prevent channeling down the side of the cooler wall (which I have witnessed while batch sparging).

I was just about to correct you on your geometry until I read this part. Looks good man! :mug:


just for reference sake and because I went through the trouble of finding it...
How to Brew - By John Palmer - Building the Manifold
 
Back
Top