I am currently converting to electric, and think that having a bottom drain for the brew kettle would help tremendously for priming the pump and also clean in place. My question to those with bottom drains: how do you plump the ball valve for the bottom drain? I want to put a 1/2" ball valve on the bottom, obviously directly connected to the bottom of the keg is no different than my current dip tube that sucks from the bottom of the keg. But what about plumbing a 10" pipe from the drain in the bottom of the keg to the ball valve? Is the 10" of wort in the plumbing that is not boiling cause problems?
You are using an out of date browser. It may not display this or other websites correctly.
You should upgrade or use an alternative browser.
You should upgrade or use an alternative browser.
Bottom Drain on Brew Kettle
- Thread starter HawkATP
- Start date

Help Support Homebrew Talk - Beer, Wine, Mead, & Cider Brewing Discussion Forum:
This site may earn a commission from merchant affiliate
links, including eBay, Amazon, and others.
Your looking at about .008 gallons of wort in that tube. It will be sanitized because of the heat, so that's not a problem. If you're worried about hop utilization or something, I'm sure that's not enough to make a difference. If you are super anal, you could drain out the .008 gallons during your boil and put it back in the keg, but I bet enough mixing will occur without doing that. I would not worry about it!
Thundercougarfalconbird
Well-Known Member
- Joined
- Dec 16, 2010
- Messages
- 760
- Reaction score
- 25
You could circulate with the pump throughout the boil as well. I really like the idea though, there a lot more* dead space with a valve on the side of the kettle.
You'll have to post pics, I'd like to do the same eventually.
You'll have to post pics, I'd like to do the same eventually.
Did you get a chance to try this out? I have a functioning RIMs setup that I'd like to upgrade to include bottom drains. I get air stuck in my lines while priming, which isn't a too big of a deal, but I want to add electric valves for some automation.
The bottoms are cut off of two kegs, just waiting on the tri-clovers from brewers hardware. I'll post some pics after they're built and a review, I was hoping to get a brew in before Christmas. Here are links for the rest of the parts I'm using:
Stainless Steel 304 Cast Pipe Fitting, 90 Degree Elbow, Class 150, 1/2" NPT Female
http://www.amazon.com/dp/B001VXVZ9A/?tag=skimlinks_replacement-20
Stainless Steel 304/304L Pipe Fitting, Nipple, Schedule 40 Welded, 1/2" X 10" NPT Male
http://www.amazon.com/gp/product/B003JQJMV0/?tag=skimlinks_replacement-20
2" Tri Clover X 1/2" Male NPT
https://www.brewershardware.com/2-Tri-Clover-X-1-2-Male-NPT.html
2" Tri Clover Clamp
https://www.brewershardware.com/2-Tri-Clover-Clamp.html
Silicone O-Ring for 2" Tri Clover Cap
https://www.brewershardware.com/Silicone-O-Ring-for-F1.html
Plus your ball valve.
Last edited by a moderator:
LordUlrich
Well-Known Member
I currently have a keg setup using the coupler opening and a triclamp as a bottom drain for CIP, but use a side drain for wort transfer. I worry about using a bottom drain as you will be pulling all the trub toward the drain. But I am a huge fan of whirlpools and settling.
As far as any trub in your outlet pipe I suggest pumping during the boil. Last brew day I left my whirlpool pump on during the whole boil (I needed to stir preventing a boil over and got press ganged into bar duty) by the end of the boil I had trub chunks the size of marbles, once I stopped whirlpooling they dropped like rocks, and I had a clear transfer.
As far as any trub in your outlet pipe I suggest pumping during the boil. Last brew day I left my whirlpool pump on during the whole boil (I needed to stir preventing a boil over and got press ganged into bar duty) by the end of the boil I had trub chunks the size of marbles, once I stopped whirlpooling they dropped like rocks, and I had a clear transfer.
jeffmeh
Well-Known Member
- Joined
- Feb 26, 2009
- Messages
- 2,145
- Reaction score
- 216
I currently have a keg setup using the coupler opening and a triclamp as a bottom drain for CIP, but use a side drain for wort transfer. I worry about using a bottom drain as you will be pulling all the trub toward the drain. But I am a huge fan of whirlpools and settling.
As far as any trub in your outlet pipe I suggest pumping during the boil. Last brew day I left my whirlpool pump on during the whole boil (I needed to stir preventing a boil over and got press ganged into bar duty) by the end of the boil I had trub chunks the size of marbles, once I stopped whirlpooling they dropped like rocks, and I had a clear transfer.
That's what I would suggest, a center bottom drain for CIP and a side port with a pick-up tube to drain wort or recirculate. I believe Ohio-Ed welded a 2" tri-clamp ferrule to the bottom for CIP.
cyclogenesis
Well-Known Member
Got to say that is one sweet setup!
OT but what are you using as an exhaust fan?
OT but what are you using as an exhaust fan?
Thanks, the fan is a Hydrofarm inline 6 inch, 400 CFM, off of Amazon:
http://www.amazon.com/gp/product/B002JQ14F8/?tag=skimlinks_replacement-20
http://www.amazon.com/gp/product/B002JQ14F8/?tag=skimlinks_replacement-20
Last edited by a moderator:
bigljd
Well-Known Member
I was scrolling through your thread and had to do a double take when I saw your control panel - how did my control panel get in your brew room?  Nice job, it looks good! Have you tested out the control panel yet?
cyclogenesis
Well-Known Member
Thanks, the fan is a Hydrofarm inline 6 inch, 400 CFM, off of Amazon:
http://www.amazon.com/gp/product/B002JQ14F8/?tag=skimlinks_replacement-20
Perfect! I think I may duplicate your hood setup.. I have a similar basement window shape and setup...
Last edited by a moderator:
bigljd
Well-Known Member
Thanks, used your thread for the build, except I used a Lowes plastic junction box. . Thanks for answering my questions in your thread. Tested it yesterday and everything worked great.
I've learned a lot from HBT so I'm glad my build thread could be helpful to someone.
One other note - I ran autotune on the PID to help it hold my HLT water temps nice and steady and it worked great. However, when using the PID in manual mode for the boil kettle the first time I had a pulsing boil that I didn't like. After searching HBT I found the boil can be smoothed out by changing the P value to 1 and the T value to 2. I've made a note of what the autotune values for P & T are (in my case they were ~ 300 and 6) so when I am heating strike and sparge water I'll set the P value to 301 and T to 6, then when I switch to manual mode I'll set P to 1 and T to 2. This gives me great HLT temp control and a nice smooth boil.
Subscribed. I'm very interested in finding out how well your BK does with the hop and trub filtering. Is the a splatter screen or an FB? Wondering if you would be able to just use the stainless mesh screen that everyone was buying from Mcmaster car to make hop stoppers with and just cut it to completely line the bottom of the keg for filtering hops. I'm still planning my e-brewery
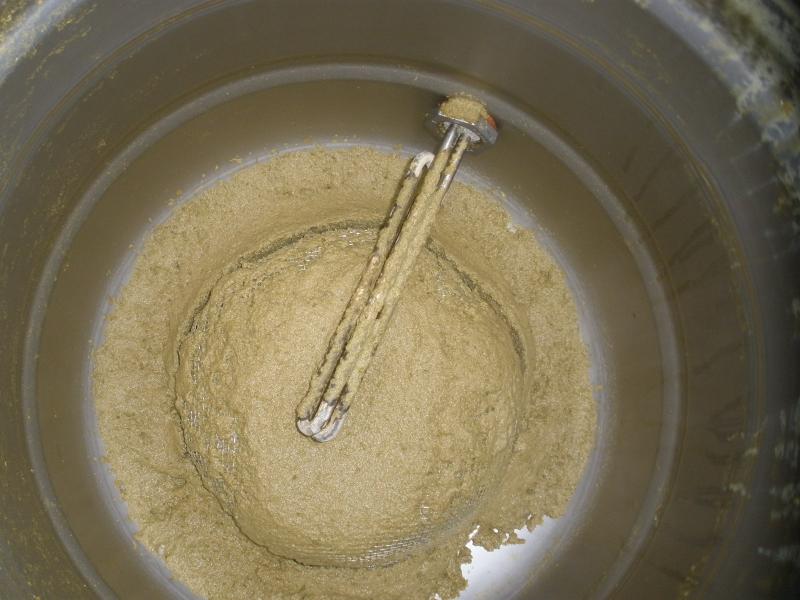
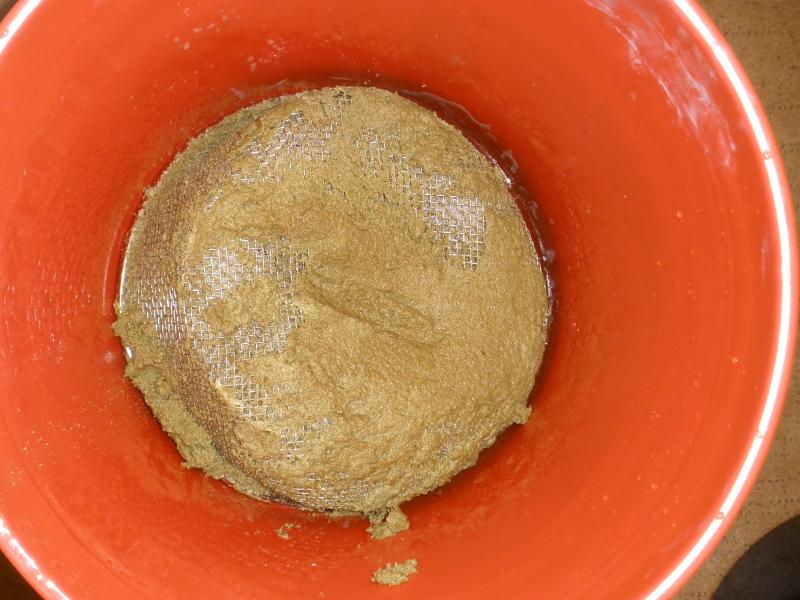
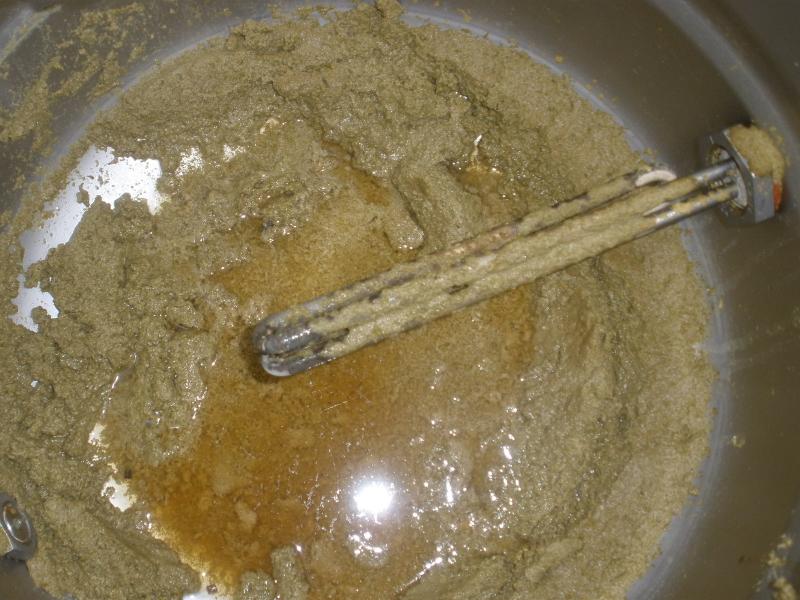
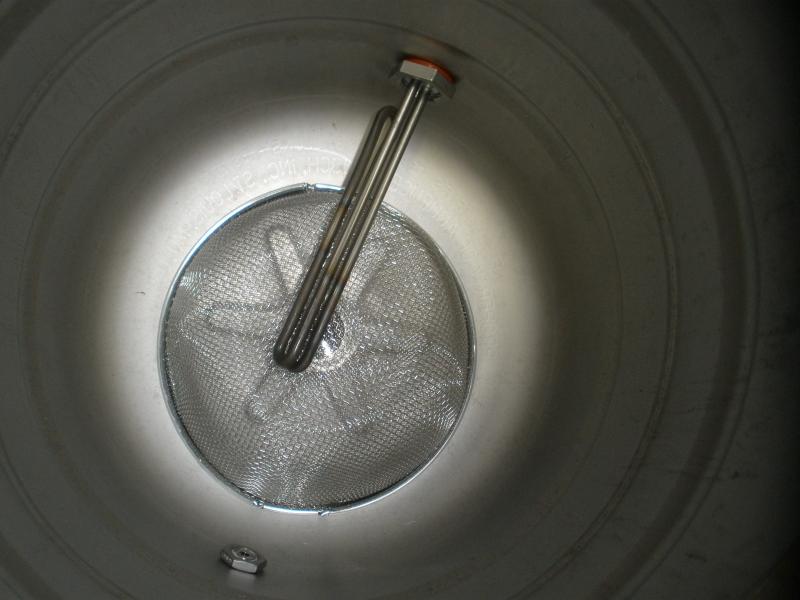
Well I managed to get a 10 gallon batch brewed today. Thanks for the tips on the PID bigljd. The bottom drains worked great, didn't have any problems priming the pump. The bottom drain in the boil kettle also worked great. I recirculated the boil for the last 10 minutes. The hop and trub screen caught all of the hops and trub. I had a total of 10 ounces of hops in the boil. I had previously used the paint strainer method, but I feel the stainless screen allows the hops to flow much better throughout wort. The hop filter is made from a stainless strainer that I had but never used. I just cut off the handle. It tucks right under the element.
Polar Ware Stainless Steel Strainer | Beer Wine Hobby
Clean up in place was a breeze afterwards, using the water I had collected from the CFC.


Polar Ware Stainless Steel Strainer | Beer Wine Hobby
Clean up in place was a breeze afterwards, using the water I had collected from the CFC.


looks like the screen worked great. I have a bottom drain as well but have used a hop spider thus far. I'm going to have to try this
Can I ask a question on your table? It looks like the drain line feeds through the cross member on the face on the table. Do you find it difficult to get at the clamp and drain?
Thanks Jem
Can I ask a question on your table? It looks like the drain line feeds through the cross member on the face on the table. Do you find it difficult to get at the clamp and drain?
Thanks Jem
looks like the screen worked great. I have a bottom drain as well but have used a hop spider thus far. I'm going to have to try this
Can I ask a question on your table? It looks like the drain line feeds through the cross member on the face on the table. Do you find it difficult to get at the clamp and drain?
Thanks Jem
I don't have any plans on taking the plumbing apart. I cleaned and flushed the keg through the ball valve. If I needed to move the keg I would detach the drain valve, 10" pipe, and 90 degree elbow. Not difficult to do, but not necessary to get the keggle clean.
HawkATP said:Here are some pics of the completed set-up. I probably won't be able to test it until next week though.
Hey hawk. Is your stand specs the same as kals? I built the my stand at about 33" deep to allow for some space to place things on the stand but now I'm concerned that it won't matter as the ball valve won't fit to the outside edge like your Setup. I'm also planning a bottom drain EHERMS system like yours and I wanted the valves coming out of the front skirt. What are your stand specs?
what is your steam hood made out of? i have been looking for an option that is less expensive than stainless, love the setup really similar to my basement setup
Hey hawk. Is your stand specs the same as kals? I built the my stand at about 33" deep to allow for some space to place things on the stand but now I'm concerned that it won't matter as the ball valve won't fit to the outside edge like your Setup. I'm also planning a bottom drain EHERMS system like yours and I wanted the valves coming out of the front skirt. What are your stand specs?
I originally started out with kals stand in mind, but decided to shrink it quite a bit because the footprint of my kegs were smaller than his kettles. I also substituted 2x4s for the 2x6s as well. The length of my stand is 60" x 24" depth + 24.5" tall. I also have a middle bracing joist under the top shelf to help support the kegs. If you already have the stand built, just simply get a longer 1/2" stainless nipple than the 10" one that I am using to get outside your front skirt. And if you don't already have a center support joist, I'd add that as well, and you'll be good to go.
what is your steam hood made out of? i have been looking for an option that is less expensive than stainless, love the setup really similar to my basement setup
I ended up making it out of 1x2s from the local big box store. I lined and spray painted black 1/2" foam board insulation and then used ducting tape to seal it up.
One last question, with those stand dimensions how much space do you have from the front of your keggles to the edge of the stand? How much space from back of keggle to the back edge of stand? My stand is only framed out so I may change the depth to help with the strength and valve placement. Thanks again I needed that inspiration to hurry and finish my brew system
CannibalAJ
Well-Known Member
Hey Hawk,
I'm gonna jump on the venting bandwagon here. I would like to set up a hood so I can brew indoors to avoid the elements. The big thing in my house is the smell. I'm sure there is no avoiding some smell, but does it help at all? Hopefully it helps a lot! Froze my rear end off on Saturday!
I'm gonna jump on the venting bandwagon here. I would like to set up a hood so I can brew indoors to avoid the elements. The big thing in my house is the smell. I'm sure there is no avoiding some smell, but does it help at all? Hopefully it helps a lot! Froze my rear end off on Saturday!
The keggles are 2 3/8" from the front of the stand and 6" from the back of the stand. I just finished my second 10 gallon batch on the setup on new years and am very pleased with the bottom drains. Good luck with your build and let us know how it works out?One last question, with those stand dimensions how much space do you have from the front of your keggles to the edge of the stand? How much space from back of keggle to the back edge of stand? My stand is only framed out so I may change the depth to help with the strength and valve placement. Thanks again I needed that inspiration to hurry and finish my brew system
Hey Hawk,
I'm gonna jump on the venting bandwagon here. I would like to set up a hood so I can brew indoors to avoid the elements. The big thing in my house is the smell. I'm sure there is no avoiding some smell, but does it help at all? Hopefully it helps a lot! Froze my rear end off on Saturday!
The vent hood pretty much eliminates the smell from brewing. For some inexplicable reason, SWMBO cannot stand the smell related to brewing. My first brew I didn't turn the hood on while I mashed in and heard about it. After I turned the hood on she agreed that it took care of the smell. No complaints during the second brew session.
CannibalAJ
Well-Known Member
The vent hood pretty much eliminates the smell from brewing. For some inexplicable reason, SWMBO cannot stand the smell related to brewing. My first brew I didn't turn the hood on while I mashed in and heard about it. After I turned the hood on she agreed that it took care of the smell. No complaints during the second brew session.
I'm quoting you on this one!! LOL
I will install my own hood so I can brew beer in the winter with out doing it in an igloo

I'm quoting you on this one!! LOL
I will install my own hood so I can brew beer in the winter with out doing it in an igloo
My last outdoor brew session in December is definitely what drove me inside!
Hawk .. your pics with the camlocks sticking out of the brewstand gave me a raging mash paddle (-: Looks like I'm definitely going to swap my current keggles out to bottom drains with 3/4" electric ball valves. I have one 15.5gal keg .. but unfortunately my other one is only 13.5gal .. effin' canadian keg .. eh (-:
Hawk .. your pics with the camlocks sticking out of the brewstand gave me a raging mash paddle (-: Looks like I'm definitely going to swap my current keggles out to bottom drains with 3/4" electric ball valves. I have one 15.5gal keg .. but unfortunately my other one is only 13.5gal .. effin' canadian keg .. eh (-:
You'll have to post some pics, I've never heard of these electric ball valves you speak of, but they sure sound nice!
shushikiary
Well-Known Member
Similar threads
- Replies
- 39
- Views
- 704
- Replies
- 3
- Views
- 591
- Replies
- 0
- Views
- 218
- Replies
- 0
- Views
- 238
- Replies
- 1
- Views
- 449


