OP
OP
kal
Well-Known Member
Wow. This one looks like an *exact* replica. Cool! Nice work!
Kal
Kal

Hi!
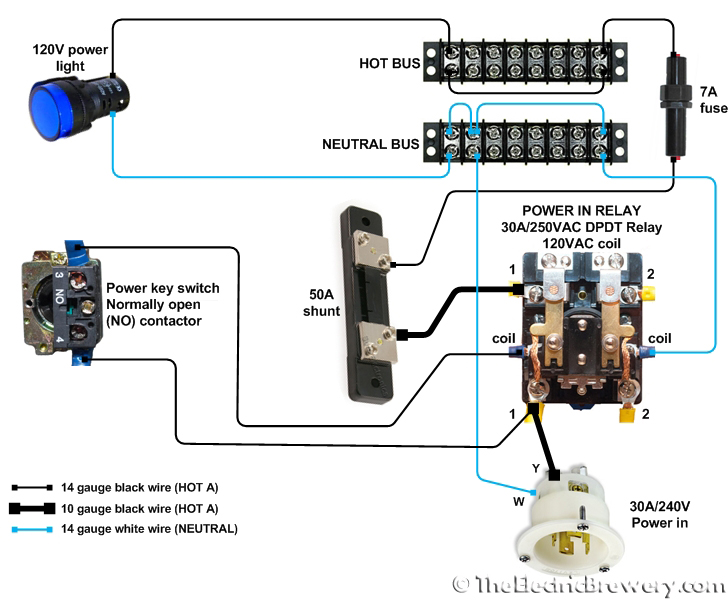
You can use 14 AWG from the relay to the Neutral bus. No issues.
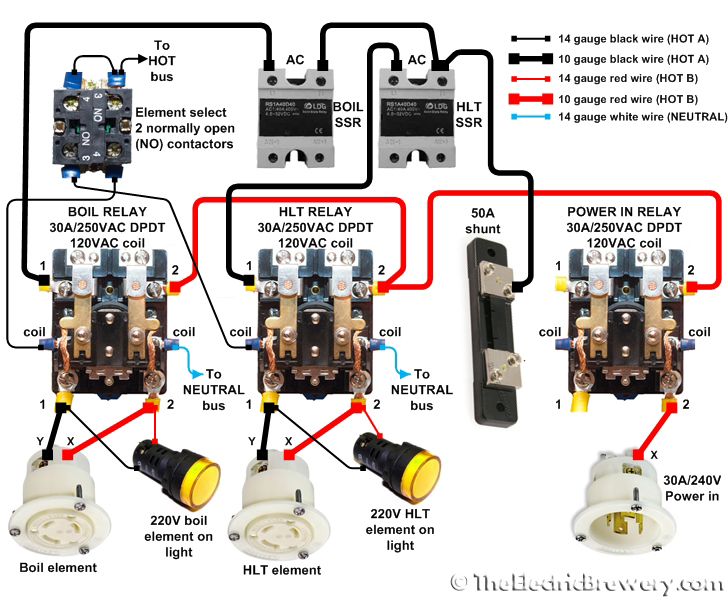
Just make sure to use 10 AWG from the relay (not shunt) to the SSRs in the later diagram:
Kal
I wonder how many control panel builds you inspired. I had a hard time finding heating elements. Amazon store is sold out.
I wonder how many control panel builds you inspired. I had a hard time finding heating elements. Amazon store is sold out.
The 5500 watt elements that home depot sells work just as well IMO as the camco. If you're doing 5 or 10 gallon batches I doubt you'll notice a difference between the two.
Kal is single handedly responsible for several suppliers going out of stock.
I can also go Tri-Clamp instead. For four hoses, two pumps, one chiller, HLT, Mash Tun, BK and RIMS Tube, I am looking at $871.00 from Sabco.
Please, please talk to Swagman on HBT before you go to Sabco. Not only are you supporting a HBTer, but he will almost always get you a better deal...not to mention a high quality product.
Another option is KLG Stainless on ebay.
Is it ULWD? The main benefit of ULWD (ultra-low-watt-density) is not to prevent wort scorching (which IMHO is internet folklore) but as a safety feature to avoid blowing the element if ever by accident you fire it dry.
Kal
")
9 PIDs seems a tad excessive... Why did you not just get digital temperature meters?
Namako, if you are concerned about fitting them in the box, the backside of them is much larger than the front. Which switches did you buy? The front of the selector is not much bigger than the hole.
I was at Home Depot today and checked on these. They are Camco brand and they are definitely ULWD. The only difference is the shape. They are the straight kind with only one bend.
Here's a link: http://www.homedepot.com/h_d1/N-5yc...splay?langId=-1&storeId=10051&catalogId=10053
Even though the description above says "Low Watt Density" The package actually says "Ultra Low Watt Density"
I'm 95% complete with my own Kal Clone, but I need just ONE dimension that I can't seem to find anywhere. The 22mm selectors appear to require a 22mm hole to be drilled, but I can't find the diameter of the plastic selector anywhere. Surely it's not the same diameter as the hole itself, is it?
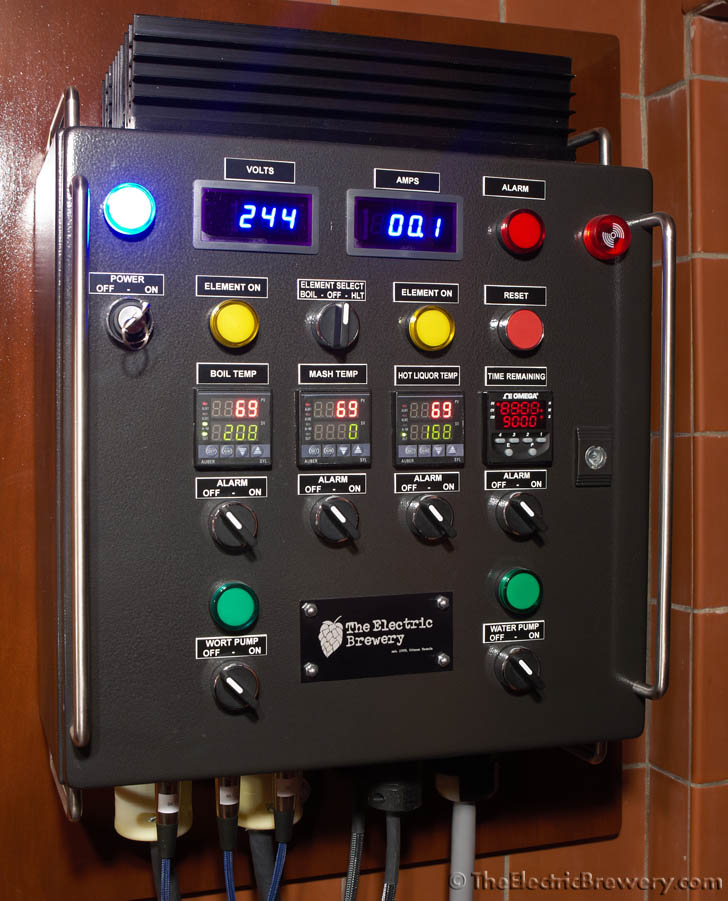
I'm building a 24" x 16" control box with - and yeah, I may be over compensating for deficiencies elsewhere - 9 temp PIDs (only 3 of them actually control the GAS burners, the rest are just monitoring temps), a pH controller, and a timer. With all this equipment crowded into the box, I want to make sure that there's still room for my FAT AND DRUNKEN fingers to turn the damned knobs!
If someone could enlighten me, I can finish the design and start drilling!!
BTW, I gotta give a shout-out to Kal's recommendation of electrical_parts on eBay - that guy truly ROCKS!!!

Control panel switches require either 22 or 30mm holes. That's really all you need to know. The selectors go with the switch base.I'm 95% complete with my own Kal Clone, but I need just ONE dimension that I can't seem to find anywhere. The 22mm selectors appear to require a 22mm hole to be drilled, but I can't find the diameter of the plastic selector anywhere. Surely it's not the same diameter as the hole itself, is it?
Control panel switches require either 22 or 30mm holes. That's really all you need to know. The selectors go with the switch base.
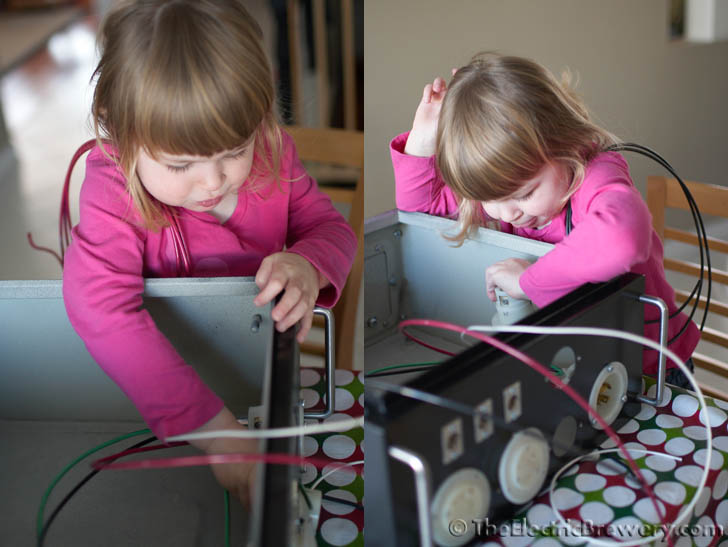
Can you post pictures?
Kal
Kal:
Why are you referring to yourself in the plural?
Make sure it's going to fit. The only way to get to ULWD (50W per square inch) is to make the total element length longer. The ones I use keep the overall length shorter by (a) folding the element over on itself, and (b) using a zigzag pattern.
The ones you listed don't have a zig-zag pattern so the installed length must be longer (?).
Kal
But, you're right, you should check the side diameter of whatever vessle you use first.
Ok, I looked at my switches and the knob is about the same diameter as the width of the box behind it.

Jan 16, 2011 update:
We're offering an alternate method for cutting the 22mm holes in the control panel which results in cleaner, perfectly centered holes with the least amount of work. It involves using a GreenLee 1/2" conduit punch to make the 7/8" (22mm) holes instead of exclusively using a GreenLee 36414 1-3/8" step drill bit. This is now our recommended method for creating the control panel 22mm holes, especially if you do not own a drill press. See here for complete details.
Kal
Enter your email address to join:

