Flash boiler

Homebrew Talk - Beer, Wine, Mead, & Cider Brewing Discussion Forum

Help Support Homebrew Talk - Beer, Wine, Mead, & Cider Brewing Discussion Forum:

This site may earn a commission from merchant affiliate links, including eBay, Amazon, and others.

GreenMonti

Well-Known Member
Joined
Nov 29, 2009
Messages
1,268
Reaction score
67
I thought I would put up my Flash boiler build. After MANY, MANY, Pm's to Kladue. I have started. Thank You Kevin for all you have done!

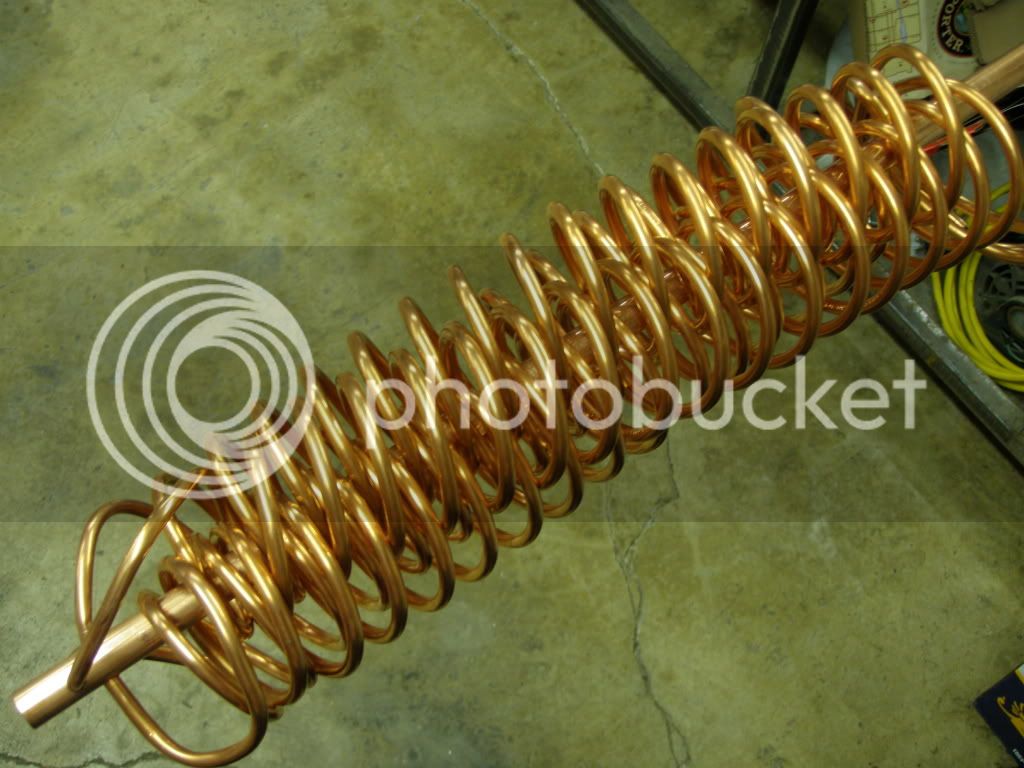
So I have built mine around Klaude's design. I am using copper tubing on mine instead of the SS. I bought a 50' roll of 1/4" copper tubing and cut 4 12'4" lengths. I wrapped the lengthes around a 2" PVC pipe to get nice tight wound coils. Keeping them on the pipe I spread them out to get about 1" of spacing inbetween the coils. I am using 1/2" type L as the center tube for the inlet water. I didn't take pics of the coils while they were seperate. Sorry.

Here is a pic of it as it is now.
P1010137.jpg


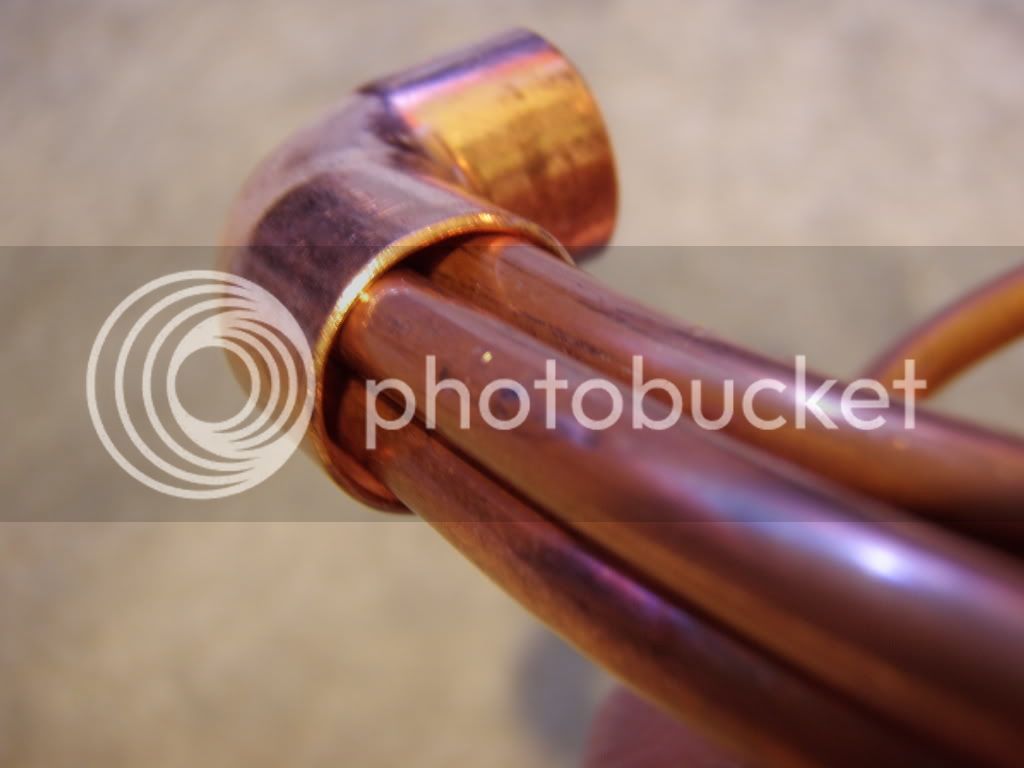
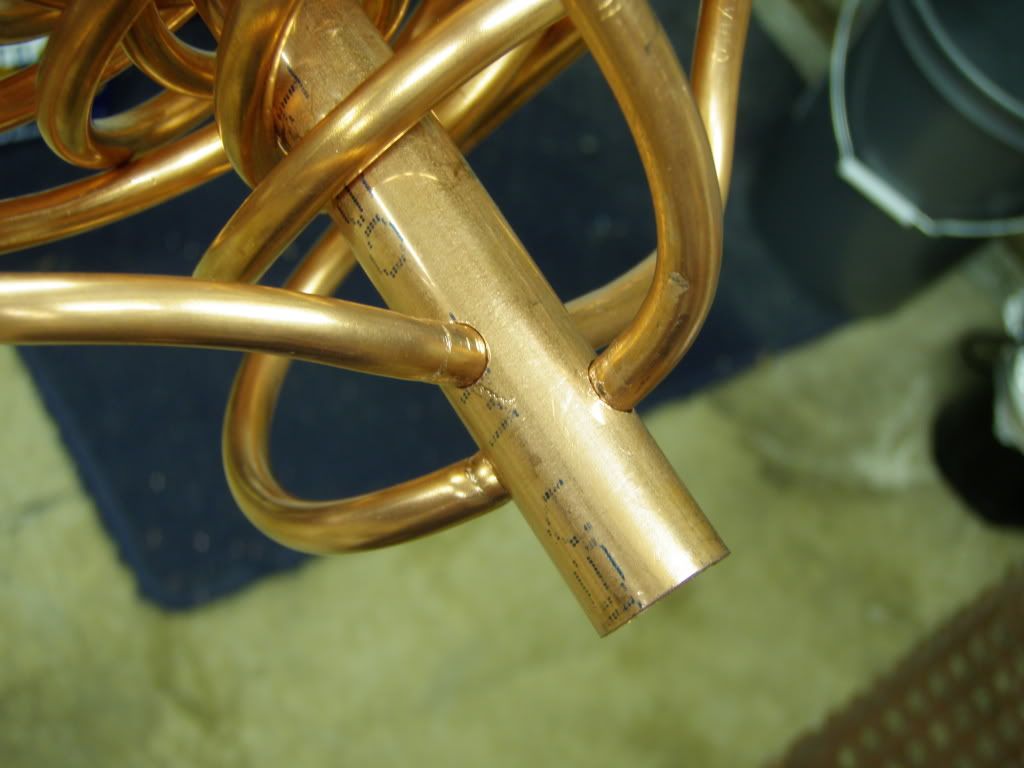
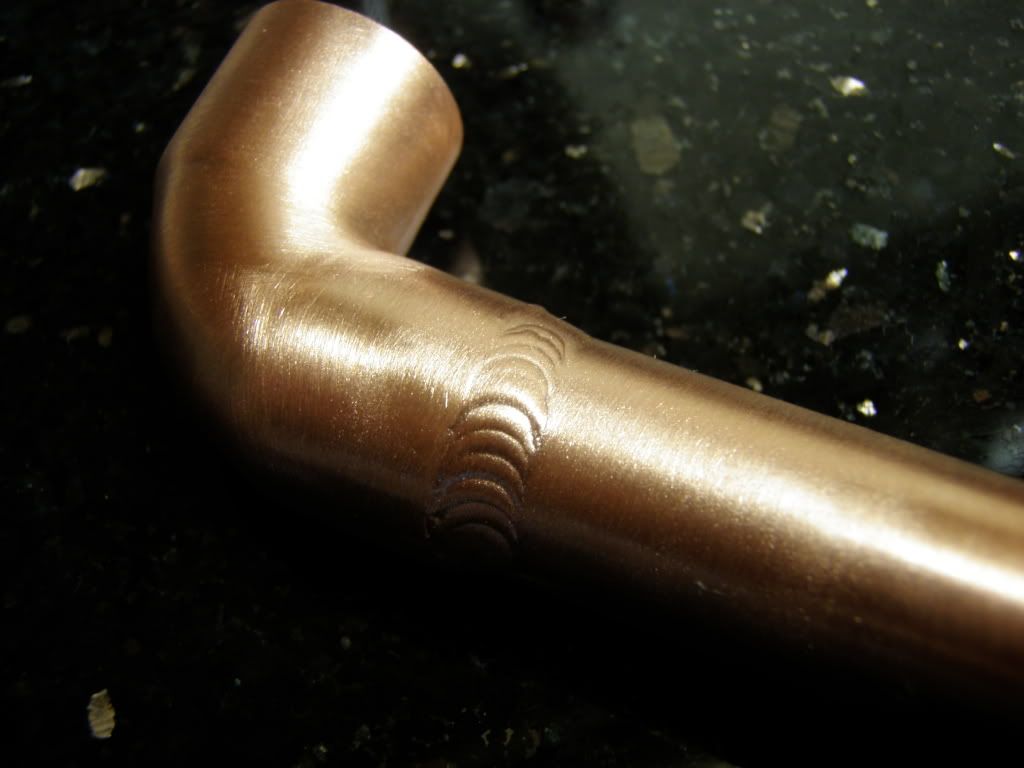
I have decided to weld in the tubes at the bottom, because I don't really trust solder and because I am able to weld them. Kladue used compression fittings on his. I like the use of compression fittings very much so. I am just trying something different as well as I am not to sure of the brass compression fittings being able to hold up. So, I drilled holes in the bottom of the 1/2" pipe to allow the 1/4" tubes to go into it. Here are a couple of shots of that.
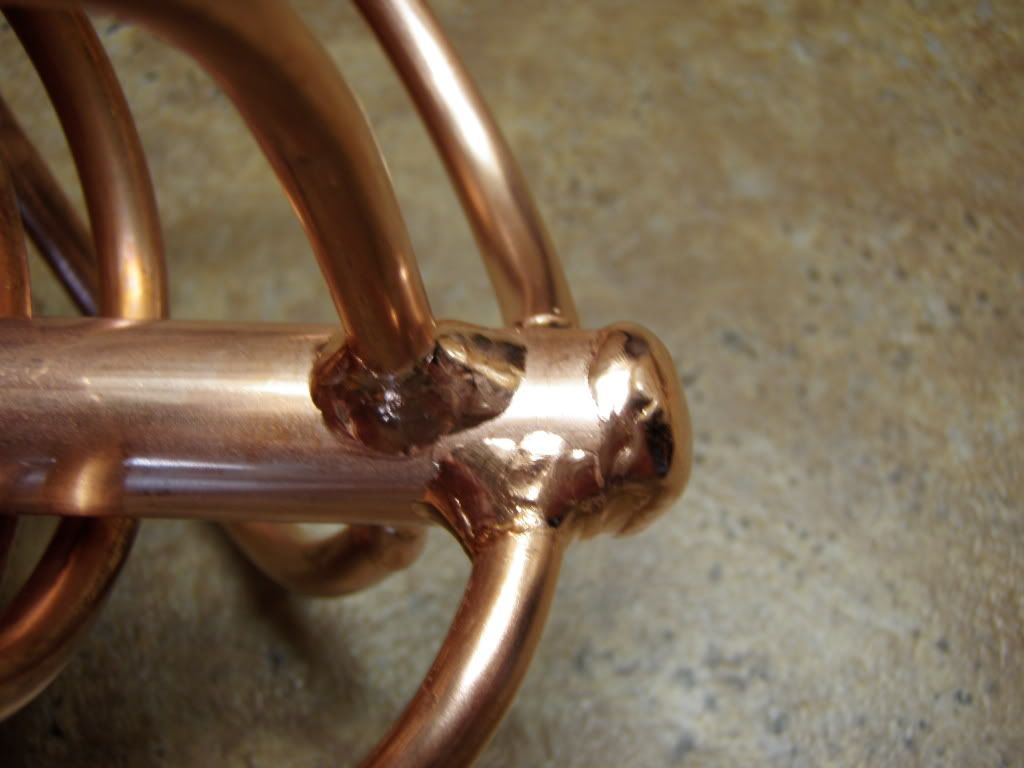
Reminds me of the base of a x-mas tree.
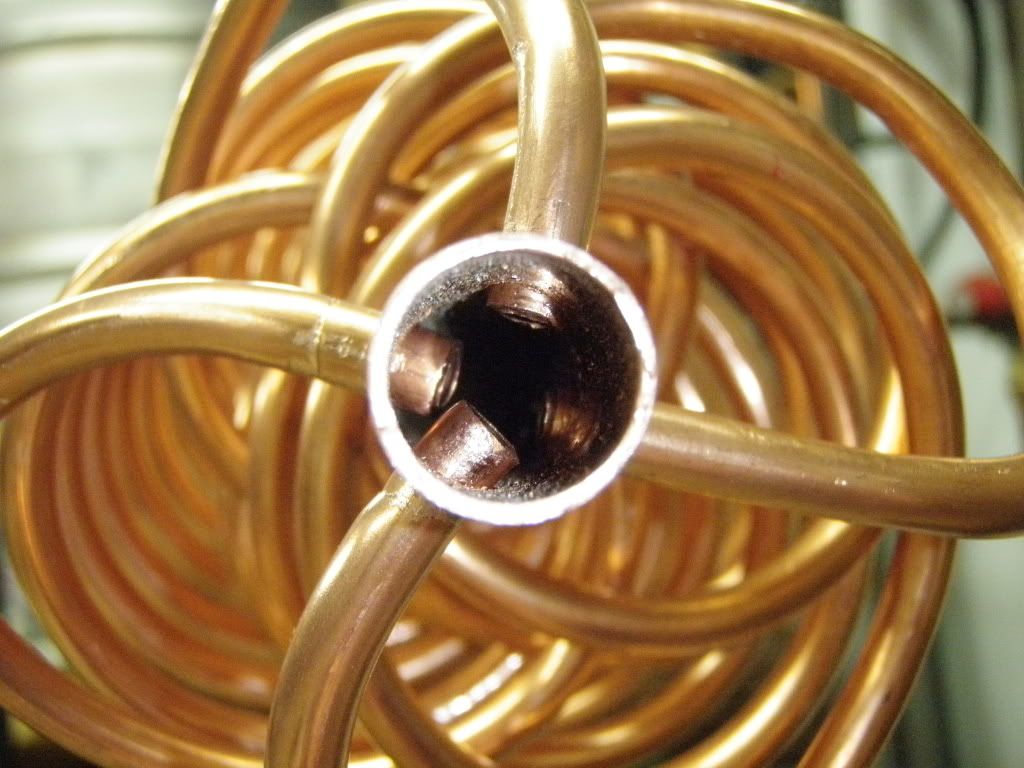
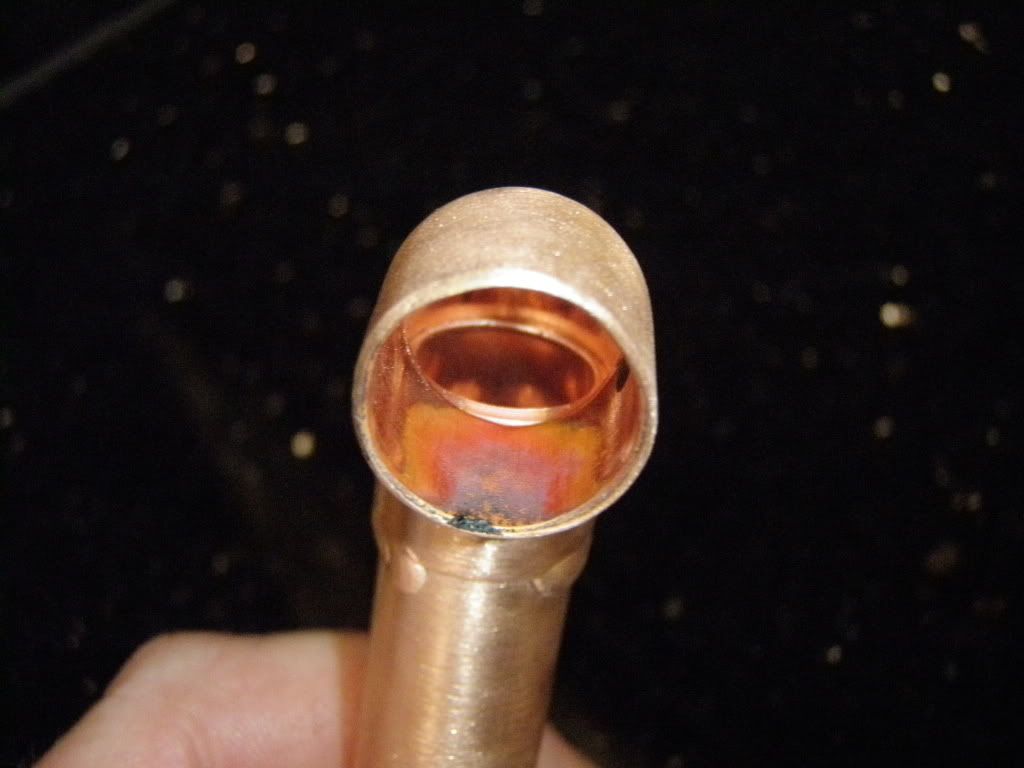
P1010138.jpg


The inside.
P1010139.jpg


That's it for now. I am doing a test weld tomorrow with a couple of different filler wires. I have welded copper before with no issues, I am just playing with different stuff. Stainless filler, or Silicone bronze.....

Any thoughts or suggestions are welcome. Prost.:mug:
 
How has the weld testing gone?


I didn't get much time to devote to the testing today but. I did get a couple small welds done. As I suspected in the begining, that copper filler would be the best. I cut a piece of romex and used the ground wire from it. It was 12 awg wire so it was a huge piece of filler for the job. But it gave me a real good idea of what to expect. I also used stainless and silicone bronze. While the welded the pieces together, they were not ideal for what I want. Here is a pic of the copper filler weld. Again it is a bit big for the job.

P1010141.jpg


I also got a chunk of 6" stove pipe from a guy at work who just finished his stove install. It looks like it should be just about perfect in height.

Oh yea, I did purge the inside. Here is how it looks without cleaning.
P1010142.jpg
 
Dead sexy GreenMonti! Not sure if we talked about this but definitely get some clear on the finished product to preserve the finish. I kind of like the brushed finish.
 
Thank you CodeRage. Yes you mentioned to me about the clear coating to stop the tarnish from happening. That will save a lot of time polishing.

Well, I took the boiler into work today to get the lower end welded up. I decided to weld it in the bubble. (purge chamber) Since I don't have much experience welding copper, I can't say why it wouldn't do what I wanted it to do. When I did my copper gas manifold it came out like the pic above. This time......No. I showed it to a few guys at work who have done some copper and they all said "that is exactly how mine came out. Looks great for a copper weld." I am not happy. I am glad I wont ever see it.

Here it is.
P1010144.jpg
 
Its pretty cool, though I'm not entirely sure what its for, is it just used to heat sparge water or something? I am still quite a newb though so I may be missing something fairly obvious. Its always cool looking at these monstrous copper creations

edit: cause I'm a nerd, what temp to you plan on boiling from and how fast do you want to get how much water that hot, I assume your not going for steam, just on the verge of boiling
 
Lots of views and no thoughts. I guess I will let this one die.
Just because there aren't dozens of people commenting on it doesn't mean it's not going to be useful info for someone down the line. I say keep documenting your progress and taking pictures. I know I'm interested; I just don't really have any welding or copper-working experience to share.
 
Its pretty cool, though I'm not entirely sure what its for, is it just used to heat sparge water or something? I am still quite a newb though so I may be missing something fairly obvious. Its always cool looking at these monstrous copper creations

edit: cause I'm a nerd, what temp to you plan on boiling from and how fast do you want to get how much water that hot, I assume your not going for steam, just on the verge of boiling

Actually it is built for both. Input water flow is adjusted to give the user the temp desired. Steam is the goal for step mashing or to keep mash temps right where you want them. It isn't that big at all. 50' of copper reduced to a mier what, 18". With a 4" diameter if that.

It was mentioned by Kladue, that a steam temp of about 300 degrees it doable. Though I don't think I will need that much. At about .5 GPM I should get a temp of 170ish. Unless I am mistaken. A more slow flow will produce steam to keep mash at or raise temp.

Just because there aren't dozens of people commenting on it doesn't mean it's not going to be useful info for someone down the line. I say keep documenting your progress and taking pictures. I know I'm interested; I just don't really have any welding or copper-working experience to share.

It isn't that I am looking for great praise. Espically during the hoildays, even on a build that has been done before by many. But if all just look and no hints of intrest, one can only assume that it has been beaten to death. Or is of no intrest to others due to more "simple" means. Other then a heat question you haven't showed any intrest untill a "I'll let it die" post.

As for not having any knowledge of copper, I have let it be known that I don't have any either. However, you being a mechanical engineer, you should know the work harding of copper is very prominet(sp). It can also be a down fall to copper from being over wroked. Many have noticed that once copper has been bent it is much more diffucult to bend it again. Copper will fail shortly after if this is kept up.

Point is it is hard to update a thread if no one shares even the slightest bit of interest.
 
Look at views - not at replies as a gauge of interest.

Even us postwhores (me - not you) try to stay out of threads we are interested in but have nothing useful to contribute.

Post on.
 
No, that thing is BEAUTIFUL! I was mesmerized by Kladue's boiler....but I felt bending the tubing in such a way was beyond my dexterity. I jury-rigged a similar setup with 3/8" copper and metal ducting. The boiler worked okay, but I had some things working against me, mainly freezing weather in Chicago. I had to turn the flow way down to compensate for heat loss, but then the steam sputtering scared the hell out of me. Mine was more of an experiment...I shelved it for parts and will probably be going with an electric RIMS for on-demand water.

Please, by all means, post more pics! This thing is sweet!:mug:
 
Very nice job ! I'm always very interested in this kind of work, and the techniques used. I have years of experience with an acetylene torch and soft and silver solder (one of my professions is a brass instrument tech, you know tubas, french horns etc.), and I really really want to expand my abilities into welding.
Would you say welding copper is a good practice? As in practice for more difficult welding jobs? Can it be done with acetylene/oxygen?

Cheers !
 
The main advantage of the flash boiler will be the ability to shorten the startup time for a brew session when it is used like an instant water heater for strike and sparge water. With the boiler operated in steam mode and injecting the steam directly into circulating wort you can deliver enough heat to 1 GPM of wort flow to raise the temperature from 125 degrees in to 152 out of the mixer quietly, and by adjusting burner gas flow, control the mixer temperature. The greatest feature is the ability to deliver hot water or steam on a continous basis at levels greater than the pressure cooker setups can safely deliver. When built into a system you hard pipe the boiler outlet into the wort mixer then to the MT sparge system, you do not need to switch any plumbing connections during brew cycle. I have two brew rigs built around the flash boiler with SS coils instead of copper, and have operated the old R&D system about 6 years now. The copper is easier to fabricate and should have about 10 times the heating ability of the SS coil versions that I have built, with soldering or brazing skills it should be easy to build.
 
Look at views - not at replies as a gauge of interest.

Even us postwhores (me - not you) try to stay out of threads we are interested in but have nothing useful to contribute.

Post on.

I think I post in more threads when I shouldn't. Does that me a post whore too?

No, that thing is BEAUTIFUL! I was mesmerized by Kladue's boiler....but I felt bending the tubing in such a way was beyond my dexterity. I jury-rigged a similar setup with 3/8" copper and metal ducting. The boiler worked okay, but I had some things working against me, mainly freezing weather in Chicago. I had to turn the flow way down to compensate for heat loss, but then the steam sputtering scared the hell out of me. Mine was more of an experiment...I shelved it for parts and will probably be going with an electric RIMS for on-demand water.

Please, by all means, post more pics! This thing is sweet!:mug:

I was a bit intimidated by the bending of the tubes myself. Once I got a little bit into the first one I relaxed. Although I used copper and not SS. I don't think I would have nice bends if it were SS. Kladue has a real knack for bending tubing.

Do you have any pics of your build?

Very nice job ! I'm always very interested in this kind of work, and the techniques used. I have years of experience with an acetylene torch and soft and silver solder (one of my professions is a brass instrument tech, you know tubas, french horns etc.), and I really really want to expand my abilities into welding.
Would you say welding copper is a good practice? As in practice for more difficult welding jobs? Can it be done with acetylene/oxygen?

Cheers !

As far as I know, copper can be welded with a oxy/acetylene torch. I don't have any first hand knowledge of it though. I would think there would be one heck of an issue with it creating a bunch of scale and messing up the weld. IMO, if TIG isn't avalible I would solder it. In the first pics I welded that on my bench. I had a hard time keeping it from yurning black and producing a lot scale. This is the main reason I wanted to weld it at work in the bubble. This way the entire piece was in an argon enviroment. The test weld I did got a purge on the inside.

I wouldn't practice welding copper to try to get good for other materials. Copper has it's own feel. It is interesting to weld on. It takes a lot of heat to get it to temp. Once it starts to get there you see it get shinny, (the puddle) it doesn't take much more from there. The puddle looks like alumn. The molten copper doesn't have much.........back bone. When it gets to melting point it wants to just drop. If you back off on the heat it will very quickly cool and solidify, (due to the wonderfull conductive properties) you then have to pour it back on to get back to where you need it. It is like a constant tug of war.
 
Does any one see an issue with me using copper unions for the pipeing connections to my boiler?

The way I am thinking of using them is about 2ish inches away from the boiler pipes. So they would be just outside of the chimney.
 
There should not be any problems with soldered connections, only thing that might happen is union retaining nut might loosen and leak after a number of high temperature swings from cold water to steam temps.
 
There should not be any problems with soldered connections, only thing that might happen is union retaining nut might loosen and leak after a number of high temperature swings from cold water to steam temps.


Thank you kevin.

I wonder how bad it might be? I guess I could always change them out. Do you think a compression fitting would be better to use? Those come apart.
 
I have not used the copper unions in steam applications, the outlet pressure there is so low there will probably be no problems even with temperature swings. If you have concerns use RTV on the outside of the union halves when you install nut to seal leakage path.
 
Keep on rocking, Im really curious how this turns out. Kinda looks like a strange form of a calandria (used in commercial brewing). I have never really seen copper "welded" like that, normally we just braze it together. It looks pretty cool, keep us updated!
 
I do, but I don't want to threadjack. Plus, it's pretty ugly :p....it was more of an experiment than anything....

Here's an album:

http://s165.photobucket.com/albums/u76/hawkie333/HOMEBREWING/FLASH%20BOILER/

Enjoy!:mug:

I don't think it could be considered jacking. For one thing it is subject related, just a different design. It shows different a configuration and pro's and con's can be discussed. Plus, I asked you for the pics.

You said it work well. That water looks nice and steamy. It either worked a little better then well, or it was a cold day.
What was it about it you didn't like?
I also noticed you placed a T fitting right after the inlet water. Why? Were you recirculating mash or sparge water through it?

Thanks for sharing.
 
If you stop documenting this build, I'll send Mr. T over to choke you. Just one picture of the copper welds makes the thread worth while.


That's funny. That guy still looks pretty much the same as way back.


So, I would like some ideas folks. I am at a cross roads with the upper section where all the 1/4" tubes come together. The inital thought was to merge them all together like a header pipe for engines. I am kinda shying away from this idea. You may have guessed that I wanted to weld the upper like the bottom section. I would have to weld all the way down and around the tubes to get it to seal. My next though is to use compression fittings and do a frankin stein hog podge of parts. It would not look very clean.

Can I use solder to fill gaps? The solder I have here is a silver solder made by Oatey. I got it from lowes. I don't know the blend. I wouln't mind soldering the fittings on for the rest of the build up to the point where I have it be able to disconnect.

I will get a pic of how the 1/2" 90 looks with all the tubes inside.

P1010146.jpg
 
Pull the tubes out of the fitting and apply flux and solder to coat tube ends with solder, then do the same for the inside of the 90. When all the parts have been "Tinned" reassemble and fill gaps with solder, if there is a problem with filling the larger openings use a bit of copper wire to take up the space. The solder will flow by capillary action when the parts are heated so the gap on the inside should fill as solder is fed in.
 
This thread is sweet!!!!

Thank you. Time to get your going.:D

Pull the tubes out of the fitting and apply flux and solder to coat tube ends with solder, then do the same for the inside of the 90. When all the parts have been "Tinned" reassemble and fill gaps with solder, if there is a problem with filling the larger openings use a bit of copper wire to take up the space. The solder will flow by capillary action when the parts are heated so the gap on the inside should fill as solder is fed in.

Thanks Kevin.

So if/after I get this piece soldered on, should I directly reduce it down to 1/4" again? Maybe 3/8"? Just wondering what the best size would be for the steam to be carried up the the mixing chamber/area.
 
I have used 3/8" tubing to speed up the transition from water to steam flow as the smaller diameter helps carry the water in the saturated steam to the mixer before you reach superheated steam stage. you will need to get to 1/4" for the mixer screen in the tee fitting which can be right at the tee fitting.
 
I have used 3/8" tubing to speed up the transition from water to steam flow as the smaller diameter helps carry the water in the saturated steam to the mixer before you reach superheated steam stage. you will need to get to 1/4" for the mixer screen in the tee fitting which can be right at the tee fitting.


Very good. Thank you yet again Kevin. I hope your holidays are going well. Prost.:mug:
 
Pull the tubes out of the fitting and apply flux and solder to coat tube ends with solder, then do the same for the inside of the 90. When all the parts have been "Tinned" reassemble and fill gaps with solder, if there is a problem with filling the larger openings use a bit of copper wire to take up the space. The solder will flow by capillary action when the parts are heated so the gap on the inside should fill as solder is fed in.

Don't know but you might have already tried it. But I have used sil-floss in the past great for gaps. This group of alloys facilitates the joining of copper to copper without a flux and copper-based alloys.


Dominus Vobiscum

Swagman:cool:
 
I have never seen copper welded before! I do not have access to TIG but will endeavour to have a go at welding copper as soon as I can.

You commented a while back on a lack of comments so far, so to add my 2 cents worth, your copper coils would sit nicer in a group if two of the coils had been wound the opposite hand to the other two! The intertwined copper coils never seem to photograph well as they always look a mess from just about any angle except end on, (as seen on my "monster 96 ft wort cooler" build in the diy section.. My coils won't see any real heat, so I could soft solder my construction, but now I've seen copper welding I'm jealous!

P.S. Have you seen any of the flash boiler driven steam outboard motors? Now there are some seriously mad peeps...
 
You said it work well. That water looks nice and steamy. It either worked a little better then well, or it was a cold day.
What was it about it you didn't like?
I also noticed you placed a T fitting right after the inlet water. Why? Were you recirculating mash or sparge water through it?

Thanks for sharing.

It was hella cold! I live in Chicago, and I think it was 15F that day. It was one of those days where your gear is put to the test, if you know what I mean. That being said, it would probably work well enough on a 70F day. I used a tee because I wanted to be able to hook up my 1/2" wort lines, or my 3/4" hose connection and not be messing with a dangerously hot and unstable copper coil. I think if I were to really put my best foot forward and do a build like you and Kladue have done, I might be very happy. Unfortunately, I'm exploring electric brewing right now, so this project will have to wait. I guess I'll just have to live vicariously through this thread :D
 
I have used 3/8" tubing to speed up the transition from water to steam flow as the smaller diameter helps carry the water in the saturated steam to the mixer before you reach superheated steam stage. you will need to get to 1/4" for the mixer screen in the tee fitting which can be right at the tee fitting.


Would it hurt the preformance any if I used 1/2" to carry the steam? Would it make it better? I can get that and run it for less cost then buying 3/8" soft copper rolls.
 
I have never seen copper welded before! I do not have access to TIG but will endeavour to have a go at welding copper as soon as I can.

You commented a while back on a lack of comments so far, so to add my 2 cents worth, your copper coils would sit nicer in a group if two of the coils had been wound the opposite hand to the other two! The intertwined copper coils never seem to photograph well as they always look a mess from just about any angle except end on, (as seen on my "monster 96 ft wort cooler" build in the diy section.. My coils won't see any real heat, so I could soft solder my construction, but now I've seen copper welding I'm jealous!

P.S. Have you seen any of the flash boiler driven steam outboard motors? Now there are some seriously mad peeps...

No, I have never seen steam driven outboard motors.

I will check out your build, sounds interesting.

Good luck playing around with welding the copper. Take your time and make sure the purge is setup well. It doesn't take long to get the black nasy scale built up. Then you have to stop and clean it. That's why I put mine in the chamber at work. I don't even want to know how much gas I used that day. You can use the ground wire out of some house wire. (Romex) That's what I used for filler. Have fun when you get to it.

It was hella cold! I live in Chicago, and I think it was 15F that day. It was one of those days where your gear is put to the test, if you know what I mean. That being said, it would probably work well enough on a 70F day. I used a tee because I wanted to be able to hook up my 1/2" wort lines, or my 3/4" hose connection and not be messing with a dangerously hot and unstable copper coil. I think if I were to really put my best foot forward and do a build like you and Kladue have done, I might be very happy. Unfortunately, I'm exploring electric brewing right now, so this project will have to wait. I guess I'll just have to live vicariously through this thread :D


That's cold. I don't think I would get old herbie up to operating temp in that cold of weather. Air cooled VWs run cold enough.

Have you started building your system yet?
 
Would it hurt the preformance any if I used 1/2" to carry the steam? Would it make it better? I can get that and run it for less cost then buying 3/8" soft copper rolls.


Any ideas on the 1/2"?

It seems to me it would help the steam.
 
The 1/2" tube will work for both the steam and water sides, just need to reduce at mixer, try to avoid trapping water in steam side by grading tubing uphill into the mixer so water will run back to the boiler. The mixer works by turbulent flow over the screen or slotted diffuser tube so the steam can mix without making steam bubbles which give the popping snapping noise when they collapse.
 
The 1/2" tube will work for both the steam and water sides, just need to reduce at mixer, try to avoid trapping water in steam side by grading tubing uphill into the mixer so water will run back to the boiler. The mixer works by turbulent flow over the screen or slotted diffuser tube so the steam can mix without making steam bubbles which give the popping snapping noise when they collapse.

Thank you.

Any plans to test this one out or are you rebuilding out of 1/2"?

I am not rebuilding the boiler. I am talking about the outlet pipe that carries the steam to the mash tun. The elbow that all the 1/4" tubes terminate into is a 1/2" 90. So it makes life simple just to run 1/2" pipe from there. As Kladue has mentioned, I will reduce it to 1/4" right at the junction where the steam will be injected.
 
Back
Top