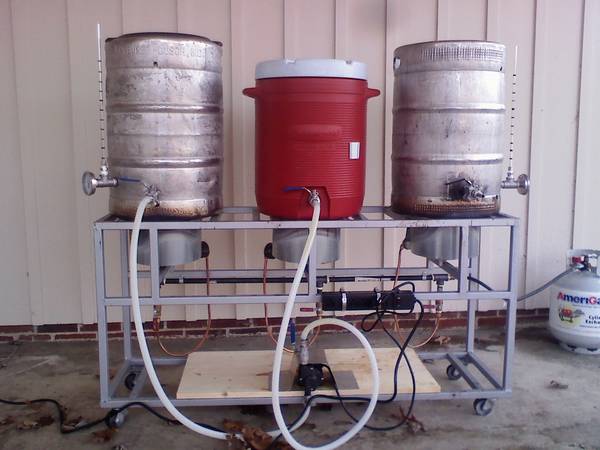
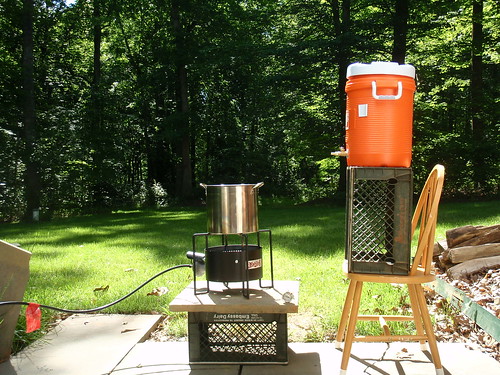
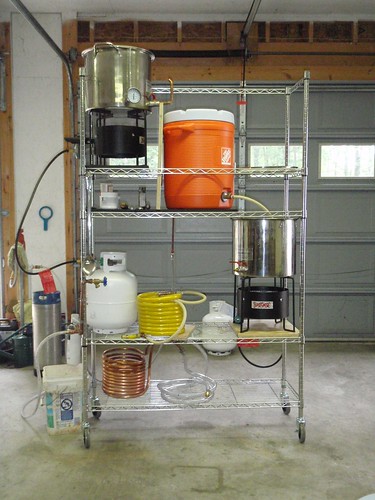
Show us your sculpture or brew rig

Homebrew Talk - Beer, Wine, Mead, & Cider Brewing Discussion Forum

Help Support Homebrew Talk - Beer, Wine, Mead, & Cider Brewing Discussion Forum:

This site may earn a commission from merchant affiliate links, including eBay, Amazon, and others.
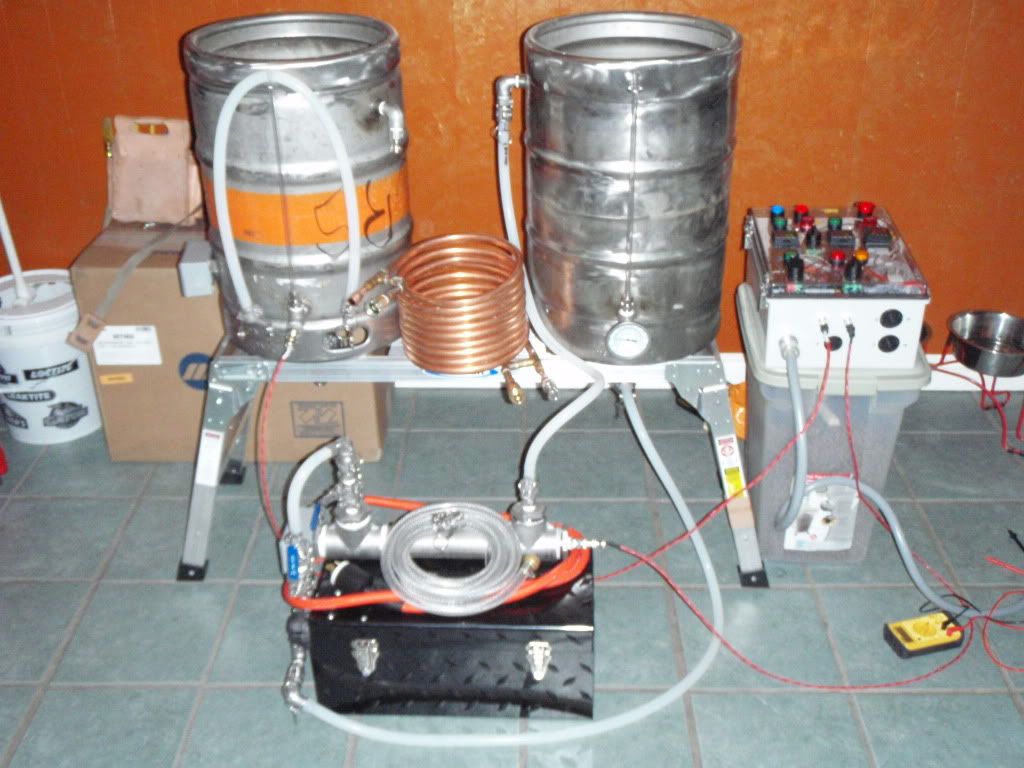
Finally got a chance to try out my diy brewstand.
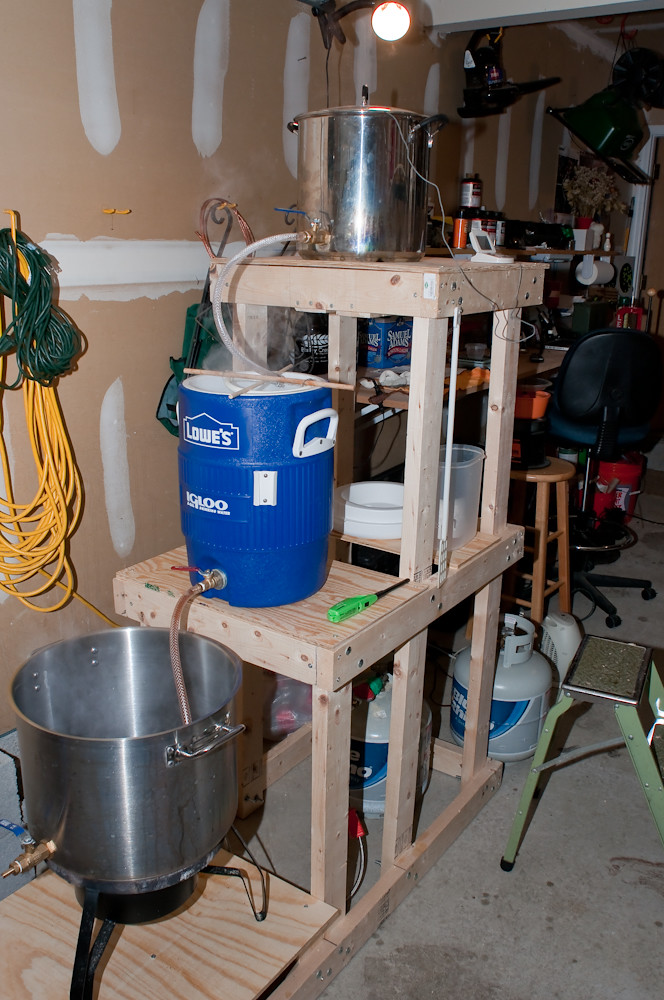

5267863744_5fb597b4ea_b.jpg
 
Now that I've actually made a batch I guess I can post here.

It's a two vessel all electric using a 5500 W kettle and 5500 W RIMS. I get on demand sparge water from my tap through the RIMS, so I can fly sparge without the HLT.

PC140195.jpg


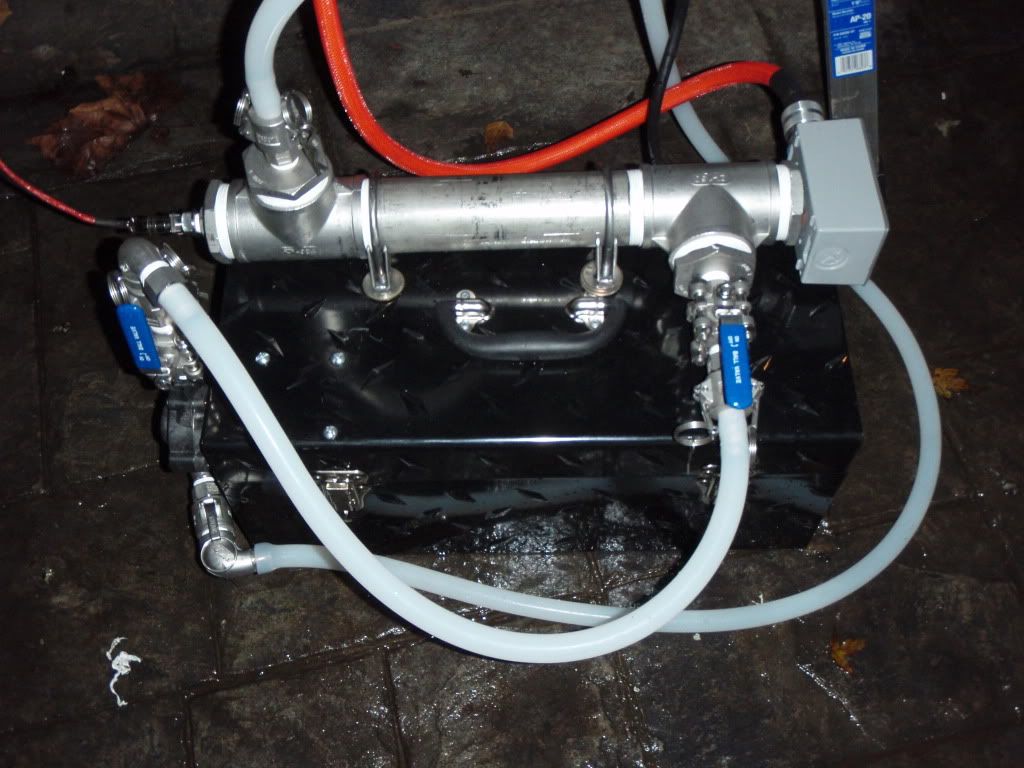
The pump's inside the toolbox, the RIMS is bolted to the top.

PC150201.jpg


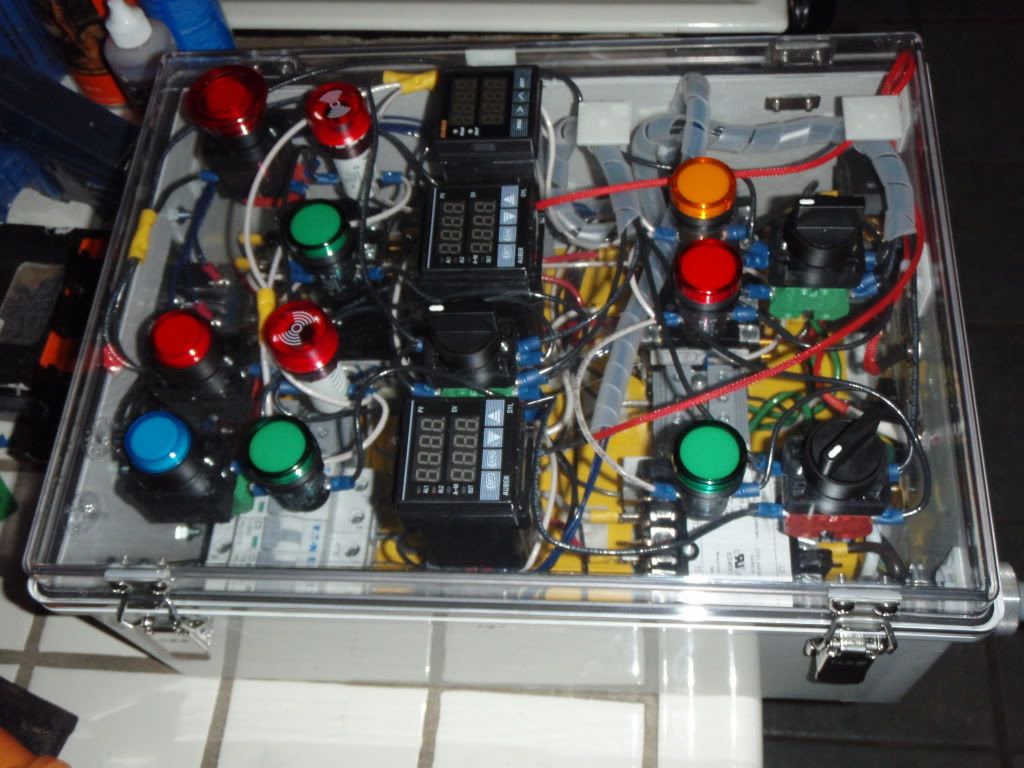
Here's the panel, yea its' got a clear front, not my best aesthetic choice.

PC130188.jpg


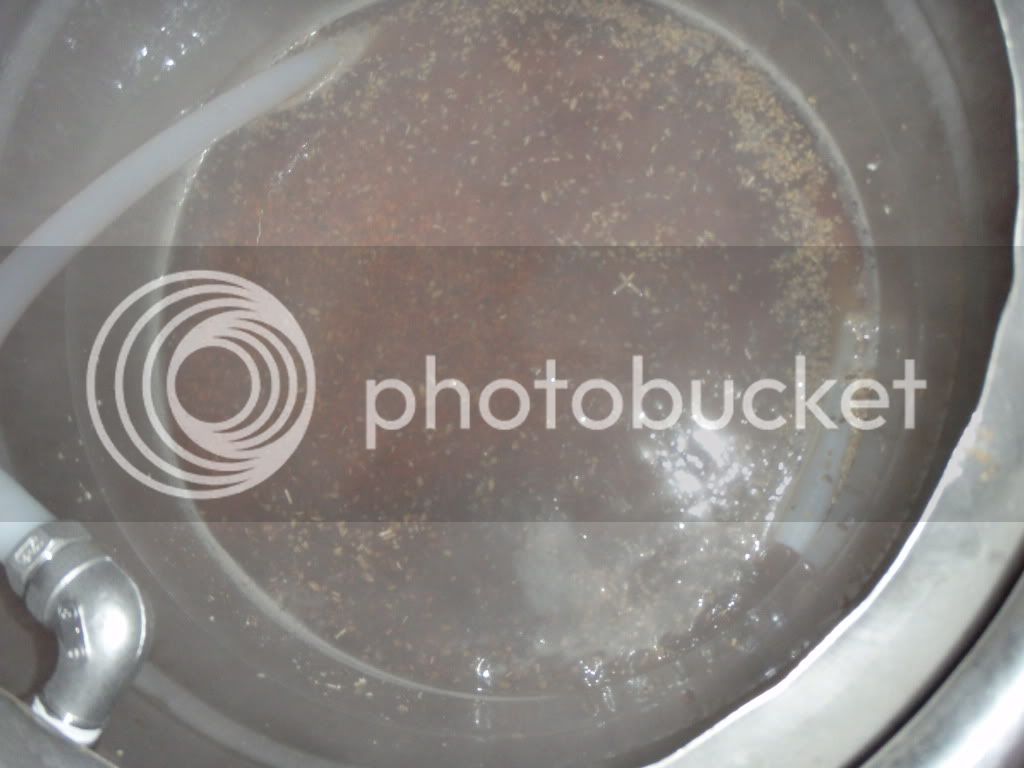
And here it is recirculating the first mash.

PC160208.jpg


After a couple more shakedown brews I'll pull it apart and polish/insulate.
 
Fantastic system, I like it a lot. You can always spray paint the inside of the control box to make it opaque and still leave the exterior finish. I've been contemplating using my 5500w RIMS to do away with my HLT as well.
 
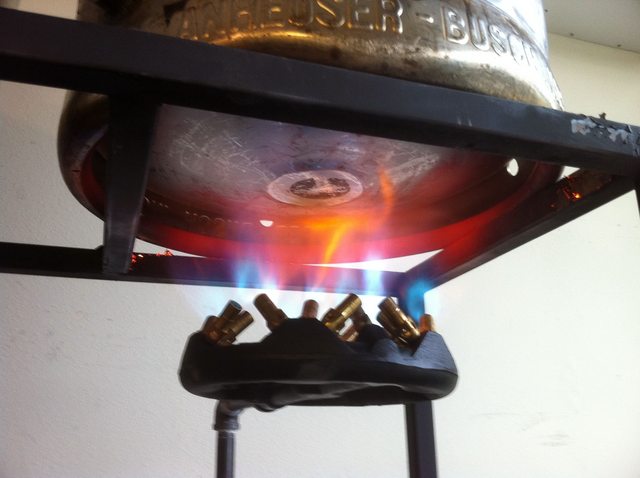
Glowing red with awesomeness.
xzUaml.jpg

What burners are those, I've been trying to figure it out for a while now, and where did you get them? Other than looking pretty sweet, what are the benefits or drawbacks of them vs. something like the hurricane burners?

thanks, look great!!! :mug:
 
Not yet, that was the first go with it, i'm sure eventually it will start looking used.

Keep an eye on it, if it starts to smoke, spray it with a hose. You'll then need to replace it.

Or, you can do like I did and get a sheet of aluminum diamond plate and turn it into a heat shield. I have 2x6s that the burner sits on. It's open right under the burner, but they still got hot enough to smolder. The heat shield should help.
 
Looks way to close too the frame and MHL JMO, the burner will be kicking out tons of heat out the sides of the BK.
Purchase some large square tiles for the BK base, also think about shielding the face of the MLT uprights in tile.
Heat with the adhesive on the vertical may be an issue?
 
Keep an eye on it, if it starts to smoke, spray it with a hose. You'll then need to replace it.

Or, you can do like I did and get a sheet of aluminum diamond plate and turn it into a heat shield. I have 2x6s that the burner sits on. It's open right under the burner, but they still got hot enough to smolder. The heat shield should help.

Thanks for the tip, i'll get that done before my next brew day.
 
If you offset the plate with a few washers or a bolt or two, the heat shield will work better...I have my rubbermaid MLT not too far from my heat shield and its just fine.
 
Here is my system! It's all direct fire, there is plans to put a RIMS tube on it but for now it's all manual. I also want to put a Bobby M mash tun insulation project on it since the reflective junk is melting if I turn the flame on to high.

cheers!:mug:

156795_647290733872_185103070_36975946_4854514_n.jpg
 
Here is my system! It's all direct fire, there is plans to put a RIMS tube on it but for now it's all manual. I also want to put a Bobby M mash tun insulation project on it since the reflective junk is melting if I turn the flame on to high.

cheers!:mug:
156795_647290733872_185103070_36975946_4854514_n.jpg

Kotti, remove the [ url] [ / url] tags from your post and the photo will show up.

Code:
it should look like this
[IMG ]http://sphotos.ak.fbcdn.net/hphotos-ak-ash2/hs615.ash2/156795_647290733872_185103070_36975946_4854514_n.jpg[/IMG ]
I love the small foot print of your rig nice job.

-=Jason=-
 
Anyone in the Austin area brew with a 3 tier system? I would like to be around the next time you brew if so. I want to learn before I build.... Anyone?
 
Kotti, remove the [ url] [ / url] tags from your post and the photo will show up.

Code:
it should look like this
[IMG ]http://sphotos.ak.fbcdn.net/hphotos-ak-ash2/hs615.ash2/156795_647290733872_185103070_36975946_4854514_n.jpg[/IMG ]
I love the small foot print of your rig nice job.

-=Jason=-

Hey Jason,
Thanks, I wanted a small foot print to save space and by having the mash tun up high I could fly sparge with one pump instead of two. I don't know if that matters so much (batch vs. fly) but at least it's an option. The only problem was getting 20+ lbs of soaked grains down from that height so I built that crane system on the back right corner of it so I can just pick up the tun and swing it out over the side and lower it down slowly with that pulley and a rope breaking system, similar to an ATC used with climbing gear.

cheers!
 
Here's my humble single tier...got the stand from a member here who was selling it through Rebel Brewer, and I could not be happier with it...All manual, batch sparging at this point, but looking to automate this year.

BrewRig5.jpg
 
Not a fancy rig, but it works. The cart is from Harbor Freight. It has storage down below and also under the tile top:
DSC_0030.jpg


Inside of my HLT. I use a 1000 watt bucket heater to keep water warm. I use the propane BK to initially heat it and pump it to the HLT where the bucket heater maintains the temp. The bucket heater will heat to >160F (I have done so quite a few times), it just takes an hour. These Coleman Bev Coolers also have nice markings in US gallons and liters:
DSC_0035.jpg


I use a bag and the SS basket instead of a false bottom:
DSC_0036.jpg


Recirc Return/Sparge Arm:
DSC_0037.jpg


SS valves and Camlocks:
DSC_0040.jpg


My pump is over 15yrs old, but brand new. I stopped brewing right after I bought it. I used it once last December. I bought it when I read an article in BYO, or BT or Zymurgy...can't remember which. It was about building a RIMS. I bought the same pump and speed controller they used (from Grainger)
DSC_0043.jpg


My Auber PID. This is a plug-n-play PID from Auber. I plug the probe into the valve on the MT that is in the first and fifth photo above:
DSC_0041.jpg


Simple DJ lighting control. Everything is plugged into a GFCI outlet:
DSC_0042.jpg


I used hangers that are used for hanging rakes and shovels in garages to hold the paddle:
DSC_0044.jpg


A simple RV filter and white potable water hose take care of the water supply:
DSC_0045-1.jpg


The BK is a 40qt and the burner says it is 90 or 100,000 BTU, can't remember which. It heats quickly. I am still waiting for my SS RIMS tube to come. It supposedly shipped on 29 Nov. I have a PVC tube for now which I have not used and don't plan to. Stay tuned for my final thoughts on the SS RIMS tube. Not pictured is my immersion chiller.

Hey if that basket you're using instead of a false bottom is from a turkey fryer then it's made from aluminium and not SS. I have one that looks just like it. At mash temps and pH it should be OK and develop a nice hard dark grey layer of aluminum oxide on it over the course of a couple of batches. Oh and what kind of pump is that. I doesn't look like a March to me.
 
Hey if that basket you're using instead of a false bottom is from a turkey fryer then it's made from aluminium and not SS. I have one that looks just like it. At mash temps and pH it should be OK and develop a nice hard dark grey layer of aluminum oxide on it over the course of a couple of batches. Oh and what kind of pump is that. I doesn't look like a March to me.

Yes, it was aluminum. I actually boiled it a couple of times and it did change colors. However, I am only using a large bag now. The basket made it easy to lift everything out, but I had problems with a stuck mash.

The pump is made by Teel. I bought it on 1/23/1996. Yep, 1996 and I still have the receipt. I read an article in Zymurgy or BT or BYO...pretty sure it was Zymurgy about constructing a RIMS. They used this same pump purchased from Grainger. It cost me $84.60 back in Jan, 1996. On Jan 21, our second daughter was born and for some weird reason, I stopped brewing and never even used the pump...go figure. I had a lot of equipment including keggles and at least 8 cornies and a nice lab setup. I sold almost everything except the brand new pump a Johnson Controls thermostat that I used on a chest freezer and my two 10gal Coleman Beverage Coolers. I started brewing again in 2009 and resurrected the two coolers and the pump. It works great and it's really quiet. Since I posted those pics, I have added my stainless steel RIMS tube and a shield over the pump.
 
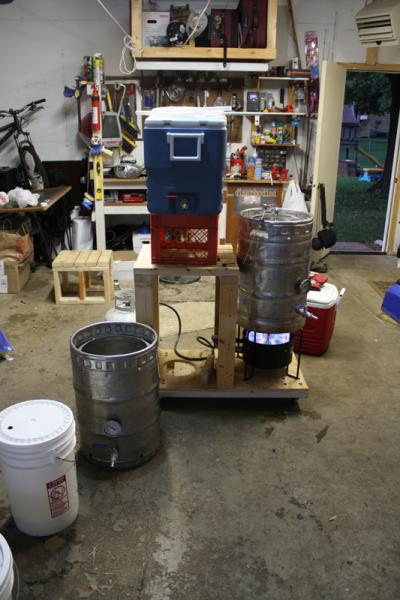
Here's my current setup which will be changing very soon as work has already started on a single tier stand. See Gridlocked's thread for build pics. This setup has worked well and it started as a full boil extract stand and which didn't last too long before I converted to all grain.

Mashing.jpg


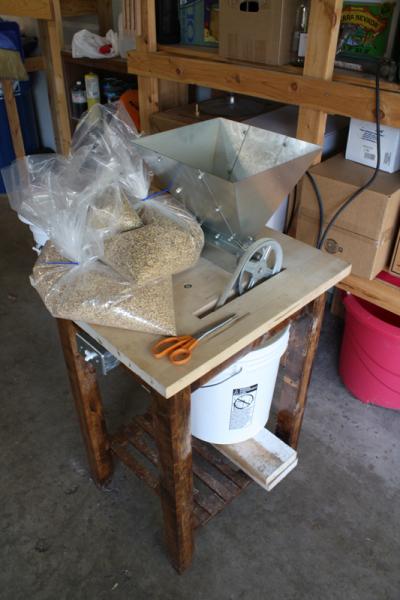
Mill.jpg
 
Can you provide us with some specs on that mill?
Lets see. Stand is a donated Ikea kitchen cart. Monster Mill MM-2 with hopper. Don't remember the diameter of the sheaves or belt but I can measure them when I get home. 1/2 h.p. motor from the local Axeman store mounted underneath. Wired up with switch in the front with a 6' cord to plug.

Still thinking about making a cover for the moving parts but it just looks so cool when its running.

here's short video of it running- [ame]http://www.youtube.com/user/ejholmgren#p/u/1/sj6HfvqlhFE[/ame]
 
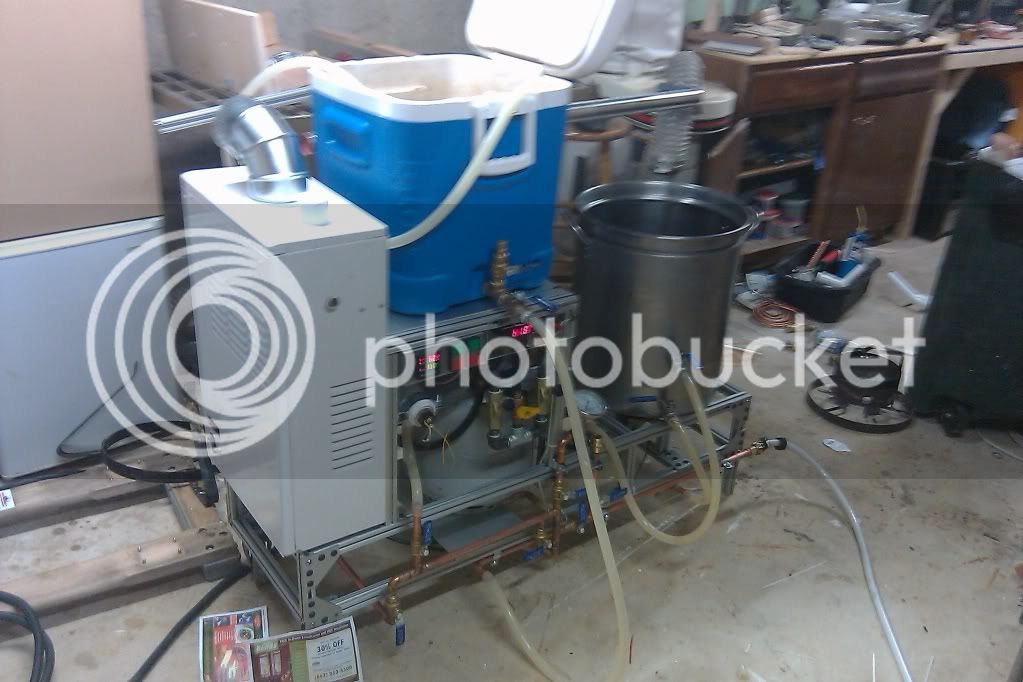
You're using a tankless water heater? I was wondering if anyone had tried that yet...

Mine only goes up to 160... So I thought maybe that was the reason I had not seen any incorporated into a brew set up...

Or do you heat it more after it goes through the water heater?

I was thinking about getting a 110v point of use instahot... so that I could use water tight out of the hose bib and not wait forever for the burner to heat a keggle full of water from near freezing.. But I'm gonna move my rig to my deck once I am finished screening it in this spring... at which time I can just extend hot and cold water from the kitchen via freeze proof Hose Bibs... So I'll just hoof hat water from the kitchen in buckets for three or four months until I make the move..

But anyways... Sweet looking set up.. Looks like you put a lot of thought and work into it...
:mug:
 
Thanks,

No, in order to use a tankless heater like that, you have to completely gut it, there are so many safety features built in that you could never get 170° strike and sparge water out of it.

For strike water, I fill the MT to my desired volume, then recirculate through the heat exchanger to get to my strike temp. This way, I don't have to run it WOT (imagine a flame shooting out of the chimney). For sparge water, I run it WOT in order to even get by at 0.5 gal / minute at 170°.

A 110v tankless heater would never be be able to produce water at much more than a trickle, you really need >5000W to heat water at an appreciable speed.
 
3558761769_461a732ee3.jpg

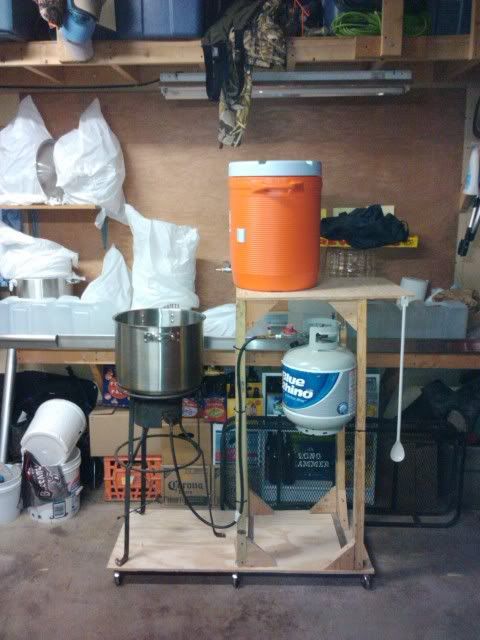
My first all Grain "Milk Crate and Slate Rig".

4653220730_b45f72b903.jpg

Current contraption. No more weather issues.
Got the idea from this thread. Now I'm moving to sanke's, so I have to renovate my setup again. I'm sure this thread will be a help.
 
Thanks,

No, in order to use a tankless heater like that, you have to completely gut it, there are so many safety features built in that you could never get 170° strike and sparge water out of it.

For strike water, I fill the MT to my desired volume, then recirculate through the heat exchanger to get to my strike temp. This way, I don't have to run it WOT (imagine a flame shooting out of the chimney). For sparge water, I run it WOT in order to even get by at 0.5 gal / minute at 170°.

What is "WOT"?

A 110v tankless heater would never be be able to produce water at much more than a trickle, you really need >5000W to heat water at an appreciable speed.

Yeah, I was just going to use it to pre heat water from the spigot (which is around 33-34 degrees) to something in the 80-110 degree mark as is was being dumped into the HLT for heating with the burner..

But that's a moot point now.. As I will just wait until I move the rig, where I can then draw hot water from the kitchen.. and for that I have the tankless control set to 145 degrees... which makes heating to 170 a piece of cake.......

So for now, I'm just gonna fill buckets of water in the kitchen and carry them up the ladder and dump them in... Until I get a sight glass installed, that's the only way I have to measure how much water goes in anyways..
 
The old - made from scraps that I had in the garage the night before my first all-grain run.
sculpture.jpg


The new (work in progress):

163732_10150090100028846_596098845_6090603_6938743_n.jpg


166884_10150091301398846_596098845_6103431_101893_n.jpg
 

Latest posts

Back
Top