My Single Tier Brewing Stand

Homebrew Talk - Beer, Wine, Mead, & Cider Brewing Discussion Forum

Help Support Homebrew Talk - Beer, Wine, Mead, & Cider Brewing Discussion Forum:

This site may earn a commission from merchant affiliate links, including eBay, Amazon, and others.

johnholzer

Supporting Member
HBT Supporter
Joined
Jun 25, 2011
Messages
40
Reaction score
20
Location
Moreno Valley
Hello, HBT! This is my first post on this site, but certainly not my first visit.

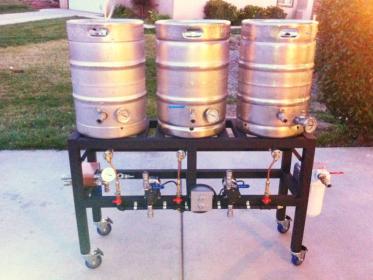
I recently completed my build of a Brutus 10 "clone", minus the fancy electronics—it's all manually controlled. I wanted to post a photo of said brewing stand and say THANK YOU to EVERYONE that posts/posted on this site for the endless knowledge and needed insight that you all unknowingly provided to me throughout this build. It took me a little over a month to build the stand. Because of the knowledge provided here, I really think I made a quality, safe, kick-ass brewing stand.

I plan on taking more photos this week, and I'll post them when they're complete.

Again, thank you very much to everyone here! To anyone that plans to build something similar, feel free to ask any questions that may arise—I am more than willing to answer and hopefully, help you out.

Cheers!
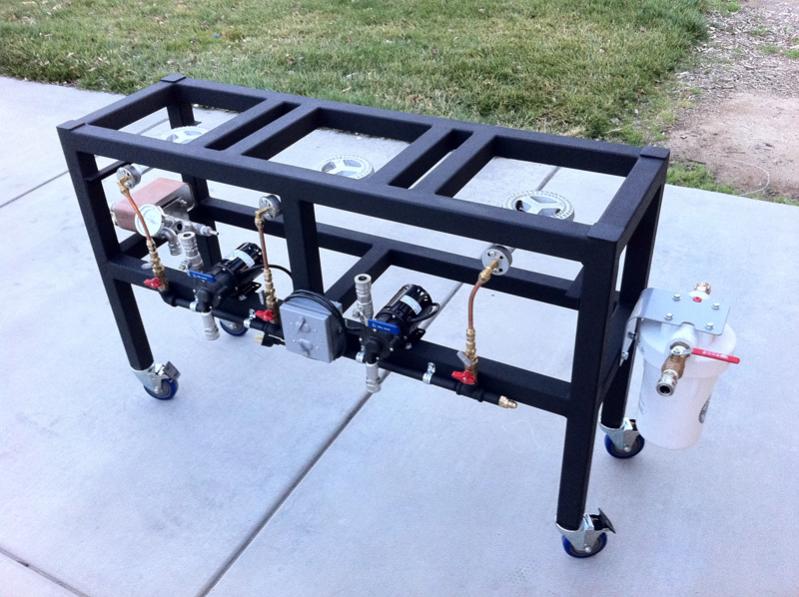
photo.jpg
 
that looks beast how many hours and dollars did it cost to make? Was it worth building it yourself? I sometimes end up spending more time and effort than what it would cost to buy when i build things DIY
 
that looks beast how many hours and dollars did it cost to make? Was it worth building it yourself? I sometimes end up spending more time and effort than what it would cost to buy when i build things DIY


I think it was totally worth it building it myself. I think I spent about about $1300 for everything in this photo. This includes the metal for the frame, two March pumps, the water filter, the Blichmann plate chiller, all the gas piping, brass and SS fittings, valves, casters and inserts for casters, top insert covers, electrical, paint, and the female SS quick disconnects (in the photo). I have yet to add it all up to exact numbers.

johnnybrew said:
John - looks great! Really nice build. If you want to build one for me I wouldn't be upset. ;)

Thanks! And, um... I don't think I'll be building another one for a while. This one was quite enough work. ;) Cheers.
 
johnholzer said:
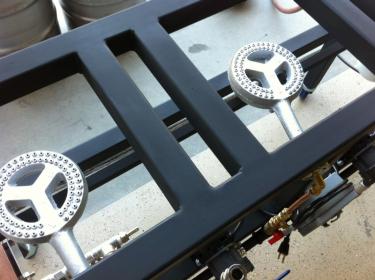
The burners are mounted to a .75" x .75" steel angle. That angle is then bolted to a 1" x 1" angle on each side of the frame.

How do they attach to the mounting brace?
Looks good btw
 
johnholzer said:
The 1" x 1" angles are just bolted to both sides of the inside of the stand.

And, thanks!
Heh, last question... How are the burners attached to the cross brace? is there a tapped hole that you can put a bolt in?
 
Maybe a silly question John, but I have the same burner as you are using only it's mounted to the stainless steel propane burner (Model SQ-14). I want to make new hoses for these, but can't use the orifices that are currently attached to the hose. Could you tell me where you bought the orifices that you've got hooked up to the propane inlet on the burners? I looked on Bayou Classic's website and found this:

http://bayouclassicdepot.com/5235_propane_burner_part.htm

I'm assuming that's the correct part, but don't know for sure. If you could point me to your source, that would be awesome. Thanks!

Yep. That's what you need. I got the same thing, but in a 90° version. Got it from the same place too.
 
Very very nice John. I need to get out there to visit the New Brew Thursday crew and see this thing in action. :mug:
 
This looks awesome and is pretty much what I want to build.

Couple of questions for you - are those the 6" low pressure burners from AgriSupply?

What regulator are you using?

Have you thought about a need for wind screens on the burners?

Can't want to see more pics!
 
Looks excellent. Are you planning type of electric spark of anything to light the burners or just stick with a lighter?
 
This looks awesome and is pretty much what I want to build.


Couple of questions for you - are those the 6" low pressure burners from AgriSupply?


What regulator are you using?


Have you thought about a need for wind screens on the burners?


Can't want to see more pics!

Thanks!

The burners are 6" Bayou classic burners, model BG-12. And they're "high" pressure, which is above .5 psi. Bought them on Amazon. That style burner is what I was using on my single burner setup initially. I like them. I was going to use the 10 tip jet burners, but after ready all the controversy with those kind of burners, I went with what I was familiar with.

I am using the 30 psi regulator from Tejas Smokers, model COMRI-30. http://www.tejassmokers.com/gasregulators.htm

I've thought about adding wind screens but haven't found the best way to mount them and it's not that big of a deal for me. I'm sure my attitude will change on a windy day... ;)
 
Cool build, what'd you use for steel? I'm looking at picking up some 1 1/4" steel square tubing for a stand project and my local outfit has got 18, 16, 14 and 12 gauge steel in this tubing. I'd like to make sure I've got a strong enough frame but thinner steel is going to be cheaper and easier to cut.
 
Cool build, what'd you use for steel? I'm looking at picking up some 1 1/4" steel square tubing for a stand project and my local outfit has got 18, 16, 14 and 12 gauge steel in this tubing. I'd like to make sure I've got a strong enough frame but thinner steel is going to be cheaper and easier to cut.

I used 2"x2" carbon (mild) steel, 11 gauge (.120), which is almost a 1/8" thick wall. Painted it with high temp Rustoleum engine paint.

I went with the 11 gauge because I needed to tap holes in it to mount everything. Also, I think having the heavier gauge helps with the welding process to help keep the metal from distorting more than it would if a lighter gauge was used.
 
NBT guy? Anyways congrats on your Brutus build! I love the way it is basically an all in one system. I'm looking at doing something similar but maybe add an additional section to mount a milling station. Where did you get that huge water filter?
 
NBT guy? Anyways congrats on your Brutus build! I love the way it is basically an all in one system. I'm looking at doing something similar but maybe add an additional section to mount a milling station. Where did you get that huge water filter?

Thanks! I got the water filter at Home Depot, with the $30 carbon filter. It's intended to be used as a whole house filter.
 
This would be a great rig to feature in a NBT homebrew special edition. Something to be proud of and show off!

Thanks. We do plan on doing a show about it, with a blog post and video, etc.. I just need to get a few more batches under my belt to really know how to use it. I'm getting there... :)
 
Back
Top