[Not a] Bike Pump Keg [Evolution]

Homebrew Talk - Beer, Wine, Mead, & Cider Brewing Discussion Forum

Help Support Homebrew Talk - Beer, Wine, Mead, & Cider Brewing Discussion Forum:

This site may earn a commission from merchant affiliate links, including eBay, Amazon, and others.

pizzaman

Well-Known Member
Joined
Feb 6, 2009
Messages
679
Reaction score
8
Location
San Antonio, TX
[EDIT]

This thread is 30+ pages of my journey into kegging. I go through some very silly ideas and eventually wind up using cornelius kegs, a standard co2 regulator and a paintball sized co2 tank. I learned some interesting things along the way, and found and posted links to sites with all kinds of ingenuity related to kegging. If you are thinking about getting into kegging, do it. If you think you can come up with a better way than the methods already out there, please read this thread first.

My journey begins with the idea of using a bike pump and a water bottle......


[/EDIT]

I remember a few months back seeing a website selling kegs which required no CO2. They were basically a bottle with a plastic liner which you would put in some kind of pill which created expanding gasses. As more beer was siphoned out of the keg, the plastic bag would inflate more, taking the place of CO2.

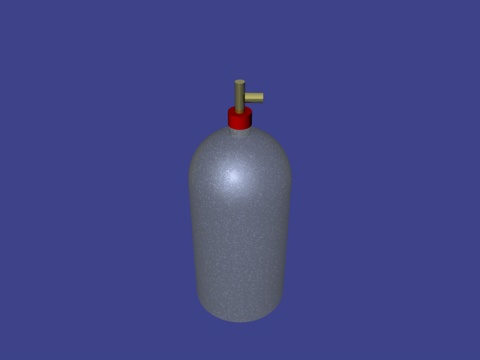
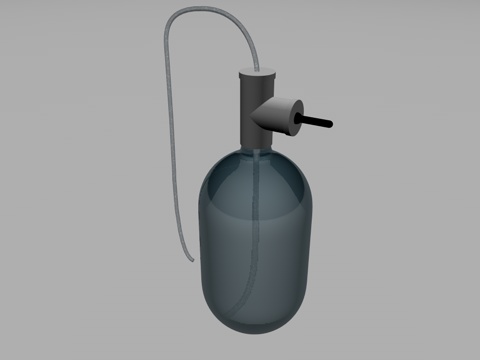
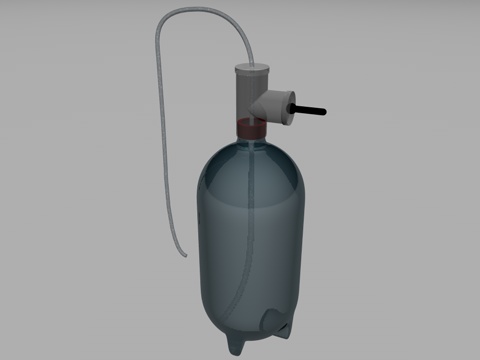
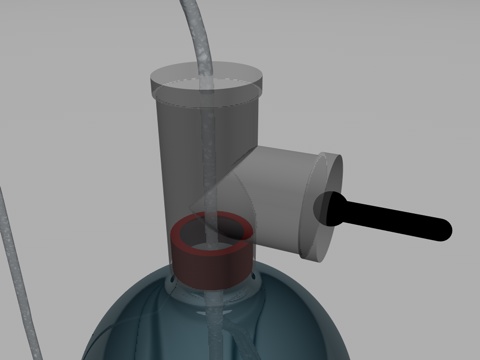
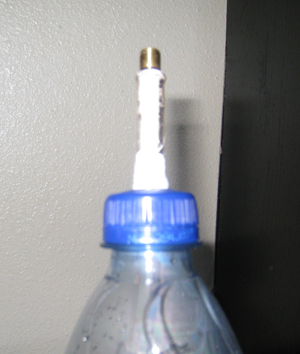
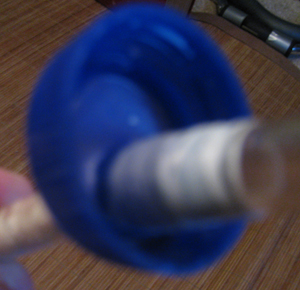
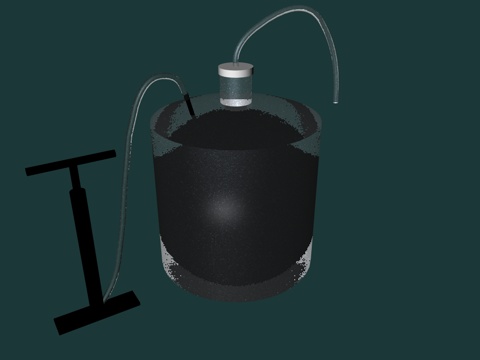
This got me thinking, what if I took a 5 gallon water bottle($5), put in a large, clean, plastic bag($1), connect a bike pump valve($2) to lead into this bag, attach the necessary kegging equipment($15?) to the vessels' lid, and voila! I have a reusable keg that I can pressurize with a few strokes of a bike pump(or the flip of a switch on a portable air pump).

Any relevant comments and thoughts are appreciated.

BPKeg1.jpg
 
I remember a few months back seeing a website selling kegs which required no CO2. They were basically a bottle with a plastic liner which you would put in some kind of pill which created expanding gasses. As more beer was siphoned out of the keg, the plastic bag would inflate more, taking the place of CO2.

Party Pig? Welcome To The Pig Farm!
 
Good to know, thanks for the input. I've decided to build a small 2Liter version and go from there. I'll do some trial runs with it in a safe location filled with water in case there is an explosion.
 
If you haven't seen the latest BYO magazine where John Palmer was extolling the unorthodox methods and DIY savvy of the Australians, then you might not know that they have been breaking some interesting barriers of inventiveness in Brewing for well over 30 years. They do things with junk and even ingredients that put us to shame, and often goes against the common wisdom that we have come to hold as gospel.

In fact the first Brewing Podcast came form the aussies, it started over 10 years ago as an actual radio show, then jump into the web with gusto. I spent my Christmas vacation listenning to every podcast of theirs I could find online...The two hosts have combined 60 years of brewing experience....

Anyway, Graham Sanders the hose has an article that you'd be interested in:

FANTASTIC PLASTIC KEGS

Pressure sprayer kegs;

Pkeg1.jpg


pkeg2.JPG


I love the built in beerguns.

The rest of the articles are equally interesting Australian Craft Brewing

And here's the links to the podcasts CraftBrewer Radio

Have Fun DIYING!!!! :mug:

I'm thinking about doing this and getting one of those small co2 painball chargers for CO2.
 
Apart from the problem getting a cost effective container, i think there would be a problem keeping the plastic liner from getting sucked up the dip tube when dispensing.

I'd say if you were taking your keg to a party, just dispense with the bike pump. If your making good beer it wont last more than a couple hours at any decently sized party so oxygenation isn't an issue.
 
That's awesome Revvy, thanks for the info and links!! I've always felt like I had a little Australian in me...little bugger keeps trying to come out. Those beerguns do look like fun. It looks like one of those sprayer bottles sells for aournd $20 for a 1 gallon. Not exactly cost efficient, but possibly necessary. I'll spend the next few days hunting the internet for any cheaper alternatives for sturdy plastic containers.
 
Spent the last 40 minutes or so searching for something like that on this site. I found plenty of forums where people listed the links I just listed, but no build plans anywhere here.

I did find another good external link: 3 Liter Pop Bottle Mini-Kegs

This looks like the simplest and easiest setup so far. I think I'll just build one of these and see how it works out with a plain 'ol bike pump. When we host or attend a party where my beer is being served, we always run out of it first so I'm sure using a bike pump would work out fine without having to worry about oxidation. Plus, if I can pull it off and impress the wifey enough I'll be allowed to invest more money into future keggings!

Yeah for fast consumption I think something like that WOULD be the way to go....that and the Beer Engine from the RV Pump...


OOOH dig up that thread as well....I think the title is "Ladies and Gentlemen, meet my new beer engine" there is a discussion of something similar in there. :mug:
 
But of course...we got an awesome digital cam last year and I use the heck outta it. I'm bored right now and am working on a basic 3d model....nothing fancy, but this thread could use another pic.

MK1.jpg
 
From what I've read on other sites, the 2 Liter kegs are all used in addition to a real keg. They have the beer primed and ready to go in their full keg, and transfer it to the portable keg. I wonder if I would have a problem priming in these bottles since I don't currently own a keg? I would assume as long as I got the priming calculations correct it shouldn't be an issue as I used to use pint plastic bottles before I stocked up on glass bottles and they worked fine...

What I would like to do is prime in the 2L bottles with a regular cap on the bottle. Then, after priming for 3 weeks take 2 or 3 of the bottles with me to a party and have one lid with the mini-keg fittings. Once one bottle is empty I'd move the MK lid to the next bottle and so on until all gone. I imagine as long as the bottles are sealed and cold they would remain primed and ready to drink....and since I'll be using a bike pump anyway the initial opening to switch caps wouldn't be too much of an issue with oxidation right?
 
Priming and conditioning in soda bottles shouldn't be a problem.

If it's gonna get killed in a couple of hours, I wouldn't worry much about oxidation. Some people worry about the (very low but non-zero) oxygen permeability of soda bottles but I doubt it'd be too significant unless you're planning on storing the beer for long periods of time.

I'd avoid root beer bottles since the flavor is the most likely to linger of common sodas.

Finally, I'd think long and hard about the cost/benefit. Something like the party pig runs $50 for an 8.5 liter dispenser (that's no pump, no oxygenation). Those keg-tap instructions say $10 in parts, but then another $18 for the CO2 charger that he decided was necessary. That's $28 + the cost of bottles. If you already have a bike pump you can keep the cost lower, and it's probably cheaper to run (per-bottle cost) than the pig bags. Still, you're also changing out tops more often.

I like the DIY thought, I'd just worry that at the size it's going to wind up fairly finicky. I'd at least consider using 3-liter soda bottles; they're not expensive and you'd be changing tops less often. And I'd make the plans around a CO2 charger (maybe not buy it initially, but design for expandability) in case you decide you want to go that route.
 
Good points. The main reason I'm going the DIY route, other than my constant desire to build anything and everything, is that swmbo won't approve me to purchase any kegging equipment or hardware, as it's not in our budget at the moment. If I can build a feasbile keg for around $10, which it looks like I can as we already own a bike pump and the necessary tools to build this, I should be able to introduce her to the many benefits of having a kegging system. After a couple months of using the diy kegs, she would more than likely approve the purchase of better hardware.
 
Oxygenation shouldn't be a problem since the 2L bottles are pressurized with CO2 over atmospheric pressure. I use them all the time to carb samples of a kegged batch that hasn't carbed up yet.(its a heck of a lot easier to shake a 2L than it is a keg) Recipients of the barleywine trade will receive the beer in this manner to cut down on shipping and handling cost. Bonus- they get to keep the carb cap.
 
I didn't read the current links listed. Mine consist of metal valve stems mounted directly to the cap. Remove the cap, fill with beer, install cap, carb through the valve stem with an automotive style air chuck hooked up to the CO2 line. Not nearly as pretty as yours but functional. I don't know what the burst pressure of a 2L is so I never force with more than 20 psi dialed in.(at 60psi they become a bomb and sound like a cannon going off. A lot of fun in the shop):D
 
I wonder...is CO2 reusable? does it have a shelf life? would using recycled CO2 cause problems? Could someone in theory transfer CO2 from an empty keg to a full keg if they had the right equipment to do so?
 
I figured out a way to build this using pvc pipe instead of copper. Total cost: $2, plus the tubing and schrader valve, both of which I already own. I'll post plans and pics tomorrow. Hopefully will have time to build and test it this week.
 
How do you plan on sealing the pvc with the bottle? All those brass fittings can add up on a college budget, digging the $2 price tag
 
The PVC tee will do one of three things, depending on how well everything fits together. It will either:

1) Slip over the cap of the 2 Liter and be sealed with pvc cement(as in pic)
2) The tee will be threaded and screw directly onto the 2 Liter Bottle
3) The tee will be mounted to the top of the 2 Liter cap

I'm hoping I can find a size that slips directly over the cap, as in the picture. Once I purchase the PVC I will no for sure.

MK2f.jpg
MK2e.jpg
 
As long as I'm trying to build this sucker for as cheaply as possible, I thought I'd throw out the Tee, since it's not really necessary when working with PVC. I found a 1" end cap for $1 at lowes, will run up there tomorrow to see if it fits the 2 liter rim or the cap. If this works it should be easy enough to talk swmbo into letting me spring for a CO2 pump: GENUINE INNOVATIONS ULTRAFLATE2

If I find one that fits I'll post pics and instructions tomorrow, though it is fairly self-explanatory, I would've liked to have found something like this when I was first looking....

MK3c.jpg
MK3a.jpg
 
About to head out to Lowes to do some sizing and hopefully buying of pvc...as I was finishing my coffee I had an idea for automatic release of CO2, sort of a push-button system. Have a looksee and tell me what you think:

The top half of the tube isn't permanently attached, and can slide up and down the smaller middle tube, which is permanently attached to the bottom tube. When you want a drink you press down on the top of the tube, which activates the CO2 cartridge, forcing beer through the feed tube.

MK4a.jpg
MK4b.jpg


Would having the feed tube constantly open to the bottom of the minikeg cause any oxidation issues?
 
Here's the cap before applying cement:
mk1_004.jpg


The bottle with everything assembled, prior to sealing:
mk1_003.jpg


Once cement is dry I'll do a pressure test and post the results and a diy guide.
 
The first attempt failed to hold pressure. I am rethinking the overall design, still trying to keep it under $10. I did learn that a 1/2" pipe fits snugly inside of the rim of the 2 liter, which may be useful. I'll probably end up doing something with brass similar to what I have seen others do...
 
My second attempt after much more thought has produced a working result. It's not pretty, but it is cheap and effective. I took the schrader valve I had, stripped the rubber off the metal core, and wrapped it in threading tape. Then I inserted it into a short piece of 3/8 tubing, wrapped the tubing in a thin strip of duct tape covered with threading tape. The tube is inserted in a water bottle cap with enough room left for one more tube of equal size to be inserted in the same cap. To my surprise, the water bottle held 20 psi with no leaking. My next purchase will be a picnic tap which I will attach to a second tube attached to the lid next to the schrader tube in the same way, with the tubing running straight to the bottom. Once I have this all setup, I'll report back with more pics and info before taking everything apart and moving it to a 2 Liter setup, and, hopefully, reporting back to write up a full blown diy project.

mk1_010.jpg
mk1_012.jpg
 
Not to harsh your buzz, but these are 2 liter bottles that you're going to start oxidizing as soon as you pump in air. They're not too heavy to lift, and that's only 4 pints of beer.

What's the real advantage over just treating it like a regular soda bottle and pouring the 4 glasses of beer? Is it to try to avoid stirring up the sediment, or just for fun? (fun is a reasonable answer)
 
After sitting for three hours the psi has dropped down to 10 psi, which is obviously not good. I'm gonna try to find some 3/8" compression fittings to use instead of the tape method, which I assumed wouldn't work from the start, but had to try anyway for experimenting sake. It's looking more and more like I'm gonna have to shell out the $10 to make this legit.
 
SumnerH, while the main reason for doing this is just for fun...I do have a few other reasons. The 2 and 3 liter caps are interchangeable, so eventually I want this to be a 3 Liter system, which is just short of a gallon, which equals 9 - 12oz bottles, or when served into 8oz cups equals 13 servings. I want to be able to take 5 or 6 different 3 Liter bottles of beer, stick them in a cooler, and serve them up one at a time amongst myself and my disc-golfing buddies while playing a course. The only problem with just pouring them out is that while I drink waaay too fast, my wife drinks waaay too slow, and everyone else is somewhere in between. So at some point the wife would be complaining that she's not getting her fair share and blah blah blah she's got another black eye(just kidding). But again, this is mainly just for fun.
 
My second attempt after much more thought has produced a working result. It's not pretty, but it is cheap and effective. I took the schrader valve I had, stripped the rubber off the metal core, and wrapped it in threading tape. Then I inserted it into a short piece of 3/8 tubing, wrapped the tubing in a thin strip of duct tape covered with threading tape. The tube is inserted in a water bottle cap with enough room left for one more tube of equal size to be inserted in the same cap. To my surprise, the water bottle held 20 psi with no leaking. My next purchase will be a picnic tap which I will attach to a second tube attached to the lid next to the schrader tube in the same way, with the tubing running straight to the bottom. Once I have this all setup, I'll report back with more pics and info before taking everything apart and moving it to a 2 Liter setup, and, hopefully, reporting back to write up a full blown diy project.

mk1_010.jpg
mk1_012.jpg
Switch valve stems to a all metal truck tire stem. It has a nut to hold it on from the outside. The inside is a flat base that is rubber coated so it will seal against the inside of the cap when the outside nut is tightened down. Maybe I missed it but why all the extra work to add a faucet when you can unscrew the cap and pour a beer? 2L is only about 4 pints. Most people would kill that in 1-2 hours.
 
I've looked everywhere for those metal stems and can't seem to find one locally. I tried lowe's, home de-pot, ace, even autozone.

As far as your question, aside from the 10 different reasons I've given in previous posts, I just thought of another one. My *ahem* brewing method is 1 week in primary and 1 week in the bottle. Scoff and curse all you want but it works and it's damned fine beer. The only downside is the thick layer of sediment in the bottom of the bottles. I've tried different yeasts to counteract this, but they all affected the taste. I've tried racking to secondary, but then I have to wait another 2 months before it's drinkable, and is not any clearer and doesn't taste any better than my 2 week start to finish method, there's just less sediment. So, with all that said, I need a cheap, homemade way to dispense beer into peoples cups without disturbing the sediment, which means no moving of the bottle, and especially no pouring. Combine that with all my previous responses and you've still only really got a half-assed answer so once again my real reason for doing this is the same reason I make my own beer in my bathtub.

Because I want to and I can.
 
Back
Top