Antique Fridge Kegerator Build

Homebrew Talk - Beer, Wine, Mead, & Cider Brewing Discussion Forum

Help Support Homebrew Talk - Beer, Wine, Mead, & Cider Brewing Discussion Forum:

This site may earn a commission from merchant affiliate links, including eBay, Amazon, and others.

snooky

Well-Known Member
Joined
Jan 18, 2009
Messages
58
Reaction score
3
Location
Buffalo
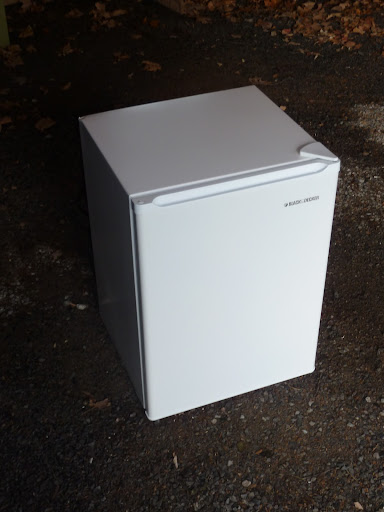
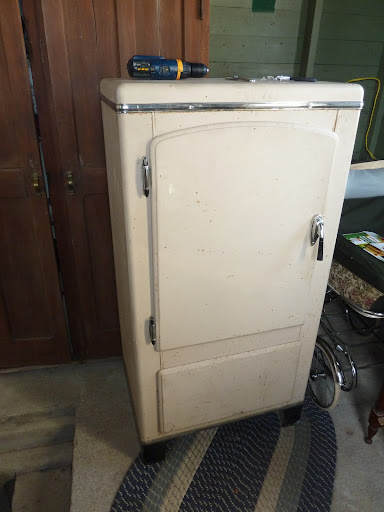
I am about to embark on the most extensive build that I have ever done. My wife and I moved into an old farm house recently, and we are expecting our first child in the beginning of May. Everything I have heard says that a stockpile needs to be made in preparation since my free time will be limited for a while. So, like any homebrewer, I decided to build a kegerator to help save me the time of bottling. I was surprised that it really didn't take much convincing. My wife was 100% on board, we just had different ideas of what the kegerator would be/look like. We have a small pantry, and I wanted to put a fridge in the basement and run the lines through the walls and hook up the taps in there, but I was vetoed on that suggestion and what I ended up with was a gutted fridge from the 1940's (maybe) that we found on craigslist.

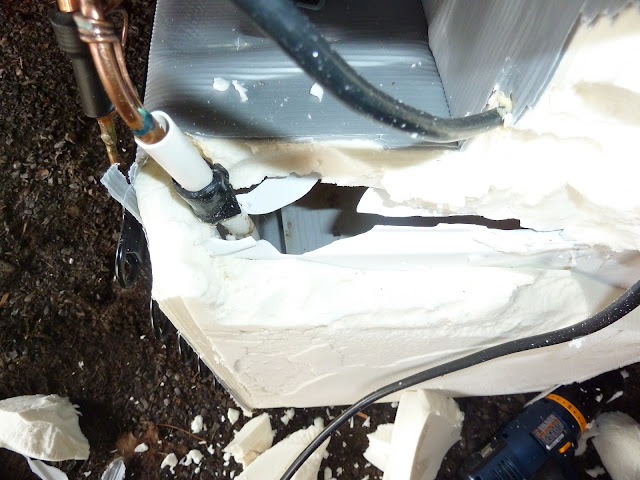
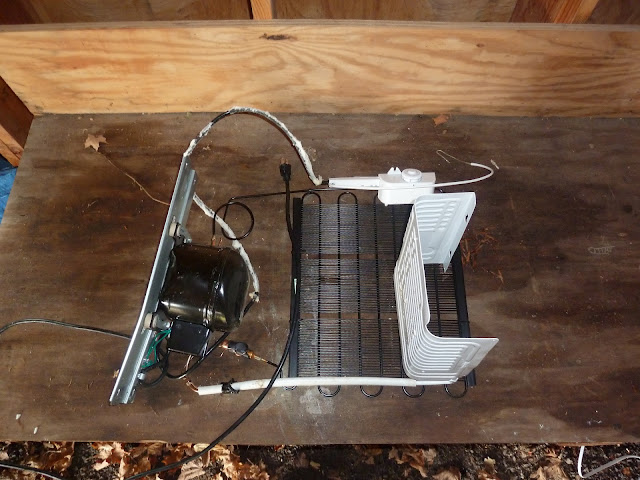
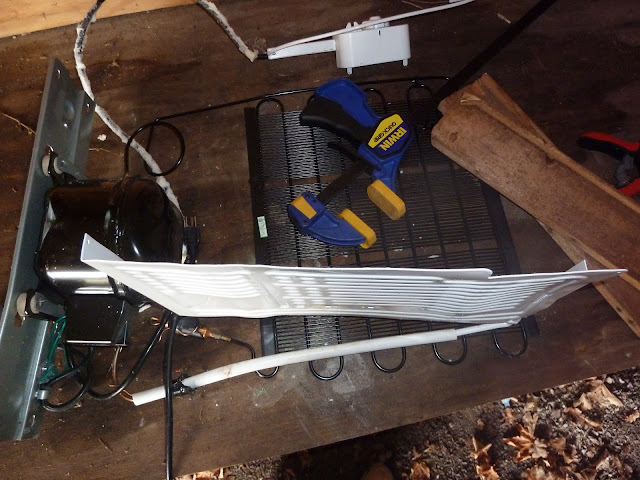
As I said, this project is going to be massive, and so is the fridge. Its large enough to fit four kegs, and underneath in the small cabinet, I will be able to stash a couple tools and the CO2 tank. One of the biggest challenges is going to be taking apart a mini fridge and somehow getting the internals into the fridge. It sounds like it will be hard, but we shall see...

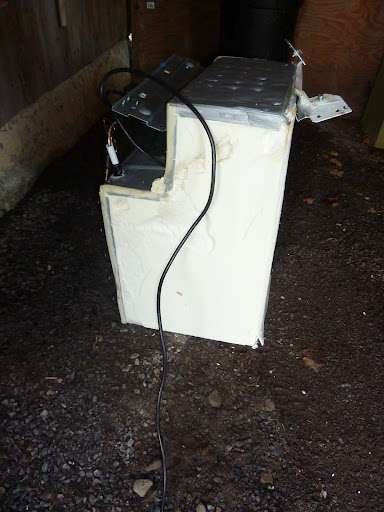
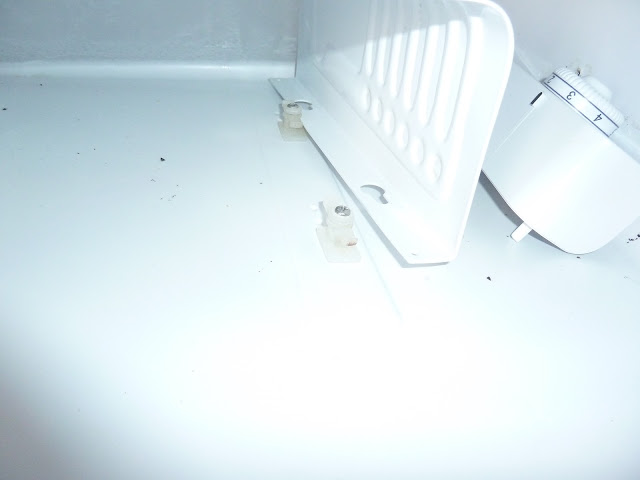
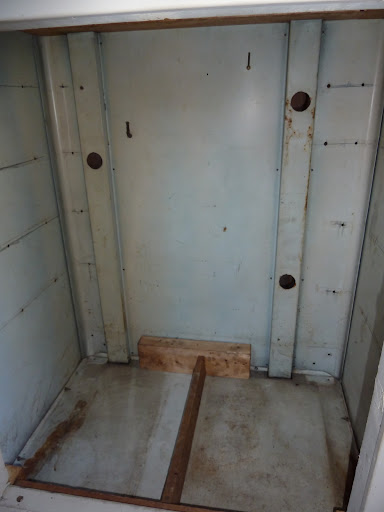
Someone had previously gutted this fridge and turned it into a tool chest, so one of my first orders of business was to take out all of the shelves and door compartments. Below are the after pictures.

There are still a couple things that I need to get done, the most challenging perhaps, is to buy a mini fridge, disassemble it and transfer the parts into the kegerator. The next step after that will be to insulate the kegerator and pipe in the taps, but that is a lot further down the line.

We're still not 100% sure on what we want to do with the colors, but we are thinking a robin's egg blue with white/cream doors and chrome accents. This definitely wont be something that happens over night, so I look forward to constantly updating this post on my progress with it.

P1020109.JPG


P1020112.JPG


P1020113.JPG
 
Can't wait to see how this turns out!

Is the cabinet underneath tall enough to store the CO2 tank upright? I believe they are supposed to be stored upright.
 
beertastic said:
Is the cabinet underneath tall enough to store the CO2 tank upright? I believe they are supposed to be stored upright.

It isn't tall enough to fit the CO2 tank upright. I've never heard that it has to be standing vertically. I'll have to look into it though.
 
It isn't tall enough to fit the CO2 tank upright. I've never heard that it has to be standing vertically. I'll have to look into it though.

I have heard if they are not upright liquid co2 will come out of the tank.
Cool build...I look forward to seeing how it comes along. Subscribed
 
basementbrewbrad said:
I have heard if they are not upright liquid co2 will come out of the tank.
Cool build...I look forward to seeing how it comes along. Subscribed

Yes it needs to be upright, I play paintball and there is a special dip tube you need to allow the tank on it's side or the liquid will come out and freeze your gun. In your case it will get into your beer.......not good. You could put it outside the fridge and run the line into it, that's how my buddy did it in his fridge.
 
Originally Posted by basementbrewbrad

I have heard if they are not upright liquid co2 will come out of the tank.
Cool build...I look forward to seeing how it comes along. Subscribed

Only the tanks used for filling other CO2 tanks have the dip tube. Make sure you don't use those for your kegs. It probably wouldn't be a problem, but could cause some problems with your regulator and possibly send liquid CO2 into your beer.

Beverage CO2 tanks do not have a dip tube so they pull from the gas on the top, not the liquid in the bottom.
 
Looks like it has a lot of potential. I'll be keeping an eye on this thread...
 
Looks awesome! And congrats on the coming kid!

My $0.02 - you may need to add some insulation to that pig. It looks like it doesn't have much if any. Insulation will help your mini fridge guts chill all that thermal mass with out over working.
 
CannibalAJ said:
My $0.02 - you may need to add some insulation to that pig. It looks like it doesn't have much if any. Insulation will help your mini fridge guts chill all that thermal mass with out over working.

You're right. Now its just a steel shell. I plan on getting some of the pink foam board from home depot and lining it with a couple layers.
 
I bought my mini fridge yesterday and tore it apart today. I'm hoping to post a full tutorial of it in a day or two.
 
Very nice here is my vintage kegerator.
https://www.homebrewtalk.com/f51/vintage-kegerator-282345/
I actually think your fridge is from the 30's most of the 40's were rounded like mine. The 30's were more boxy. I gutted mine, re insulated it and had to replace the guts with mini fridge guts. My only suggestion is to find an older mini fridge with the cooling condenser fins on the back. It will be hard to remove all the lines from whe walls of a newer style mini fridge.
 
So I finally got around to writing up the post about taking apart the mini fridge. While brewing one Saturday, I took some time and separated the internals from the useless (to me at least) outer shell.

P1020114.JPG


It was a lot easier than I had anticipated, all that was required to take this apart were a screwdriver (or drill), a hammer, a clamp, and a couple blocks of wood. The key was to do it slowly and work in small sections. In order to make it a bit easier to work with, I removed the door from the fridge.

P1020117.JPG


The next thing I did was remove the steel shell from the insulation and disconnect the compressor from the frame.

P1020119.JPG


Next, I took out the freezer compartment that will distribute the cooled freon inside the kegerator.

P1020120.JPG


After that, I took had to peel away some styrofoam to get the cooling lines out. At that point, the guts of the fridge were completely removed.

P1020122.JPG


P1020128.JPG


The last thing I did was flatten out the freezer compartments with some clamps and blocks of wood so it will fit up against the wall for my build.

P1020131.JPG


Like I said, if you're planning on doing this yourself, just take your time. I was terrified that I would nick a freon line and my $50 purchase would be a lump of trash, but just checking what I was taking apart along the way really helped. All in all, this took me about 45 minutes from start to finish. While my single hop additional beer was boiling was a perfect time.
 
As for the CO2 bottle: Idealy you will have the bottle positioned vertically. If you do need to lay the bottle at a low angle or horizontally you will draw liquid CO2 from the bottle. For those that play paintball the solution to this is to use an expansion tank. Basically this is a small, vertically mounted chamber that allows the liquid CO2 to turn to gas before entering the rest of the system's plumbing. A google search of expansion chambers will show you what the paintball guys use. With a little ingenuity you could eith plumb one into your system or build your own. Good luck with your build. It already looks like a winner!
 
Back
Top