purplehaze
Well-Known Member
- Joined
- Mar 2, 2011
- Messages
- 398
- Reaction score
- 27
Neither of my two keezer builds would have been possible without the documented builds on this site, thanks.
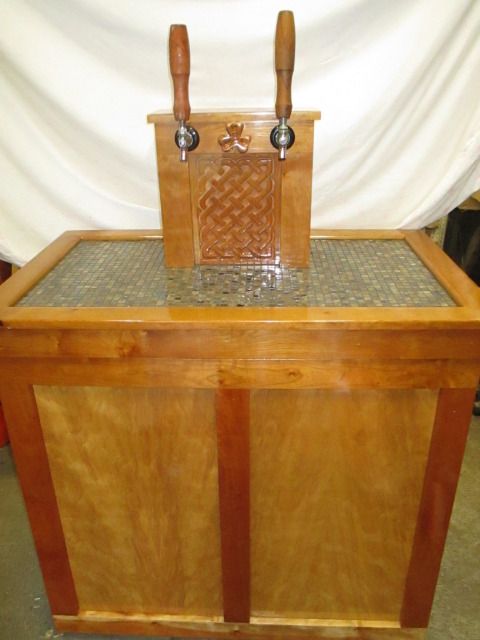
My lil brother saw my keezer and wanted one. Initially he wanted one similar to my own but I talked him out of it. He wanted a two tap coffin with room for expansion. One will be designated for a commercial keg and the other a corny keg. He does not brew but helped make a break in batch of brown ale.
Of course he wanted an expensive wood, cherry, a tile top and something similar to the inlay I did on mine.
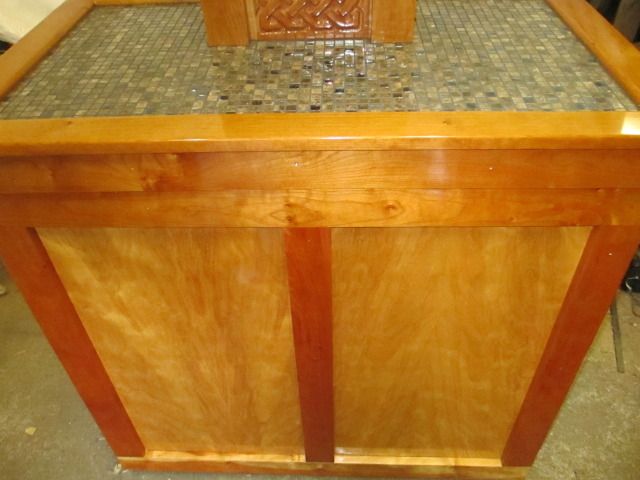
Since Cherry plywood is very expensive I opted for some birch plywood that I could stain cherry. One side of the plywood was nice and white ready for staining. When I turned it over the second side was a lot darker with some interesting grain. After experimentation with a variety of stains with and without sealer and they were all too red. I then tried plain old poly, on the dark side and its a close match.
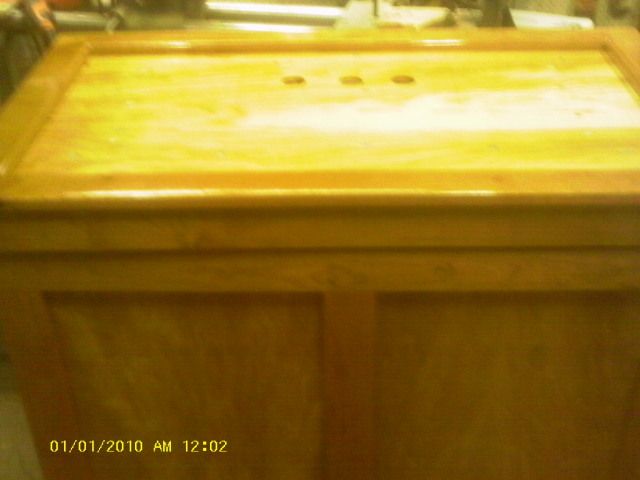
The coffin and top trim were built so that I only had to cut one tile on each side of the recessed part of the coffin.
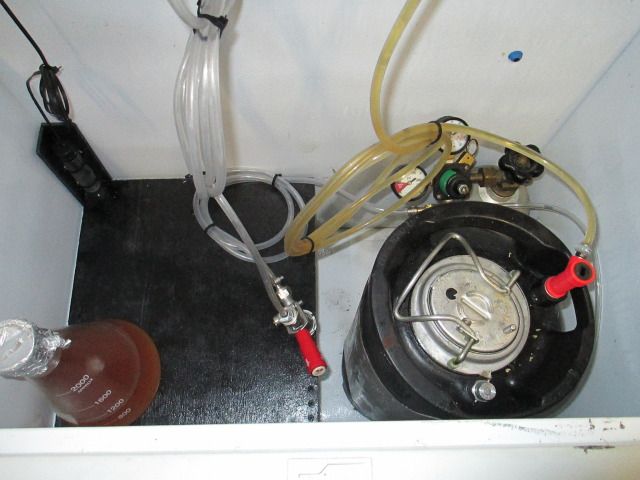
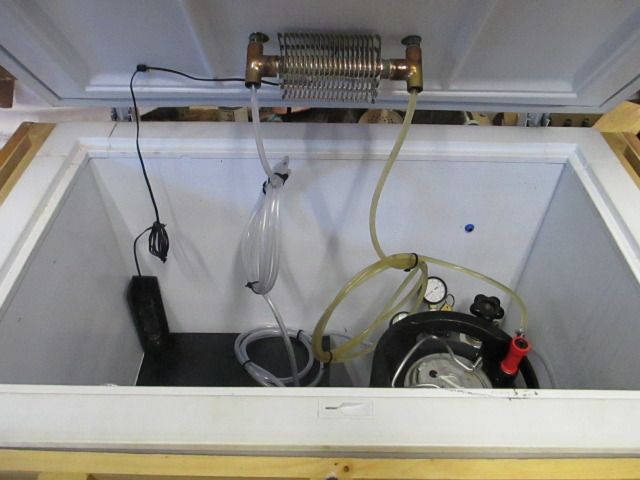
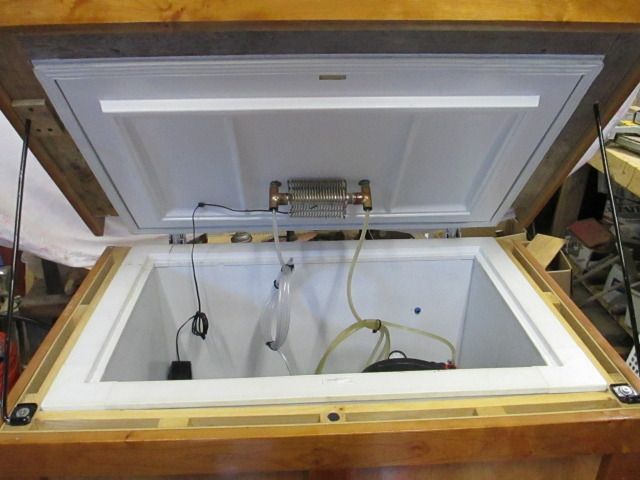
When it came to building the coffin I bought a pocket hole jig which made things a lot easier. I recommend it to anyone attempting one of these builds. I bought the cheap one which was not cheap at $40 but worth every penny in saved time. I also used an aquarium temp controller installed in the back of the coffin.

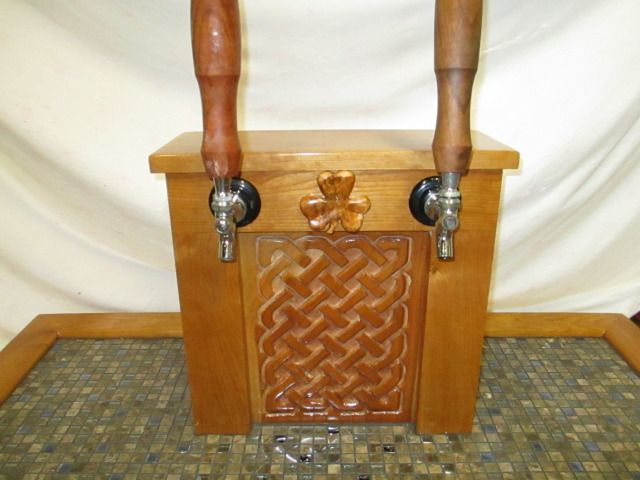
I had never done an inlay before I made the one on my own keezer. Now that I did one I wanted to try something else so after watching some videos on Celtic knots I figured I would try that. After one practice piece my daughter and I made this.
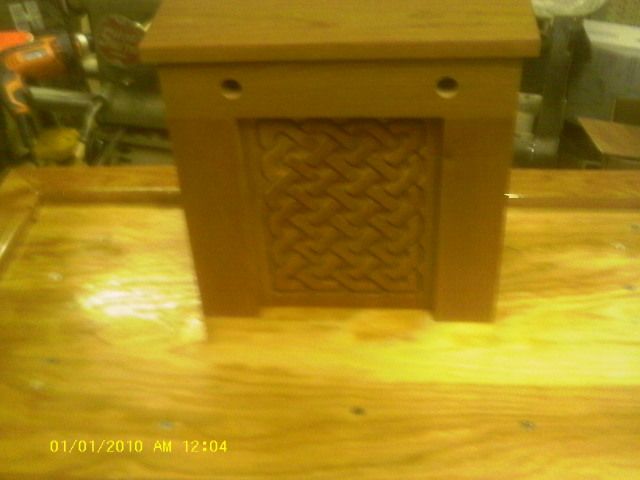
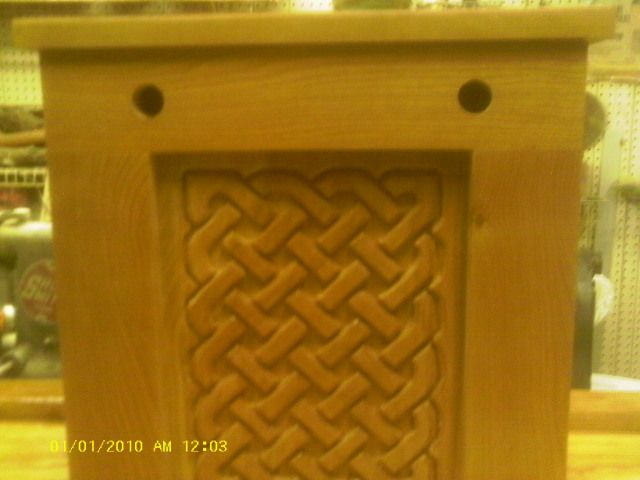
Initially a carved cherry burl shamrock that was going to be glued in the middle of the knot. After seeing the finished piece my brother thought it would take away from the knot so two clovers will be glued to the coffin, one on each side.
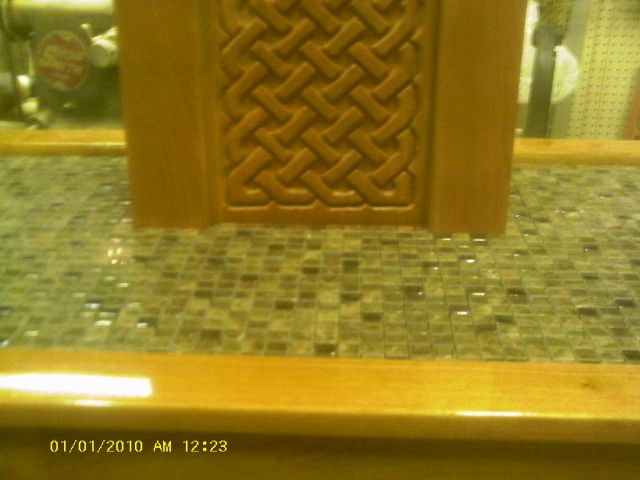
The tile is just dry fit because I have a few more coats of poly I have to apply to the top. I will be using a fairly new product to glue the tile down instead of thinset. Its a rubber membrane that the tile sticks to so that you can grout immediately.
My lil brother saw my keezer and wanted one. Initially he wanted one similar to my own but I talked him out of it. He wanted a two tap coffin with room for expansion. One will be designated for a commercial keg and the other a corny keg. He does not brew but helped make a break in batch of brown ale.
Of course he wanted an expensive wood, cherry, a tile top and something similar to the inlay I did on mine.
Since Cherry plywood is very expensive I opted for some birch plywood that I could stain cherry. One side of the plywood was nice and white ready for staining. When I turned it over the second side was a lot darker with some interesting grain. After experimentation with a variety of stains with and without sealer and they were all too red. I then tried plain old poly, on the dark side and its a close match.
The coffin and top trim were built so that I only had to cut one tile on each side of the recessed part of the coffin.
When it came to building the coffin I bought a pocket hole jig which made things a lot easier. I recommend it to anyone attempting one of these builds. I bought the cheap one which was not cheap at $40 but worth every penny in saved time. I also used an aquarium temp controller installed in the back of the coffin.
I had never done an inlay before I made the one on my own keezer. Now that I did one I wanted to try something else so after watching some videos on Celtic knots I figured I would try that. After one practice piece my daughter and I made this.
Initially a carved cherry burl shamrock that was going to be glued in the middle of the knot. After seeing the finished piece my brother thought it would take away from the knot so two clovers will be glued to the coffin, one on each side.
The tile is just dry fit because I have a few more coats of poly I have to apply to the top. I will be using a fairly new product to glue the tile down instead of thinset. Its a rubber membrane that the tile sticks to so that you can grout immediately.