Single Vessel Electric Build: 1.5 to 5 gallon batches

Homebrew Talk - Beer, Wine, Mead, & Cider Brewing Discussion Forum

Help Support Homebrew Talk - Beer, Wine, Mead, & Cider Brewing Discussion Forum:

This site may earn a commission from merchant affiliate links, including eBay, Amazon, and others.
I guess I still don't understand what you're doing with the basket? Will it extend down on the side that has no elements, etc.? Wouldn't that affect your mash? How will you prop up the "regular" side?
 
I guess I still don't understand what you're doing with the basket? Will it extend down on the side that has no elements, etc.? Wouldn't that affect your mash? How will you prop up the "regular" side?

I'm trying to make the steamer fill as much of the kettle as possible, so extending it down the side without elements... yes. I don't think it would affect my mash... hope it doesn't... just kinda blindly trying it. As for proping up the "regular" side... I don't know what you mean by that.

So... basically the extended portion of the steamer (shown below) hits the bottom of the kettle where the heating elements and such aren't. This will allow the grain to occupy as much of the kettle as possible.

Maybe pictures will help...
4851598370_3bf69f03f6_d.jpg


With the bottom mesh in (took forever):
4851599378_29ce80bce1_d.jpg


And on a separate note... installed the reflectix on the sides and bottom (still need to pretty it up):
4850979763_70dde28685_d.jpg


More pictures of the construction here: http://www.flickr.com/photos/martz/sets/72157624363961825/

Haven't done any of the electrical stuff yet. That will probably be next weekend. Hoping to be done then so that I can brew something in time for my birthday.

Cheers,
:mug:
 
Looks awesome! I guess I was wondering how it would be supported, and you answered that. It should work fantastic, I can't wait to see how it goes!
 
Holy ball valves batman, wow, I am lost. Why do you need so many? Do you not like high temp tubing?
 
Holy ball valves batman, wow, I am lost. Why do you need so many? Do you not like high temp tubing?

The tee before the kettle goes to the pump... so theres a valve for the kettle and a valve for an outside source... From the pump there are 3 valves to direct the flow... either through the CFC or straight back to the loc-line to sparge/recirculate/fill the fermenter/whatever.
 
Update... I'm about 95% done with this project! Still troubleshooting a number of issues though. It took me a while to realize that SSRs are not mechanical switches. I was originally testing mine by applying a 5V signal to the control part and then seeing if the two primary leads would let a signal pass through (via multimeter) they didn't. After a few minutes of cursing I figured out that they need the 120V to actually be present for them to work.

Hurray! The electronics work.

//Insert pic of pump running

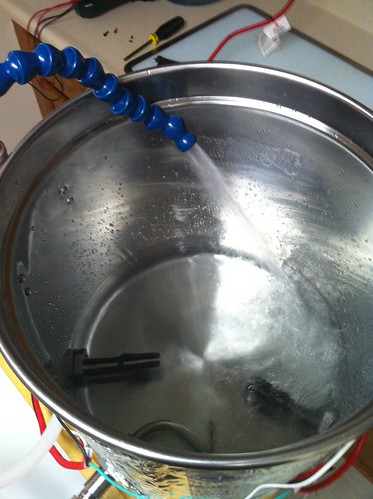
IMG_0079 by mmartz, on Flickr

//Insert pic of toolbox construction

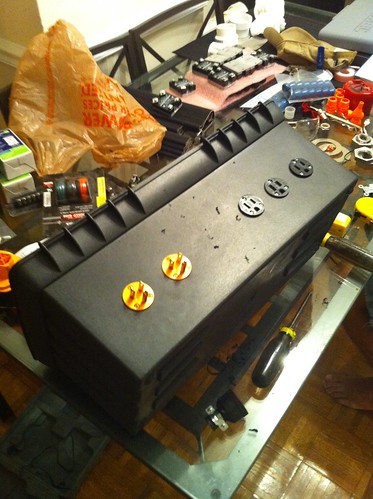
IMG_0080 by mmartz, on Flickr


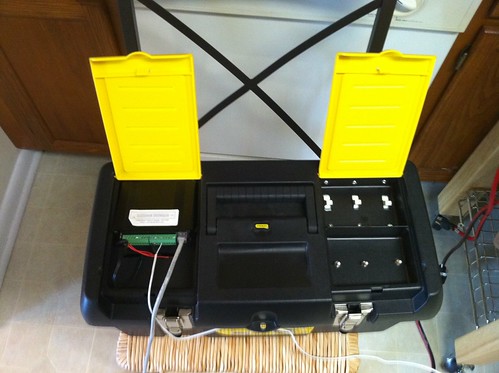
IMG_0086 by mmartz, on Flickr
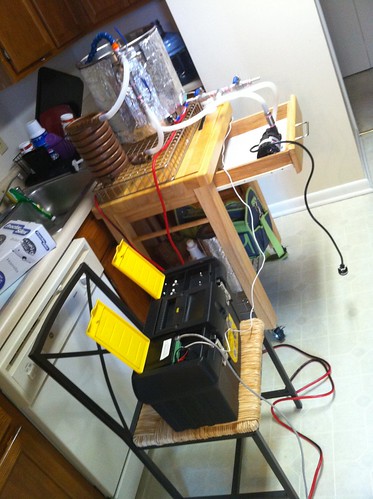
In this pic, you can see the switches I use to control things. The small switches enable the BCS460 to control the SSRs (so I can manually override the BCS). The big switches allow me to manually turn ON whatever is attached (bypassing the BCS/BCS doesn't even need to be hooked up). For both sets... the outer ones control the heating elements and the center controls the pump. I can have all 3 on at the same time w/no problems.


IMG_0085 by mmartz, on Flickr

Another bug I'm working on is the whole chillzilla issue. I ran clear water through it and it came out DISGUSTING. Apparently someone used this before (got it from ebay) and didn't rinse it very well. Has me a little concerned with whether I trust it or not (right now I don't). Not sure what I'm going to do there...

The last bug would probably be cleaning. Not as easy as I imagined. The kettle is hard to dump because of all the attachments (for the last bit remaining at the bottom) and I have no idea how to properly drain all the hoses.

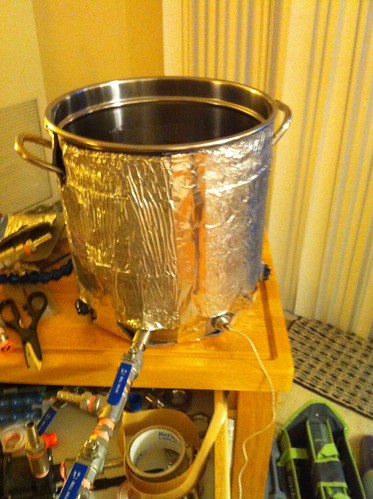
I did a boil test and it brought a few inches of water up to boil.

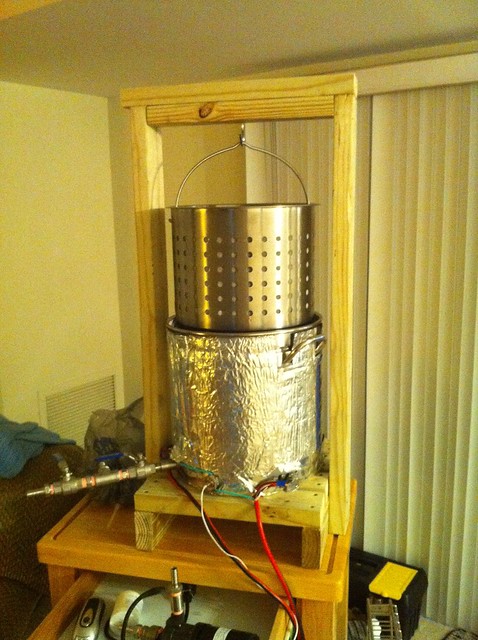
What's awesome is the BCS460. I can control everything and see the temperature from my iPad anywhere in my apartment. I can turn on the individual heating elements and run the pump, check the temperature... all from the comfort of my couch.

I messed around with running the pump every once in a while to "stir" the water instead of doing it by hand. That locline is pretty awesome stuff.

I might try and brew tomorrow... at the very least I'll do a clean run and see what happens with the chillzilla. I haven't finished the steamer mod either... will probably just use a grain bag for now. I bought a brew kit (PSA IPA) just to try the system out. I've done enough thinking, didn't want to have to worry about recipes.

If you have any tips on my setup, I'd appreciate it.
 
I would see if you can CIP the kettle. Maybe recirc hot PBW, rinse, drain, and use a turkey baster to get the last bit of water out.

For the chillzilla, do a strong solution of PBW/oxiclean and leave it in there for a few hours. Rinse well.

What do you plan on using to keep the basket in the up position? A grill grate?

BTW, how does it heat? I'm interested to hear how those elements work.

Yeah, I'll try that for the chillzilla. For the basket, it's held up by the regular ridges that came with it. I extended half of it down (shown above I think) to go to the bottom of the kettle.

For the elements... I got them from plumber supply. They're extra low density elements 1500W. Mounted them by drilling a hole with a step drill bit and then using a nut and o-rings from bargain fittings
 
Re: the basket, I guess I wasn't very clear. You're going to need to suspend the basket over the kettle to drain it. How do you plan on doing this?
 
You will be able to remove the zinc using a scotch brite pad.

Wouldn't that expose the carbon steel element, which would then rust?
Can you not get stainless or inconel ones or is the price to much?
 
Re: the basket, I guess I wasn't very clear. You're going to need to suspend the basket over the kettle to drain it. How do you plan on doing this?


Oh, I understand... Good question. I am going to have to build a stand of some kind with a hook... Most likely out of 2x4's initially. I'm not worried about that for the moment, Ill be brewing a kit beer first just to flush out the system,

CIP seems like it will work ok. After a dry run today... It brought 5 gallons of water from room temperature to boil in about 30-40 minutes. I also messed with the pid controller aspect and it held the temperature pretty well.

This week I'll be soaking the chillzilla a couple times (maybe twice at a day each) and then brew my kit IPA next weekend.
 
Can't wait to find out how this works, will eventually build something similar.

Two points - I originally thought that my BCS had to have manual switches, was a big mistake for me as inadvertently firing the RIMS heater almost led to major disaster. Be careful.
Second, the two male plugs sticking out of your toolbox are iffy/dangerous, I'm not an electrician but it looks scary.

The two major plugs (male ones I'm assuming you're talking about) are where the power comes in, so they are never uncovered/live at the same time. Extension cords hooked up to gfci plugs plug into them.

As for the switches... They all work great. The small runs only run off of 5V power, which is fine for what they're rated for. Those switches also don't interface with the BCS, they are in-between the bcs output and the ssr... So on order for the ssr to be on, the switch AND bcs have to be on.

Good to hear that you know what you are doing!

Hopefully you will post a final parts list when the set up is rolling out the brews!
 
Good to hear that you know what you are doing!

Hopefully you will post a final parts list when the set up is rolling out the brews!

Ha, I know enough not to kill myself doing it...

Once I "finish" (will never truly be done with it) I'll post a parts list. I am not looking forward to tallying up the total cost. Definitely at least $1000
 
An update: I ended up sealing my heating elements inside the kettle with a silicone sealant to protect against the rust I saw after one use (in plain water). And if I could remember my ebay username I'd be ordering a set of 4 solenoid valves, since I've decided to splurge. I might give up on that though.

First brew should happen next tuesday (taking a day off after the boise state game)
 
Which silicone sealant did you use? I'll probably end up having to go that route myself....
 
Built a stand today:


IMG_0091 by mmartz, on Flickr


One day I'll probably paint it, but not any time soon. I may also hang a piece of wood off the front and hang the pump vertical (so the input for the pump is straight up).

I also ordered 4 solenoid valves from ebay (to replace 4 of the 5 ball valves) and a plate chiller from duda diesel. The chillzilla freaked me out too much, so if someone wants to take the time to clean it, I'll sell it to you relatively cheap.

On a side note: 9/7 I'm brewing a test kit beer (PSA IPA) and on 9/11 I'm going to brew two Octoberfest beers... one a recipe I come up with, and one my friend Kyle comes up with. Kyle has helped me with some of the stuff as I went along. For my next project... I'm going to turn my kegerator into a kegbot! See: http://kegbot.org/ :ban: I'll start with just two flow sensors (I have a two tap kegerator) and a temp sensor... might eventually use RFID tags too.
 
Hey all, sorry I haven't posted in a while. Figured I should do an update/lessons learned post...

I've brewed with my rig 3 times now, and will do a fourth next weekend. I've learned most of the tricks for using it now and it's a very handy system. The ability to control it from my iPad/iphone from the living room is amazing.

Lesson learned number one: Dont put mesh inside a steamer basket. It is a PITA to clean. I can not emphasize this enough. I saw a post somewhere that someone found a place to order stainless steel mesh baskets from... THAT is what you want to use. The steamer part of the basket blocks the flow of water through the basket to clean it and stuff gets stuck in there. If you just had the mesh part it would be easy-peasy.

Thought number two (not sure how to fix this one): the piping/valves coming off the front of the kettle are a bit awkward. It's very long and bumps into things, and it's heavy... So in the long run I'm worried about it bending the kettle, messing up the seal. Next time i would probably connect a T joint directly to it and have the tubing go off to the side. Solenoid valve on one side of the T and ball valve on the other.

Lesson learned number three: invest in better quick disconnects for electronics. There is a bunch of stuff connected directly to the kettle (solenoid valves, temp sensors, etc). In order to clean the kettle... Spraying it out and dumping the rest... You need to disconnect the electronics to move it to the sink... Not very easy in the current arrangement. This could be solved by another problem in that the dip tube doesn't get everything out of the bottom. It would be better if the bottom of the kettle curved downward towards the center and either had a drain located there (preferrable and could solve number two above) or a dip tube to the center.

Thought number four: i would highly recommend insulation on the outside, it helps a lot and its cheap. The loc-line is also a very handy addition.

Lesson learned number five: pump placement is somewhat tricky and should be tried out before fixing it somewhere. I had my pump arranged vertically, but horizontally works better to get the pump primed. March pumps don't work unless they're primed.

All in all, it's a great setup. I'm probably going to buy one of those mesh baskets to replace my steamer setup... And eventually I might buy a new kettle and redo the dip tube/drainage. I'd also be curious to see of the heating elements could be mounted from the bottom (would get a better seal that way, but don't have leaks now so I'm not as worried about it.)

Cheers!
:mug:
 
Another update... I decided to follow my own lessons learned. I've purchased a new kettle and will be soldering a triclover ferrule at the bottom for a drain (per: https://www.homebrewtalk.com/f51/soldering-stainless-steel-155782/). It will be setup like this:

Ferrule (small part mounted to the bottom of the kettle) --> triclover elbow --> triclover-to-1/2" Male NPT --> solenoid valve --> 1/2" Barb --> silicone tubing --> barb/pump

At the pump outlet, I'm going to have an T-joint that has a ball valve w/barb on one side (lowest point in the system where i can drain everything) and the other side will lead to the current setup with solenoid valves/plate chiller/loc-line

The triclover fittings will allow me to disconnect everything below that first ferrule and make it nice and clean looking. Everything from the ferrule to that first barb will be mounted under my current stand. The drain will be towards the back of the kettle (facing the front) so if I can tip it back a little it should drain 99% of the water out of the kettle.

Since I'm not worried about smaller batches at this point... I'll place the heating elements and the temp sensor both in the rear and as low as practical... meaning it will look nicer in the front. On my original build I sorta messed this part up... I put the first heating element a bit too low and it took a while to get it to seal properly.

(I'd draw a picture but I'm lazy at the moment, can diagram it if someone is interested).

I also ordered a stainless steel mesh basket from anysizebasket.com I got a 13" diameter basket x 12 in high of 30 size mesh, which should fix my cleaning problem nicely. (The new kettle diameter is 15 in, so I did check that out)

Now all I need to do is figure out the quick disconnects for electronics and I'll be set!

Cheers,

:mug:
 
Update: Ordered a bunch of parts for a new control panel. It will be similar to a combination of http://www.theelectricbrewery.com/ and this post: https://www.homebrewtalk.com/f170/electric-question-153310. Same enclosure and stuff as the electric brewery's, but I will be integrating my BCS-460 with it.

The enclosure, heat sinks and switches/LEDs were purchased from ebay, and a lot of the other electrical stuff were purchased from McMaster-Carr.

I'm also still waiting on parts for the rest of my conversion. I ordered two new heating elements (these are chrome plated which should help with the rust problem).

Edit: Got the heating elements today... still waiting on the triclover fittings. I went ahead and drilled the holes for the heating elements and temp sensor. The pilot hole for the drain is below the temp sensor.


Untitled by mmartz, on Flickr

It's a similar setup to my old version, except everything is going to be in the back instead of the front.

Cheers,

:mug:
 
Back
Top