
zanemoseley
Well-Known Member
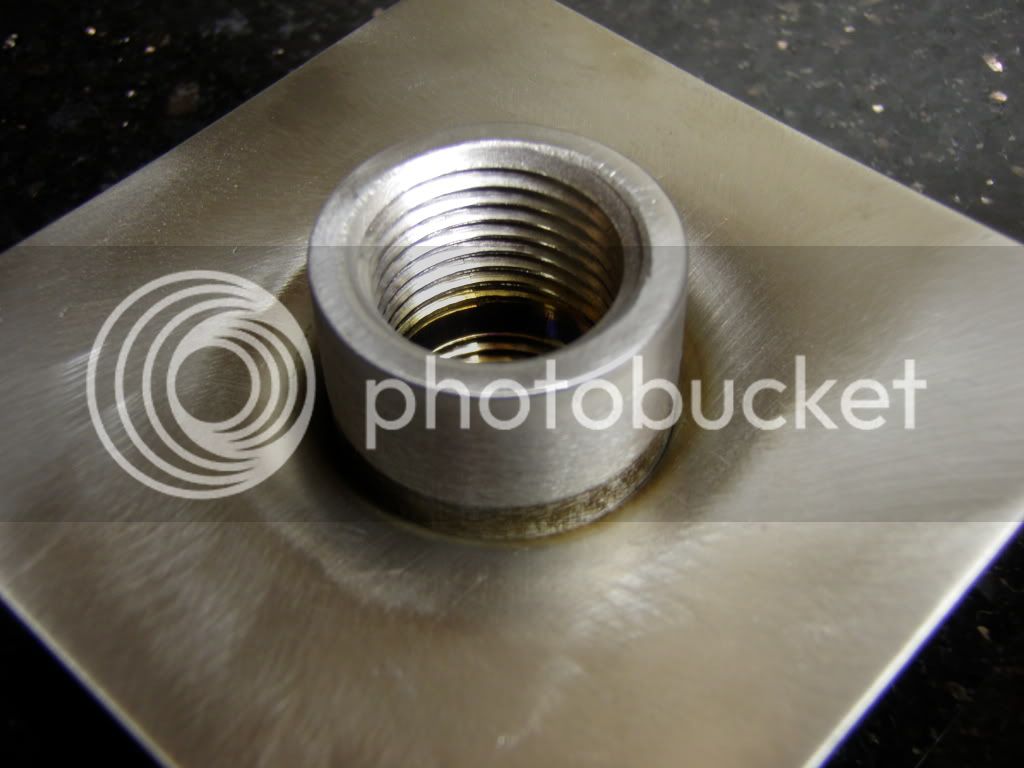
I haven't done a ton of metal working but have a decent bit and I don't believe you're thinking rationally. Sure you could get lucky and pull a fitting through an undersized hole but 99% of the time its going to be pulled off center or skewed in some way creating a messy hole. IMO it would be nearly impossible to use a standard coupling or any other fitting to create a uniform flare as he as done. Now if you were to machine a tapered plug that could be pulled through more consistently then you may have a shot.
If the fitting is stainless, all he has to do is set up a jig that will pull the fitting through an undersized hole. There is no need for a special tool to flare the hole. You just pull the fitting through the hole and it flares it in the process.


")


