Wiring Diagram Critique?

Homebrew Talk - Beer, Wine, Mead, & Cider Brewing Discussion Forum

Help Support Homebrew Talk - Beer, Wine, Mead, & Cider Brewing Discussion Forum:

This site may earn a commission from merchant affiliate links, including eBay, Amazon, and others.

KPSquared

Well-Known Member
Joined
May 12, 2012
Messages
363
Reaction score
22
Location
Wetaskiwin
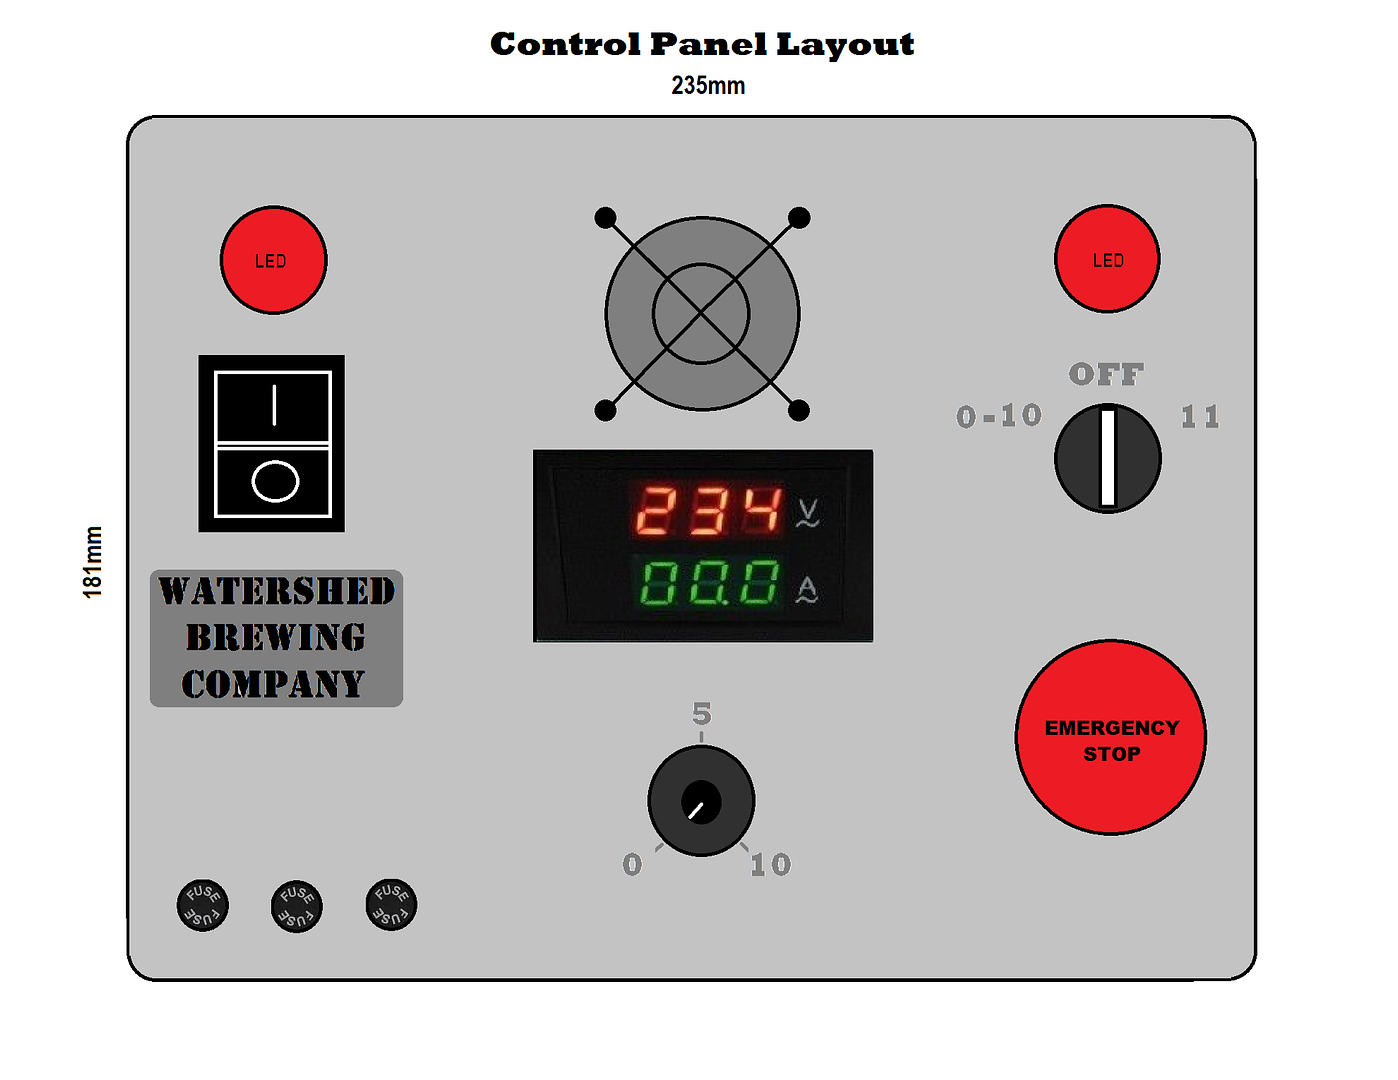
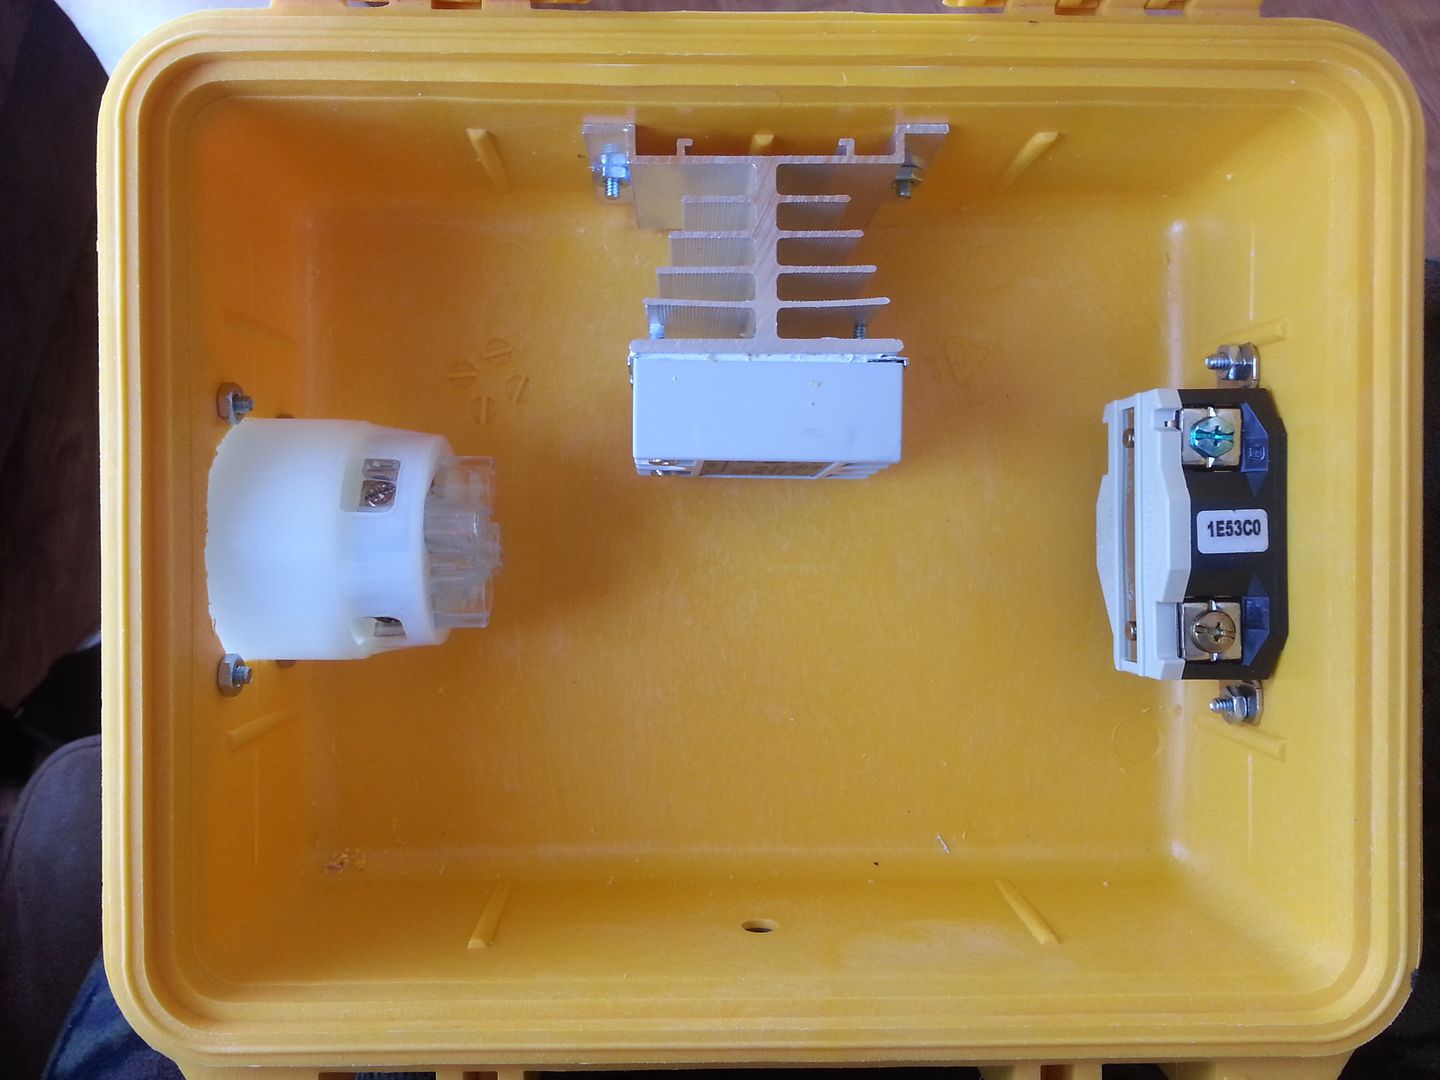
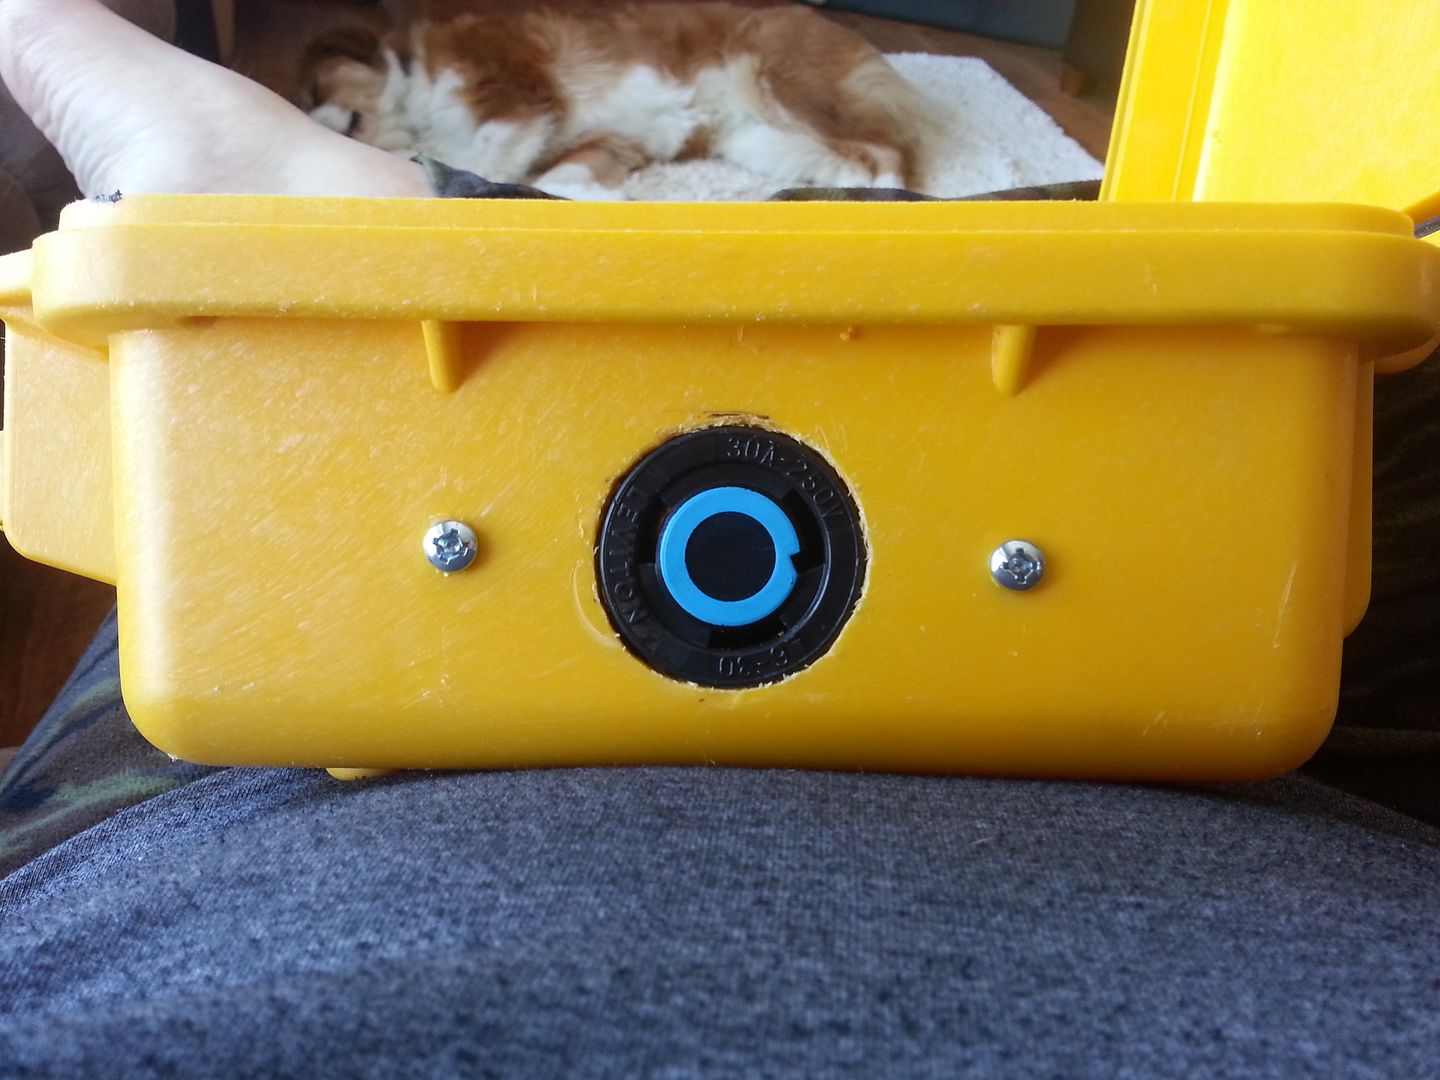
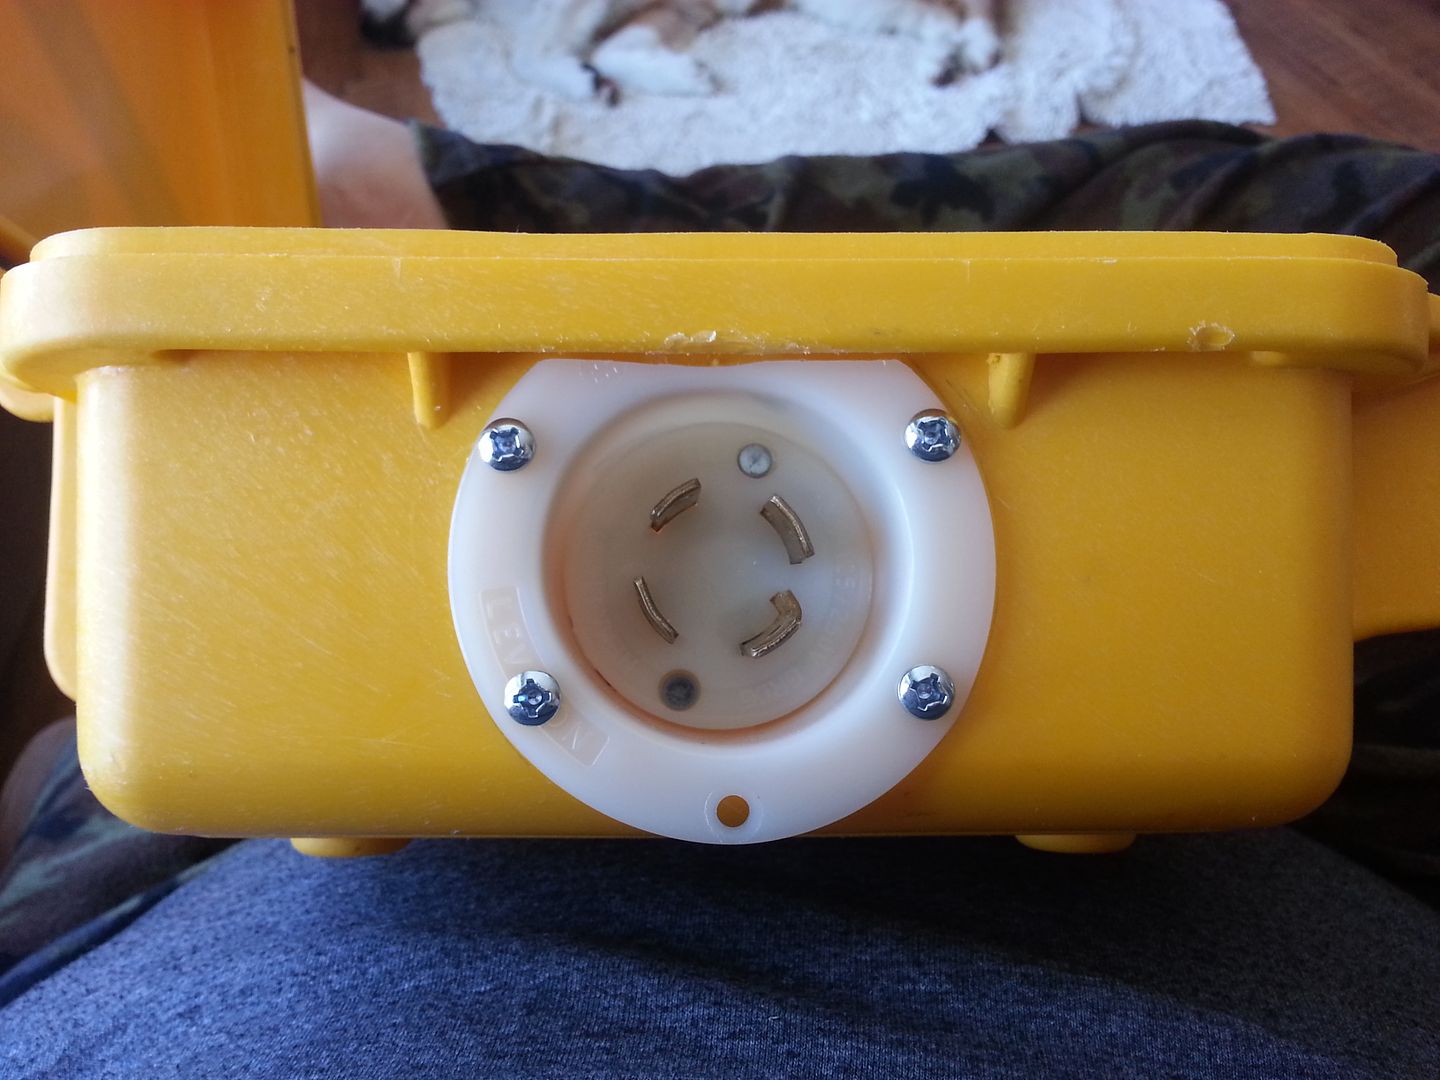
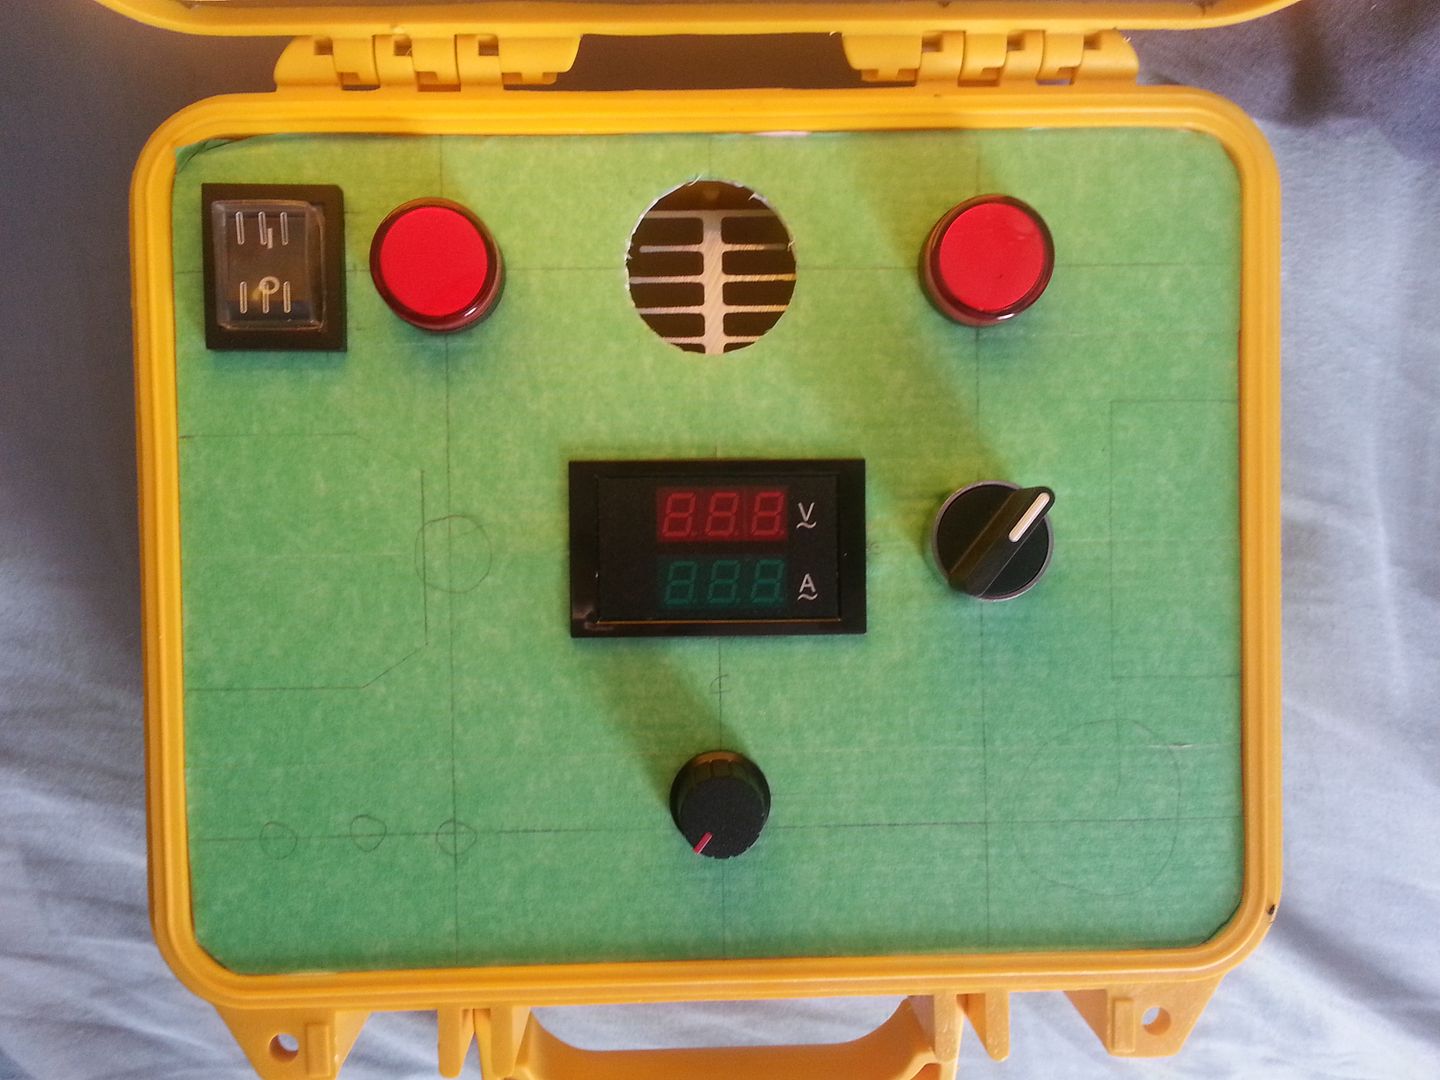
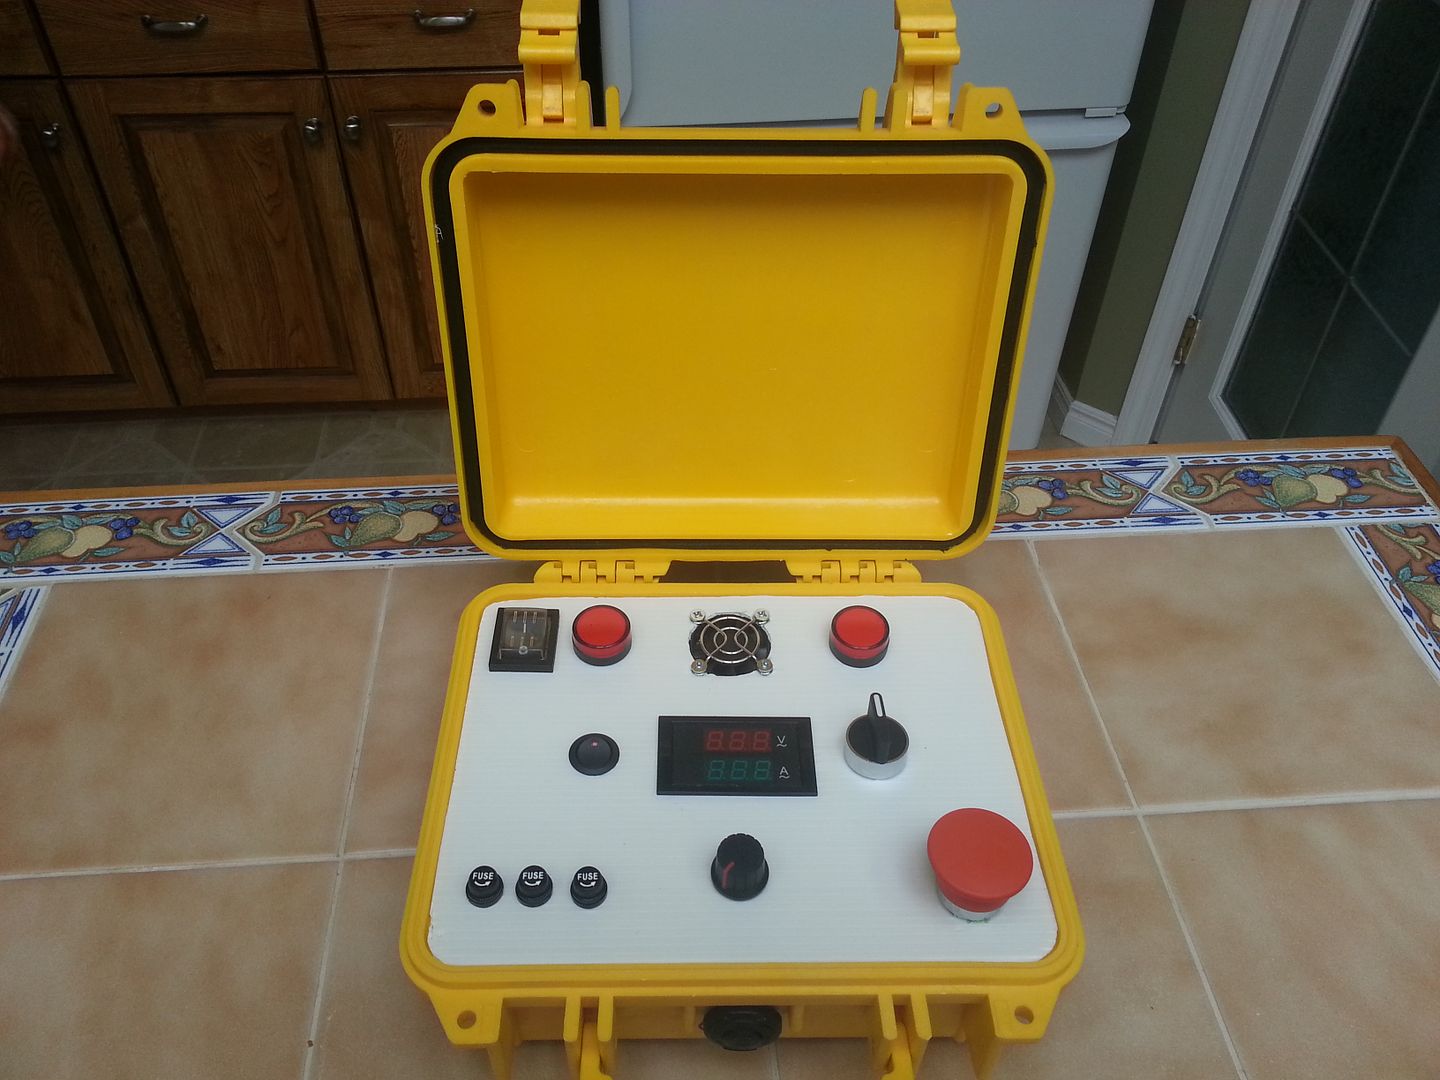
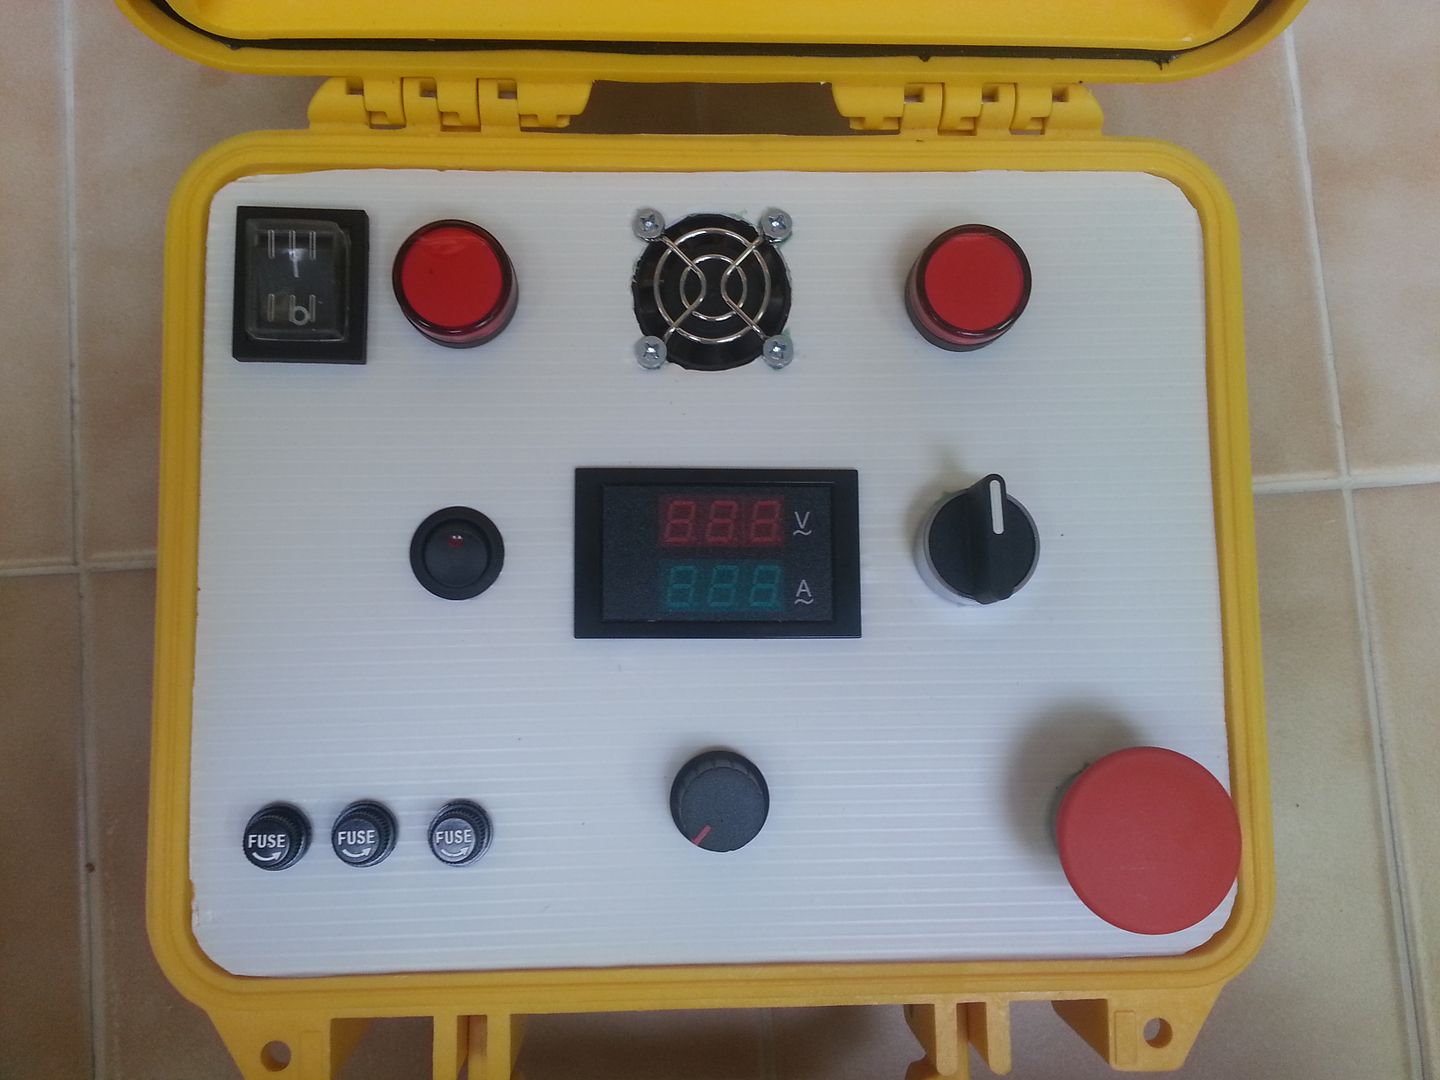
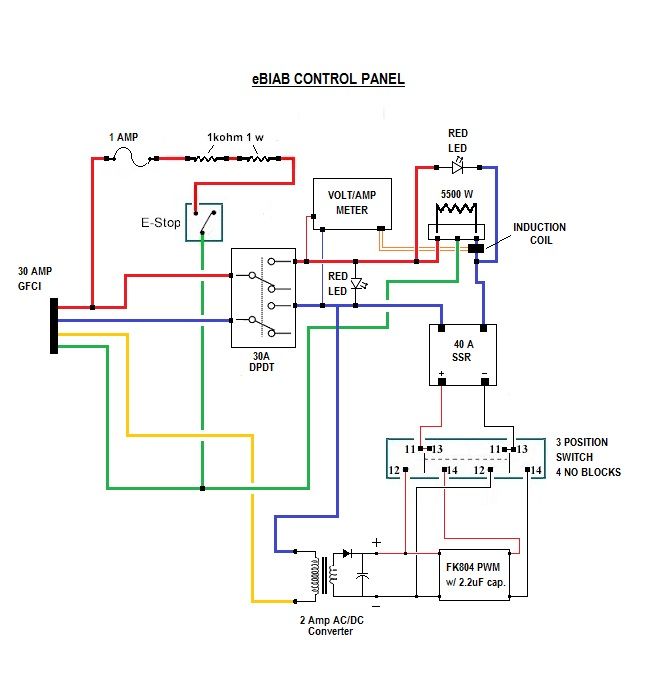
Looking for opinions on the wiring diagram I just finished. This is my plan for my "Phase 1" control panel for my eBIAB set-up. Plannig for PID, Pump, Timer etc. at a later date. . .

Any questions or suggestions feel free. The 3 way switch is to allow 100% power to the element which apparently the PWM won't do.

Thanks to PJ and Kal for all the information you guys have put on the interwebs. . . I've just scavenged and canabalised your stuff for this.

PortableCaseControlPanel.jpg
 
Looks fine just a few notes
- For PWM module even 0.5A power supply is enough.
- Are you going to use 220V rated LED bulb or connect bare LED as shown on your diagramm? In last case you need an extra resistor and a diode.
- Ammeter coil can be put on any leg going to/from heating element.
 
- For PWM module even 0.5A power supply is enough.
.

It's just what I have lying around but that's good to know. I missed an inline fuse to protect the PWM module. I guess a 1A is good enough.

- Are you going to use 220V rated LED bulb or connect bare LED as shown on your diagramm? In last case you need an extra resistor and a diode.

I should have added that. I have 220V, 22mm Panel Mount bulbs.

- Ammeter coil can be put on any leg going to/from heating element.

If I only want to see what my element is drawing, I would leave it there though, correct? When I eventually add a fan and a pump, I want to just keep an eye on the element. . .I think anyway. . .

Thanks for the great notes!
 
Diagram will work but here are a couple ideas:

* You could use a SSVR instead of PWM + SSR.
* You could replace the switch with a contactor and use the E-stop to controll the contactor coil.

3-way switch will work well when you add a PID (manual, off, auto/PID)
Good luck on the project.
 
Already have all the parts. PWM was built a long time ago.

Sent from my SGH-I747M using Home Brew mobile app
 
Well, I wasted some time at work with MS Paint. . . Here's my plan for the layout. This is all fitting in a 1200 Pelican Case (hopefully)

I'll dry fit components once they all arrive and see if I'll have room. I added a 40mm fan to cool the SSR. I'll add that to my diagram later.

ControlPanelLayoutFinal.png
 
Someone else. I have another diagram for future expansion but this is the here and now. Have most of the parts, the rest are in the mail.

Sent from my SGH-I747M using Home Brew mobile app
 
I guess I'll let this thread turn into my Control Panel build thread. . .

I started cutting up my Pelican Case. Had to reposition a couple of components due to space underneath. It could be really interesting to wire this up. It's going to be hard to make it look clean. . .

I just have a piece of corrugated plastic covered in painters tape right now for my rough fit of all the components. Still waiting for a few to show up from China (E-stop, fan, fan grill, fan switch, fuse holders) but I put everything together that I have.

Decided it was to pricey to get a piece of aluminum CNC'd so I'm going to do it by hand. A lot more work but it will look pretty sweet when I'm done.

Here's what I have so far:

Power in, Power Out and SSR/Heat Sink:

20140223_111421.jpg


Power out to Kettle:

20140223_111448.jpg


Power in from Spa Panel:

20140223_111506.jpg


Test layout minus a few components. I might have to move the LED's and power switch down a little to make room for labels.

20140223_155347.jpg
 
Is there a hole on the bottom corresponding to the hole on the top for heat dissipation from the sink? I would think you need air movement through the case, not just into, or out of.
 
Maybe a little late since you've already cut the holes in the case, but the SSR will last a lot longer if you get the heatsink outside the case for better airflow. I blew an SSR within the first 2 brews on my eBrewery and I'm fairly certain it's because there just wasn't enough airflow around it, and the heatsinks weren't even inside the case. My heatsinks may have been a little undersized too though, re-purposed from an old PC. Good luck!
 
I think that with the fan he will have plenty of air flow over the heat sink. I bought one of the monster heat sinks from ebrewsupply.com and it doesn't even get warm.
 
Is there a hole on the bottom corresponding to the hole on the top for heat dissipation from the sink? I would think you need air movement through the case, not just into, or out of.

There is a place for air to flow out of the case. I don't know if I will move enough air and have considered cutting a hole right underneath the heatsink so the air can just blow straight through.


Maybe a little late since you've already cut the holes in the case, but the SSR will last a lot longer if you get the heatsink outside the case for better airflow. I blew an SSR within the first 2 brews on my eBrewery and I'm fairly certain it's because there just wasn't enough airflow around it, and the heatsinks weren't even inside the case. My heatsinks may have been a little undersized too though, re-purposed from an old PC. Good luck!

I've seen a few control panels on here with the heat sinks on the inside aided by a fan. I didn't want something big and ugly sticking out the back of the case. I may upgrade if this doesn't make the cut but I'm going to try it first. SSR's are relatively cheap so I can afford to burn up one experimenting. Used a good coating of heat transfer paste and we'll hope the fan will move enough air.
 
There is a place for air to flow out of the case. I don't know if I will move enough air and have considered cutting a hole right underneath the heatsink so the air can just blow straight through......
The heat removed from the heatsink needs a way out of the box, otherwise the box will build up heat and heat removal from the heatsink will become less and less efficient. Air flow across the heatsink and straight through to an outlet will be the closest to having the heatsink on the outside of the box. I recommend it. Remember, removal of heat from the SSR is critical.
 
There is a place for air to flow out of the case. I don't know if I will move enough air and have considered cutting a hole right underneath the heatsink so the air can just blow straight through.
If you did this and kept the fan running I think it'll be fine


I've seen a few control panels on here with the heat sinks on the inside aided by a fan. I didn't want something big and ugly sticking out the back of the case. I may upgrade if this doesn't make the cut but I'm going to try it first. SSR's are relatively cheap so I can afford to burn up one experimenting. Used a good coating of heat transfer paste and we'll hope the fan will move enough air.
Just be sure to have an extra one on hand because you should be able to change it out in 10 minutes if need be, and you don't want to lose a brew day when you're half way though.
 
Ok. I've got two fans now. One blowing down across the heat sink and another pushing the air out the front of the case. Should move enough air to keep everything cool.

Ordered two more SSR's for back ups.

Can't wait to get this fired up.

Sent from my SGH-I747M using Home Brew mobile app
 
Got the components all laid out in the test piece. I have a 3mm sheet of aluminum that I have to cut now to replace the plastic insert. Getting closer. Also a pic of my future brewing space in my garage. Just my ferm chamber sitting there now. 240v outlet all wired up! Can't wait.


20140316_115008.jpg


20140316_115014.jpg


IMG_20140317_074059.jpg


Stay tuned!
 
Back
Top