You are using an out of date browser. It may not display this or other websites correctly.
You should upgrade or use an alternative browser.
You should upgrade or use an alternative browser.
Show us your panel
- Thread starter Jps101
- Start date

Help Support Homebrew Talk - Beer, Wine, Mead, & Cider Brewing Discussion Forum:
This site may earn a commission from merchant affiliate
links, including eBay, Amazon, and others.
That's a beautiful box berrywise! I really like that color and the wiring is nice and clean! Nice job!
John
John
Humuleneman
Active Member
- Joined
- Sep 23, 2014
- Messages
- 40
- Reaction score
- 6
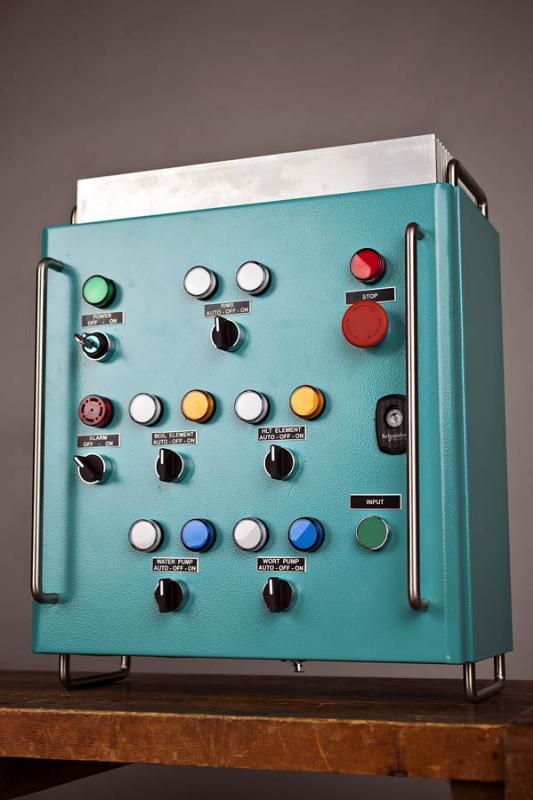
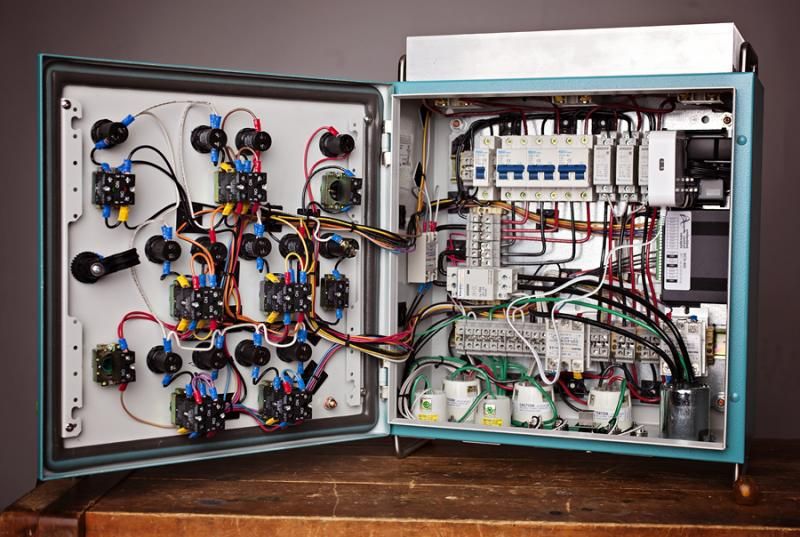
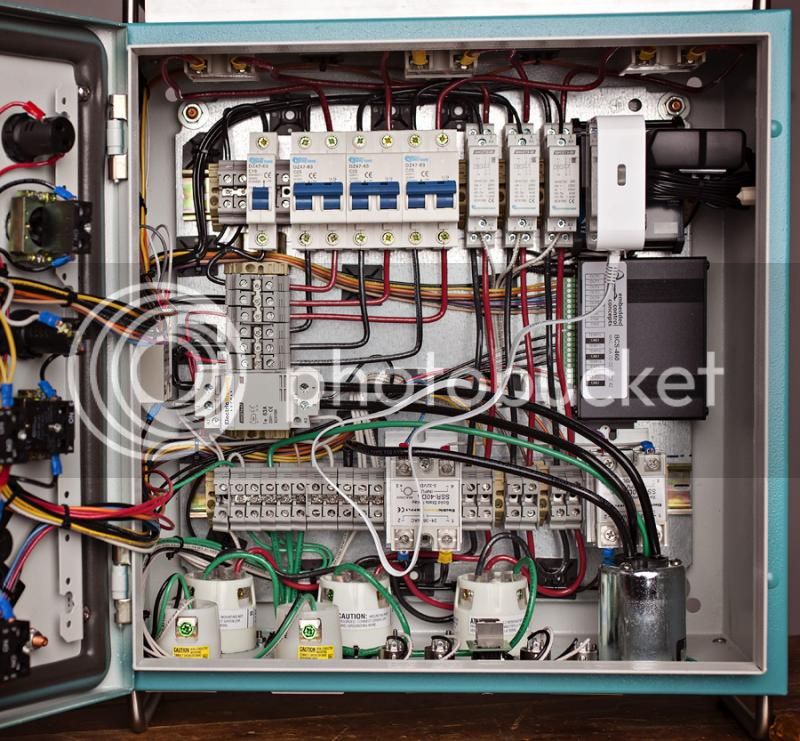
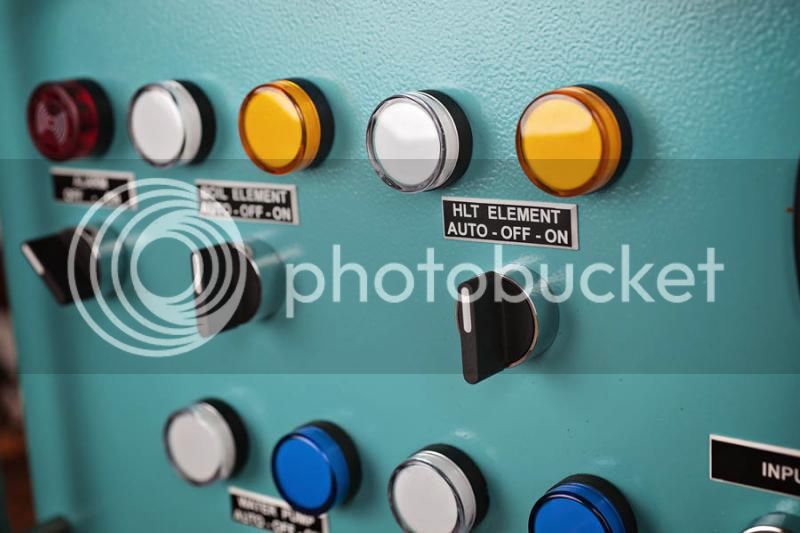
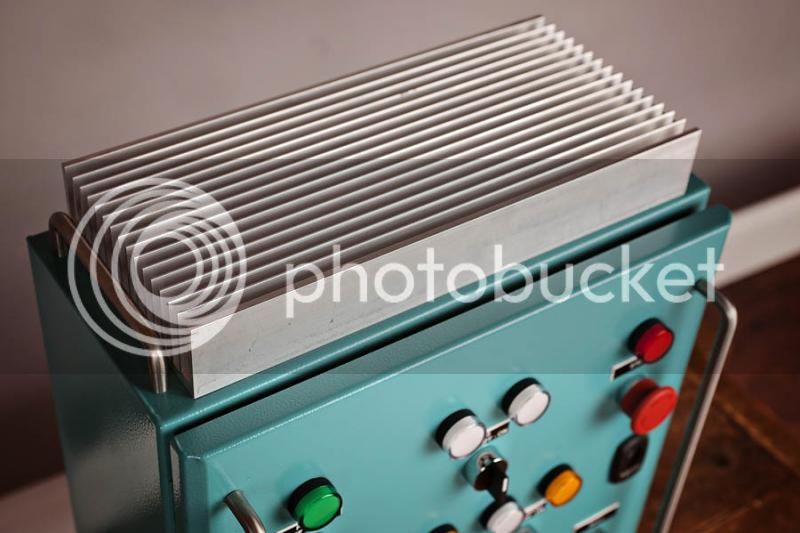
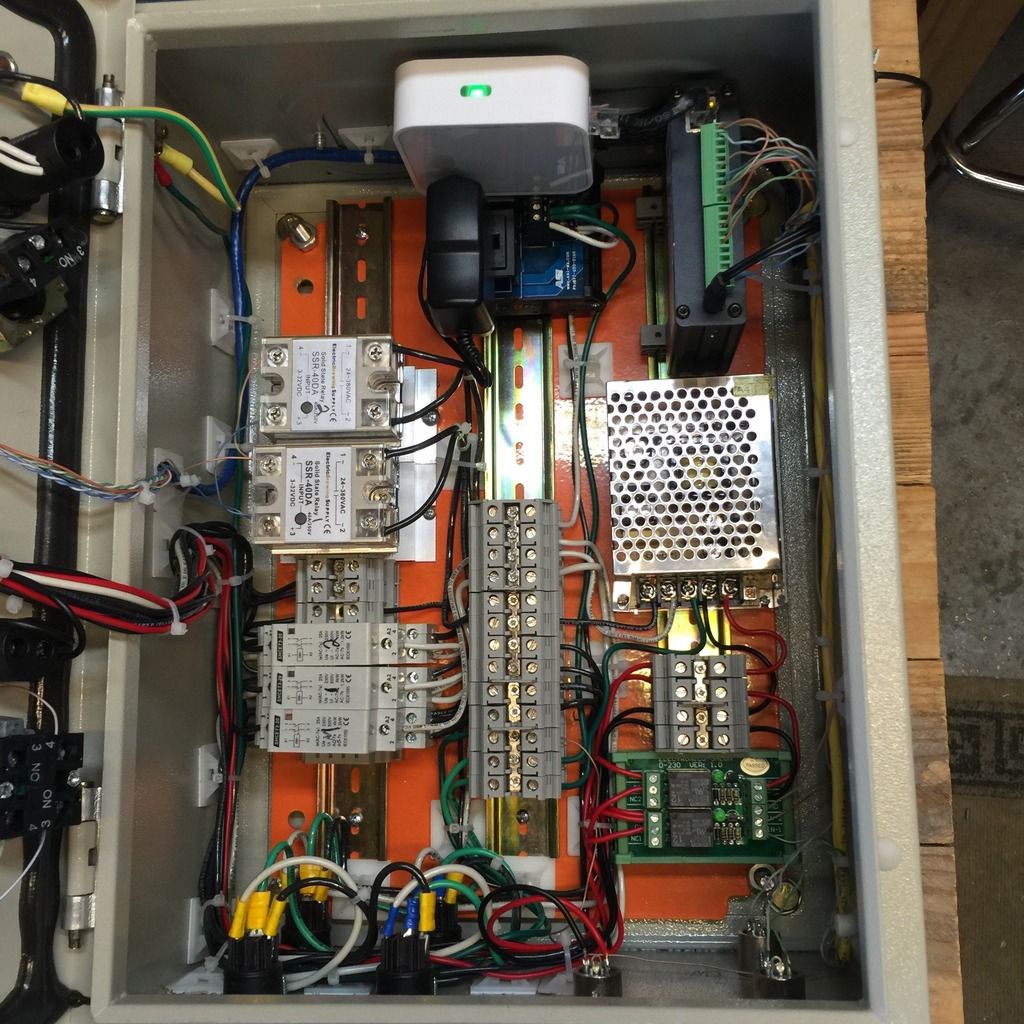
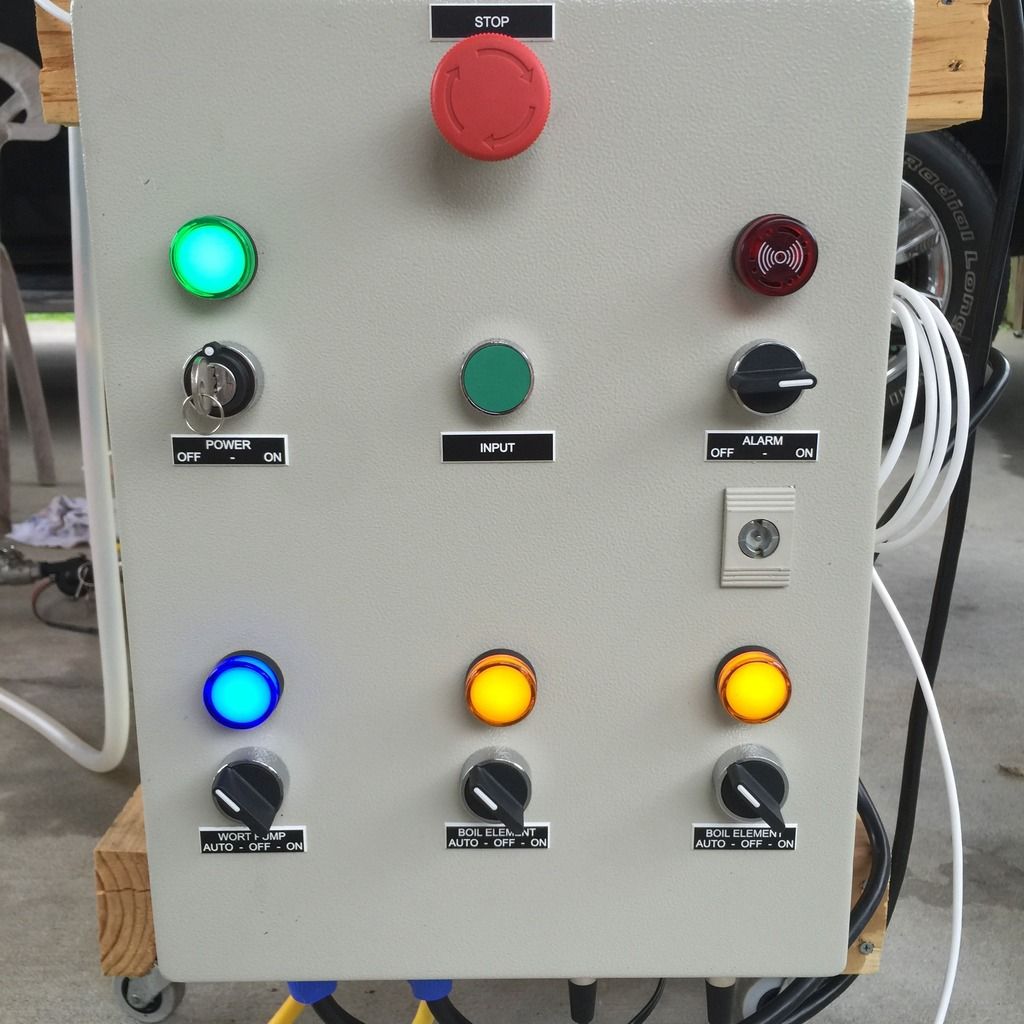
Here is what im working on. It´s an old electric box bought from my work. Drilled the holes, sanded and painted. Tonight ive putted all the components just to have a glimpse of what it will look like. For now im pretty pleased. View attachment ImageUploadedByHome Brew1443584028.259669.jpgView attachment ImageUploadedByHome Brew1443584092.176947.jpgView attachment ImageUploadedByHome Brew1443584205.733355.jpgView attachment ImageUploadedByHome Brew1443584222.274569.jpg
It works only on 240v . I use auber PIDs and one DSPR-1 for boil. All three are protected with 50ma fuses. The meter on the top right is showing volts amps watts and watts per hour!! With a nice blue backlight. So i will know how much electricity one beer batch costed me!!!! Just kidding. Cant wait to fire up the crap out of this panel and start this e herm brewing. Cheers.
It works only on 240v . I use auber PIDs and one DSPR-1 for boil. All three are protected with 50ma fuses. The meter on the top right is showing volts amps watts and watts per hour!! With a nice blue backlight. So i will know how much electricity one beer batch costed me!!!! Just kidding. Cant wait to fire up the crap out of this panel and start this e herm brewing. Cheers.
Dfitz
Well-Known Member

Since this photo all matching meters were installed. This is a dual function 50A controller

WScottCross
Well-Known Member
- Joined
- Sep 23, 2015
- Messages
- 83
- Reaction score
- 13
Here's my panel. It's a Kal clone with a few modifications.

.jpg")
.jpg")
kal
Well-Known Member
Funky! How was the painting done? (The purple swirls)
Kal
Kal
Awesome paint job chessking!
Funky! How was the painting done? (The purple swirls)
Kal
Its just several layers of transparent white airbrush flames, with a layer of candy magenta in between to give depth.
I found how to do it here:
[ame]https://www.youtube.com/watch?v=lryNZRFdmhE[/ame]
This is my first go at it. When I add the second element and pump (when the finances allow), I plan to black it out and try it again. Right now though, I gotta get this thing up and functional.
Ravenshead
Well-Known Member
Mine's not pretty but it's cheap and it was easy to wire.


brrman
Well-Known Member
Mine's not pretty but it's cheap and it was easy to wire.
Thats pretty serious lookin. :rockin:

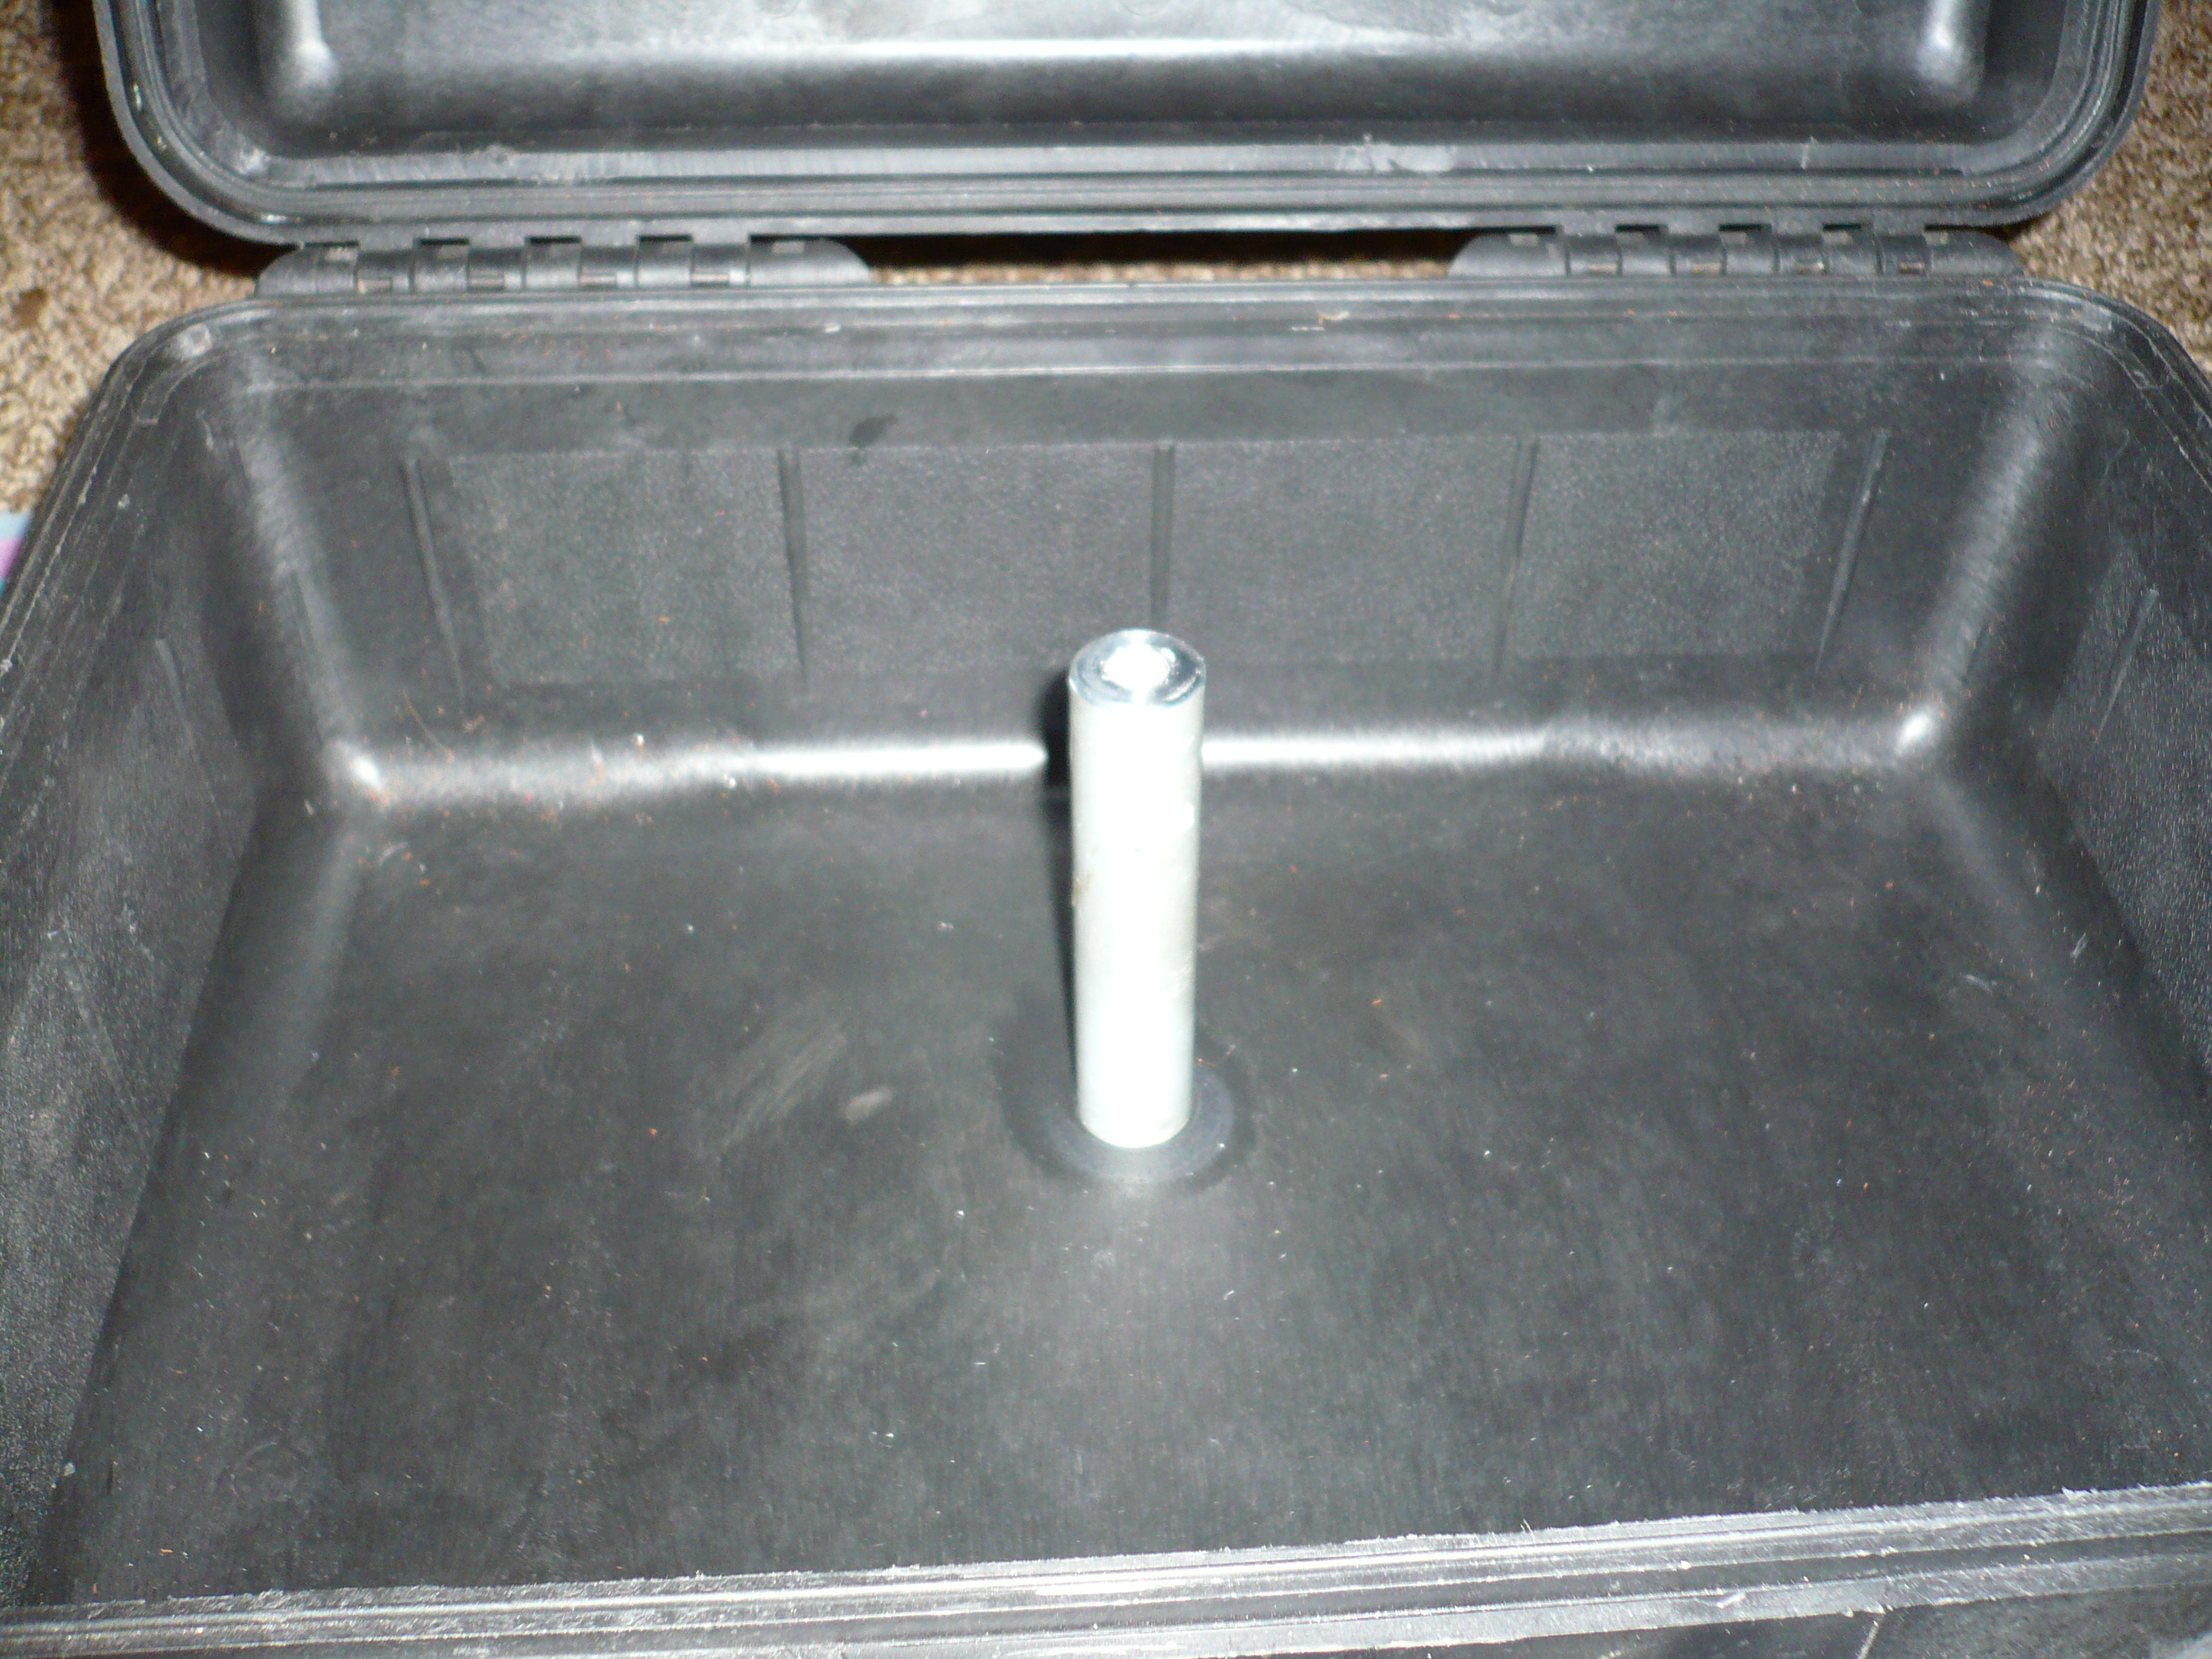
Decided to go a different route this time 'round...
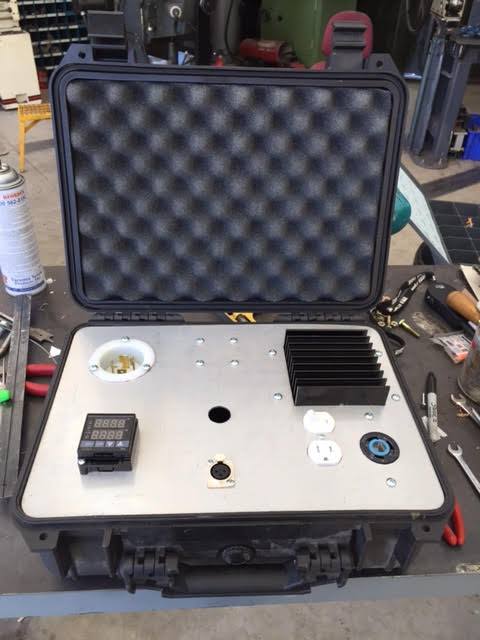
Not quite done with it. But everything is mounted to that faceplate, inside a Pelican case. Going to (hopefully) be a breeze wiring everything and not having to do door runs etc. Plus self contained. Pop that lid shut and it's watertight and indestructible.
This would be great for my garage. On brew day it looks like a small nuclear bomb went off and this panel really fit the part! Love it!
ChocolateMaltyBalls
Well-Known Member
@rabeb25 wow! I know a picture is worth a thousand words, but that needs some explaining. I'm guessing the switches are valves and you have the touch screen drive temp control?
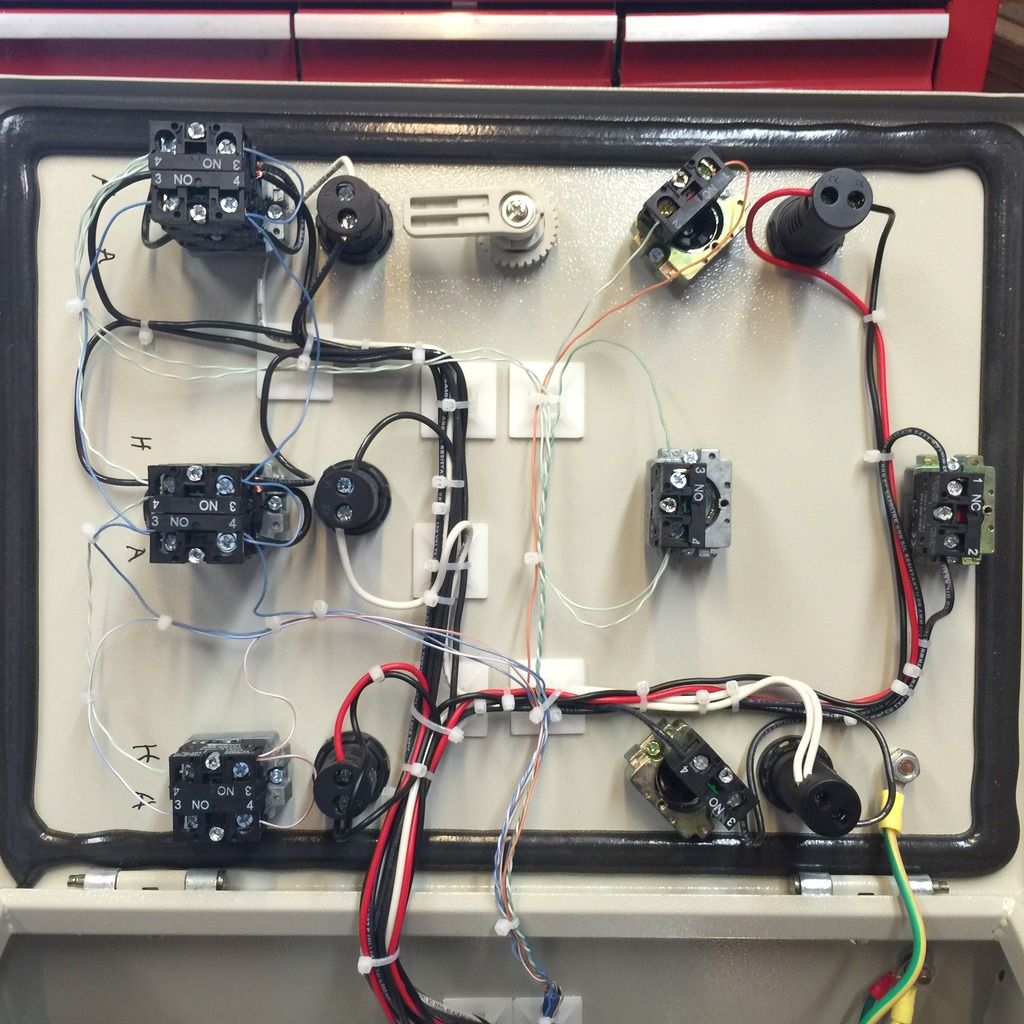
rabeb25
HE of who can not be spoken of.
Its part of this:@rabeb25 wow! I know a picture is worth a thousand words, but that needs some explaining. I'm guessing the switches are valves and you have the touch screen drive temp control?

But nut shell, switches are pumps, valves and elements. 3 way switches Auto/off/on- automated with a brewtroller. 14" toucscreen is a PC, and it runs the rest.
Cheers.
ChocolateMaltyBalls
Well-Known Member
Its part of this:
But nut shell, switches are pumps, valves and elements. 3 way switches Auto/off/on- automated with a brewtroller. 14" toucscreen is a PC, and it runs the rest.
Cheers.
Wow that rocks!

John
Its part of this:
But nut shell, switches are pumps, valves and elements. 3 way switches Auto/off/on- automated with a brewtroller. 14" toucscreen is a PC, and it runs the rest.
Cheers.
Ahhhh... yeah.... no. You are not gonna just sneak that in here... do tell what we are seeing in full detail!!
-BD
superstorm204
Well-Known Member
- Joined
- Oct 14, 2013
- Messages
- 472
- Reaction score
- 27
what size and where did you get your enclosure
BCS-460 with WiFi bridge. Time sharing 2 elements with a 30amp input using transistors.
Sorry I can't figure out how to get the first picture right side up.
View attachment 1445179620765.jpg
View attachment 1445179660147.jpg
View attachment 1445179694129.jpg
View attachment 1445179748065.jpg
View attachment 1445179786564.jpg
Sorry I can't figure out how to get the first picture right side up.
View attachment 1445179620765.jpg
View attachment 1445179660147.jpg
View attachment 1445179694129.jpg
View attachment 1445179748065.jpg
View attachment 1445179786564.jpg
Decided to go a different route this time 'round...
Not quite done with it. But everything is mounted to that faceplate, inside a Pelican case. Going to (hopefully) be a breeze wiring everything and not having to do door runs etc. Plus self contained. Pop that lid shut and it's watertight and indestructible.
What case and faceplate is that?
iijakii
Well-Known Member
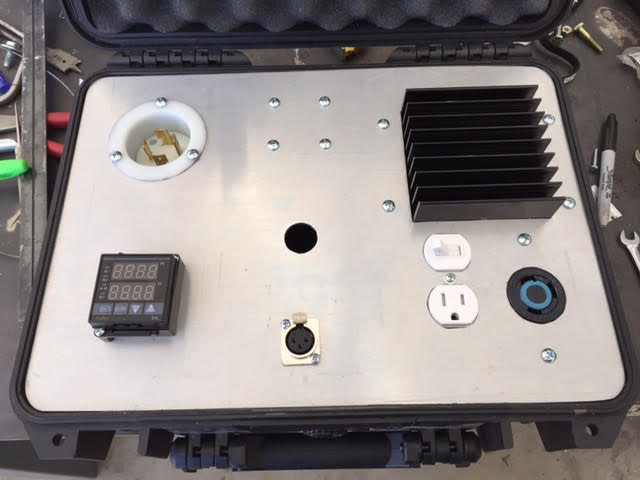
It's a Pelican 1450 and a thick piece of aluminum.
Nice work, crane!
It's a Pelican 1450 and a thick piece of aluminum.
Then just trace the case opening and take a saw after it to get that fit?
iijakii
Well-Known Member
Then just trace the case opening and take a saw after it to get that fit?
Yeah, and then there's a big coupling for a brace loctite'd to the case that the face screws into, don't think that's in that previous picture.
Yeah, and then there's a big coupling for a brace loctite'd to the case that the face screws into, don't think that's in that previous picture.
Nice! Thanks for sharing!
Got some wiring done. Not as neat as some of you freaks, but I'm just a shade tree electrician.
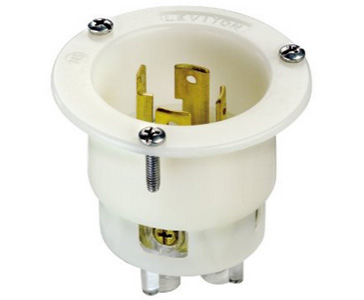
What do you think of my cheap power disconnect? Around $15 for the plug and matching receptacle for the power cord. Better that the $80 some bucks for a 50 amp receptacle from Granger.
.jpg")
.jpg")
.jpg")
What do you think of my cheap power disconnect? Around $15 for the plug and matching receptacle for the power cord. Better that the $80 some bucks for a 50 amp receptacle from Granger.
augiedoggy
Well-Known Member
Got some wiring done. Not as neat as some of you freaks, but I'm just a shade tree electrician.
What do you think of my cheap power disconnect? Around $15 for the plug and matching receptacle for the power cord. Better that the $80 some bucks for a 50 amp receptacle from Granger.
what holds it in the panel when you push the extension cord onto it?
I used the same type of plug only mounted to a cord that is permanently mounted to the panel... and then used switchcraft connectors for my element power plugs which saved a bundle.
kal
Well-Known Member
Safety/usability issues aside, the spades are completely exposed and will be prone to damage from things knocking/bumping into them. Especially true as you're building. Put that panel down at the wrong angle and (assuming the receptacle's firmly attached to the chassis) you're going to bend the spades or shear them off.What do you think of my cheap power disconnect? Around $15 for the plug and matching receptacle for the power cord. Better that the $80 some bucks for a 50 amp receptacle from Granger.
That's why receptacles always have the spades recessed like this:
Kal
Looks like it's done at this point, so might as well live with it.
-BD
-BD
bayoujeeper
Well-Known Member
Just finished mine up this past weekend. Since I do not have access to 220, it is dual 110v (Seperate Circuits) BCS panel. My setup is Brutus 20, no sparge.

..and here is one of the first wet test.


..and here is one of the first wet test.

Looks like it's done at this point, so might as well live with it.
-BD
I'm betting he could punch it out and put in a recessed receptacle. ...looks like he has the room? Plus if it was a twist lock you get the piece of mind of keeping the cable secured
what holds it in the panel when you push the extension cord onto it?
I used the same type of plug only mounted to a cord that is permanently mounted to the panel... and then used switchcraft connectors for my element power plugs which saved a bundle.
At the moment, it is just shoved into the cutout. The profile of the plug case is such that the plug gets tighter the further it goes into the hole. I do plan to have a bracket that secures it in place from the inside.
applescrap
Be the ball!
Me too!
sensortech
Well-Known Member
Had fun building this.

had fun building this.
bcs?
sensortech
Well-Known Member
Yes Crane, bcs-460.
applescrap
Be the ball!
I wanted to make something but this little guy had everything I wanted and I just couldn't get my act together and find a good diagram
View attachment 1446775632863.jpg
View attachment 1446775652174.jpg
View attachment 1446775632863.jpg
View attachment 1446775652174.jpg
Similar threads
- Replies
- 10
- Views
- 694
- Replies
- 2
- Views
- 678
- Replies
- 4
- Views
- 182
